


How to Make a Giant Wood Charcuterie Board
I love a good charcuterie board. It’s my go-to when hosting any size crowd.
But so many wooden serving boards are too small for the job. At least if you want to do it up right.
So I decided to make my own!
In this post, I’m going to show you how to make an extra-large wooden serving board with a handle, perfect for creating the ultimate charcuterie board. This simple tutorial is great for any level of DIYer.
STEP 1: CUT BOARDS TO SIZE
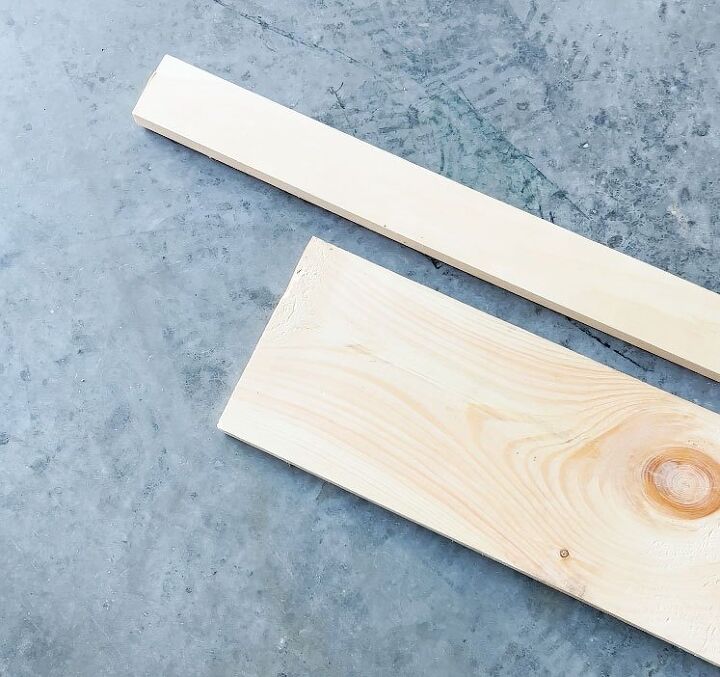
Using either a miter saw or a hand saw, cut two 26″ lengths from the 1 x 8 board, and one 30.5″ length from the 1 x 3 board. You can adjust these lengths based on the size of the charcuterie board you want to make.
Lay your boards together to be sure you like the length of the serving board’s handle and also to decide the arrangement of the wood to use for the most attractive look.
For a really pretty basket to pair with this board (maybe to hold the breadsticks?), check out this project.
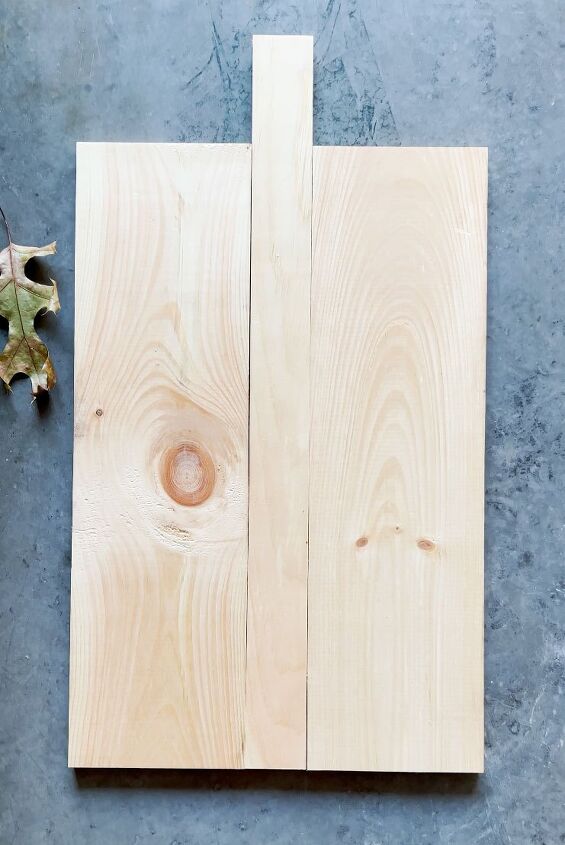
For example, I liked having the large knot closer to the center of the board, rather than the edge so I arranged my wood like this.
Step 2: Glue the long edges together
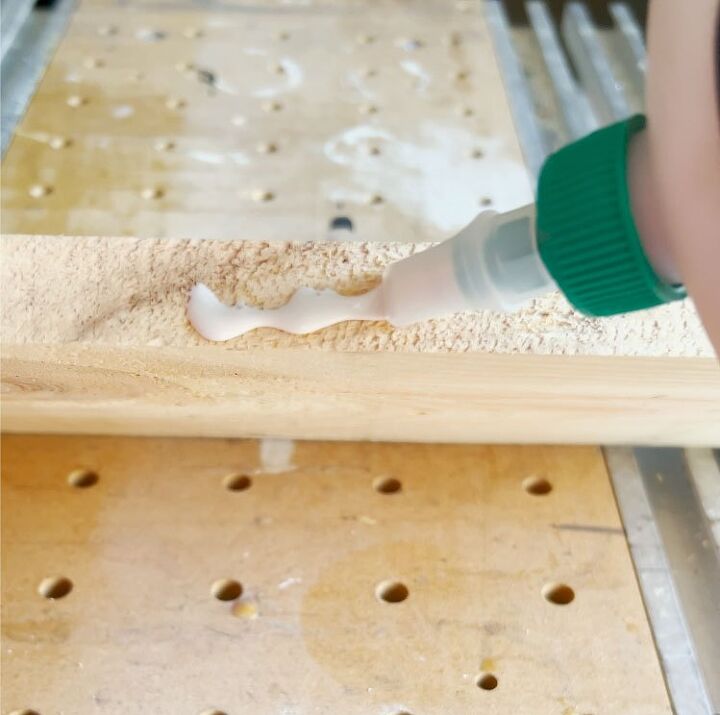
Run a bead of waterproof wood glue along the long edges of the board and smooth with your fingers to cover the surface. Since this is an end grain, be sure not to skimp on the amount of glue since a lot will be absorbed.
Working quickly, one board at a time, assemble the boards into the design you settled on in the last step.
Step 3: Clamp boards
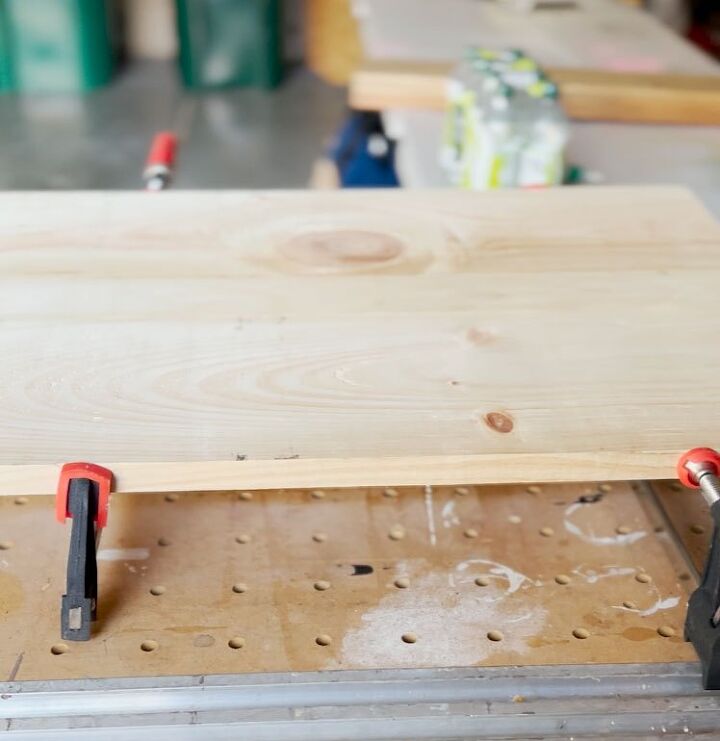
Clamp your assembled boards together and allow to dry overnight. Be sure to wipe up any excess wood glue that squeezes through the cracks.
You have a five-minute window before the glue sets up to adjust the board alignment, so if anything shifts once you clamp fix it quickly!
Step 4: Sand your serving board
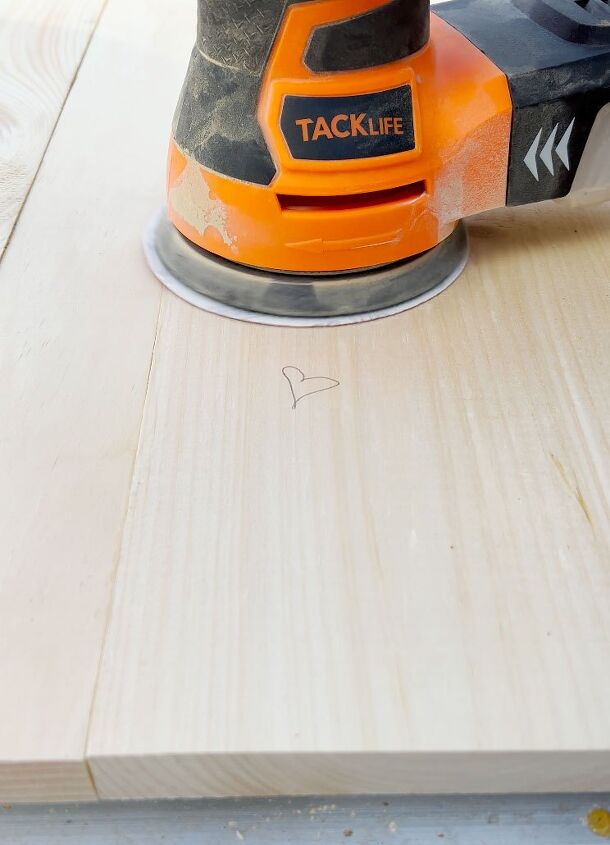
Working through multiple grits of sandpaper, sand the wooden bread board smooth. Don’t skimp on this part because sanding thoroughly will take this DIY project to a professional-looking level.
Sand in steps with a 60, 80, 120, 180, and 220 grit sandpaper. Each level will go a little faster than the last so don’t worry if this looks overwhelming!

During the 60 grit and 220 grit steps, use your sander to rustically round off the edges of the serving board. Imperfect is best here to give the charcuterie board a vintage look.
Step 5: Stain the board with a food-safe finish
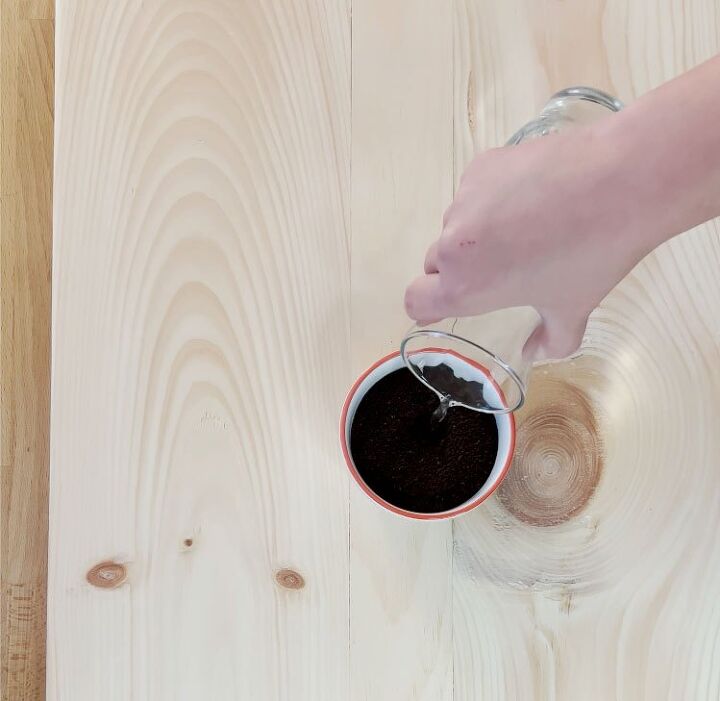
Because there will be food served on this board, we need to be sure that the finish is entirely food safe. While there are commercial stains and finishes that will work — this article has some helpful information on food-safe wood finishing — they generally take a month to cure. Pass!
So we’re going to use coffee!
Sounds weird, I know, but it works beautifully, is 100% food safe, and is cheap as heck.
Scoop 2 or 3 generous tablespoons full of ground coffee into a small bowl and combine with just enough water to create a gritty paste.
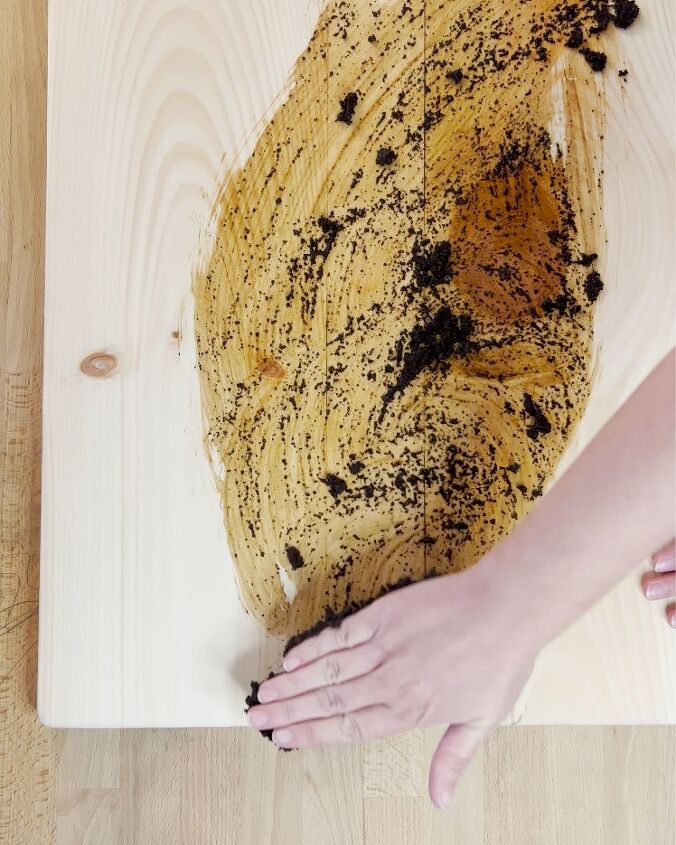
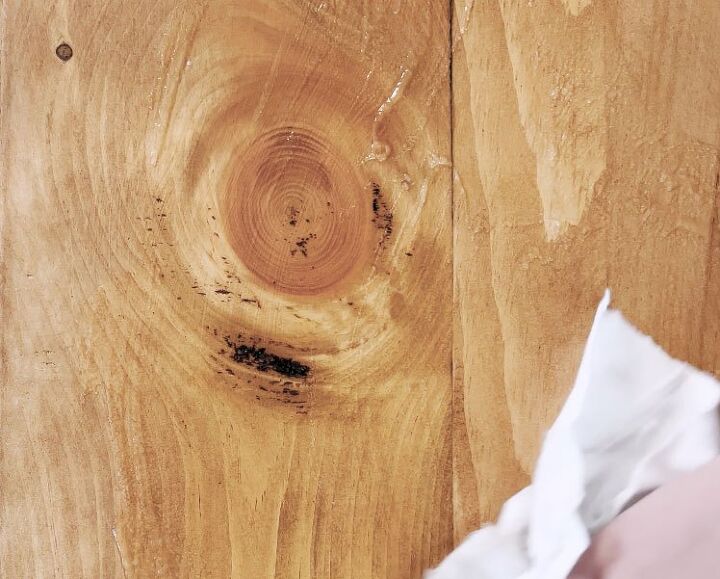
Dump the coffee paste onto your wooden serving board and rub it into the entire surface. Allow it to sit for 15 minutes.
Your hands will be weirdly smooth after this process 🙂
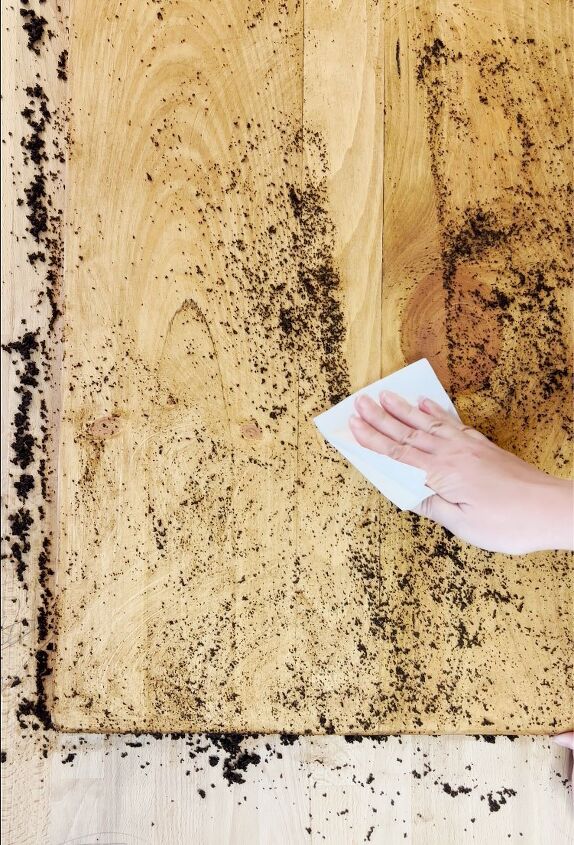
Once the 15 minutes are up, wipe the coffee grounds away with a paper towel. You’ll see that the coffee has stained the pits and crevices a much deeper shade of brown, giving this wooden serving board a beautiful vintage patina.
Step 6: Condition the wood
Squirt a generous amount of butcher block conditioner or food-grade mineral oil onto the board and rub it in with a lint-free rag. I like this butcher block conditioner the best.
Allow the oil to soak in overnight then buff with a rag. You’ll be shocked at how much the wood soaks up!
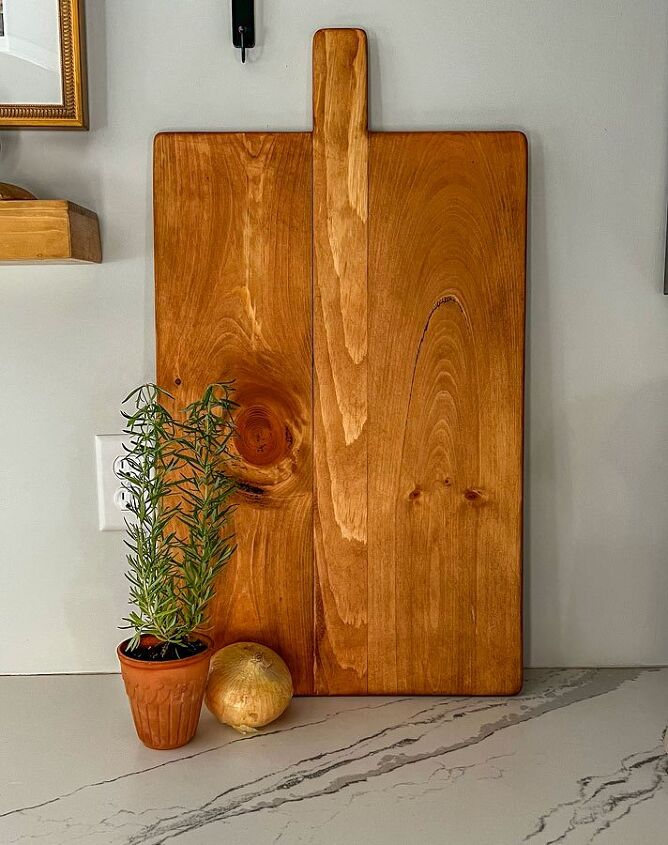
This extra-large wooden serving board (with a handle!) uses only about $10 worth of wood and looks like it costs 10 times that much. A vintage-style charcuterie board like this would make a beautiful gift!
Or just plain would look beautiful on your counter 😉
Want more? Here’s the full collection of Bloom in the Black DIYs.

Comments
Join the conversation
-
AWESOME! I am getting ready to make some of these for gifts! Thanks for sharing!!😃
-
Inspired....
and made a board for my brothers new airbnb. I used Alder wood and the coffee stain method. He loved it! Thanks for sharing your talents.


Frequently asked questions
Have a question about this project?
Neat idea! How long before the coffee smell leaves the board? Just curious if it transfers to whatever food you put on the board.
The Butcher Block conditioner you said you liked best didn't show up as a link on my computer...can you send it to me or tell me the name so I can search?