


One Room Challenge Week Two – DIY Chandelier Project
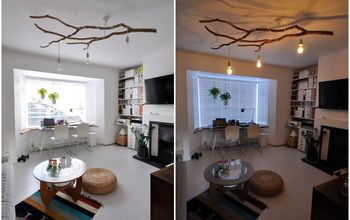
This week I am sharing my DIY Chandelier Project for the One Room Challenge. My dad and I combined a thrifted chandelier and basket to replace an outdated fan.

The Fan Had To Go To Make Way For My New Chandelier
Let’s remember where we started …
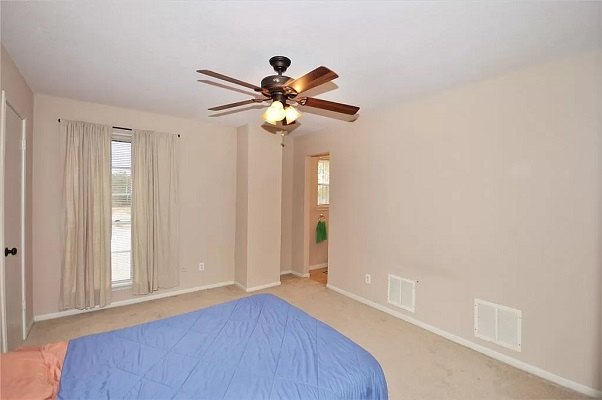
I hated that fan, I know those are strong words but I did. Reasons include –
- It never worked as a fan – why? I have no idea.
- The light was horrible. And I do not like being in the dark, it makes me sad.
- And I did not like waking up to this huge brown fan over my head.

But I do like waking up to this …
Collective aaah!
And so it was time to DIY a chandelier, yes I said DIY. Because budget!! And why purchase a ready made when you have things in thrift stores ready to be “fifth sparrow-d no more”!
DIY Chandelier Project Step by Step
Before I start I must say if you are not skilled or knowledgeable in electricity and installing light fixtures find a helper that is. I wrangled my dad into helping! And he was lot more helpful than my usual helper, see why here. My Dad helped me with my kitchen drawer project and at that time only his hands made the pictures. He started calling himself the hillbilly hand model because the post was featured on Hometalk, and I had a lot of visitors to the blog! Today you get to see all of my dad, he is looking to build a modeling portfolio. HAHAHA!
A Chandelier DIY – What Supplies You Need
You’ll need a pair of pliers with wire strippers and a screwdriver plus these items –
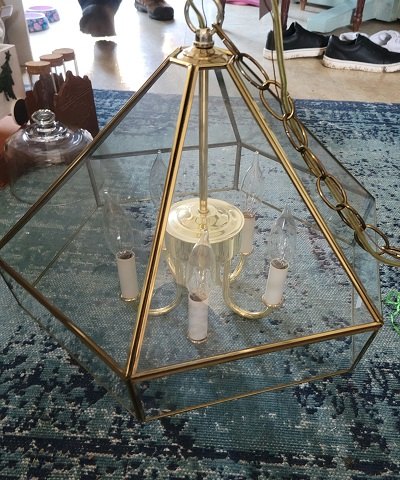
Thrifted Chandelier
I got this gem at one of my favorite thrift stores for $7.99 at Lighthouse Christian Ministries Resale. This store is on my Monday route – Goodwill’s special color is 75% off and Lighthouse has really great specials!
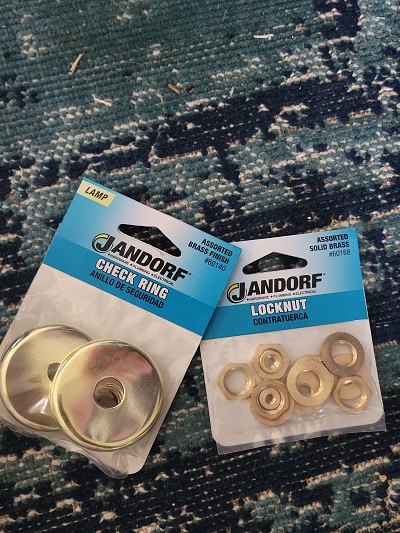
Chandelier / Lighting Fittings
Check Rings and Locknuts which were needed to attach the chandelier to the basket.
Metal Basket
I found mine at Goodwill for $3.99 but these are similar! Find the links to these on the blog post -
- This one from Wayfair
- This one from Target
- Or this one from Overstock
Step One To New Lighting
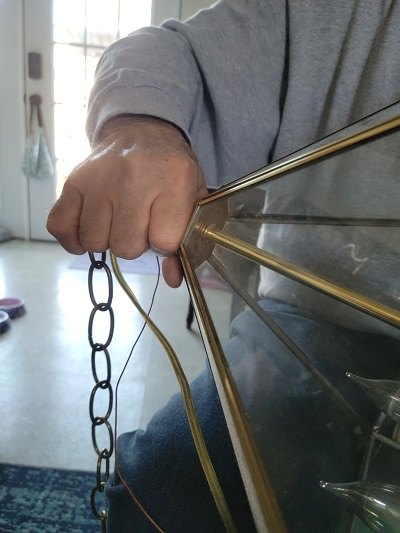
Remove the glass from your chandelier. This was done simply by unscrewing the fittings at the top. Thank you to our Hillbilly hand model …
Step Two To DIY A Chandelier
Pull wiring up through the top of your chandelier. There was a lot of extra wire in this chandelier. This is how you connect the light to the ceiling and this wire will loop through the chain to hang from the ceiling. Depending on the length you need for your ceiling pull your wiring out.

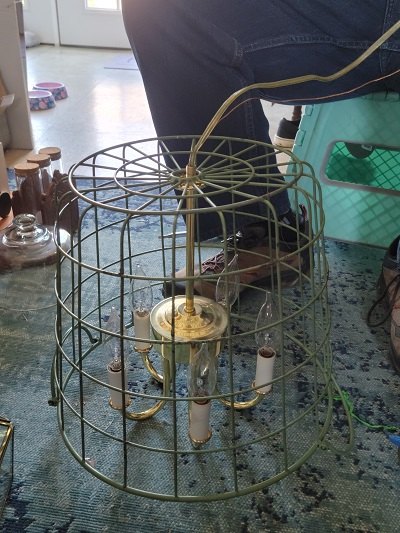
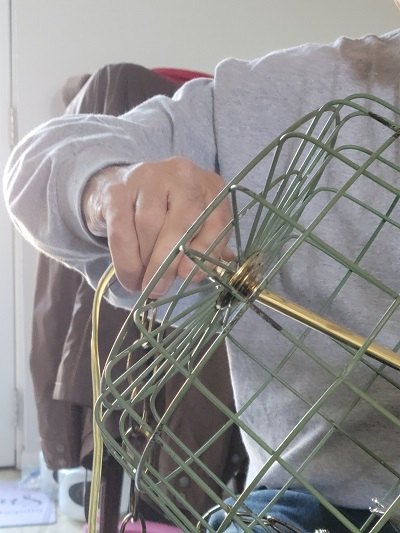
Step Three – Combining Basket and Chandelier
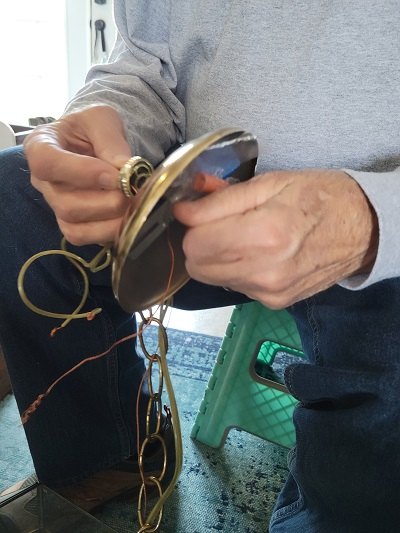
Feed your wire and top of chandelier into the hole in the middle of your basket. If your basket does not have a hole use a metal drill bit to create one. Using the locknuts and check rings secure your chandelier into the basket. Then feed your wire through the ceiling canopy (the large plate that fits onto your ceiling).
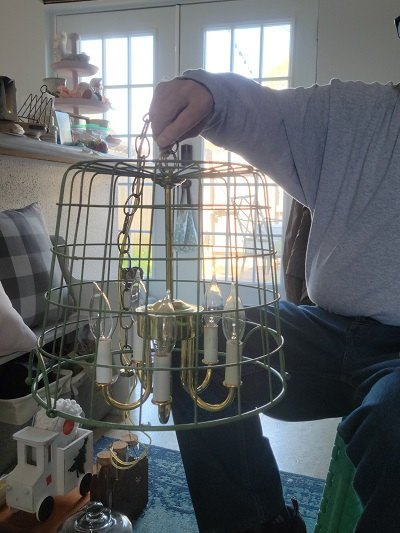
Step Four – You’ve DIY – ed A Chandelier
Time To Get That DIY Chandelier Project In The Room
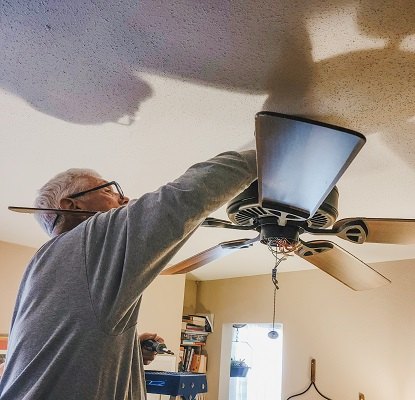
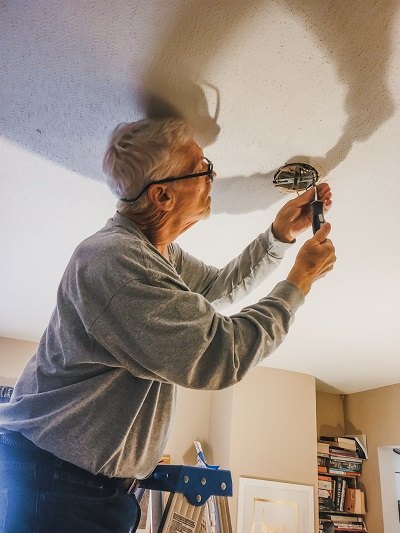
Remove your old light fixture or ugly fan and attach wire and chain to the power source and ceiling bracket. I am not an expert in this – that is why I called an expert! My dad working hard on his model portfolio and working hard to take that ugly fan down.
A Beautiful DIY Chandelier – My Finished Project For The One Room Challenge Week Two!
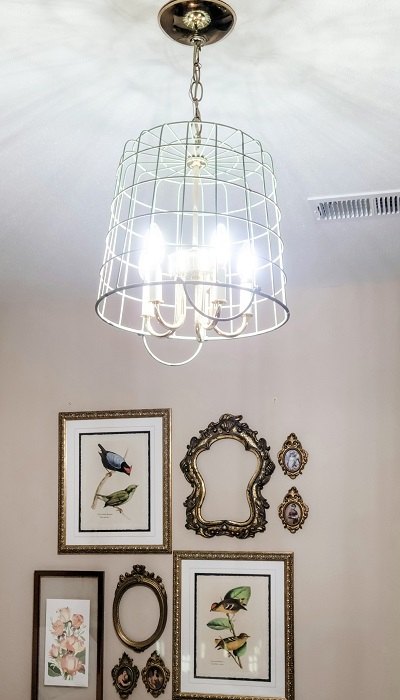
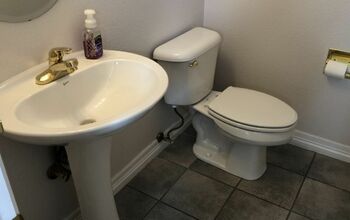
I am completely in love – it makes my bedroom so bright and happy! These light bulbs are amazing, have the vintage look and give off a bright white light. I have them in this chandelier in my half bath and this one in our dining nook.
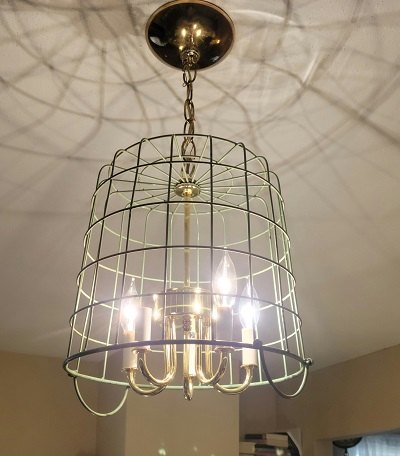
“All right, Mr. DeMille, I’m ready for my close-up.”
With the old lightbulbs that came with it.
And A bit further away with new bright light bulbs…
Before You Run Off To Create Your DIY Chandelier Project
There is so much inspiration from all the participants of the One Room Challenge – make sure and check out what they have done in Week Two. The pin this idea to Pinterest!
See All The Posts On The Blog
One Room Challenge
- One Room Challenge Week One: Primary Bedroom And Office
- Week Two – April 13th, You’re Here!
- One Room Challenge Week Three: Preparing, Planning and Prepping
- Week Four – April 27th
- Week Five – May 4th
- Week Six – May 11th
- Week Seven – May 18th
- Week Eight, The Final Reveal – May 25th

Comments
Join the conversation
-
Now I know what to do with those old baskets I have !!! Thanks !
-
You are so welcome! I am glad i could inspire you to "fifth sparrow no more" your baskets! 💜🐦️


Frequently asked questions
Have a question about this project?