


Pipe Fitting Candle Holders Tutorial
$50.00
60 Minutes
I get inspired from many places, lately one of my inspirations has come from This Old House magazine. I have been getting the magazine for years, and I keep just about every one of them on my book shelf, and refer back to them often for inspiration in many home related areas.
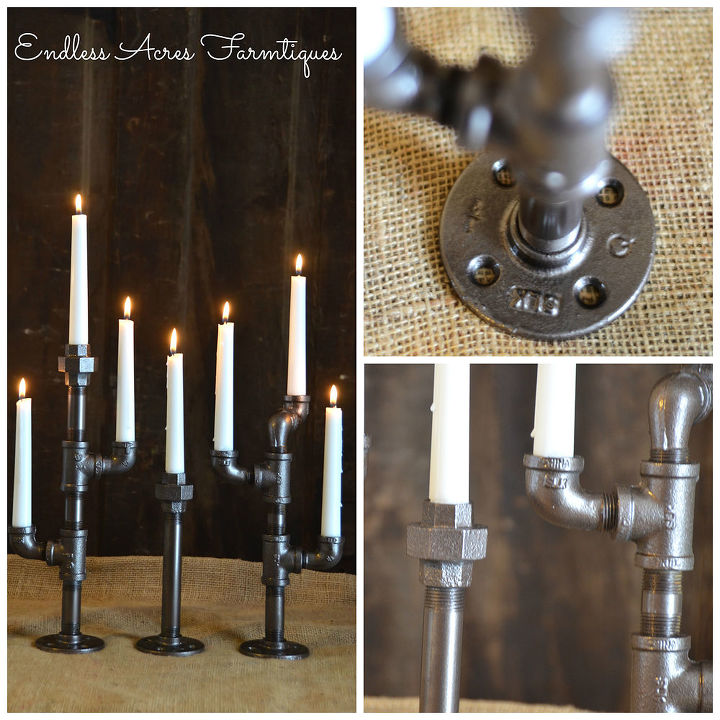
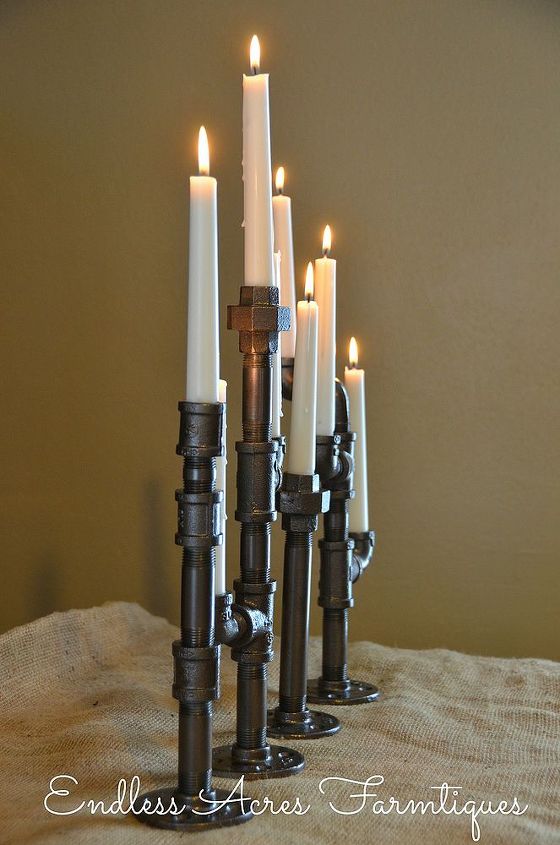
I love candles. I have especially always loved scented candles on my stove, and obsessively need to have one lit while cleaning my house , or else, I can't clean! Although I love candles, I have always kind of , sort of, had a thing against taper candles. Why? I have no idea. There is no reason in particular, except for maybe I could never find candle holders for taper candles that fit my style, and weren't too 'fancy' for my rustic country chic style house. This past month, I was reading This Old House magazine , when just a couple of pages in, I saw a photo of candle holders for taper candles, that were created out of pipe fittings, and I knew this was something I had to create! Below is my step by step tutorial on how you too, can make your own Pipe Fitting Candle Holders!
Project: Pipe fitting taper candle holders
Time: 1-2 hours (most time is dry time between coats of spray paint)
Cost: $50 (includes cost of Pipe Fittings, spray paint & candles)
Supplies: Pipe Fittings, spray paint , taper candles.
Level: Beginner
Steps:
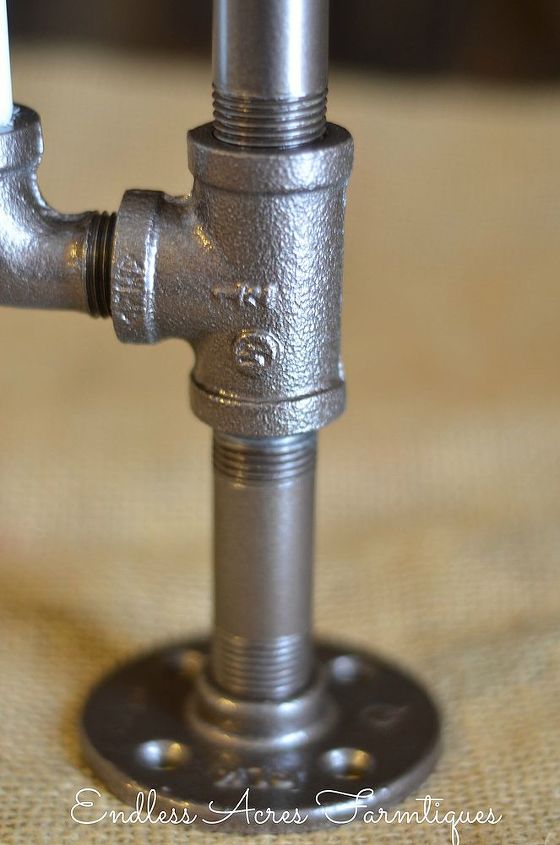
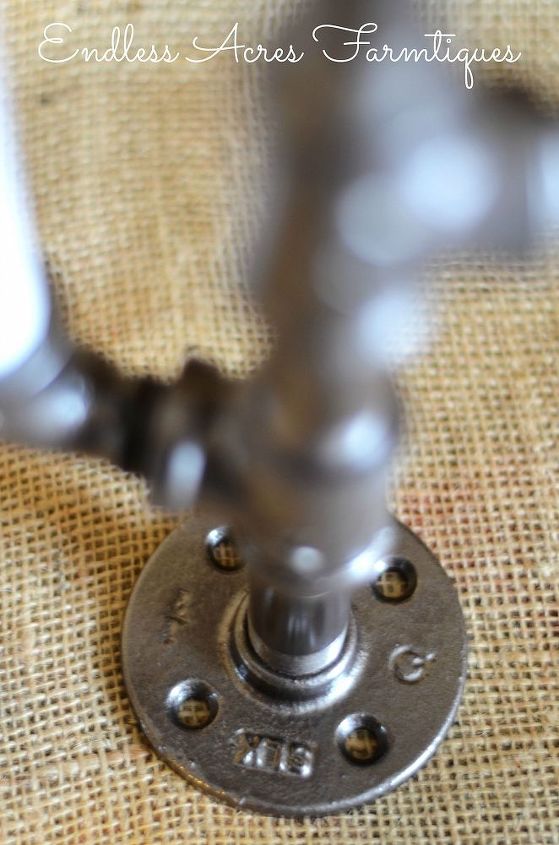
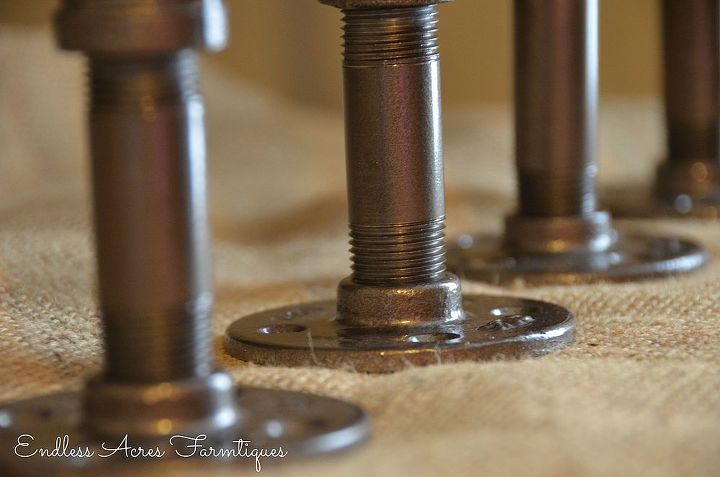
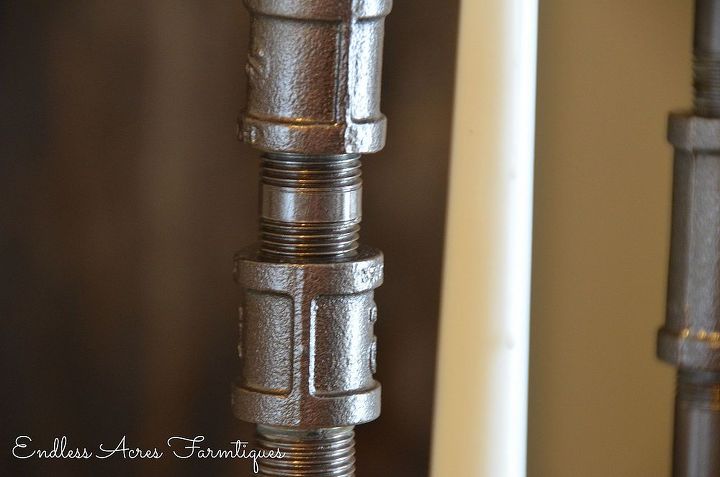
Step 1: Visit your local hardware store and pick up several different pieces of pipe fittings. You can use different pieces than I have used to be creative and make your candle holders your own and unique! You will for sure need fittings with floor flanges which will serve as the bases of your candle holders.
Step 2: Wash pipe fittings ! This is a very important step. I had to remove price/store stickers from all of the fittings, Next I placed them in a sink full of hot soapy water and let them soak for a few minutes, then scrubbed them clean and let them completely dry. This step is to rid them from any grease or build up, so the spray paint can stick.
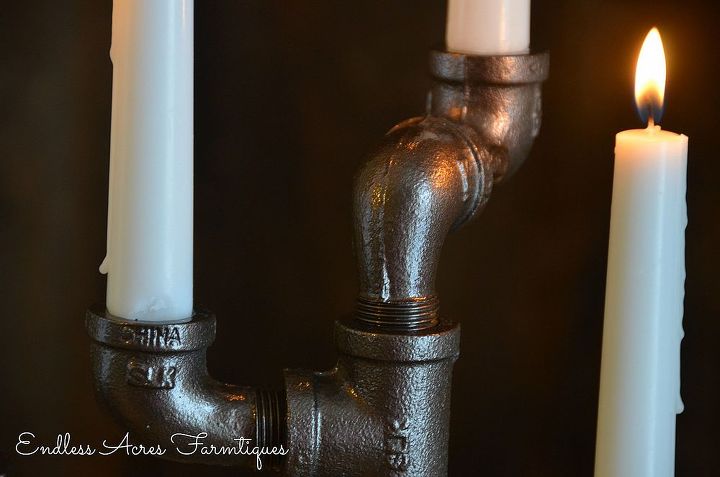
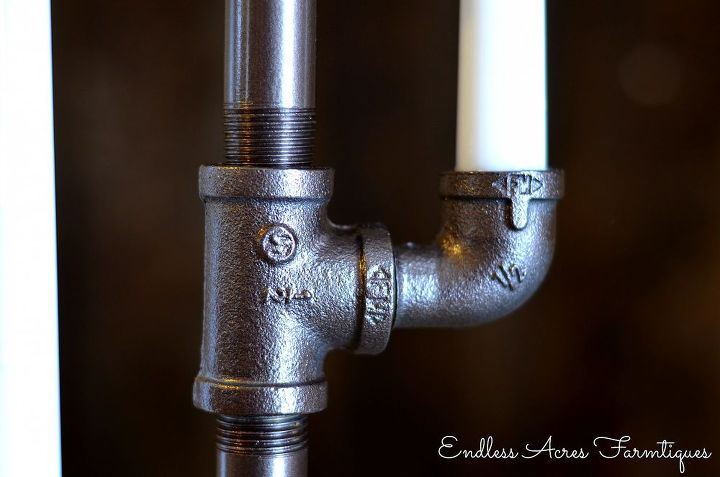
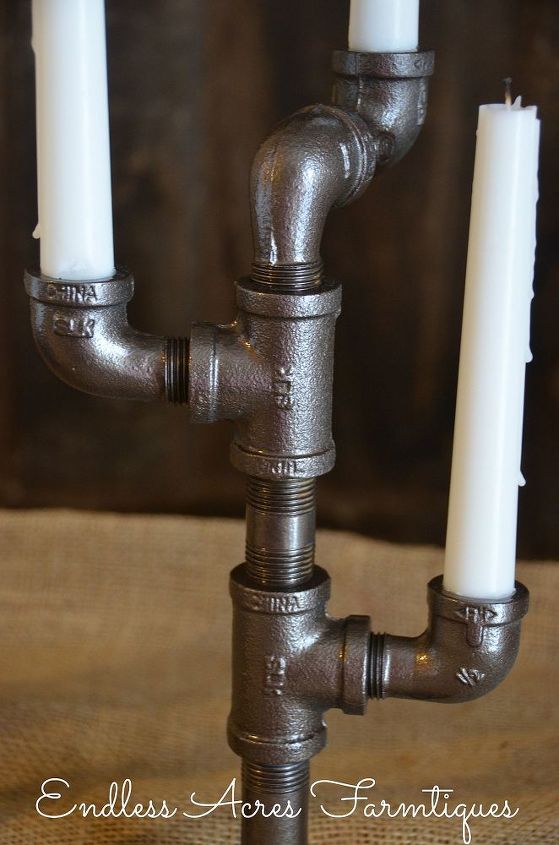
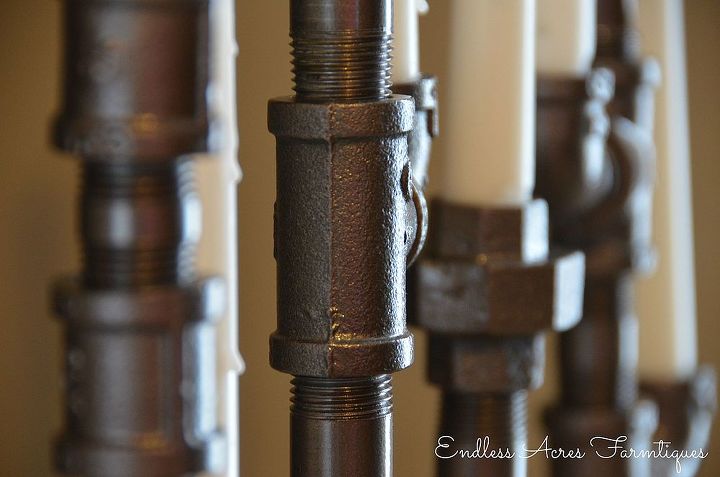
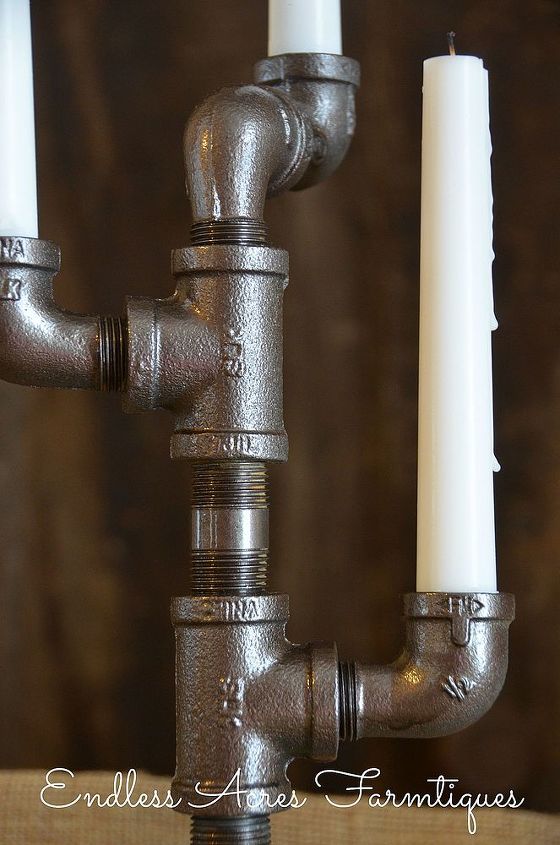
Step 3: Assemble your pipe fittings how you like, to create 4 taper candle holders (or more if you desire). Screw them together tightly.
Step 4; Place your assembled candle holders onto a piece of cardboard, or a paint drop cloth and proceed to spray paint each holder all the way around, top to bottom, side to side. It is important to make slow, soft , thin strokes with the spray paint to reduce any drips. Repeat this process one more time, after the first coat of spray paint has dried. I used Rustoleum dark bronze Hammered spray paint.
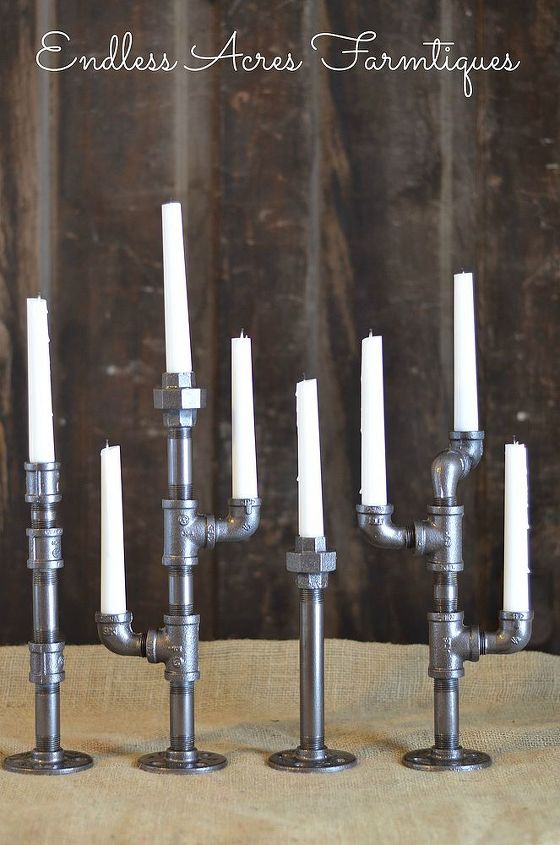
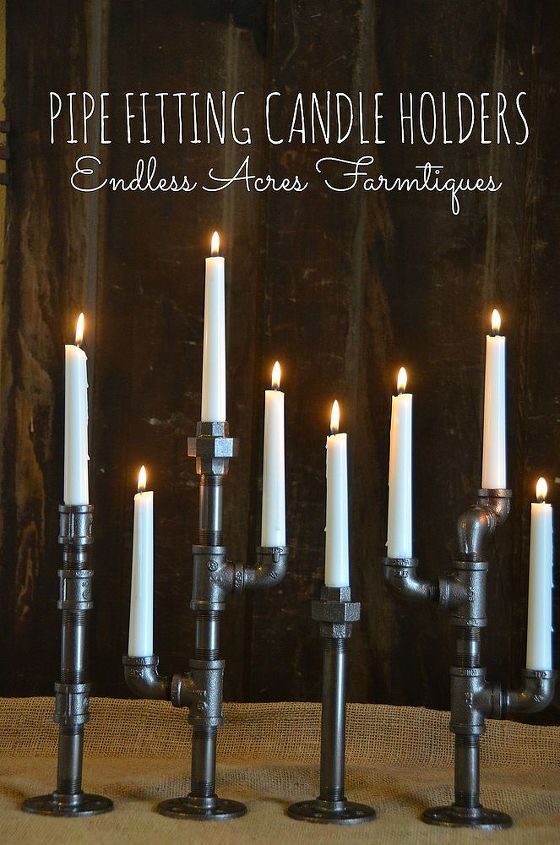
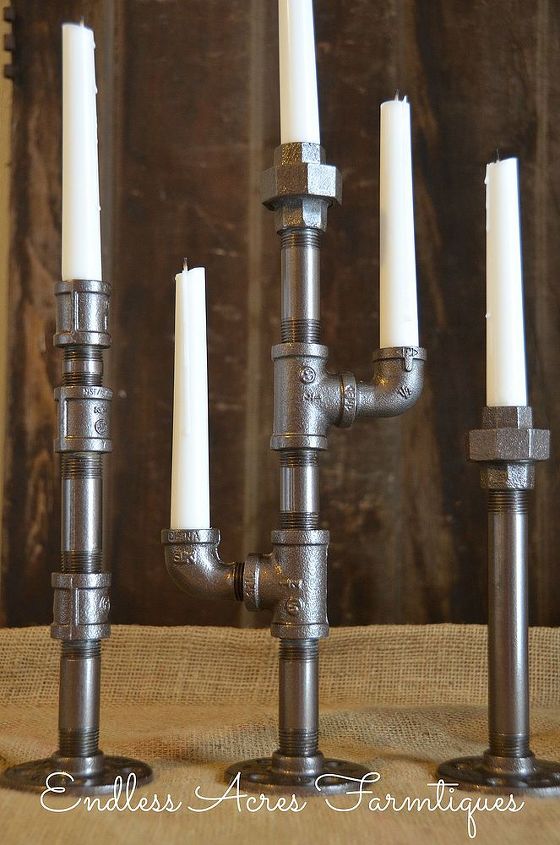
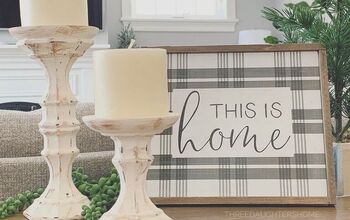
Step 5; Your project is complete! Once the candle holders are dry, place them on a table for a beautiful centerpiece! You may need to chisel down the bottom of your taper candles to fit correctly into the pipe fittings. I just used a small knife for this step.
If you aren't feeling like this is a project you would like to tackle but want to have Endless Acres Farmtiques create you your own set of Pipe fitting candle holders, please contact Kelly at endlessacres @ live.com .
Please follow Endless Acres Farmtiques on Facebook, Twitter & Pinterest.
Pin this tutorial on Pinterest, here.
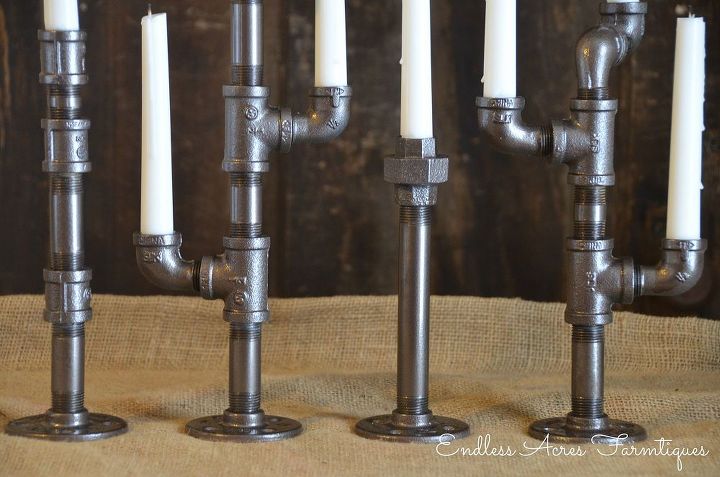
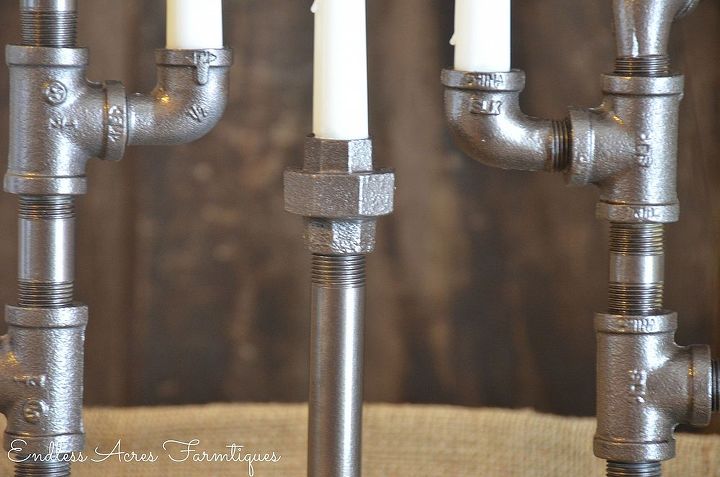
Below are some more detailed photos of my pipe fitting candle holders, enjoy.
Thanks for reading,
~Kelly
I love candles. I have especially always loved scented candles on my stove, and obsessively need to have one lit while cleaning my house , or else, I can't clean! Although I love candles, I have always kind of , sort of, had a thing against taper candles. Why? I have no idea. There is no reason in particular, except for maybe I could never find candle holders for taper candles that fit my style, and weren't too 'fancy' for my rustic country chic style house. This past month, I was reading This Old House magazine , when just a couple of pages in, I saw a photo of candle holders for taper candles, that were created out of pipe fittings, and I knew this was something I had to create! Below is my step by step tutorial on how you too, can make your own Pipe Fitting Candle Holders!
Project: Pipe fitting taper candle holders
Time: 1-2 hours (most time is dry time between coats of spray paint)
Cost: $50 (includes cost of Pipe Fittings, spray paint & candles)
Supplies: Pipe Fittings, spray paint , taper candles.
Level: Beginner
Steps:
Step 1: Visit your local hardware store and pick up several different pieces of pipe fittings. You can use different pieces than I have used to be creative and make your candle holders your own and unique! You will for sure need fittings with floor flanges which will serve as the bases of your candle holders.
Step 2: Wash pipe fittings ! This is a very important step. I had to remove price/store stickers from all of the fittings, Next I placed them in a sink full of hot soapy water and let them soak for a few minutes, then scrubbed them clean and let them completely dry. This step is to rid them from any grease or build up, so the spray paint can stick.
Step 3: Assemble your pipe fittings how you like, to create 4 taper candle holders (or more if you desire). Screw them together tightly.
Step 4; Place your assembled candle holders onto a piece of cardboard, or a paint drop cloth and proceed to spray paint each holder all the way around, top to bottom, side to side. It is important to make slow, soft , thin strokes with the spray paint to reduce any drips. Repeat this process one more time, after the first coat of spray paint has dried. I used Rustoleum dark bronze Hammered spray paint.
Step 5; Your project is complete! Once the candle holders are dry, place them on a table for a beautiful centerpiece! You may need to chisel down the bottom of your taper candles to fit correctly into the pipe fittings. I just used a small knife for this step.
If you aren't feeling like this is a project you would like to tackle but want to have Endless Acres Farmtiques create you your own set of Pipe fitting candle holders, please contact Kelly at endlessacres @ live.com .
Please follow Endless Acres Farmtiques on Facebook, Twitter & Pinterest.
Pin this tutorial on Pinterest, here.
Below are some more detailed photos of my pipe fitting candle holders, enjoy.
Thanks for reading,
~Kelly


Want more details about this and other DIY projects? Check out my blog post!
Comments
Join the conversation
2 of 4 comments
-
WOW so unique!
-
cute idea, but expensive to make, wonder how much you could retail them for?


Frequently asked questions
Have a question about this project?