


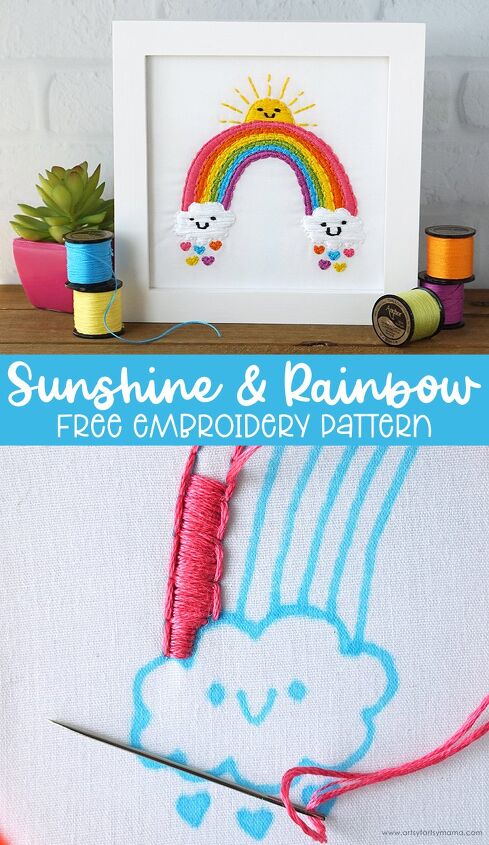
Sunshine & Rainbow Embroidery Pattern
Add a bit of sunshine and rainbows to your decor with this free embroidery pattern!
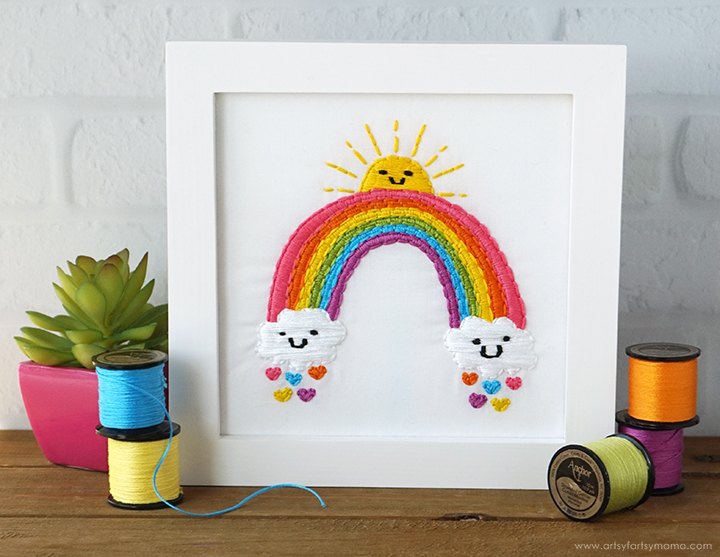
I wanted to add a bit more color into my sewing space, so I put together this "Sunshine & Rainbow" embroidery design that makes me smile every time I look at it. This is a fun and simple embroidery project that both beginners and pros alike will enjoy. Not only is it great decor for your own space, but it would make such a sweet handmade gift for a new baby, a teacher, or a friend who could use some extra sunshine and rainbows in their life.
To make your own Sunshine & Rainbow Embroidery decor, you will need these supplies:
- Free Sunshine & Rainbow Embroidery Pattern (personal use only)
- 10"x10" White Cotton Fabric
- 10"x10" Batting or Stabilizer (optional)
- Water-Soluble Marker
- Embroidery Hoop
- Embroidery Floss
- Embroidery Needle
- Scissors
- 6"x6" Frame
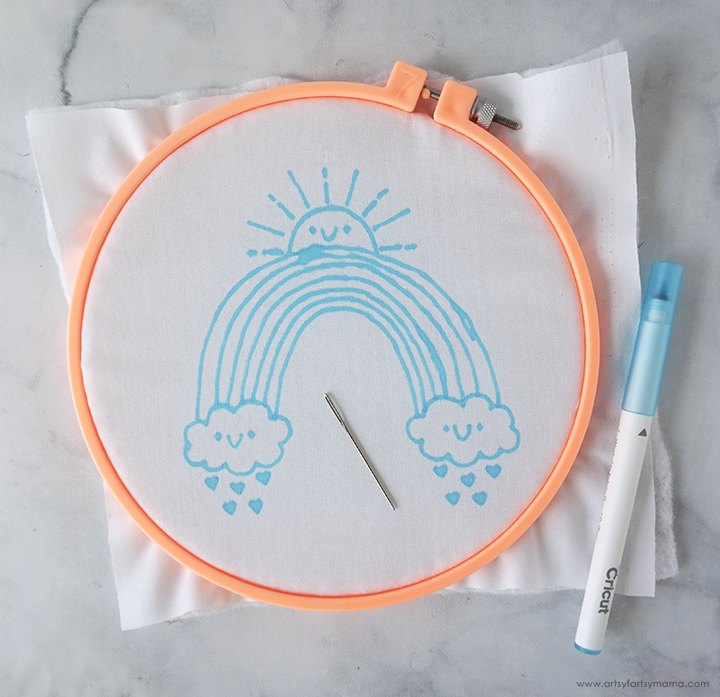
Cut a piece of white cotton fabric roughly measuring 10" square. Print the Sunshine & Rainbow Embroidery Pattern on regular copy paper, and place it underneath the fabric. Use a water-soluble marker to trace the pattern onto the fabric.
I would also recommend backing the fabric with batting or stabilizer. Not only does it help to keep the fabric from pulling or puckering from the embroidery, but that extra layer will help hide the stitches behind the fabric!
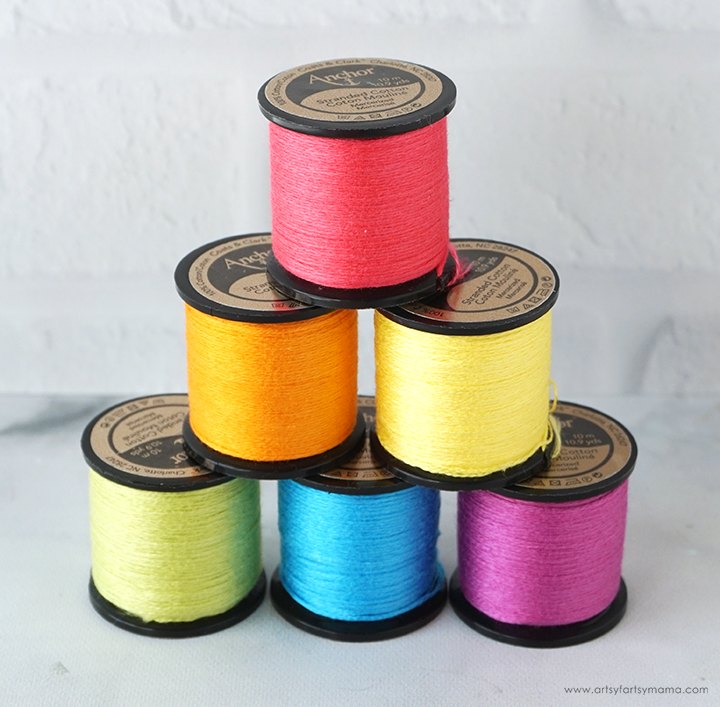
When it comes to embroidery floss, my favorite has honestly been the Anchor Embroidery Floss Spools. Yep, you read that right - spools! These spools have 25% more floss than skeins, and the floss easily comes off the spool without having to deal with tangles.
Clean-up is also a breeze because you don't have to put the thread back onto a card or figure out how to loop it all back together. Simply wind the end onto the spool and put it away!
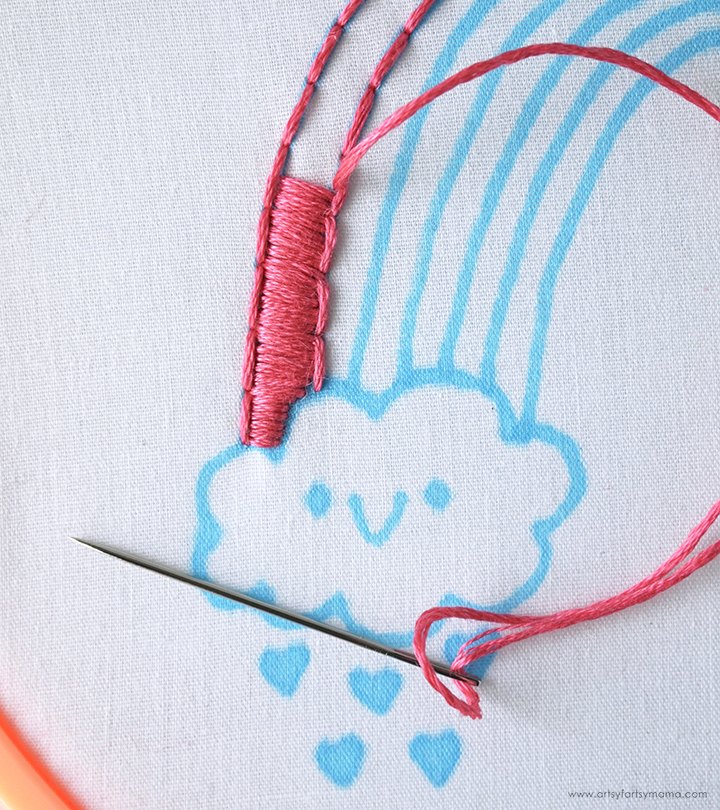
Center the fabric and batting/stabilizer in an embroidery hoop and tighten it so that the fabric is snug. Unwind a length of embroidery floss from the spool, thread all six strands onto an embroidery needle, and knot the end.
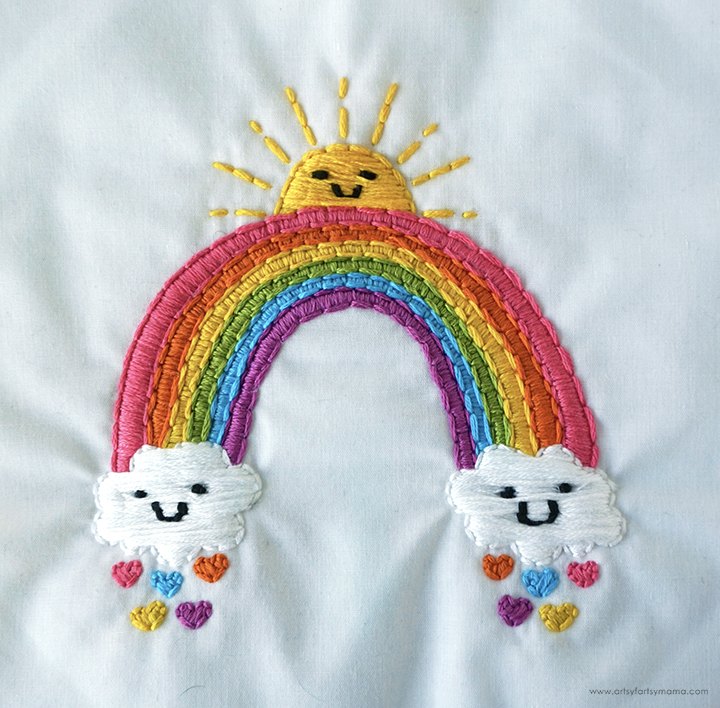
Follow the marker lines to stitch the design onto the fabric. There are multiple embroidery stitch styles you can use to get a different look to your project. For mine, I outlined each color of the rainbow and the other design elements using a backstitch, and then went back in with a satin stitch to fill each color in.
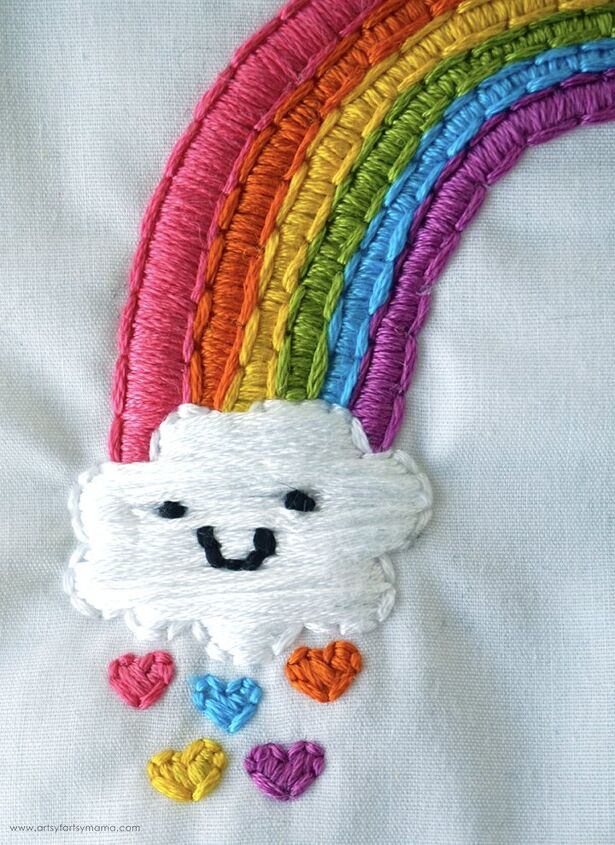
After outlining the clouds using a backstitch and satin stitch, I added the little smile with black embroidery floss. The eyes were done by doing two small French knots. Repeat this process for the other cloud and for the center of the sun.
Once you're done stitching, run the fabric under cold water to remove the water-soluble marker ink. You shouldn't need to use any soap. To help the fabric dry quicker, fold a hand towel in half and sandwich the fabric in between. Press the towel to remove the excess water, then lay the fabric down flat to finish drying. You can also put the fabric into the dryer with a small towel for a few minutes.
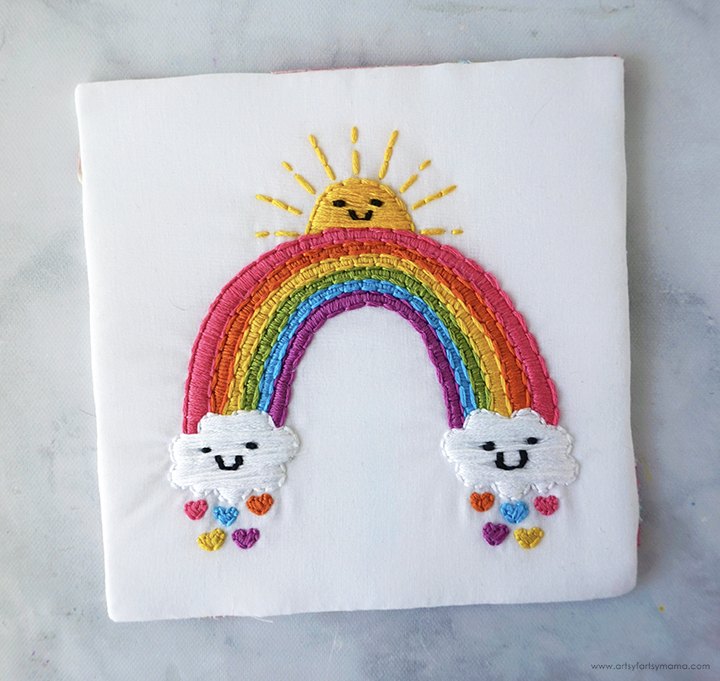
Cut a piece of thick cardstock to fit inside the frame. Once it's completely dry, center the embroidery on the cardstock and trim the fabric two inches larger than the cardstock. Hold the fabric and cardstock together and carefully flip them face-down. Pull the edges of the fabric tight and use some tape to hold the fabric edges in place.
Fit the embroidery into the frame to proudly display your hand-crafted work of art! I love how this adds a happy pop of color into my sewing space. As always, I would love to see your creations! Share yours on Instagram, Facebook, or leave a comment/photo on the project pin on Pinterest!
For more rainbow embroidery inspiration, be sure to check out these other creative ideas:
I absolutely love this Embroidered Wall Hanging that Beth from Creatively Beth made! It's made with stitchable felt, so it's the perfect project for beginners. I love how simple this project is, and how it adds such a fun pop of color to any space.
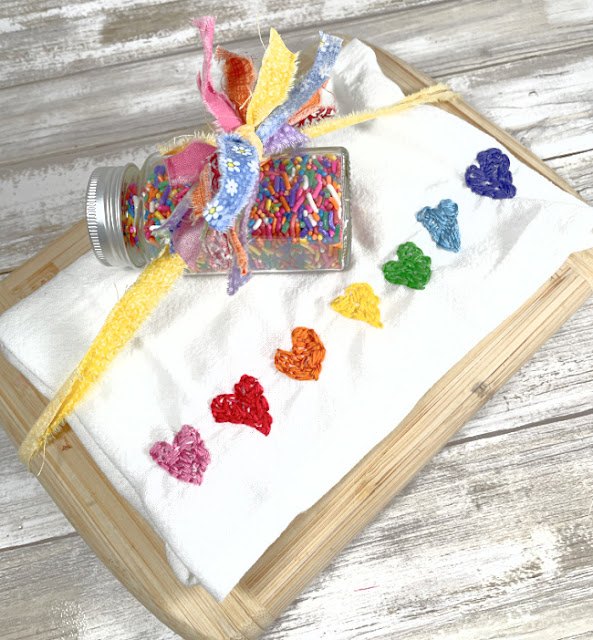
Laura from Me & My Inklings created this Rainbow Hearts Embroidered Tea Towel that pairs perfectly with some colorful sprinkles to gift to a friend! I love how she was able to make this project on the go, and it's just so fun and colorful!!
Don't forget to Pin, Like, and Share!
Resources for this project:
See all materials


Comments
Join the conversation
-
🎶 Sunshine, lollipops, and rainbows, everything that's wonderful ..............🎶


Frequently asked questions
Have a question about this project?