


DIY Board and Batten for Under $150
$150
3 Days
Medium
After much online searching, I decided to do an inexpensive board and batten wall treatment in our upstairs hallway, with a narrow shelf at the top where I could display family photos. Here are the step-by-step instructions ...
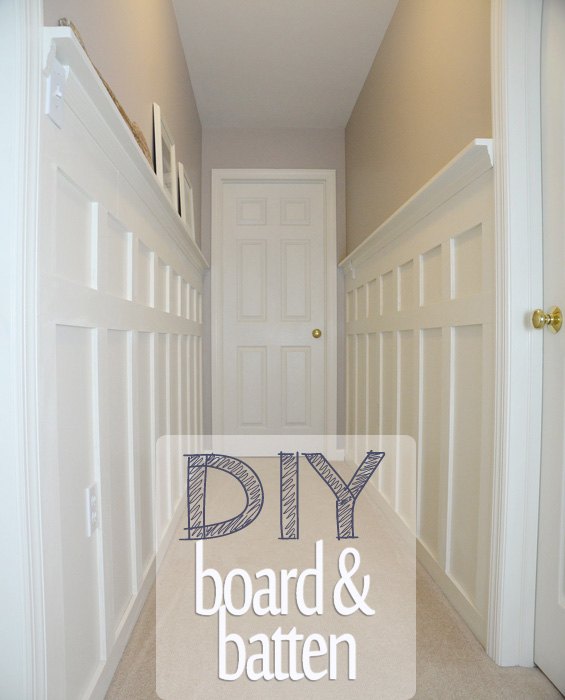
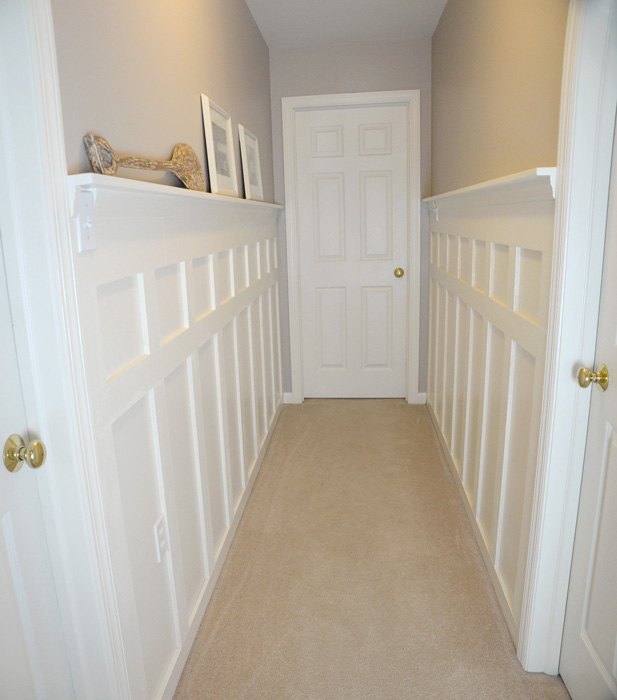
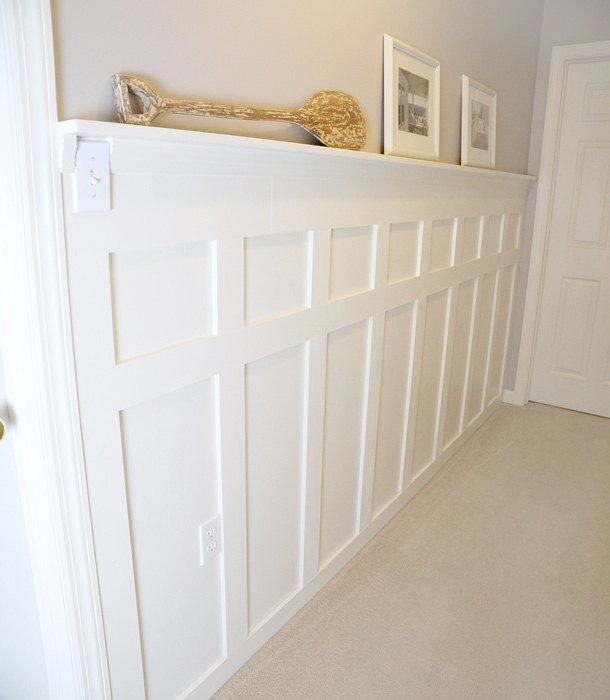
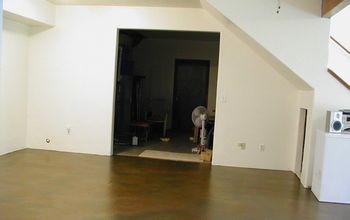
Here's a sneak peek at the "after."
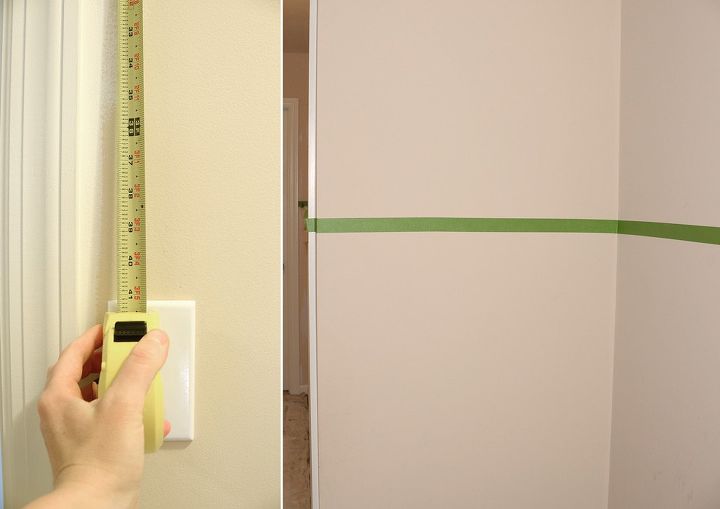
Step 1: Decide where the first horizontal board will be placed. I wanted my top board to be flush with the top of the light switches. So I measured down from the ceiling and placed tick marks all along the wall at that spot. I used FrogTape® brand painter’s tape, placed around the entire hallway, to mark that starting line.
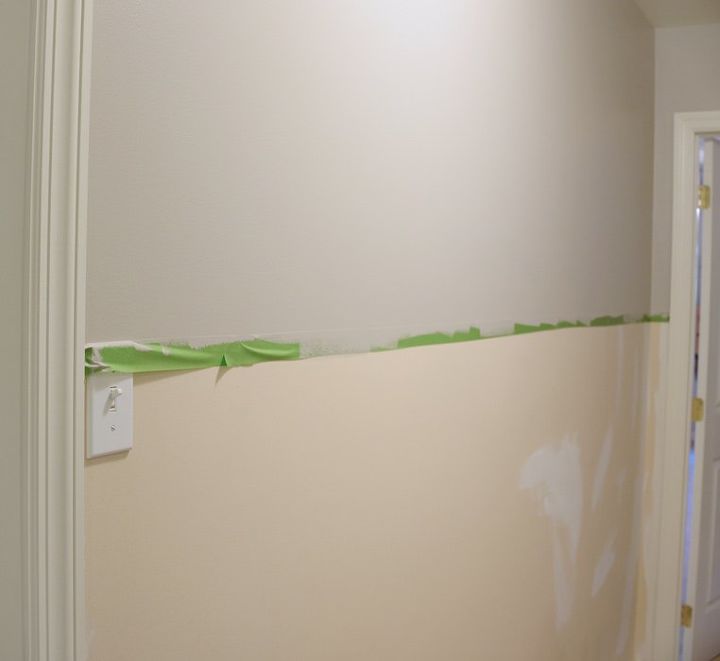
Step 2: Paint the walls to the ceiling above the line of painter's tape. I chose the color Anew Gray and had it mixed up in the lesser expensive Valspar Signature® paint (eggshell finish).
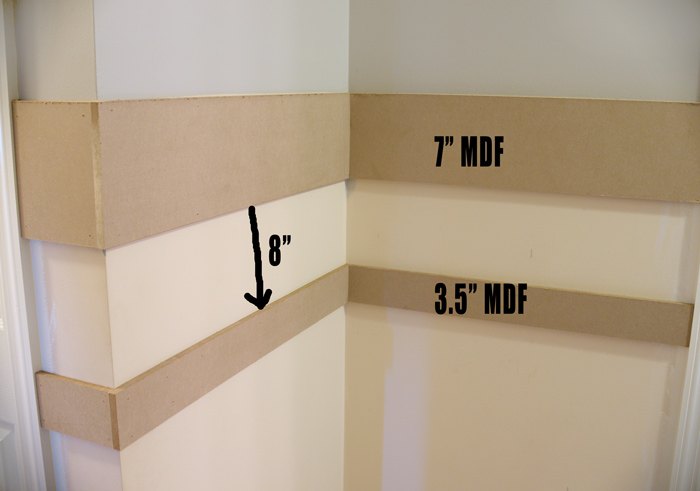
Step 3: Add the first horizontal board to the wall. I chose medium-density fiberboard to create my boards and battens. To save money, I purchased three, 8-foot sheets of MDF and had them cut down in the home improvement store. From each 8-foot sheet, I had cut one 7-inch-wide piece; the rest of each sheet was cut into 3.5-inch-wide pieces.
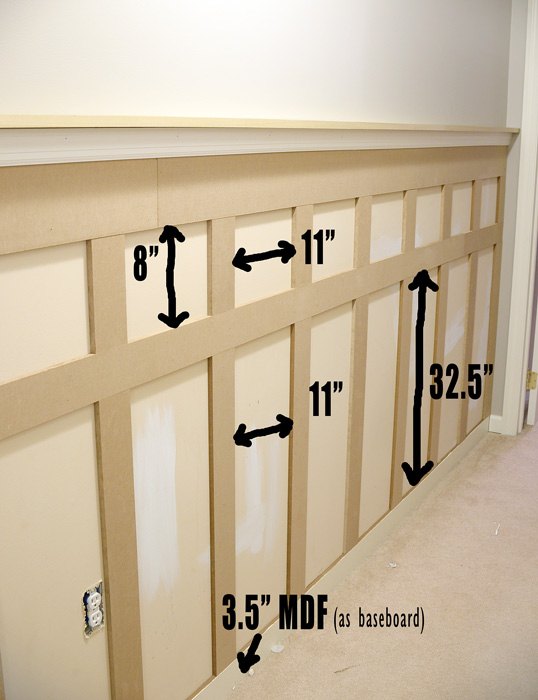
Step 5: Add baseboard. I used 3.5-inch pieces of MDF to serve as my baseboard. (Be sure to paint these boards prior to sticking them to the wall.) For the paint color, I chose to match the shade of our window and door trim.
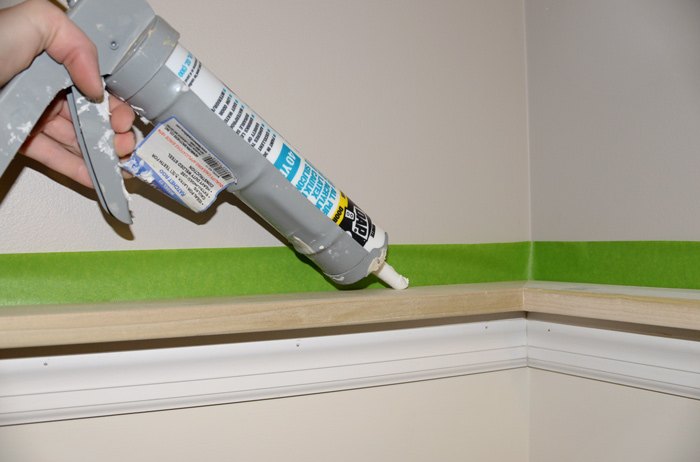
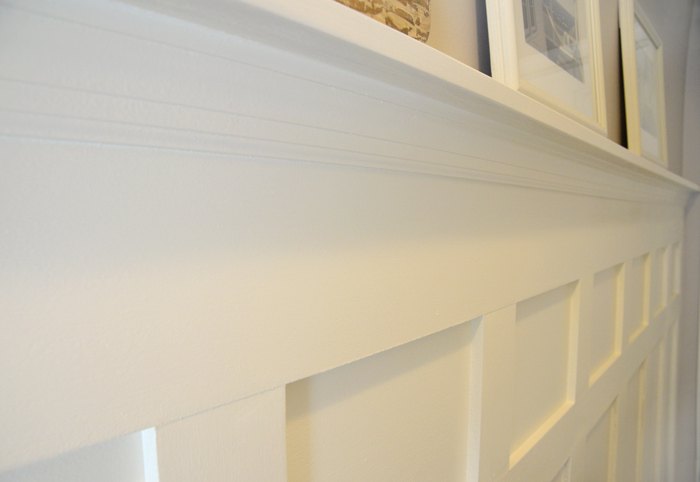
Step 7: Add the top shelf and molding. I chose a 1×3 birch board for my top shelf and inexpensive door/window casing for the molding underneath it.
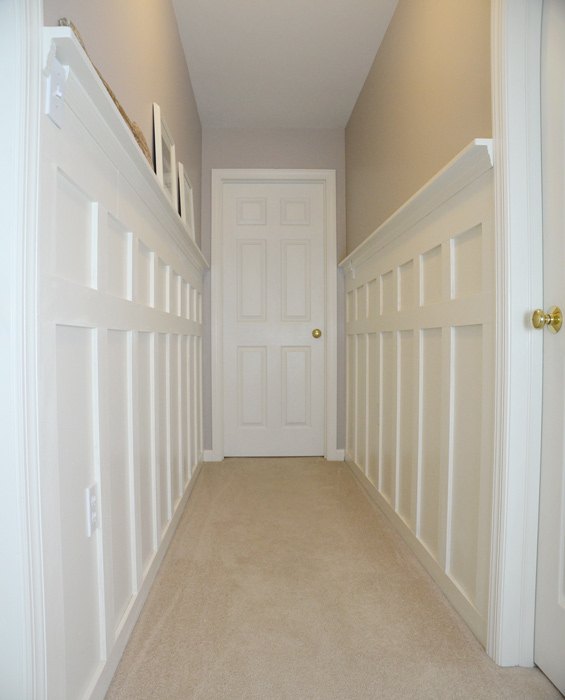
Here’s my new hallway that I built for under $150!

Want more details about this and other DIY projects? Check out my blog post!
Comments
Join the conversation
2 of 5 comments
-
Been trying to figure out our hallway and what to do. Bit I got it now. Definitely my next project for our house.
-
Brilliant! Thanks for sharing 😊


Frequently asked questions
Have a question about this project?