


DIY Peel and Stick Wood Wall Planks
This post was sponsored by From The Forest. All opinions are mine alone.
DIY peel and stick wood wall planks are a great way to bring that trendy farmhouse look into your home. Today I’m showing you how I installed White Pine Wall Planks by From the Forest on an accent wall in my laundry room and completely transformed the look of the room. This is a fun project you can complete in a weekend for a quick and easy upgrade to any space in your home.
I’ve been meaning to update my laundry room for a few years now and have been compiling materials like flooring and tile with the intention of doing a mini renovation “soon”. When I was approached by From the Forest a few months ago and asked if I wanted to try our their peel and stick wall planks I knew my laundry room was the perfect place to try them out.
From The Forest products are American made and all materials are sourced with 500 miles of their warehouse in Weston, WI. They are Green Guard certified with no added formaldehyde and zero VOC’s. As someone who is trying to be more environmentally conscious these things are important to me.
I decided this opportunity was a sign that it was time to finally get my act together and get started on this neglected room in my home. I’ll share a full tour and more projects soon but today, it’s all about the Wallplanks!
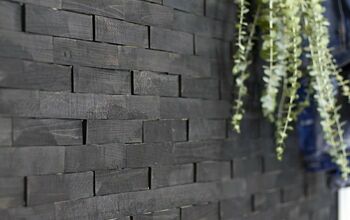
I chose the Picket Fence Original Hardwood Planks. This style goes perfect with the modern rustic farmhouse look I have going on in my house.
These Wallplanks are super easy to install. You might need to do a little bit of prep depending on if your walls have some texture to them (like mine did) but for the most part you just peel off the backing and stick them to the wall.
- From the Forest Picket Fence Original Hardwood Planks
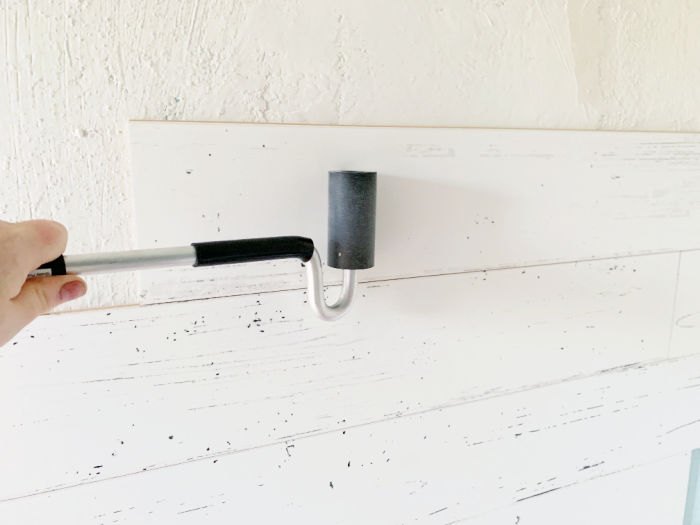
- J- Roller
- Level
- Saw – I used a miter saw but you can also use a jigsaw
- Pencil
- Measuring tape
- You may also need sandpaper and supplies for skim coating the wall surface
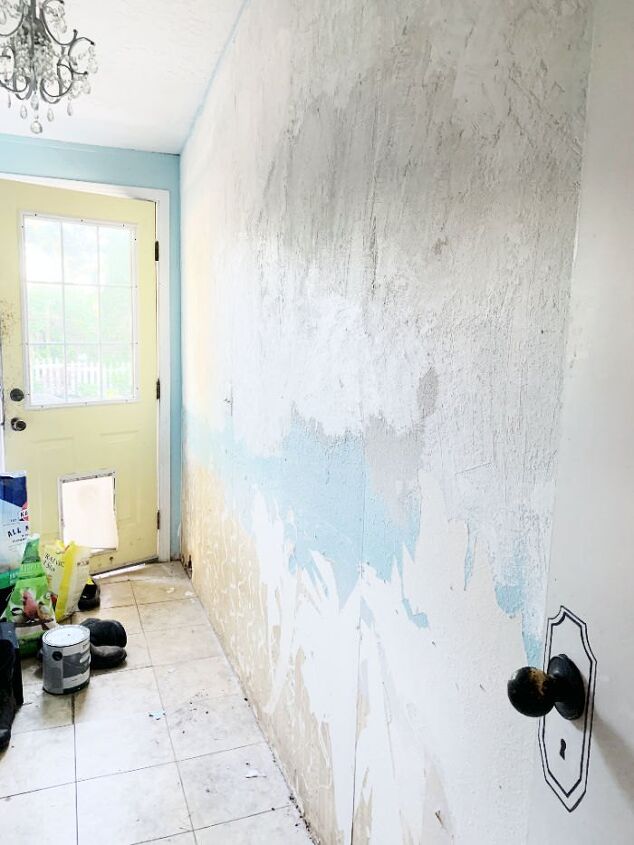
This was my wall while I was prepping it. I had bead board planks on the bottom part previously and under that was ugly wall paper and some holes in the walls. There was a dog who lived in our home before us and it’s owners let it chew through the drywall. All. Over. The. House.
- Prep the walls. Make sure they are clean and dry. If your walls are textured you may need to smooth them out like I did with Plaster of Paris. If they are already smooth you can clean them with TSP Cleaner and apply the planks once the walls are completely dry.
- Measure the wall and make sure the ceiling and floor are level. Use a level and make chalk lines if necessary to guide you as you apply the planks to the walls.
- Peel the back off of the planks and press them firmly against the wall. My floors are level so I started at the bottom and worked my way up.
- Use a J-Roller and roll over each plank. The adhesive is pressure activated so it is important to roll and press the J-Roller over the planks.
- Cut planks to fit if necessary. I trimmed some of the planks with a compound miter saw.
- Sit back and enjoy your new wood plank wall.
The walls in my laundry room were heavily textured so I needed to smooth them out before beginning. At the bottom of this post I explain what wall textures and materials the planks can be applied to. I mixed up a little Plaster or Paris and smoothed it onto the wall to fill in the deep crevasses. I sanded it and filled in more areas where I could. The wall texture still wasn’t perfectly flat but the planks still adhered very well to the wall. I then primed it and let it dry for about a week before installing the planks.
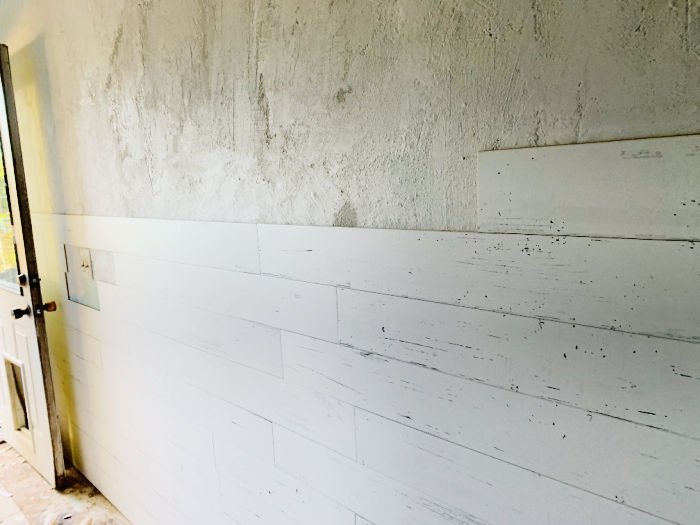
The ceiling in my laundry room is angled. It’s about a 10 degree slant which made the top part a bit of a challenge because I had to cut the planks diagonally. With my very limited wood working skills I did a pretty good job of cutting the wood. There was a bit of a gap between the top of the planks and the ceiling so I just put up a piece of trim and it hid all the imperfections and framed it nicely. I used my miter saw to cut the planks as well as a jigsaw for the top pieces I had to cut diagonally. I also had to trim the pieces around the light switch and cover.
You can install the planks on clean, flat, dry and structurally sound surfaces. You should test a sample on your wall prior to full installation. If your walls have a heavy texture like knockdown or popcorn then you will have to skim coat or sand and scrape them prior to installing the Wallpanks. Other textures like crows feet, orange peel, smooth or swirl should not require additional prep work.
Can Wallplanks be installed on tile?Yes! As long as the tile is completely dry and not greasy or dirty there should be no adhesion issues.
Can Wallplanks be installed over wallpaper?Yes as long as the wallpaper is smooth and well-adhered. If the wallpaper is peeling or embossed it can effect the bond of the adhesive on the Wallplanks. Try installing a test piece to make sure the planks will adhere properly.
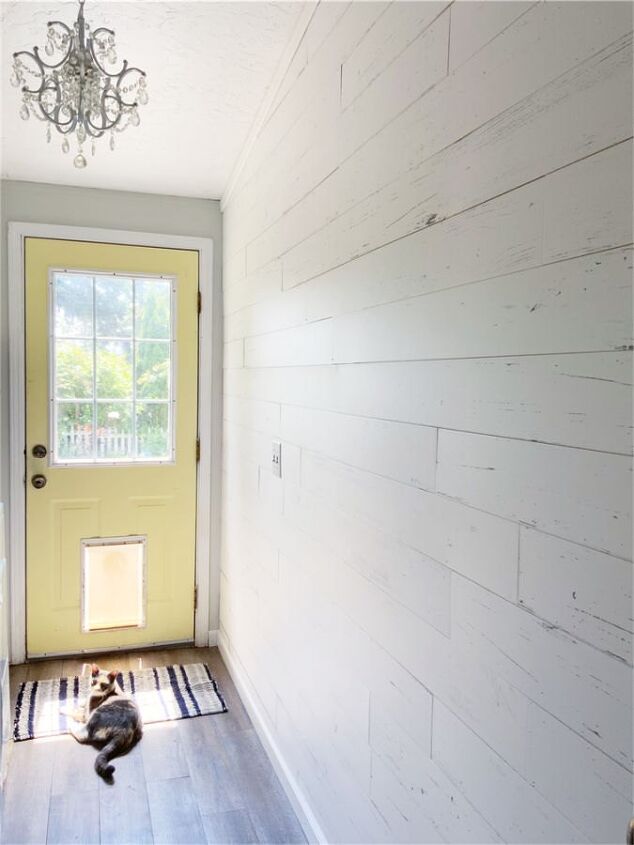
I made a lot of other changes to the laundry room which I will share when I reveal the final before and after makeover post. You can see in these photos that I installed new flooring and painted the walls. I have a few more projects to do but with the Wallplanks from From The Forest, the room already looks 1000% better. What do you think? Let me know in the comments!

Comments
Join the conversation
-
Great job!!! I would love to do this around my fireplace


Frequently asked questions
Have a question about this project?
Where did you find the peel and stick planks?