


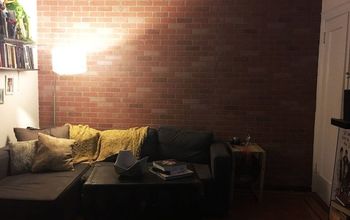
Faux Brick Wall Hack: No Power Tool or Paneling Edition! Full Review I

Today we are talking about FAUX BRICK WALL.
Before I continue sharing I want to refer you to my blog, where you can be the first to know of DIY hacks and all things home decor and DIY. Viewing this on my blog also gives you immediate access to the products I used via the links there!
Want to watch the DIY occur and hear about all the tips? Here you go! Be sure to subscribe on youtube for upcoming hacks!
Okay.. back to buisness. Now this is not your ordinary DIY Faux Brick wall.
It DOES NOT require power tools
There is NO paneling are nailing involved.
Instead… the main component to this is… Spackling and tape!! Yes, that’s really it!
I came across this concept around a year ago and immediately was drawn to find out more. The idea of a super affordable DIY that required limited supplies, no power tools yet created the look of brick with the texture and dimension really drew me in. I never followed through until now! As always with these hacks I share the process of how to do this DIY, a review of major key factors you should know about and then you decide if this right for you! I will also have the youtube video here to help you with main points on this DIY.
Ready? Lets go!
Materials:
- Spackling
- Tape
- Putty knife/scrape
- Long level
- Sponge
- Washcloth
- Paint of your choice
How to:
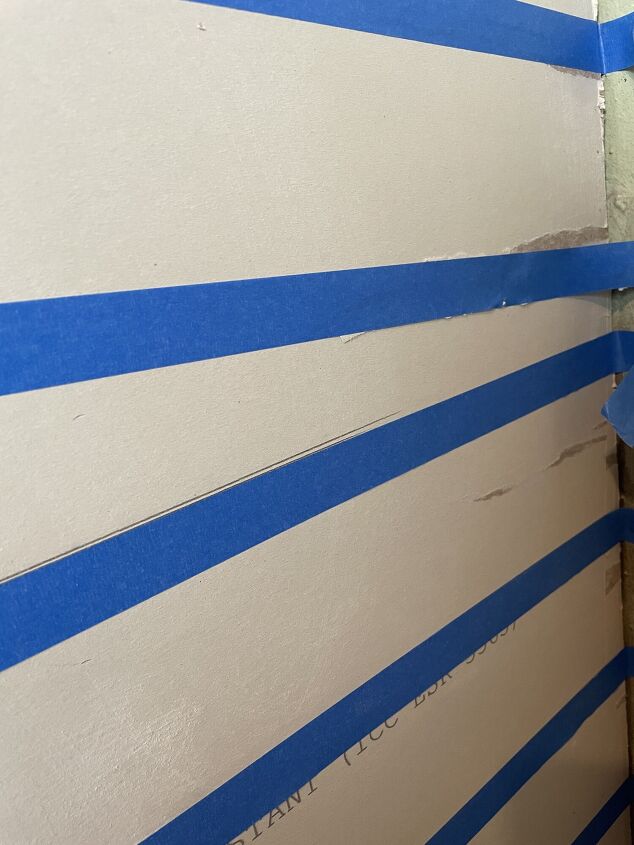
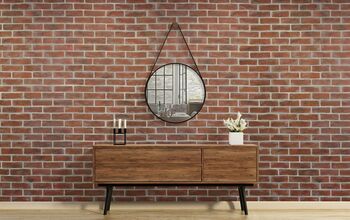
Step 1: First make sure your wall is painted for the color of your “grout”. This will save you from having to paint your grout within a small space and accidentally painting your brick (you will see in my images that I did not... lesson learned. I also peeled some of the drywall so be cautious of that if you choose to do an unpainted surface)
Step 2: Next you will mark off your template for the tape. My brick was 3x8” but feel free to use whatever dimension works for you
- When marking off your wall, also factor in the width of your tape. For instance, I went across every 9” and down every 4"
- When going across I created a staggering brick look between the top and bottom columns, I simply did this by starting one column with a full brick then the next row below it would start at a half brick and I would repeat this all the way down.
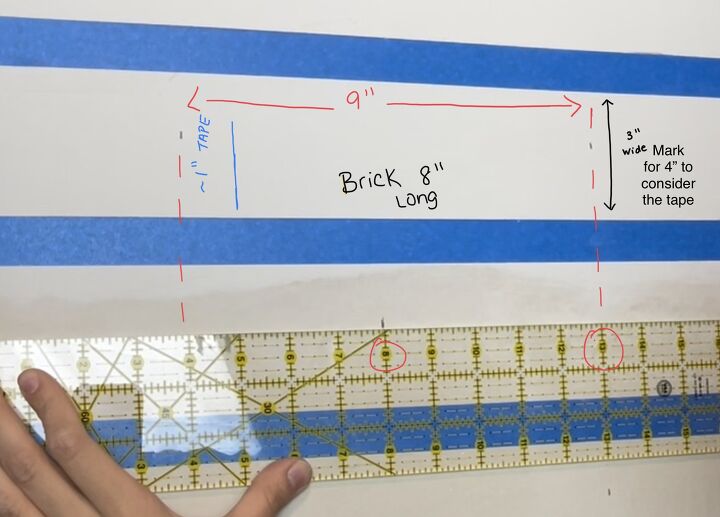
You can see here how I adjusted for the tape. BUT you can also see the layer where the ruler is has a mark at 5" this is where tape would go for the bottom column so essentially they stager every 4" when switching between columns.
C. Do not skip on the level.. not even halfway. Your eyes are not as good as a level. (trust me, I know)
This is what mean by not skipping on the level..... I corrected by bottom lines however you can see how far off I was and needed to level off my top lines.
Step 3: Once you have marked your lines, you can begin taping. Just follow your marks and stay consistent with it. This process is time consuming however is very satisfying in the next few steps.
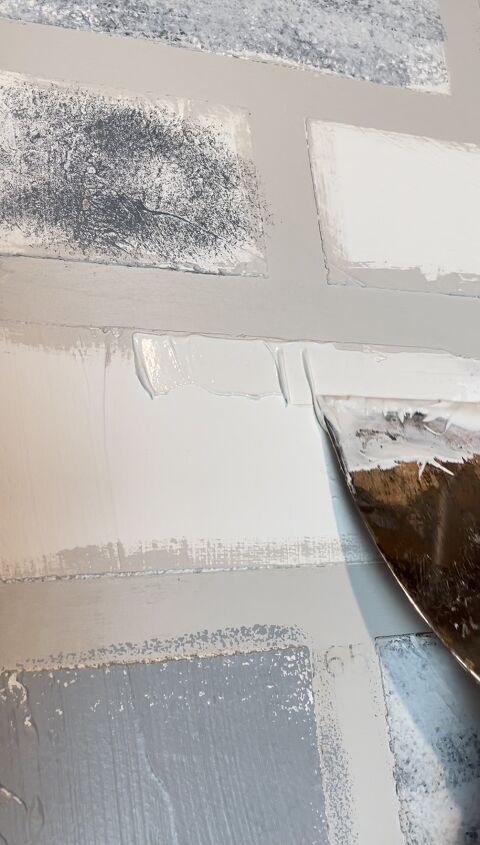
Step 4: Now its time to spackle! This part is messy but also kind of fun. Just apply it in whatever manner works best for you with the texture you want. If you would like increased depth, apply more spackle (Make sure you purchase more spackle than anticipated)
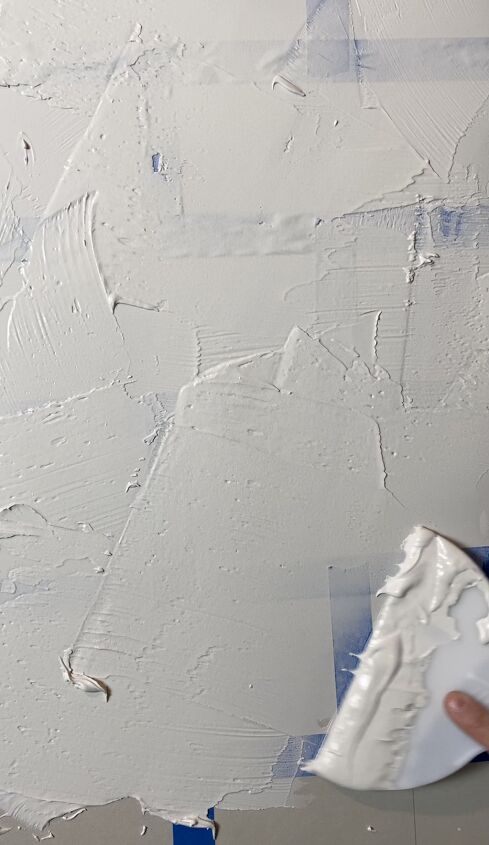
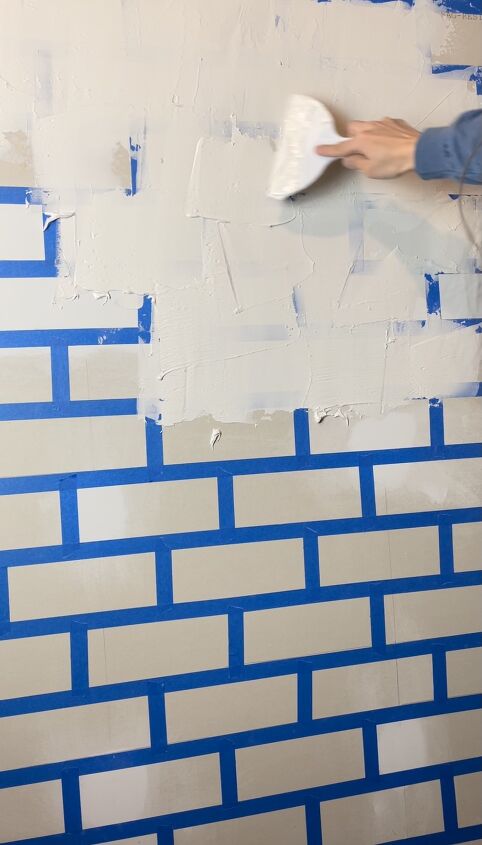
Step 5: After you are done applying the spackle, its time to remove the tape! Yes! remove it while the spackle is still wet. It will save you on the mess and also will be easier to remove.
Step 6: Allow the spackle to dry overnight and return ready to paint!
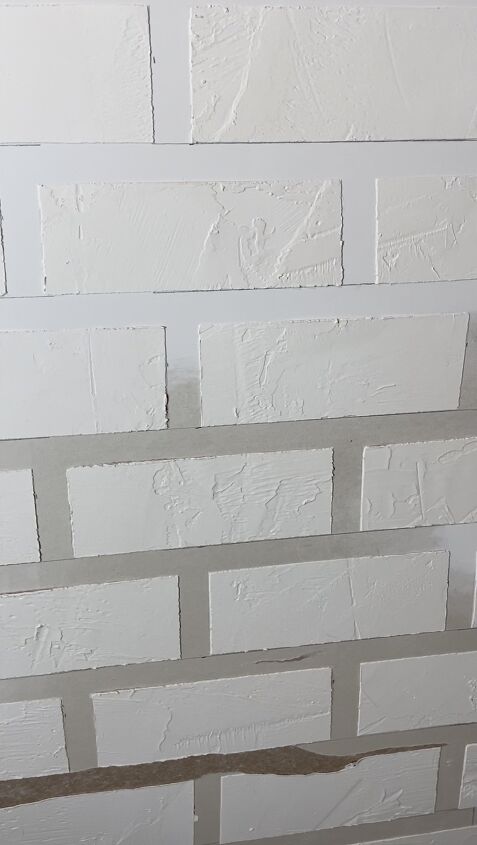
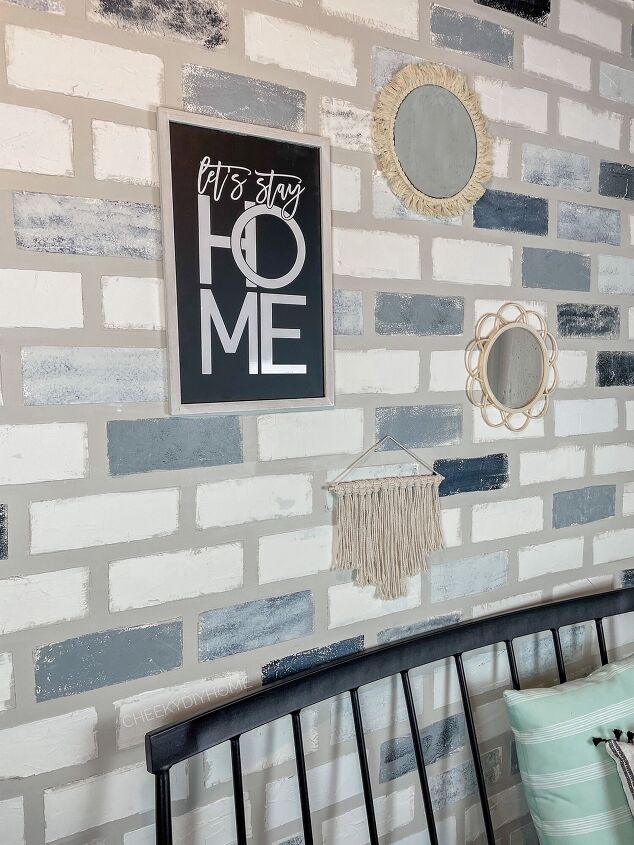
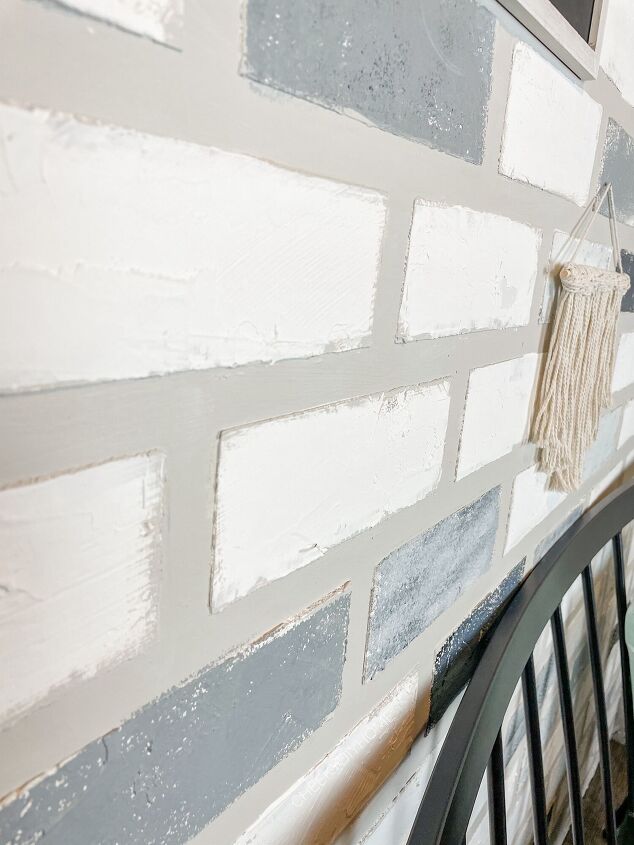
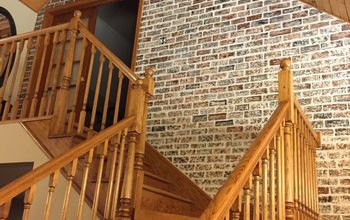
Here is a good look at the texture I created. Also the screw-up in doing this on an unpainted surface.
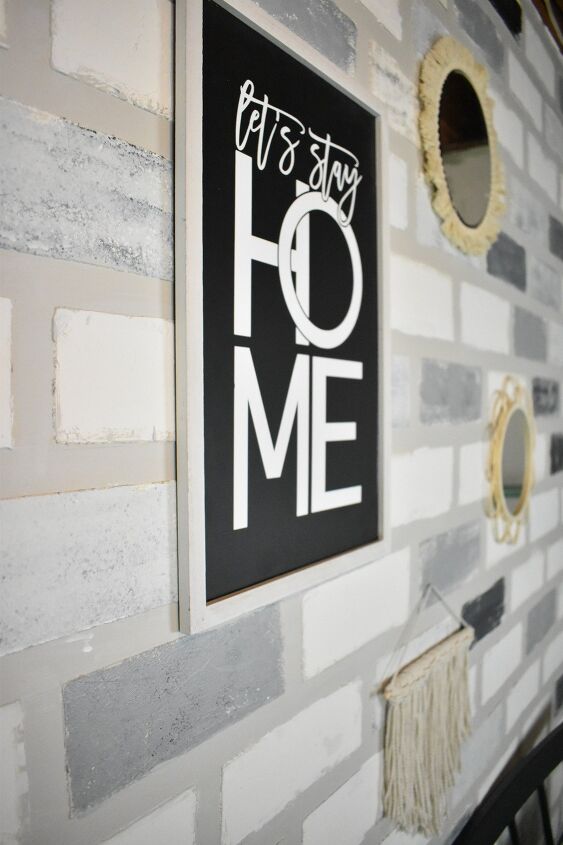
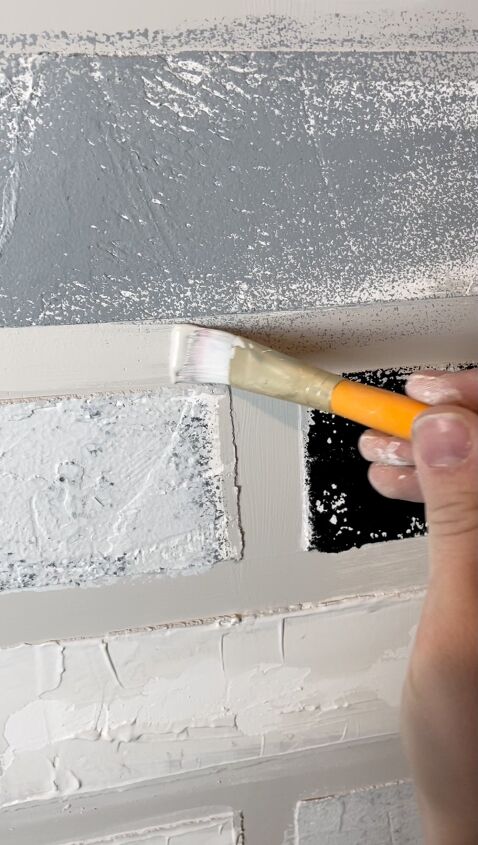
Step 7: To paint your bricks use a sponge to dab on the "bricks". I personally had 3 different paint colors which include white, black, and grey, and just mixed the colors up until I liked the combination it was creating. Don't fret too much if you do not like a color on a break it can always be painted over or if you are quick enough, a wet rag will do the job!
Step 8: Once you feel comfortable with your color choices, whitewash your bricks. It's especially important to do this to the bricks you have left unpainted. Paint will create an added level of protection and less debris will fall.
To whitewash, grab yourself white paint and pour just a small amount of it in a bowl or cup. Then wash it down with water. The ratio should be 25% paint, and 75% water.
Step 9: Add further protection by applying matte polyurethane. I have not done this step, however, be mindful that it may change the color of your brick so test a small area out first!
Now for the Review.. what you should know
Ultimately it is
- Affordable
- Allows you to be creative
- Creates dimension
- Has texture
- Beginner friendly
- Can be used on several surfaces like poured foundation or standard paneling.
However it is also
- Messy
- So make sure to wear your "DIY clothes" and protect your floors!
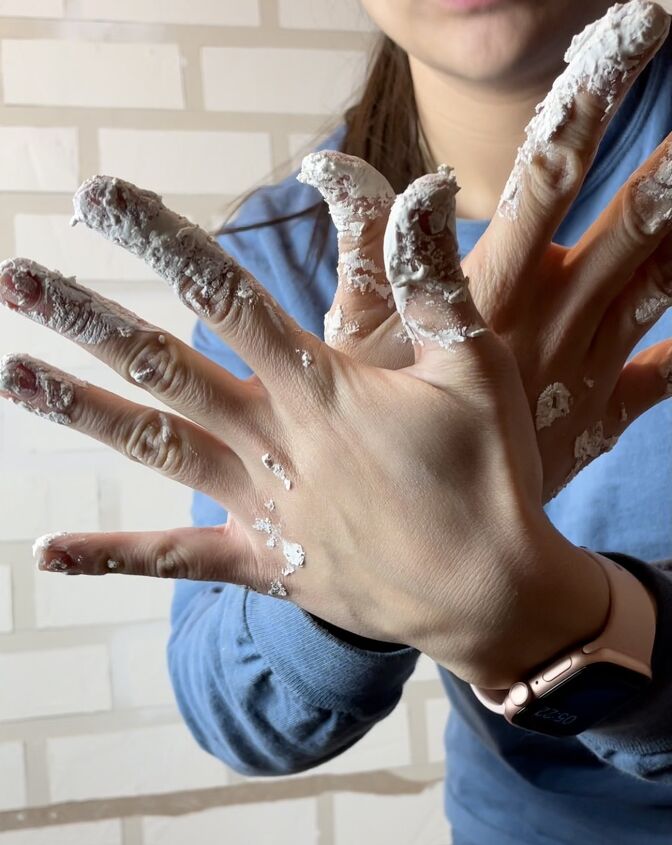
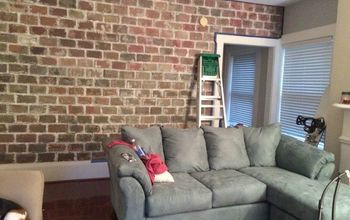
This was after removing the tape which is the messiest and where most of the spackle may have also fallen on the floor. My clothes barely got dirty but just be cautious.
- Permanent - drywall will need to be replaced if you no longer want the brick wall look.
- You could try to sand this down however it is likely you will wreck your drywall. Think of this as if you are actually placing brick on your wall.
- Requires patience
- Although this is an exciting change you may feel frustrutated with how long it takes! I dont want to sugar coat it but after the marking then taping I was done! It did get better, however that may differ for you!.
When comparing this to wallpaper this differs in that it is more affordable, you have complete control of the color choices and lastly, this actually has the texture and dimension without you paying for it with wallpaper.
Whereas, with the standard brick paneling, there is no nailing involved and no fighting off the struggle of the seams that occur. You also cut your cost 1/5 of the way!
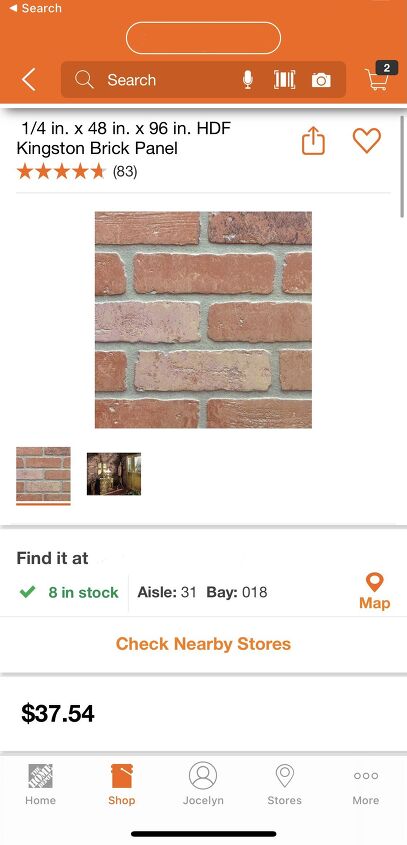
This is the standard method for faux brick walls using brick paneling. my wall which is 64" wide and 84" tall I would have needed to purchase 2 panels then add in the cost to distress this with spackling and boom. $100 vs $20!
Alright, friend. I think that's it. I would love to know if you found this beneficial! Any recommendations for hacks I should try? Let me know!
Below you will find more images. Really of me cleaning up the mess I made from not having my grout painted prior and the final turn out. My recommendation would be to have your base color for the grout painted prior to the spackle application.
P.S Yes you can go thinner with your grout lines, just buy tape that is smaller than an inch! You can find my recommendation on my blog post here along with all of the rest of the supplies I used!
Added more spackle to hide the grey but it also created for texture so at least thats a win!
Unless you are perfect or have a small sponge perhaps, you will likely have to clean up your grout lines.
As always feel free to ask any questions or your own personal experience. And if you have anything you've been debating as a DIY that you would like me to review, send it my way!
Until next time!
XOXO - Jocelyn


Comments
Join the conversation
-
Love this …..most important I can do this on my own, Thank you, looks so beautiful..
-
Great idea, I think a thinner tape (grout line) would look more realistic.


Frequently asked questions
Have a question about this project?
This looks good but Can you buy the white brick panels and paint the bricks different colors and it be the same as this?