


How To Hang A Mixed Media Gallery Wall In 4 Simple Steps
I don’t know about you but I LOVE a good gallery wall. Especially those really big dramatic ones with a mix of art and objects. Before I did my first one I was stumped as to how to go about. How do you measure it out? What do I use to hang everything? How do I make sure nothing rips out of my wall and damages a small human??
It's actually easier than you'd think! Follow these steps and you’ll be enjoying that gallery wall in no time 🙂
Step 1: Gather Your Tools
Do yourself a favor. Before you begin, make sure you have everything you need, gather it up, and have it close at hand during the process. There is nothing more frustrating than having to stop what you’re doing to run to the hardware store.
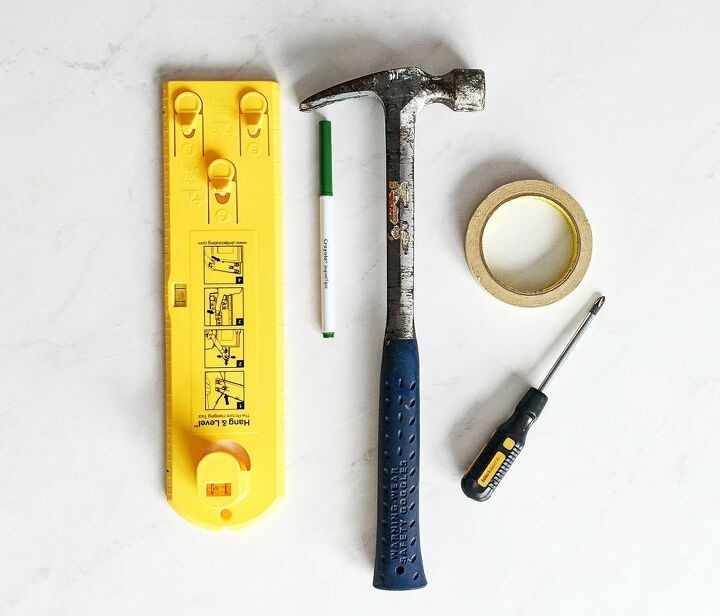
Tools You’ll NeedLevelPicture frame hanging toolPicture hangersWall anchors and screwsMasking tapePencilScrewdriverHammer
Step 2: Stage Your Layout
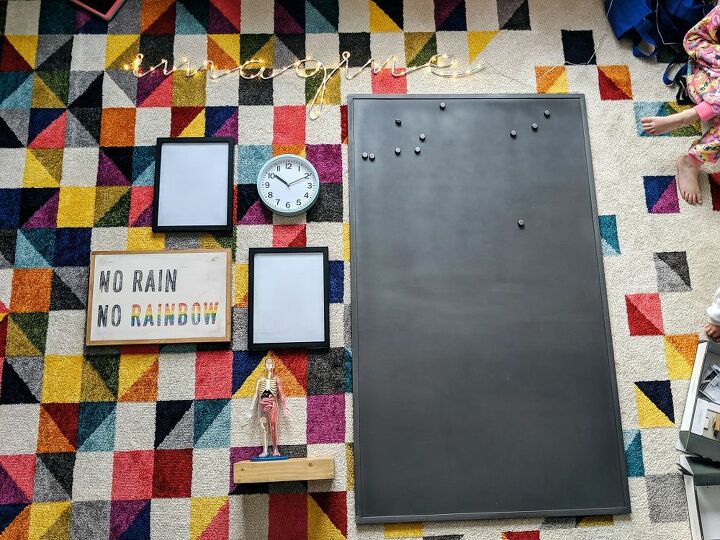
Lay all your pieces out on the floor the way you want them on your wall. Play around with the spacing and positioning until you like what you see.
Now — here is the most important part — take a picture. You think you’ll remember your plan but you won’t. I speak from (painful) experience.
Step 3: Hang Your Anchor Piece First
For detailed tips on what type hardware to choose and my foolproof method for using a wall anchor, check out the full post.
Your anchor piece is usually the item you want to be in the center of the arrangement. It could also be the largest piece. Basically, it’s the piece that will determine the position of everything else. This is the one you really want to get right so take your time.
Measure down from the ceiling to where you want the top of the frame to hit, and mark a horizontal line in pencil using your level. Then do the same from the closest wall to the closest vertical edge. This will be your guide.
You can either measure down from the horizontal guide to figure out where to place your hanging hardware OR make this mark slightly lower than were you want the piece to ultimately hang and just use that level line for hardware placement.
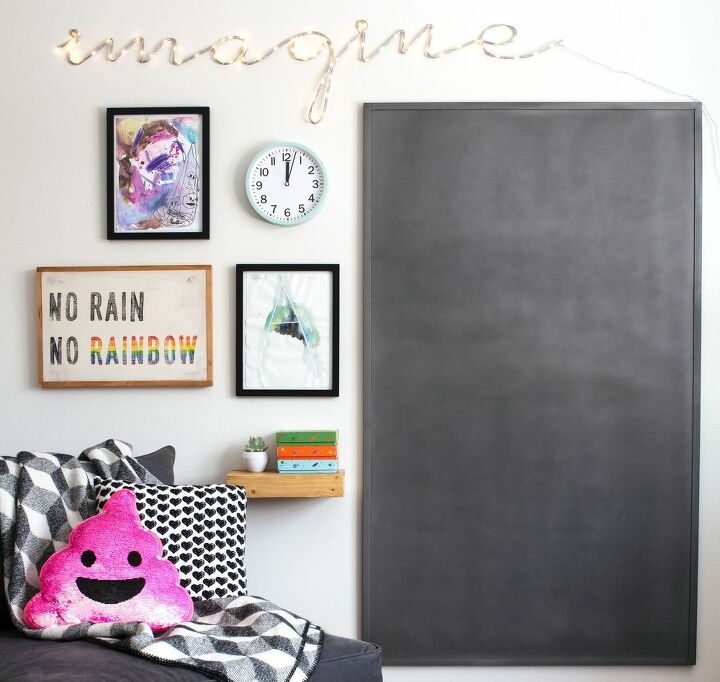
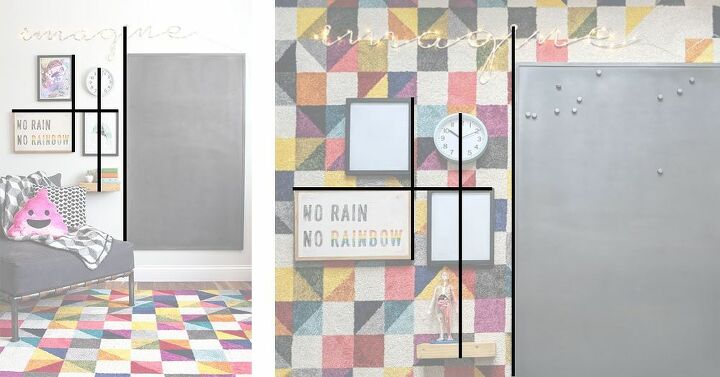
In the case of my kids' playroom, the huge magnet board was clearly my anchor. For really large pieces, especially those with two or more hanger holes for screws like this beast, stick masking tape on the back of the piece, mark the tape where the screw holes go, then stick the tape on the wall. Use a level to be sure the tape is straight, and use the marked tape to position your screw holes.
I used wall anchors for the magnet board since I had zero interest in trying to locate studs. Wall anchors are great because they allow you to hang heavy items in drywall without having to drill into a stud.
Step 4: Hang Your Remaining Pieces
Remember the photo you took in step 2? You'll be referring back to it a lot!
Start by identifying an easy reference point on your anchor piece. An edge is usually the easiest but depending on your layout, it could be the center or maybe a part of the art itself. Now grab an adjacent piece from your layout and position it on the wall in relation to that reference point.
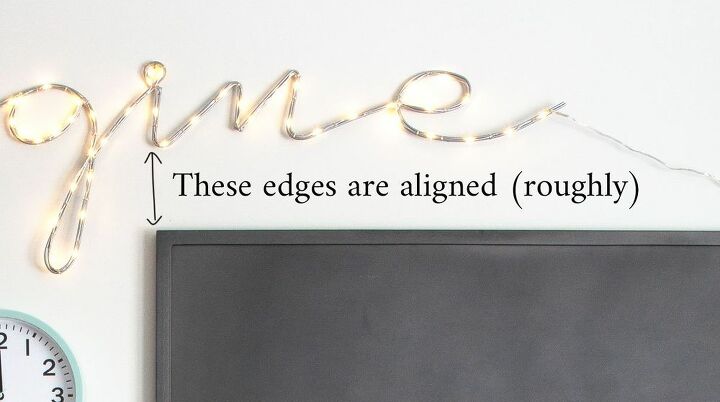
In this example, I placed the “Imagine” sign first after hanging the anchor piece because I knew I needed that lowercase “g” to dip below the top of the frame just-so. The left side of the “i” is aligned against the left edge of the frame.
The center alignment of your items should match your photo, as well as the edges, but don’t get super tense about it. If it’s close, it will be fine. Just do your best to generally line the edges up the way you planned.
Continue in the same way by choosing the next adjacent item and carefully setting your alignment based on the previous piece. Before you know it, you’ll be done!
Resources for this project:
See all materials


Frequently asked questions
Have a question about this project?