


How to Paint a Mountain Mural

Last year, my daughter wanted to add an accent wall in my grandson's bedroom so she decided to paint a mural. The scene she wanted was mountains. To create the mountains, she used painter's tape & three paint colors. This year, I added trees and snow 
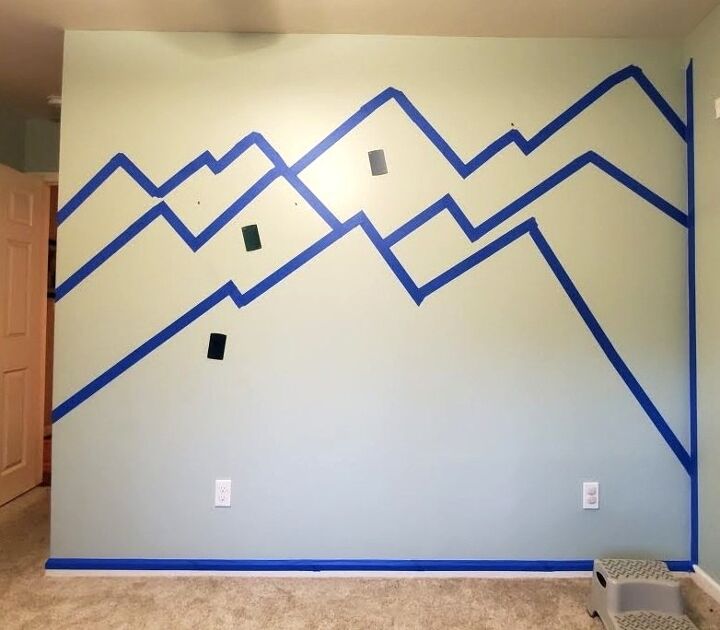
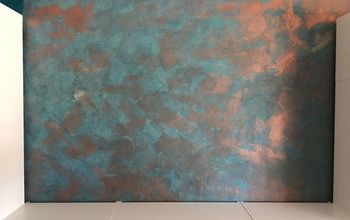
The first step in creating the mountain scene was to make an outline using painter's tape. Daughter decided on 3 sets of mountains and chose three colors: Medium blue, forest green, dark blue.
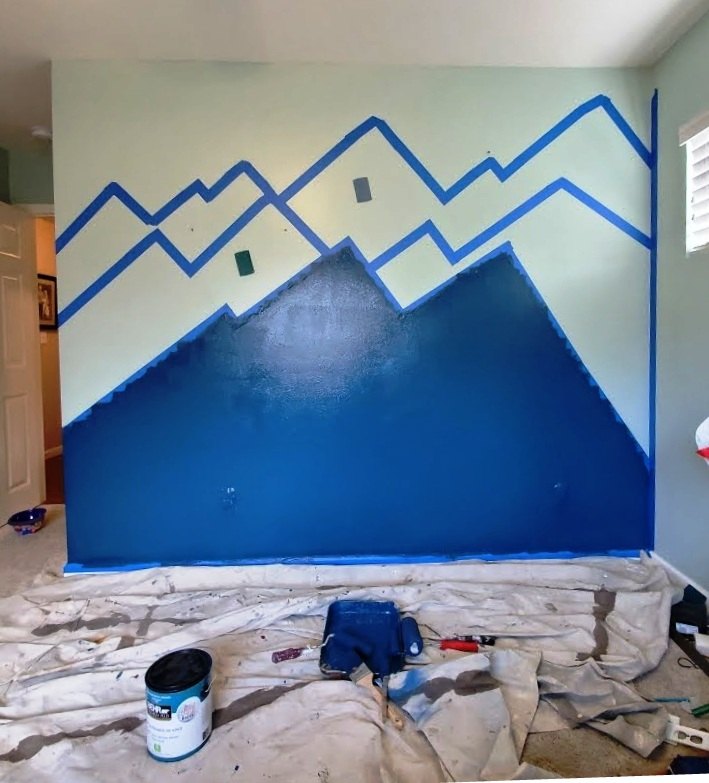
Once the shape of the mountains had been created, it was time to paint. Beginning with the closest mountain range, she applied two coats of a deep blue using Behr latex paint. Once the paint on the first set of mountains was dry, she removed the painter's tape and reattached it along the new paint line. She then continued that process with the 2nd two sets of mountains.

This is such a quick and simple way to add an accent wall! How great does this look?!
On a recent visit to my daughter's, I offered to do some painting for them. She had been doing a little redecorating and painting & when I asked if she'd like the baseboards repainted, she said yes; so I happily got to work. While I was painting the baseboards, I thought that it would be fun to add a little snow on the mountains in my grandson's room. Since they rarely get snow like we do, I thought having a little snow on the mountain mural would remind them of when they visit us at Christmas time. So, I asked my 5-year-old grandson if he would like some snow on his mountains and he said 'YES!!!' Oops, I probably should have asked his parents first. When I told my daughter that I had suggested snow to him and his reaction, she smiled and said that would be ok with her. Whew!

I was excited to get started on painting snow but.....my daughter had just installed a decal on a couple of her car windows and on the leftover vinyl, there were tree shapes! I wondered if they might work on the mountain mural. I figured I'd give it a try since they are vinyl, they are easily removed if they didn't look good.
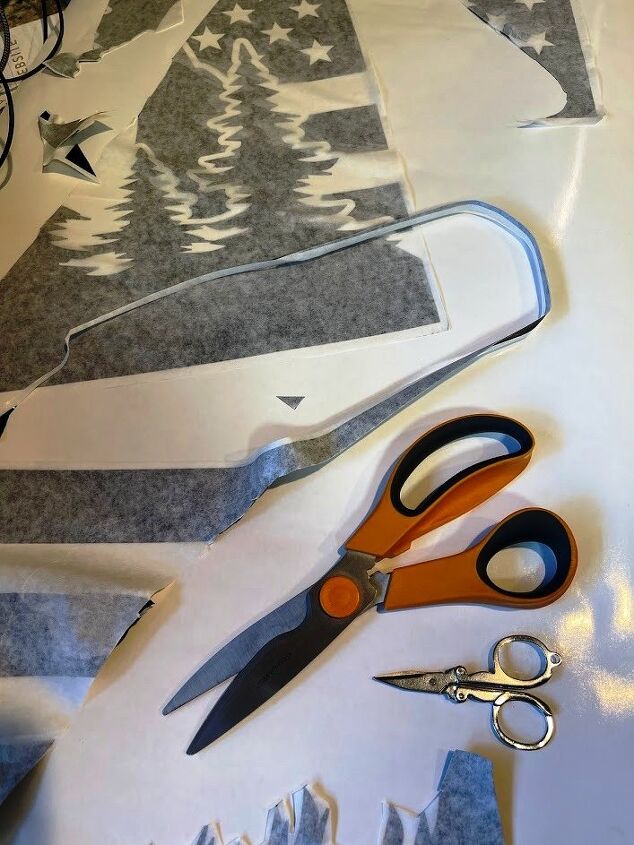
The trees were part of the decal so I would need to cut them away from the other part of the decal before putting them on the mural. Using both a large & small pair of scissors, I cut out one of the small trees.
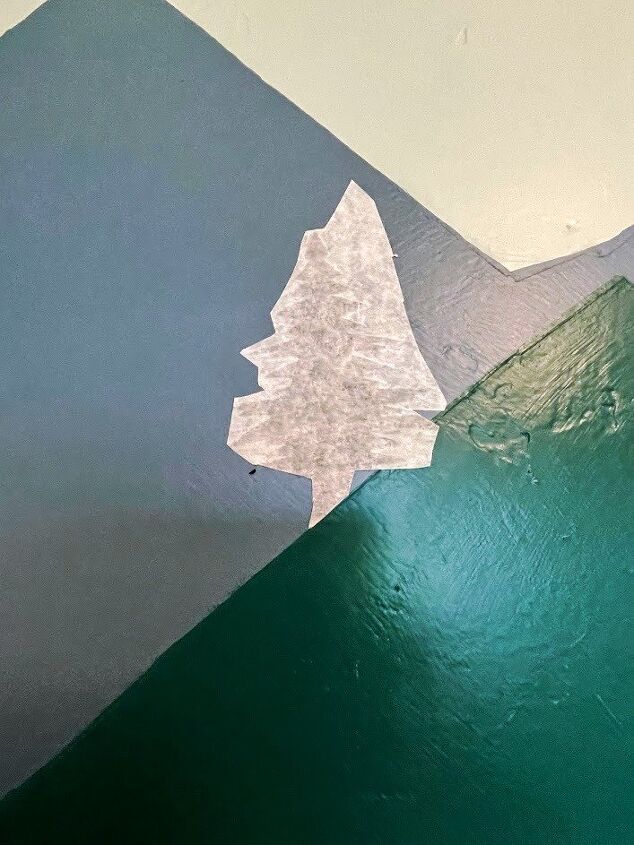
To install the vinyl, I positioned the tree on the side of one of the mountains and pressed it into place. I then took a credit card and using the edge of the card, smoothed the tree onto the wall while it still had the protective backing on it. Once I felt like the vinyl was attached well, starting at the top edge, I gently removed the backing.
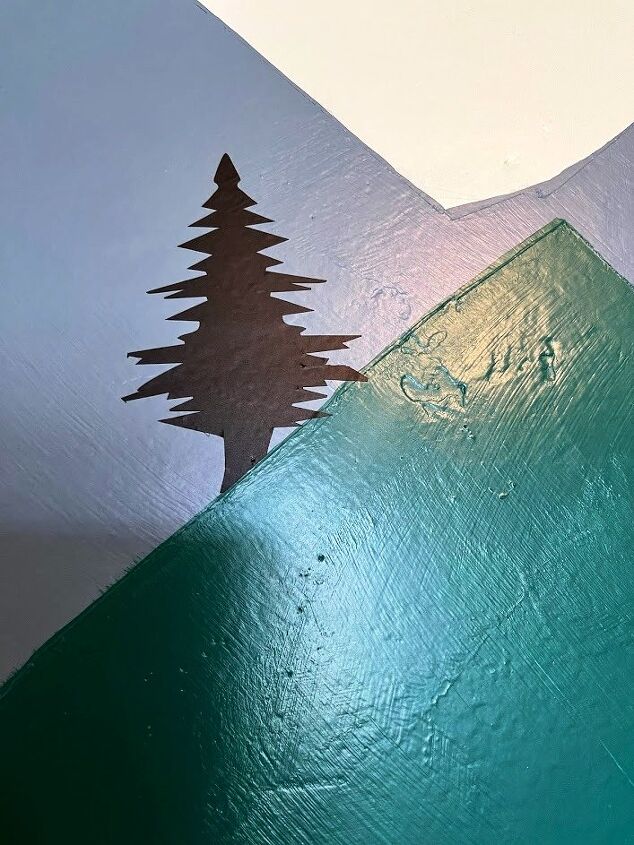
I cut out the remaining 3 vinyl trees which gave me a total of 2 small and 2 large. After deciding where to place the trees, I followed the same application process. They looked so good! Now, it's time to add some snow!
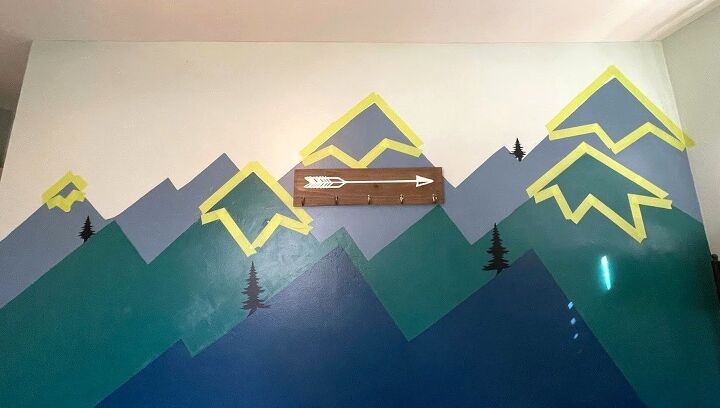
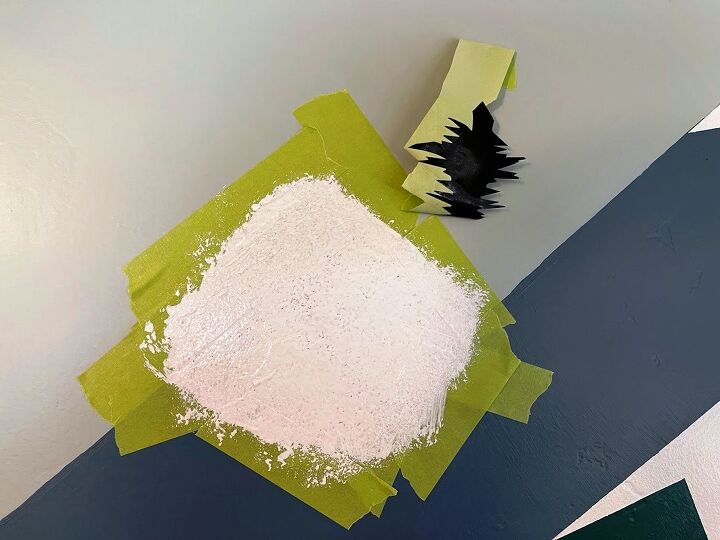
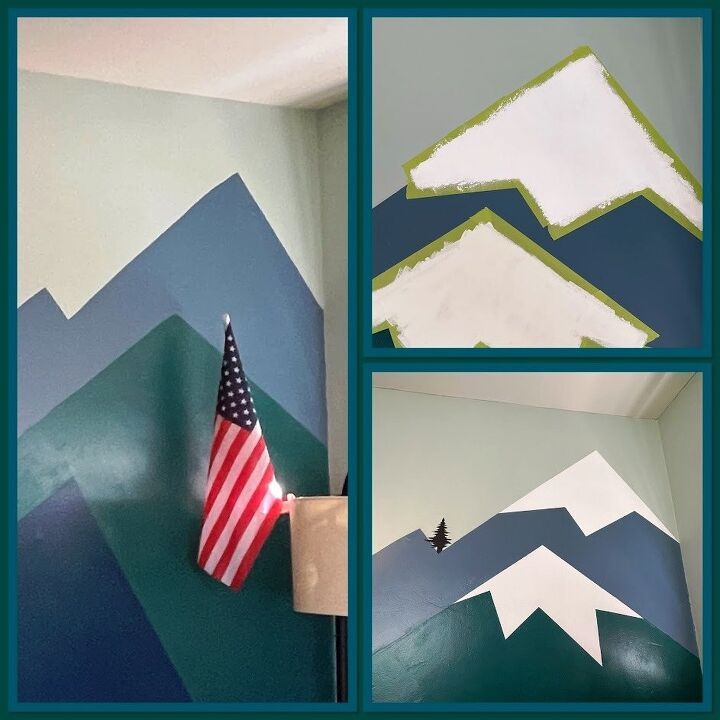
I could hardly wait to see how snow would look on the mural! I chose a few of the tallest mountain tops to add snow. Prepping the mountains to add snow was the same process as the prep for painting the mountains. Using painter's tape, I taped along the outside edge of the mountains then created a 'snow line' with more tape. I pressed the edges down well to help prevent the paint from seeping under the tape.
I applied 2 coats of white paint on each of the mountain tops I had outlined, allowing the 1st coat to dry for a little over an hour. After the 2nd coat, I removed the tape before the paint dried. If you leave the tape on too long, it can pull off some of the paint.
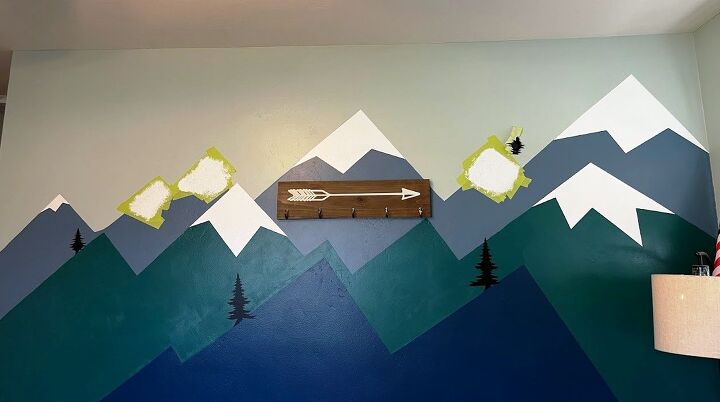
When my grandson got home from school, I told him something had happened in his room. He asked what it was and I told him we should go look. I followed him into the room and when he saw the mural, he said 'SNOW! It's soooo pretty!' My heart melted a little  He ran and got his mom & dad to show them the snow; they loved it! As we were looking at it, I told them I thought that maybe I should add a bit more snow on the medium blue mountains and my son-in-law said he thought all 3 of the remaining peaks could use snow. I agreed and decided to do more painting the next day.
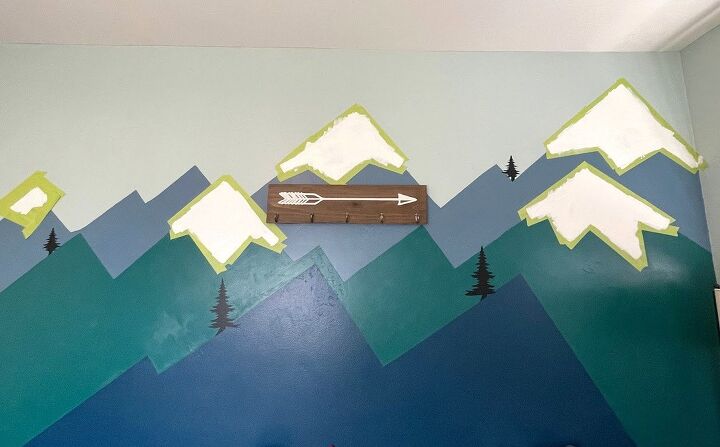
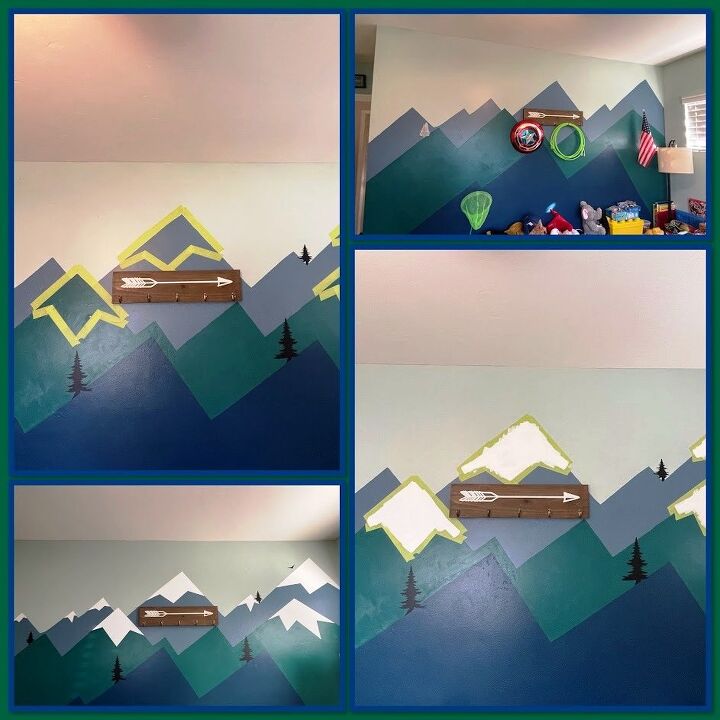
When I started prepping the last mountain peaks for snow, I realized that I would need to remove one of the trees. Using painter's tape, I smoothed it over the tree and lifted it from the bottom to move the tree off the mountain so I could paint. I attached the end of the tape to the wall so I didn't have to remove the tree altogether. Once the tree was out of the way, I applied tape to the outside of the mountain & created a snow line.
I also taped the other 2 mountain peaks & applied two coats of white paint, allowing the first coat to dry about an hour and 1/2 before I painted the 2nd coat.
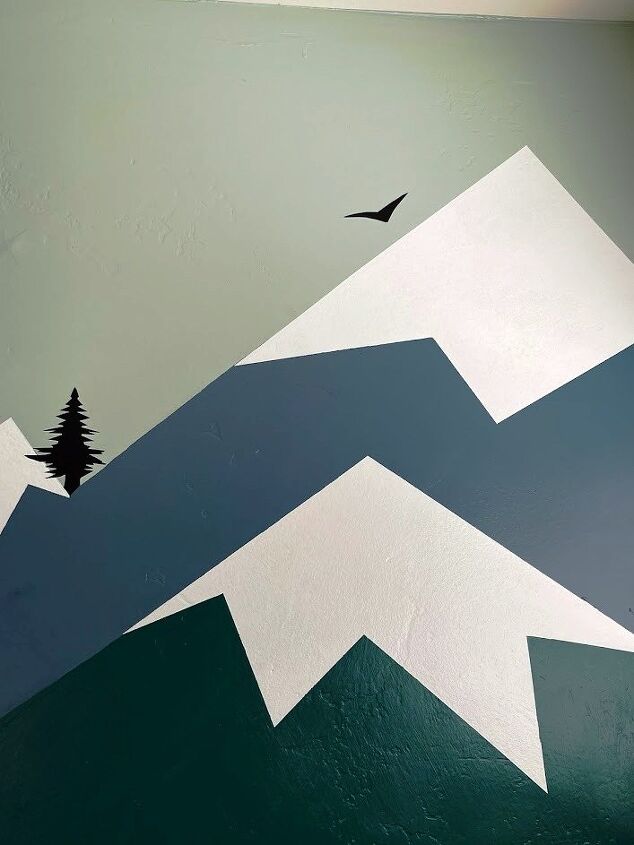
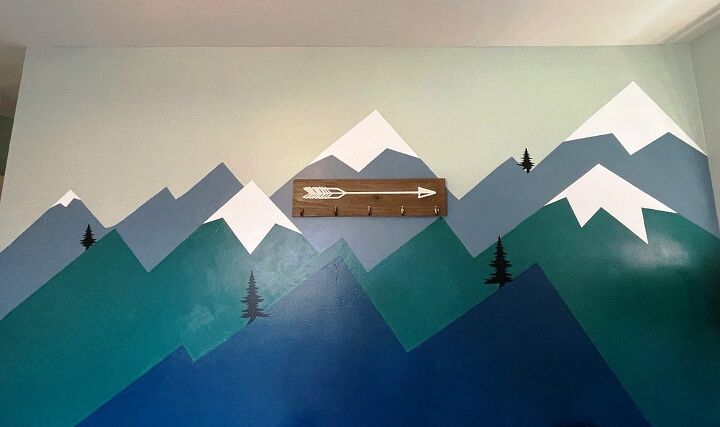
Since I had some of the vinyl decal left, I cut out a bird to fly over the highest peak.
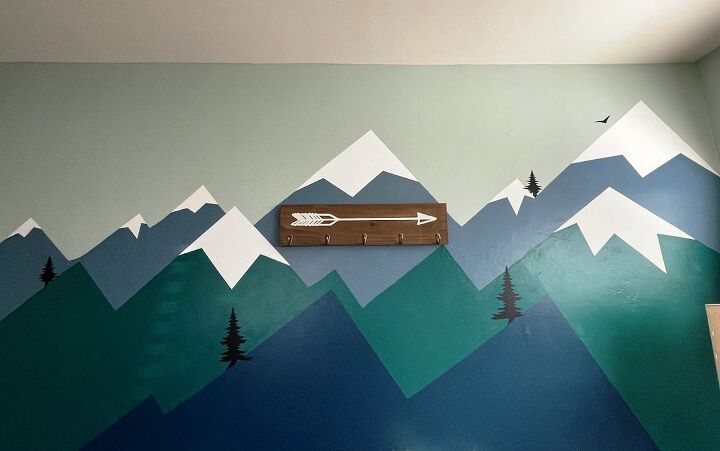
The last step to finishing the snow was to crisp up any of the edges where a little paint got under the tape. For those places, I retaped & used the roller to add a little more white paint then quickly removed the tape. My addition to the mountain mural was not only simple to do, but since we had all the supplies on hand, it was free as well! With just a little tape, paint, & paint roller, creating the snow was easy! Having the leftover vinyl for the trees & bird was a bonus! The snow and trees give this mountain mural a little Inland Northwest vibe 
If you were to buy the paint, you would only need quarts for the mountains and a sample of white for the snow. I'll price this project with that in mind.
Supplies used:
Painter's tape
White latex paint
4" roller with 3/8" nap
Scissors
Black vinyl or vinyl decals
3 colors latex paint
Instructions:
To create mountains
Create an outline of mountains on the wall using painter's tape
Using a paint roller, apply a coat of paint to lower set of mountains
- Allow paint to dry according to paint can instructions
Using a paint roller, apply 2nd coat of paint to lower set of mountains
- Allow paint to dry according to paint can instructions
Remove tape along 1st set of mountains and reposition along paint line
Repeat process with the 2nd two sets of mountains
To add snow
Apply painter's tape along the outer edge of the mountain peak
Apply painter's tape to create a snow line
Using a paint roller, apply a coat of white paint to all areas where you want snow
- Allow paint to dry according to paint can instructions
Using a paint roller, apply 2nd coat of paint to lower set of mountains
- Allow paint to dry according to paint can instructions
Remove painter's tape before paint dries completely
To add vinyl trees and/or birds
Cut trees & birds from black vinyl
Place trees & birds on the mural
Using the edge of a credit card, press the paper backing to help smooth & adhere vinyl to the wall
Gently remove paper backing
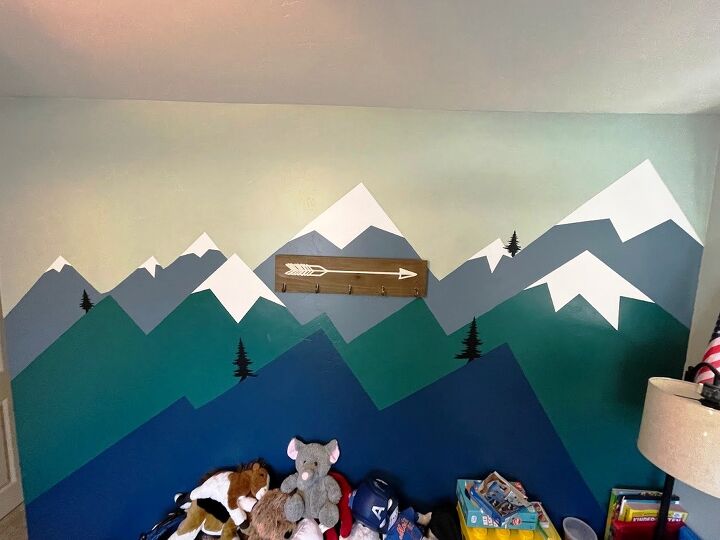
Mountain mural with snow & trees
Resources for this project:
See all materials


Comments
Join the conversation
-
This is amazing!
-
Great!!!


Frequently asked questions
Have a question about this project?
Is that a scout arrow of light holder in the middle?