


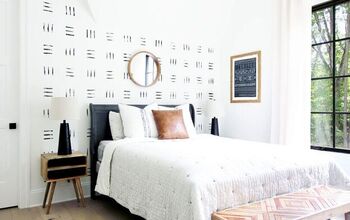
Installing Peel and Stick Wallpaper

I decided to give our laundry room a facelift and wanted to do something bold on the walls. I’ve been hearing a ton about peel and stick wallpaper and found a pattern that I loved. The reviews were good. The Youtube videos looked easy enough. So I decided to give it a try, this is what I learned on how to apply peel and stick wallpaper.
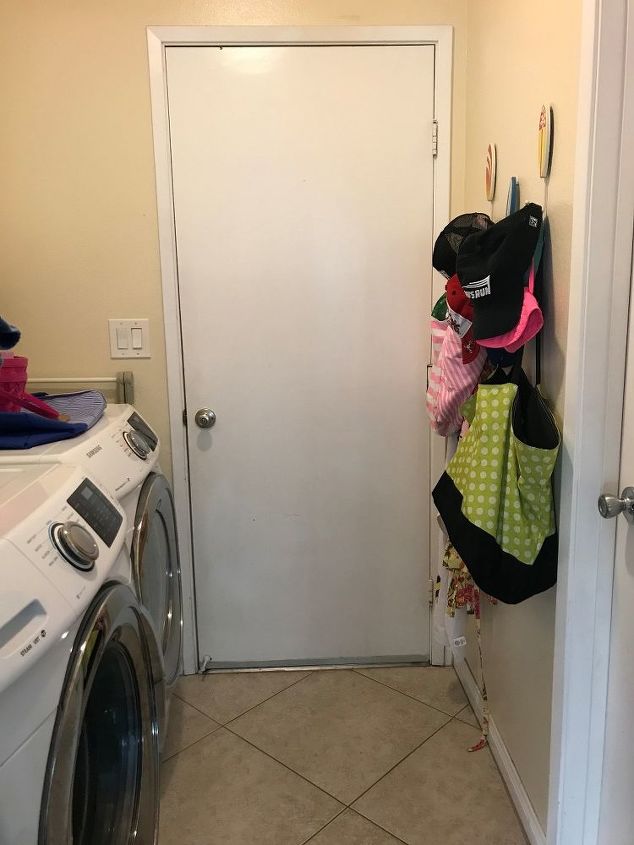
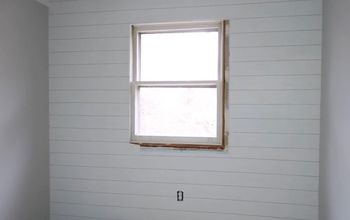
Pick an easy space. Don’t do what I did and pick a small room with three doors, cabinets and a washer/dryer to maneuver around.
Don’t do this project in front of your kids. Or just go and put $100 into your swear jar now. I believe I cursed everything from the wallpaper to the builders of our nearly 40 yr old home. Bite your tongue and take deep breathes and repeat after me “it will all be worth it”.
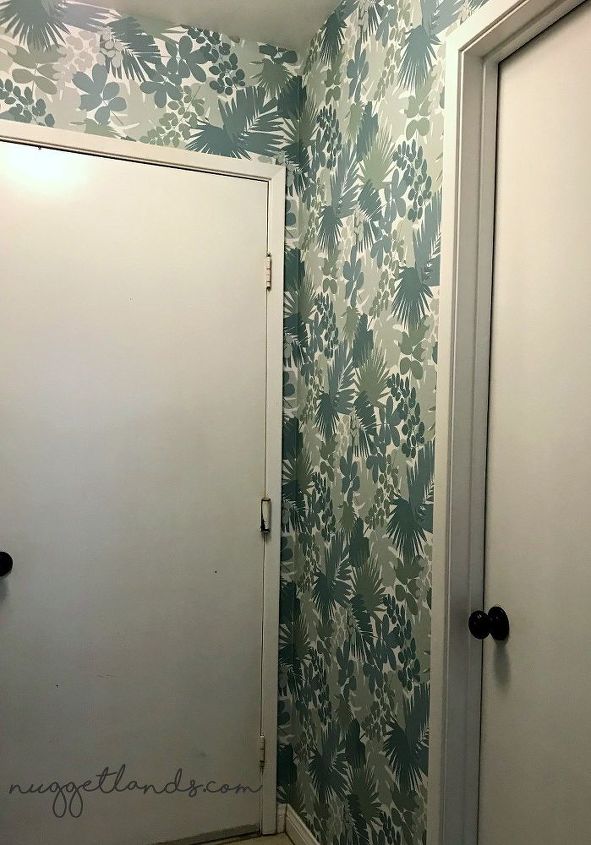
Just hang. I tried to follow the directions and precut my pieces but I couldn’t do it right. Nothing was matching or I cut them short and wound up wasting a ton of material. What worked for me was to pick my starting spot – I chose a corner part of the wall with zero obstructions – and get the top lined up and start sticking. I didn’t cut the piece at the bottom until I had about a foot adhered at the top.
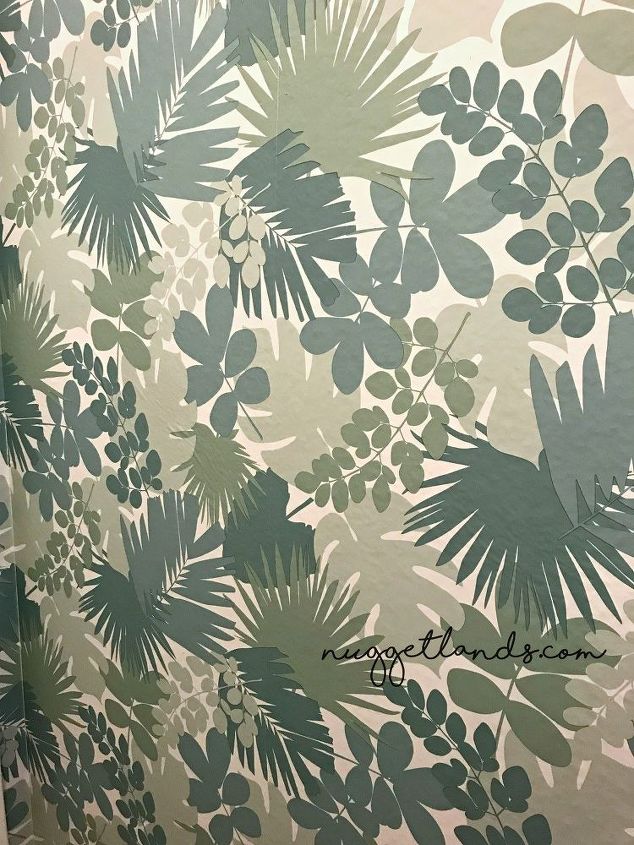
Pick a simple pattern – or better yet, no pattern at all. I feel like I wasted a lot of wallpaper trying to match up the patterns between rows. The good thing about a busy pattern is that it hides the imperfections. Speaking of which…
Throw out your perfectionist tendencies. I wouldn’t have considered myself a perfectionist before starting this project. But holy hell. Lining up the pattern while trying to keep the wallpaper from sticking wrong…or to itself…or to your hair…was a bit of a time consuming nightmare. I came to terms with it being close enough and promised myself that I wouldn’t stare at the spots I knew where a little off when I used this room.
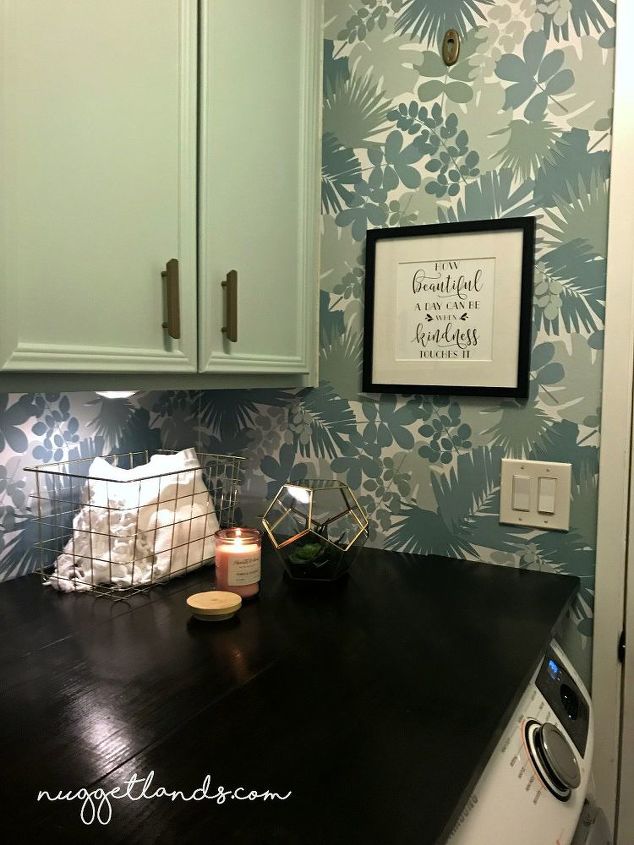
It’s worth it. For all the swearing and sweat and cost….it looks amazing. It’s exactly what I wanted for this space. See the full makeover on my blog!
It’s worth it. For all the swearing and sweat and cost….it looks amazing. It’s exactly what I wanted for this space. See the full makeover on my blog!

Comments
Join the conversation
-
You are absolutely hilarious and you sound just like I did trying to put up the peel n stick wall tiles in my bathroom! Your room looks awesome you did a great job matching up everything!!!
Do you know how hard it will be to remove? Wondering if it will take part of the wall/Sheetrock when you try to peel it off! I Was thinking of doing it in my daughter's Apartment but the landlord wouldn't like me ruining the walls no matter how nice it looked!!😊


Frequently asked questions
Have a question about this project?