


Sunshine on Our Rainy Days! #SPiTChallenge

by
Abbie Lummus
$130
4 Days
Medium
Hi, I'm young Artist and now SPiTer, Abby Lummus. I love to paint and draw animals, different flowers, etc... I have always had issues seeing my work for what it really is. Some people would look at my artwork and be astounded, while I who is a bit of a perfectionist always looked at its faults. As if that’s not bad enough, I struggle with tremors which makes it difficult to paint the way I want to. The tremors are not so bad that they effect everyday life, but I can’t do fine detail very well. This where SPiT comes in, I have been a SPiTer for a few months, Unicorn SPiT is a Water Based Non-toxic wood stain which also acts as a glaze! I feel considerably more confident and I actually see the good points like everyone else after having been using Unicorn SPiT! Please continue reading to find out how I created this beautiful Sunflower artwork on a circular table with drop down leafs!
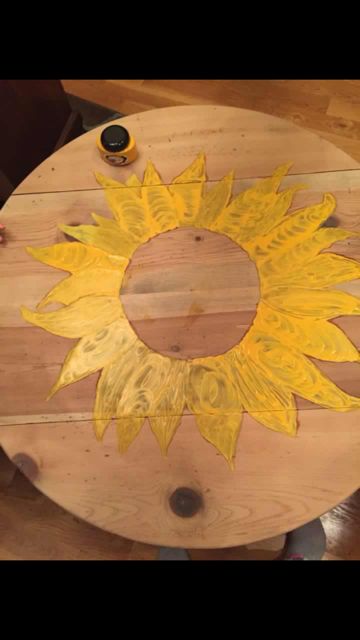
First I Applied a base layer of Unicorn SPiT Lemon Kiss to the petals with my fingers. At first I applied it in circular motions, then later decided that I didn't like it and then used a bit of water on my fingers to smooth it back out as you will see in the next picture!
After smoothing the Lemon kiss and doing a light sanding with extra fine sandpaper to remove the excess, I used the color Purple Hill Majesty as a base layer for the center. I applied this in a circular motion then once again did a light sanding, and loved the effect it gave me! Then as shown in the next picture I used the colors Phoenix Fire and Tucson Orange and Molly Red Pepper to shade the petals.
Like I said in the previous instructions, I used Phoenix Fire, Tucson Orange, along with some more of the Lemon Kiss to shade the petals. I used my fingers dipped in water to blend the colors together to get the shading the way I wanted it. Then I used Molly Red Pepper to deepen the shadows.
Like I mentioned, I then used Molly Red Pepper to deepen the shadows on the petals. I once again used my fingers dipped in some water to blend. Although shading each individual petal was tedious, I believe it was definitely worth it!
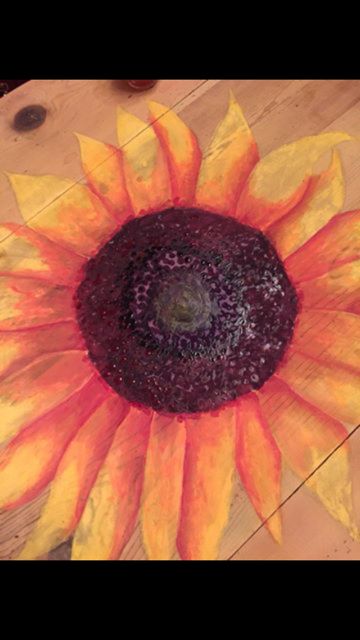
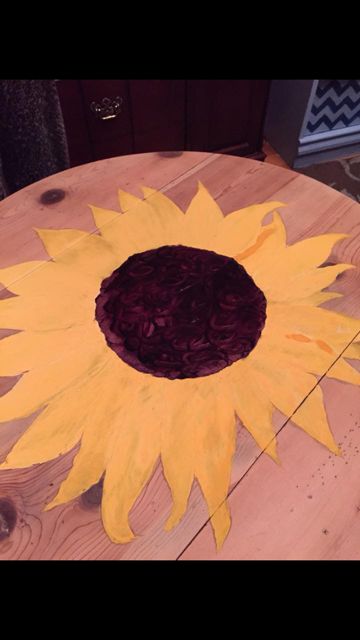
Now, this is where it became interesting! After I had applied the Purple Hill Majesty as a base, I was then ready to begin creating the textures for the center. Working inward, I first used my finger to dot some Molly Red Pepper around the center about 4 inches in, then I began to dot in the next color. The next color I used was Midnight's Blackness, once again moving inward while this time I only went about 1 inch in before dotting the next color. The next color was Purple Hill Majesty, again about only 1 inch in before the next color. After the Purple Hill Majesty I mixed a color using Dragonsbelly and Lemon Kiss, until I reached my desired color which was a yellow greenish color. At first I just dotted it in, but I then decided to wet my finger slightly and used a circular motion to create the final part of the center. Told you it was interesting!
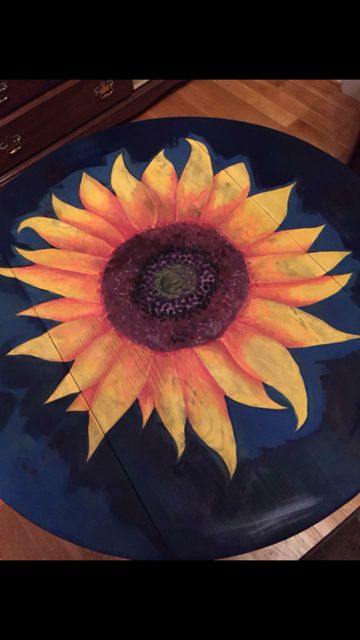
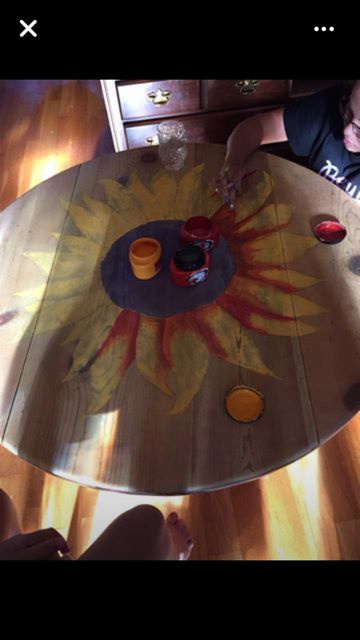
Now that you've finished the hard part, you begin the background! I used the color Blue Thunder, but you could very easily use Molly Red Pepper or some other color as a background. I just used a syringe to draw up the SPiT, then used my fingers to spread it around. You could also use a foam brush to even out the color if needed, just use a small amount of water to reactivate the SPiT. I used a small square tip paintbrush to precisely paint around the petals. In the next step you get to see all the work you just did really show!

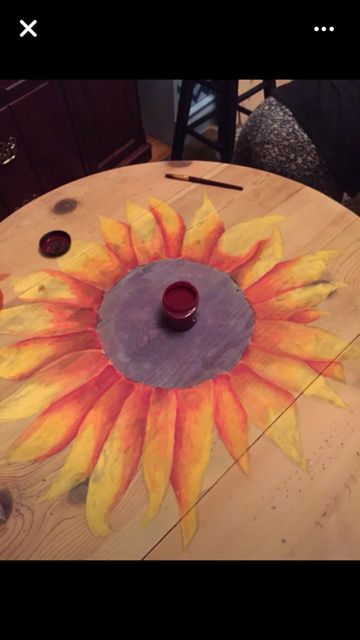
In this step you get to really see how 3-Demensional it looks! I used Tung Oil finish to see how it will look after a few coats of High Gloss Polyurethane. The thing about Unicorn SPiT is that you cant really see how it will look until you either Tung Oil it or go straight into Polyurethane, I have tried Hemp Oil to see how well it works as a substitute for Tung Oil on a different project, but it ended up darkening and losing the 3-Dimensional effect that SPiT creates. So I recommend using Tung Oil or another finish as to not loose the 3-Demensional effect.
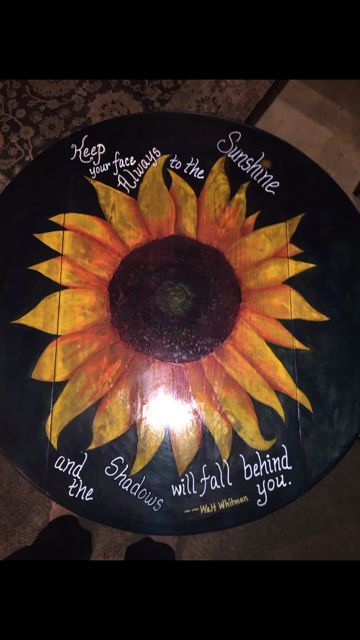
I have applied two coats of High Gloss Polyurethane, and I think it is absolutely gorgeous! I paid about $30 for the table and then each color of SPiT costs $16.50. You can purchase Unicorn SPiT online at http://www.unicornspit.com/, you can also see and meet many different SPiTers from all around the world on Facebook on the Unicorn SPiT Q and A Group, and as if that's not good enough already you can see all the different ways to use SPiT and see the other many Creations! You can see multiple tutorials in the Facebook group, and get lots of your questions answered! I hope this has helped someone get hooked on SPiT as much as I have! Happy SPiTting!
Comments
Join the conversation
3 of 11 comments
-
Hi Abbie, WOW! Your work is amazing! I had to share your posts with my daughter, 14. She said, "Wow, that's really good". She also has a passion for painting and drawing. We think your work is beautiful. You have an incredible talent. Thank you for sharing it with us!
-
Inspiring to say the least! Reminds me so much of home... those big Kansas 🌻 sunflowers...


Frequently asked questions
Have a question about this project?