


DIY Garage Floor Epoxy

Ever since we moved into our first house, I wanted to expoxy our garage floor! We lived there for three years and it never happened with all of the other projects we had going on, so I knew at our next house I wanted to make it happen! After looking at pricing for having someone come out and professionally handle the project, I did some research and decided I could conquer this project myself! :).
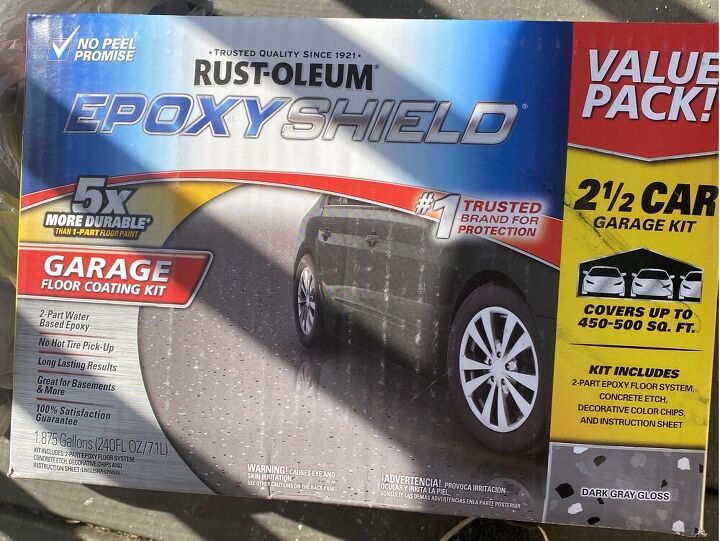
Here's the kit that I used! This project is not hard! It is very time consuming due to the wait time in between steps and the weather conditions have to be just right!In Georgia this time of year, it’s hard to get that perfect weather scenario that isn’t too humid and hot or rainy, so my project took a little longer waiting a few days for the weather to be right for the project.
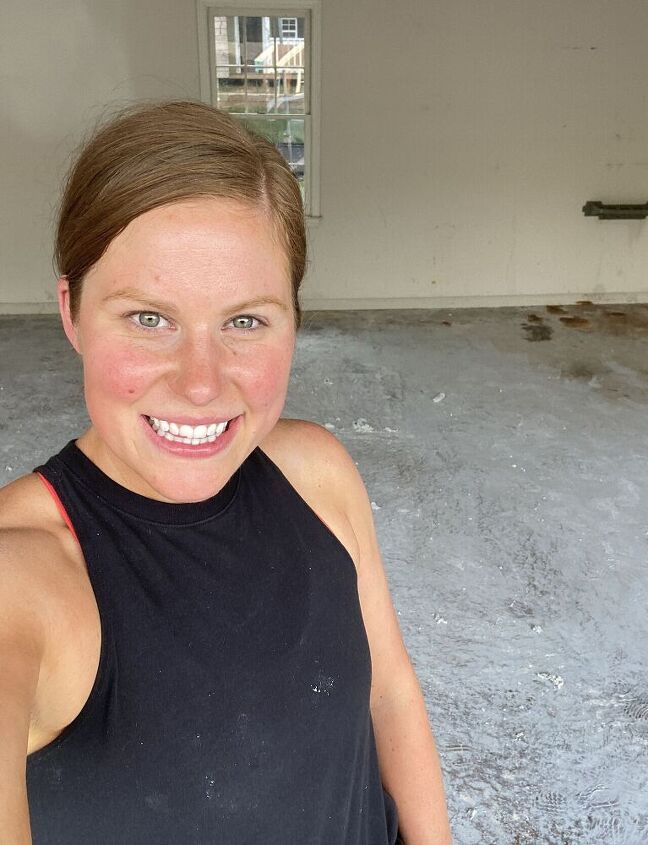
First step was to empty the whole garage out - this was one of the worst parts - haha! It took forever because we had accumulated lots of stuff from other projects that ended up in the garage and haven’t had a good system for organizing things. After we moved everything out, I blew it out and knocked all of the cobwebs down to get it as “clean” as I could before starting the whole process.
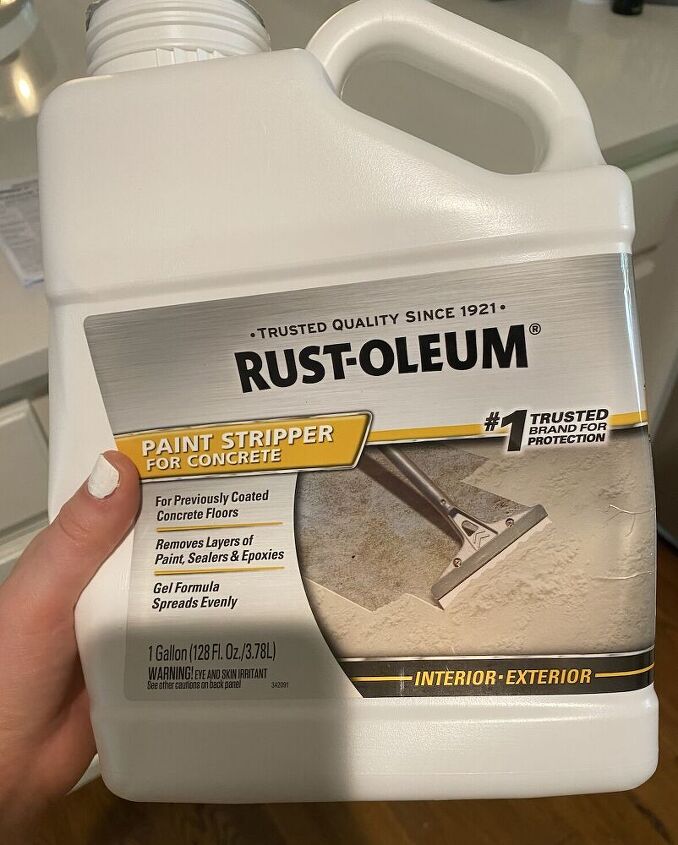
My next step was to wet the whole garage floor and use the Rust-oleum brand Paint Stripper for Concrete liquid. I ended up using four containers of it! We had lots of paint from when we painted our kitchen cabinets on the floor that had to come up before I could do anything else, plus at some point a long time ago, someone painted the floor with a garage floor paint that was old and chipping. The solution is just poured out on the floor and left to sit until it starts bubbling the paint and then you scrape, scrape, scrape until it’s all gone! Then rinse and let it dry.
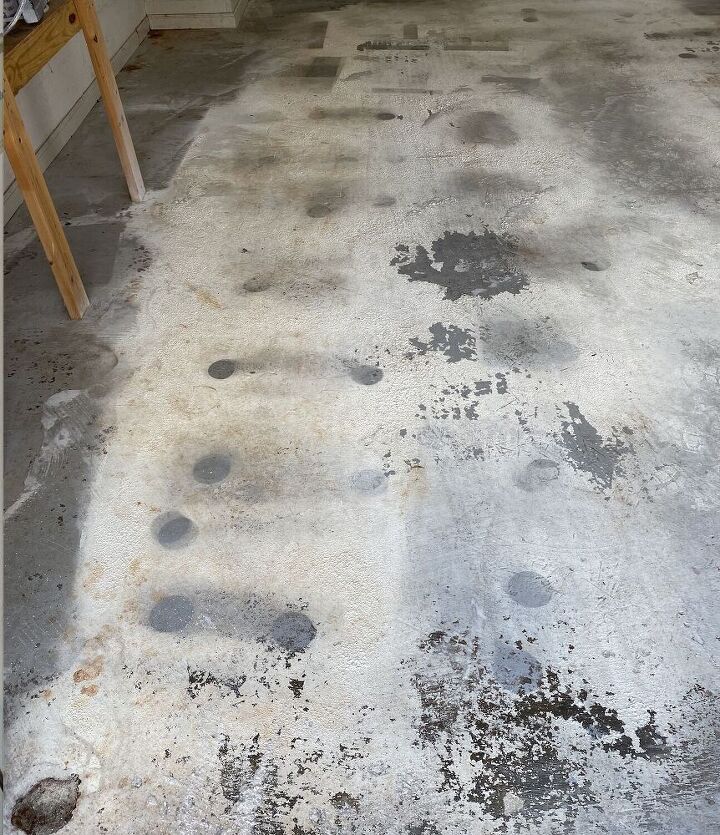
Here's the paint with the product on it. It starts bubbling so that you can scrape it!
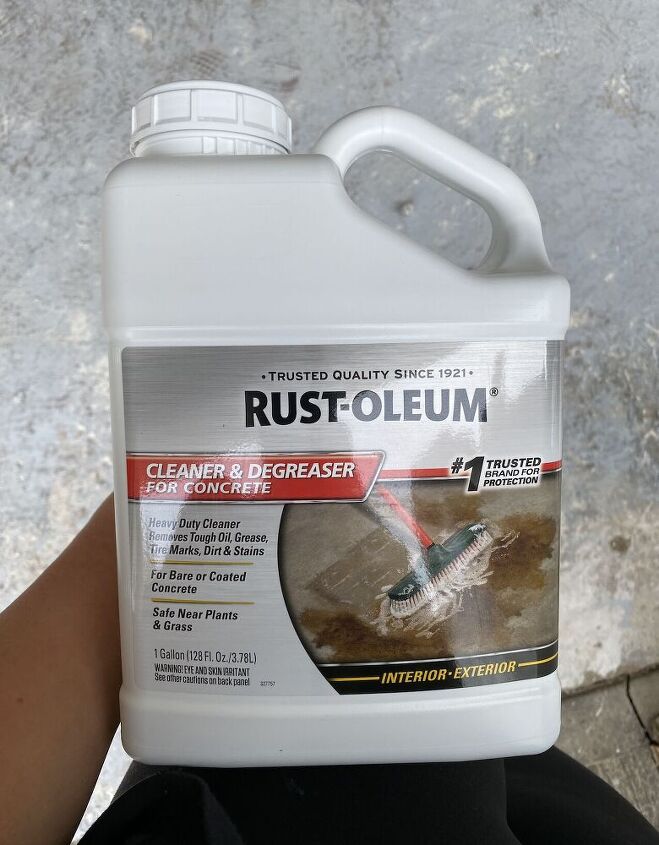
The second step was to use the Rust-oleum brand Cleaner and Degreaser liquid for concrete. I think I ended up using three containers of this. You pour it on and use a big scrub brush and squeegee to get it really worked in and scrubbed clean! Then rinse and rinse and let it dry per the instructions on the bottle. I still had some little chips of paint that needed to come off, so I took a pressure washer and did the whole garage floor with it. Not necessary if you don’t have paint that needs to be removed before doing this!
The third step I used Rust-oleum’s Concrete Patch and Repair Kit. I had to purchase two of them because our cracks and divots were so bad! At the end, I could have filled in some of the other little divots, but I was out of product and ready to move on! The patch and repair kit comes with two containers and you mix 2:1 in small batches, then take a putty knife or something to work it over and into the cracks and holes to repair the bad spots. This has to sit and dry and will form a hard coating once it’s dry.
After this comes the etching! The etching came with the kit that I bought from Home Depot. You pour it out and add some water and scrub and scrub! After you rinse it out, let it dry. If there is a powder finish that comes off on your hands when you rub over the floor, you have to do this part again.
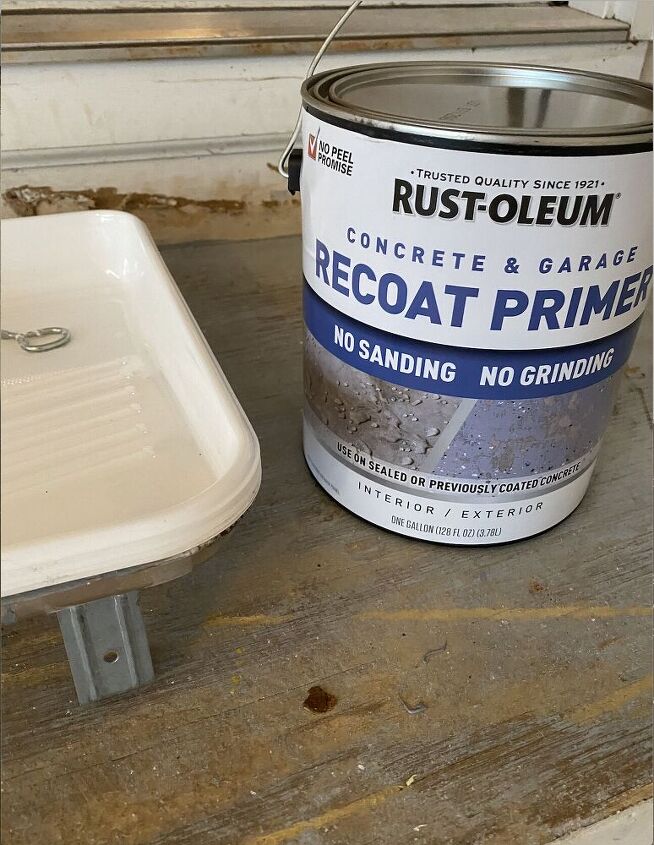
This next step does not apply to everyone, but I felt like if I had done all of the work above, I wanted to take every precaution to make this last! I used Rust-oleum’s Concrete and Garage Recoat Primer because there was still some of the garage floor paint that I couldn’t get up. It wasn’t peeling, but it just wouldn’t scrub or scrape off. The primer is gray and like a thick paint. I cut in around the edges and then used a roller with an extender to paint the entire floor with the primer. You can’t do this step if rain is in the forecast for 24-48 hours. I would suggest after this is dry that you pretty much not walk on it because this is the cleanest it will ever be and you want it as clean and ready for the epoxy as possible!
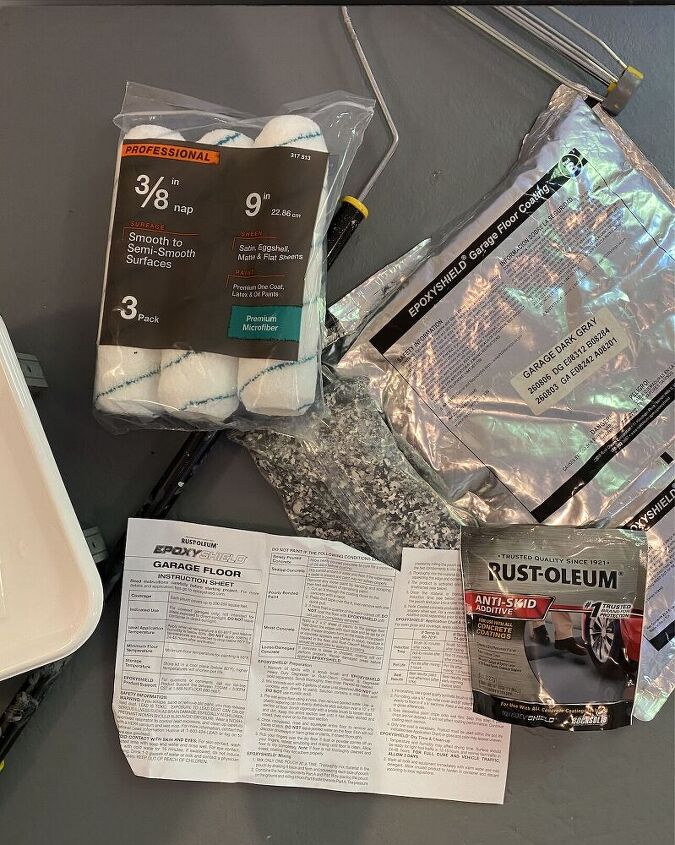
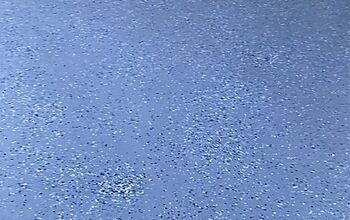
Finally! The epoxy! The kit I used comes with VERY specific instructions on the outside temperature and how long to wait after you’ve mixed the bag with the expoxy in it, it also tells you how to mix it and how long. read these instructions VERY carefully! I poured the epoxy into a paint tray and used a paint brush and extender to paint in small 4x4 sections. After you paint, if you want to use the chips, you would throw them in the painted area at this time. I loved this part! What I didn’t realize was that if you are “heavy handed” with the chips, sometimes they won’t sit down into the paint and when it dries, they’re kind of loose and just sitting on top …. this may have happened to me! ha! Also, the kit comes with two packets of the epoxy paint, I only used one.
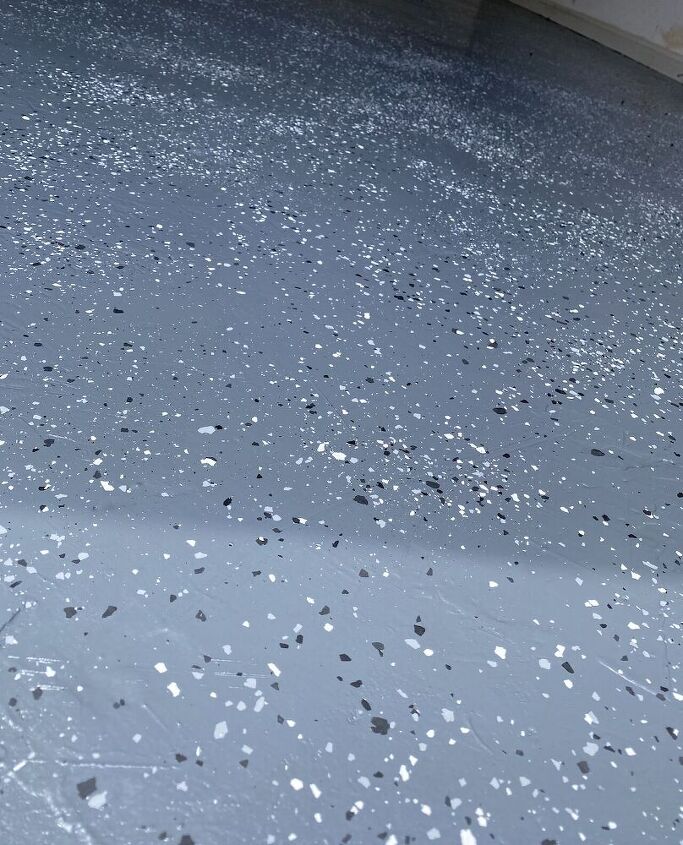
Here's what the floor looks like!
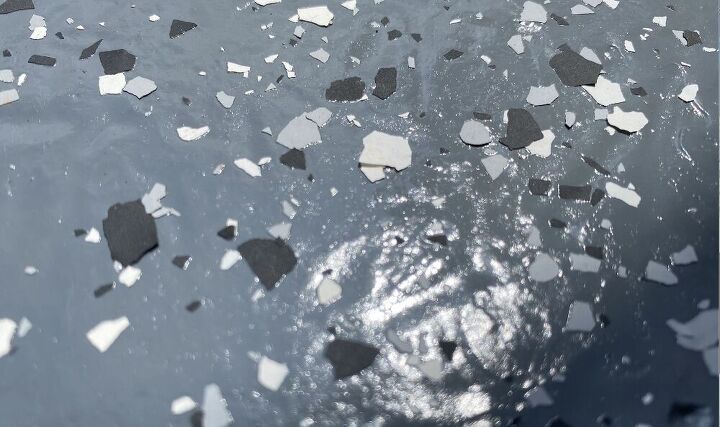
Up close before the clear coat. You can see where some of the chips didn't totally adhere. If this is the case, and also from what I read, most people said to do this anyways, put the Rust-Oleum Clear Epoxy shield on top. This seals it in and creates a BEAUTIFUL glossy finish which is really the look I was going for anyways. Again, you just paint this on with a roller! I also added in the anti skid powder that the clear kit comes with because the floors can be slick when they’re wet. The clear epoxy definitely did not go as far as the epoxy paint did. I did not have any leftover, and had JUST enough for the coverage of the garage.
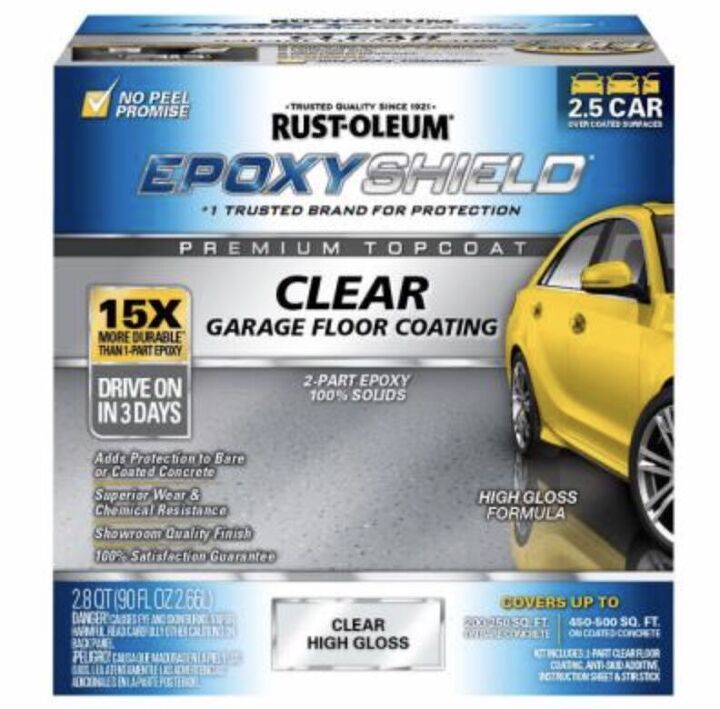
For the very last last step, I used this clear coating to put on top and really seal everything and give it an extra protective layer!
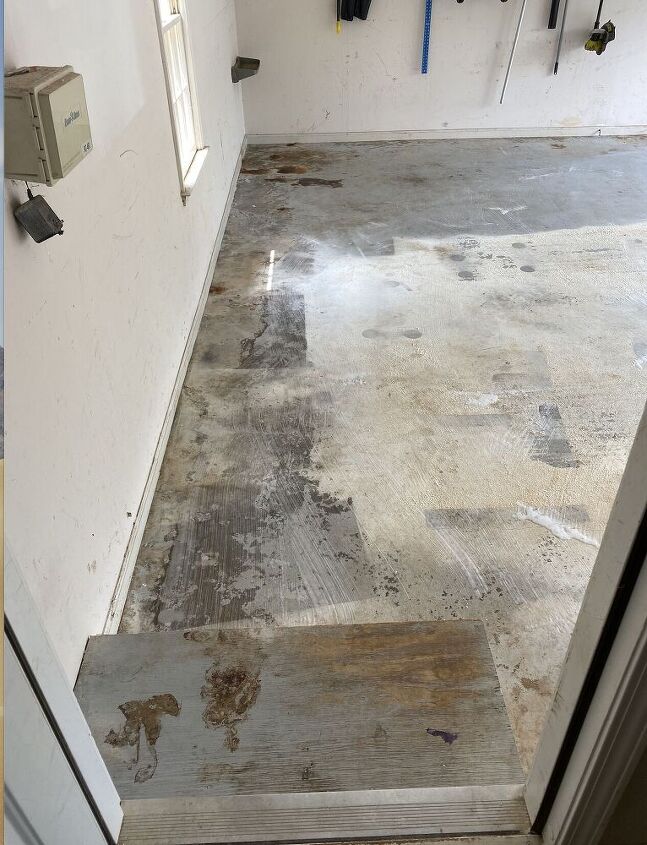
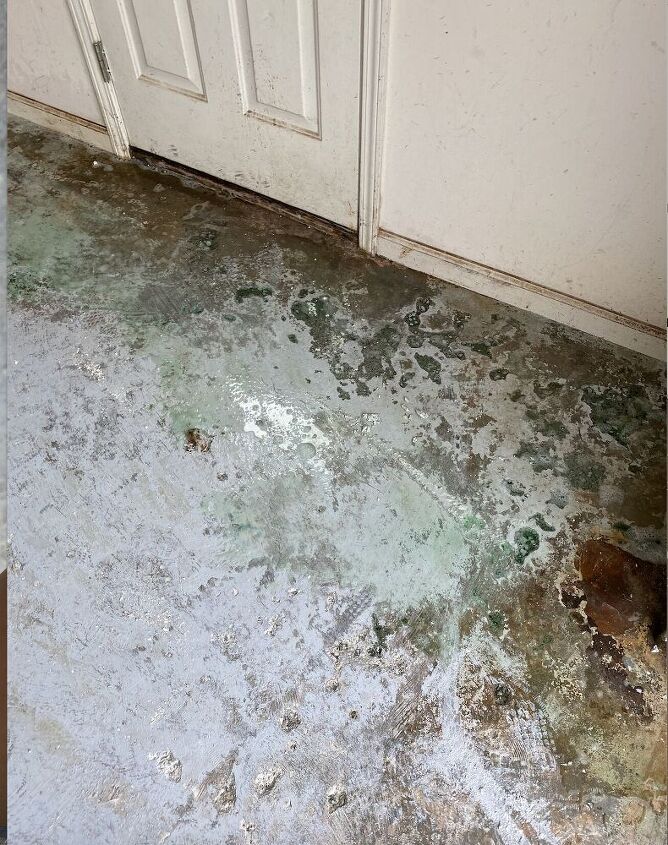
Heres my before when I started the whole project! The hardest part is waiting the three days for it to fully cure before driving anything on it. Within 24 hrs you can lightly walk on it, after 48 you can have normal foot traffic and move things in!
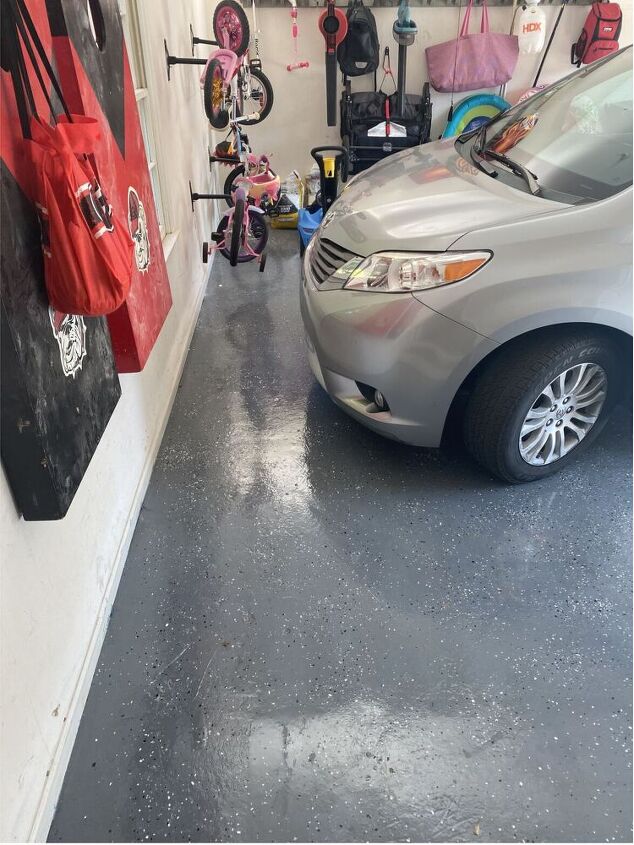
We absolutely love our floor now! It is not perfect, but it’s been AMAZING so far! I knew with everything out of the garage we needed to get some major organization going so that we could really utilize the space and enjoy it even more! I bought some hooks for the kids’ bikes off of amazon, as well as some that hold our strollers and corn hole boards on the wall. The previous owners had built in shelving already there, so I just got clear storage containers and created different ones for yard chemicals, lawn bags, pool towels, etc.
Although this was a long process, it’s not a hard one! If you follow all of the directions on the packaging and hang in there with each step, the end result is awesome! Plus, I think if we had someone come and do this to the floor, it would have been about $1,000-$2,000 maybe more and I did ours for about $530! Pretty good savings I think! Email us or comment for any questions about the process, we’d love to hear from you!
Resources for this project:
See all materials


Comments
Join the conversation
-
Great job! It looks so much better.
-
Looks awesome!! I need to do this to my new garage floor before it gets all yucky!! Thanks for sharing…. ❤️❤️


Frequently asked questions
Have a question about this project?