


How to Save $Thousands$ on Hardwoods

by
Noting Grace
$6446
5 Days
Advanced
Installing Hardwood floors can be expensive, so we needed to find ways to get the look that we wanted without the huge cost. Our first quote came in at almost $15,000. That just hurt our feelings, so we decided to find another company. We got another quote that came in at $11,571, which was an improvement, but it wasn't in our budget to spend that much. The flooring guys noticed our disappointment and made a few suggestions and revised the estimate. Our last quote was the trick - $6500! Here is how we saved over $5000 and still got the floors we dreamed of at the price we wanted.
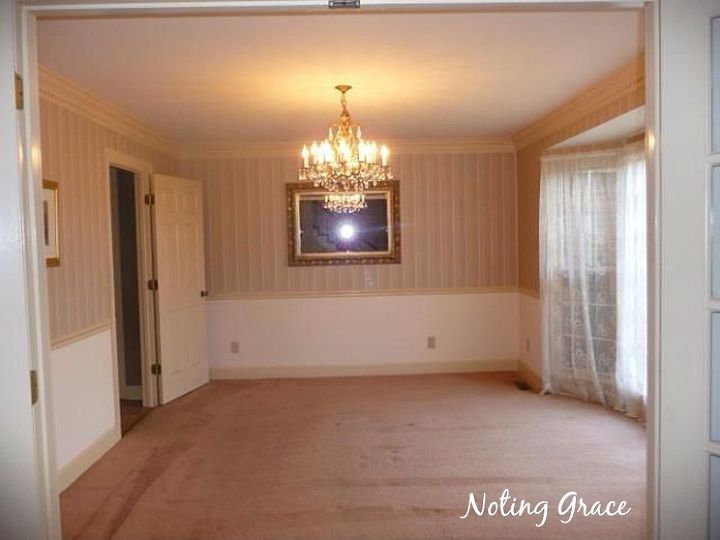
When we purchased our Tennessee home, so much about it was perfect. We loved the location--close to the city, but removed enough to give it a country living vibe. The neighborhood was well kept with very little traffic - just what we were looking for...until you opened the door.
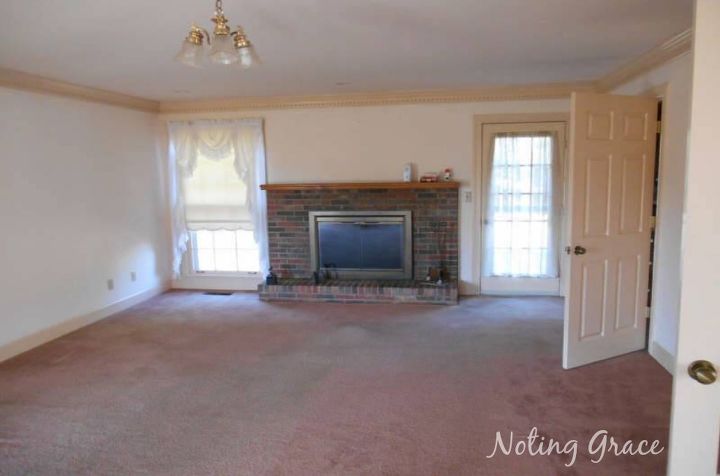
PINK CARPET! OY! After much consultation, we realized this was the original carpet to the house. Over 25 years of muck and mire -- never replaced. We knew that we could have saved money by replacing the carpet, but I've always wanted hardwood floors and I was bound and determined to get the look I desired at the cost I wanted.
The wonderful flooring guys were impressed with our Pallet Kitchen Island and our Pallet Bookcase. We explained how we loved to do things ourselves on the cheap. Once they saw we preferred the rustic look of wood, they recommended Cabin Grade Flooring. Basically, it's the seconds, or rejects, from the factory. Most people want smooth and seamless wood without marks or blemishes, but with the rise of Barnwood flooring, the rough hewn look is more popular. The Cabin Grade flooring offers the look of Barnwood without the astronomical prices.
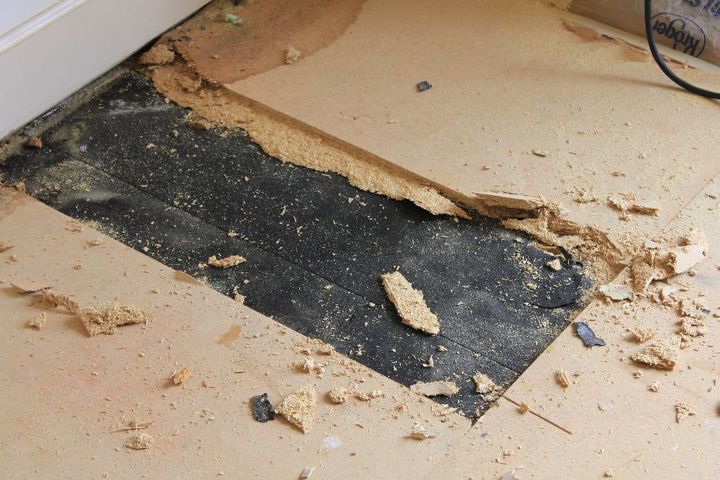
Where we saved the most money -- about $1500 -- on this install was in doing the prep work ourselves. Under our carpet and pad was pressboard. That's the chippy, flaky wood that is glued together to make sheets. Hardwoods could not be installed over that, so we would be ripping up the carpet, pad and pressboard. They provided us with 2 rolls of vapor barrier and suggested we lay it sandwiched between the subfloor and another plywood layer. It was a daunting task, but knowing that by doing the hard work ourselves would save us BIG BUCKS in the end, made all the effort worth it. Finally the carpet was able to be removed to reveal the pressboard. Ripping up the carpet was easy. Just get a few razor blades or carpet rippers and go to town. There are tutorials on YouTube, but it's pretty simple to figure out. Start in a corner and rip away. For easy hauling to the dumpster, we cut 4 foot wide strips of the carpet.
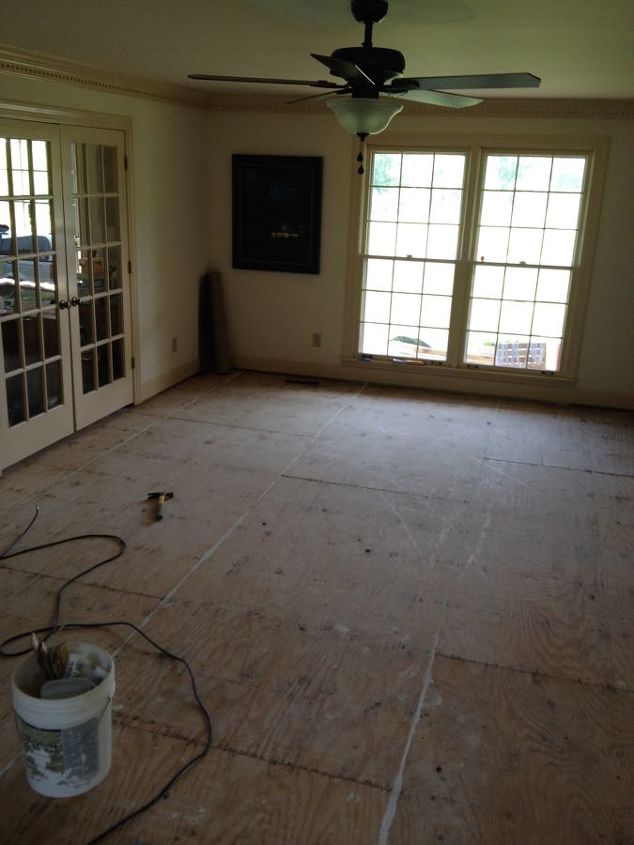
Demoing the pressboard was a bit tougher. It had been nailed in (NAILED IN!) so it had to be chipped away with hammers and crowbars, instead of easily unscrewed and lifted out. Each ping of the metal tools sounded like CHA-CHING to our ears! It was messy and we used buckets and shop vacs to get up the pieces. Tape over your floor vents to prevent trash from falling down into the duct work.
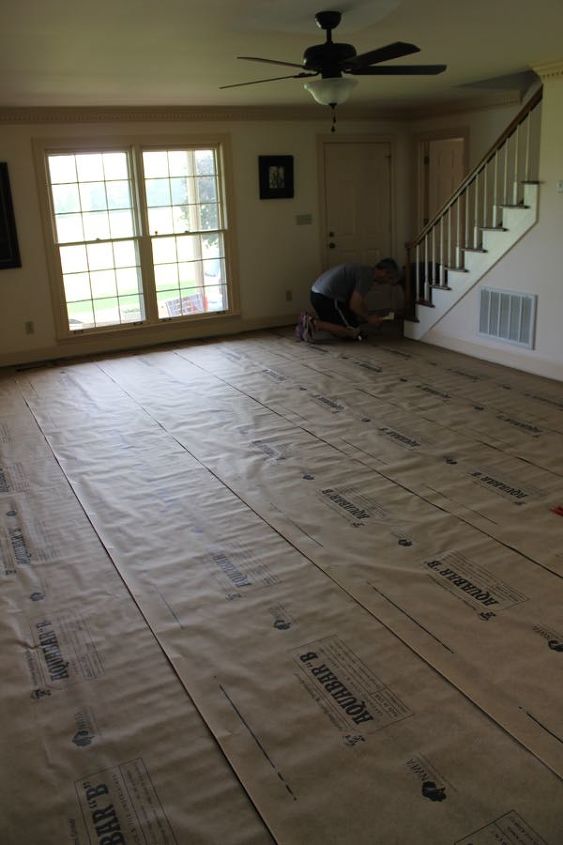
Once we made some necessary repairs to the subfloor and screwed down the plywood, we also added extra screws throughout to prevent floor squeaks. Next, we installed the vapor barrier over the subfloor.
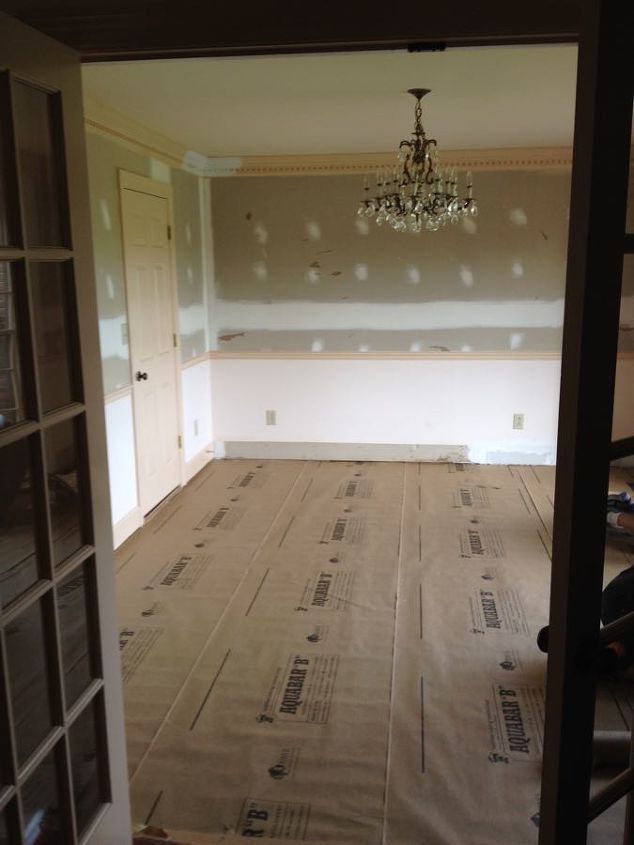
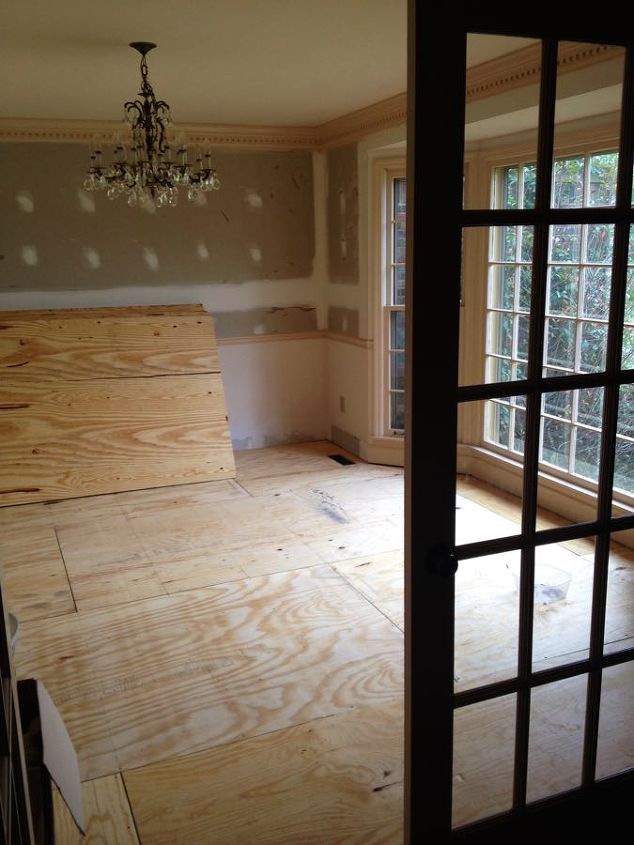
Finally, we could lay down the last layer of plywood subfloor on top of the vapor barrier. We laid the top plywood layer perpendicular to the pieces beneath. Mark the baseboards where the floor joists run so you can quickly install them.
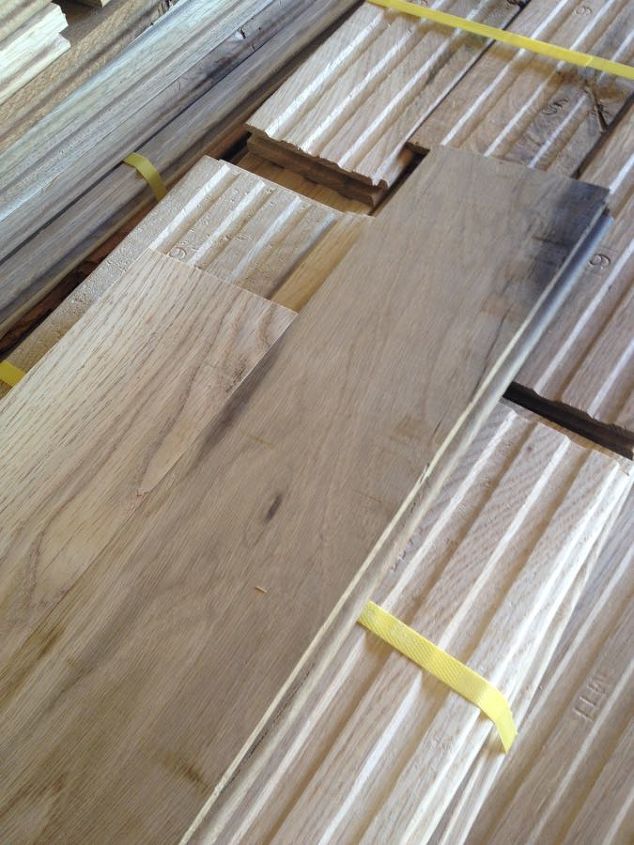
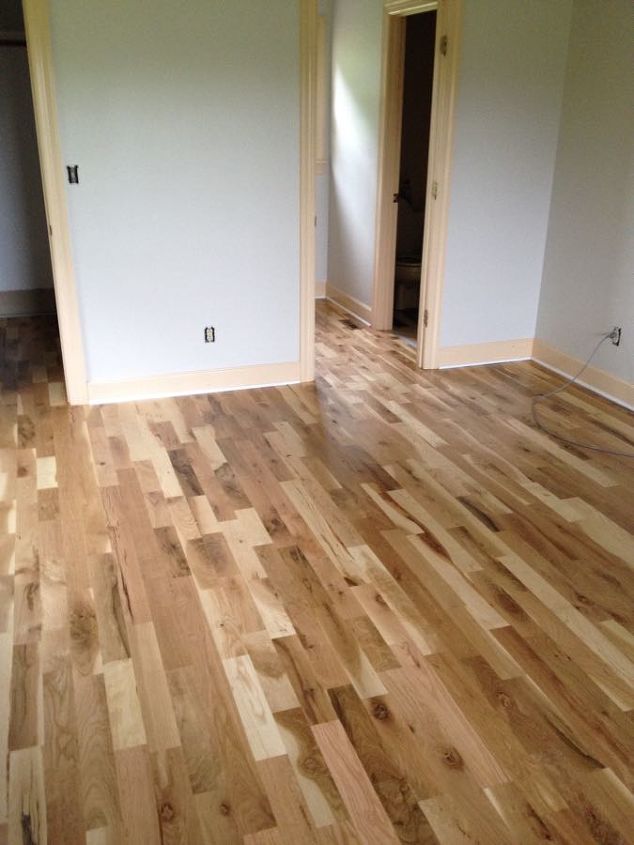
Look at that hardwood floor! They are 3.25" white oak planks - all chippy and knotty and gorgeous!
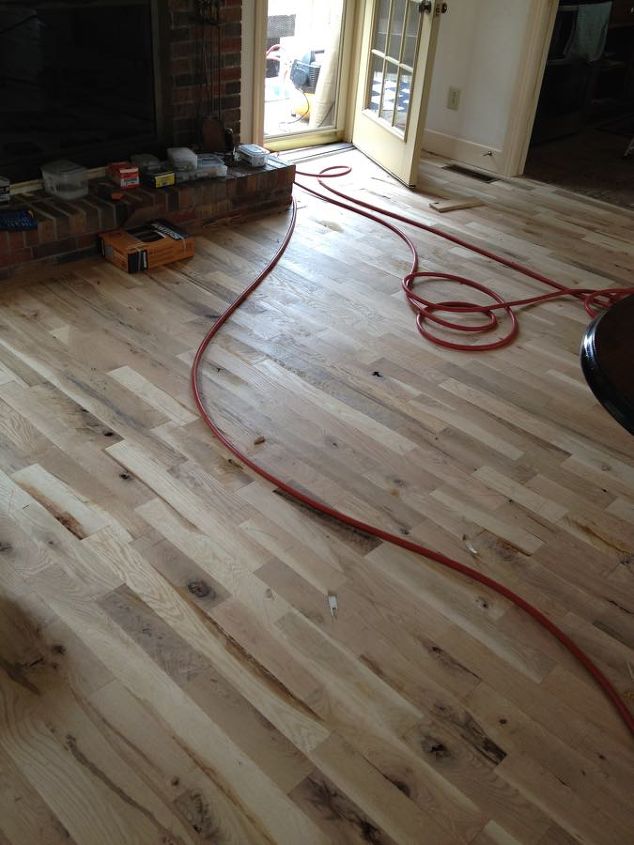
I specifically asked for certain pieces to be included in the run of the floor. I thought the variegated grain added beautiful character. We had to live with the floors unstained and unsanded for about 3 weeks to acclimate to the moisture in the house and to prevent cupping.
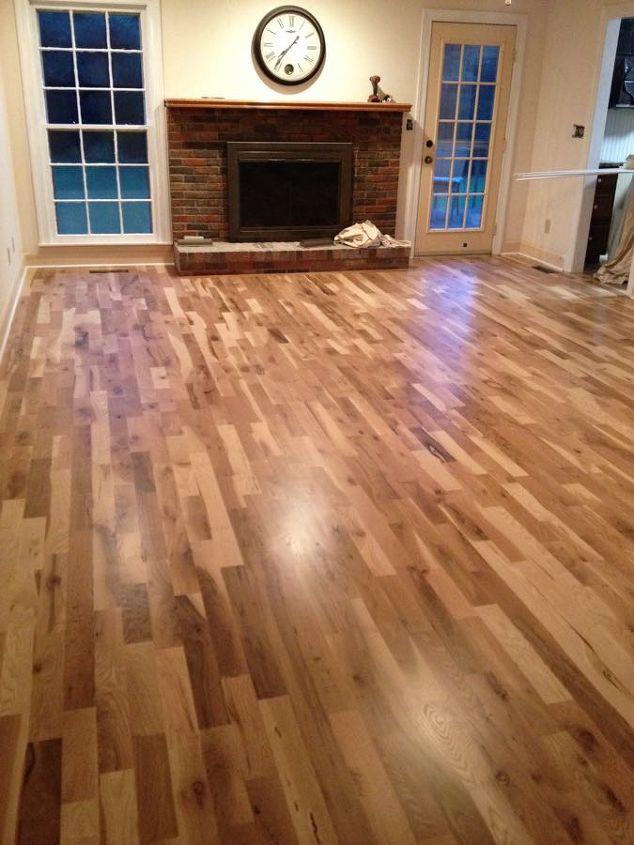
We originally were going to stain the floors, but after living with them in their natural state, we were afraid to lose the variegation with the stain. Finally the day had come! We had to leave the house for a long weekend since the fumes weren't safe. After all this hard work, a mini-vacation away from all this work was worth it!
They gave us about 5 samples of stain to look at, and we chose not to apply a stain.
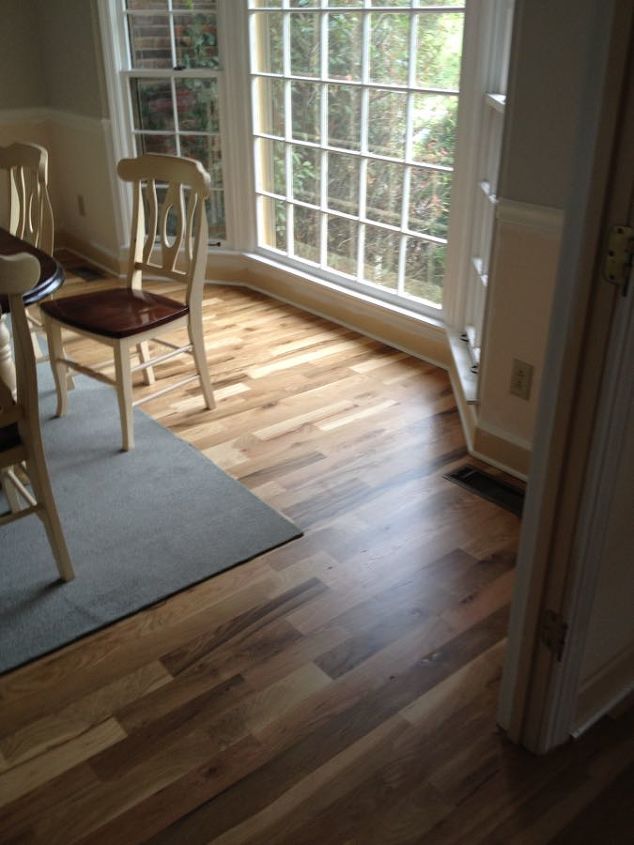
We went with a Satin Clear Finish and absolutely LOVE the end result!
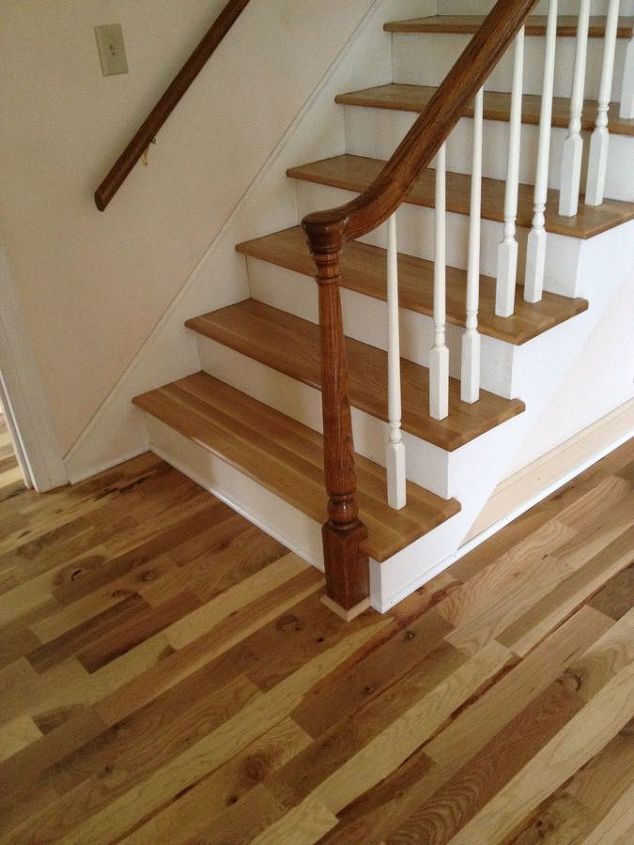
They sanded the treads on the stairs and left them natural, which matched up nicely and flowed well with the rest of the house. The final cost came to $6446 -- a total savings of $5,125! We got the look that we wanted and saved over $5000 by doing the prep work ourselves. Click the link to the original post to see more details from this incredible transformation!
Want more details about this and other DIY projects? Check out my blog post!
Comments
Join the conversation
2 of 145 comments
-
Cabin grade looks a lot like the "tavern grade" that we used for my husband's shop. We lived in the shop for several months and I loved that floor.
-
Beautiful.! Can you share who you got the wood from and who installed, finished it? The website that you provided in a comment before does not exist. Thank you


Frequently asked questions
Have a question about this project?