


For the Love of Rain Chains!

by
Megan
4 Materials
$50
3 Hours
Easy
After falling in love with Rain Chains, I decided to figure out how to DIY one that fit both my style and the size of my house.
I had heard of Rain Chains more and more in the past year, but had never really seen one in action. Then, I visited a resort in the Dominican Republic… And there they were in all their splendor… Gigantic tropical copper Rain Chains. We did get a good downpour one morning, and they were even more spectacular with the water pouring down them. I decided I had to have one back home.
I thought about buying one but they were very expensive.. and fairly short. I needed about 16 feet. So I figured I would DIY it!

First, I searched for something to use as the “cups”… this is best done in the spring/summer when you can find all sorts of planters, etc. at dollar and discount stores. I wanted something with a bigger cup to handle more water flow (like the ones I had seen in the DR). Many of the ones I had seen for sale had very small cups. I first chose pails, but they were somewhat plain and didn’t fit my style. Then I came across these.
They are metal candleholders. I found them in the “One Spot” at Target. I loved the lace look and the shade of yellow.
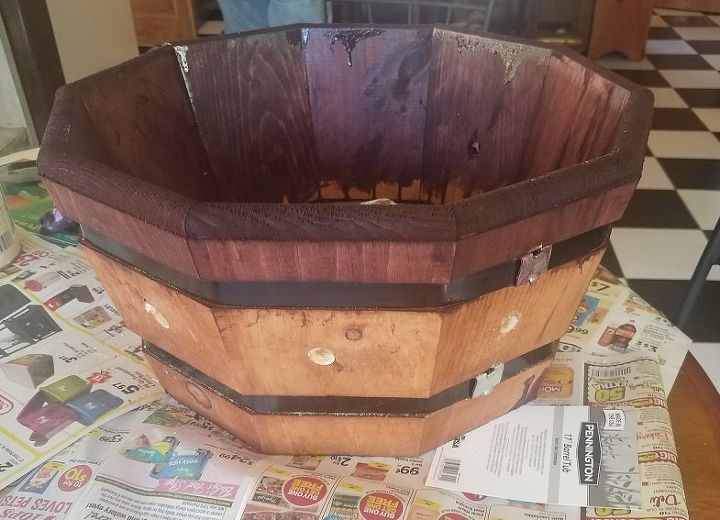
Next, I bought a wood barrel planter that fit perfectly in the landscaping bed where the downspout comes down. I drilled several extra holes in both the bottom and sides for drainage. Lastly, I stained in a nice shade of dark plum to go with our color scheme.
Please disregard my stain drips… I am the world’s worst painter, plus silly me decided to stop mid stain to take the picture. I did eventually clean those up.
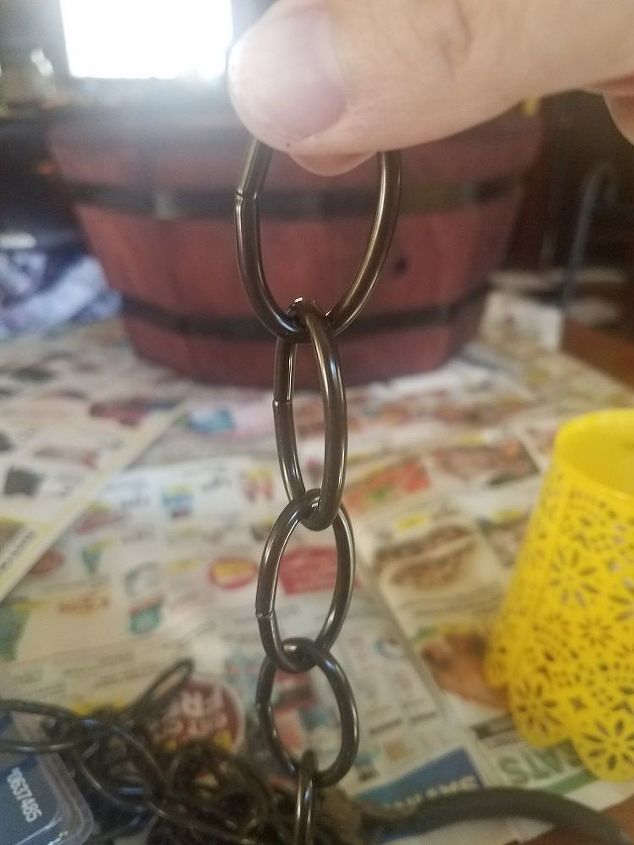
Next, came assembling the rain chain. We bought 2 standard chain in 10 ft lengths at the hardware store.
We decided to use 13 candleholders approximately 10 inches apart.
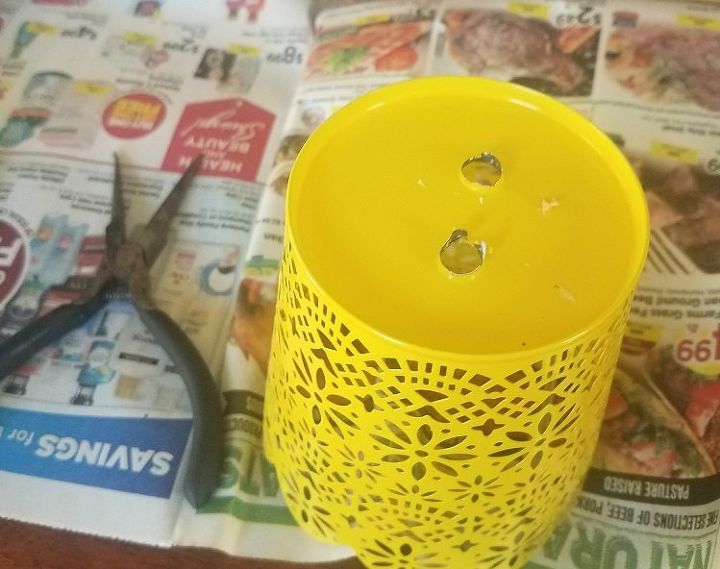
Originally, we were just going to drill one big hole through the bottom and create wire handles to hang them from the chain, but these $1 candleholders were tougher than they look. Therefore, Super Hubby drilled two holes in the bottom of each in such a way that we could hook a link of chain in the bottom of each one.
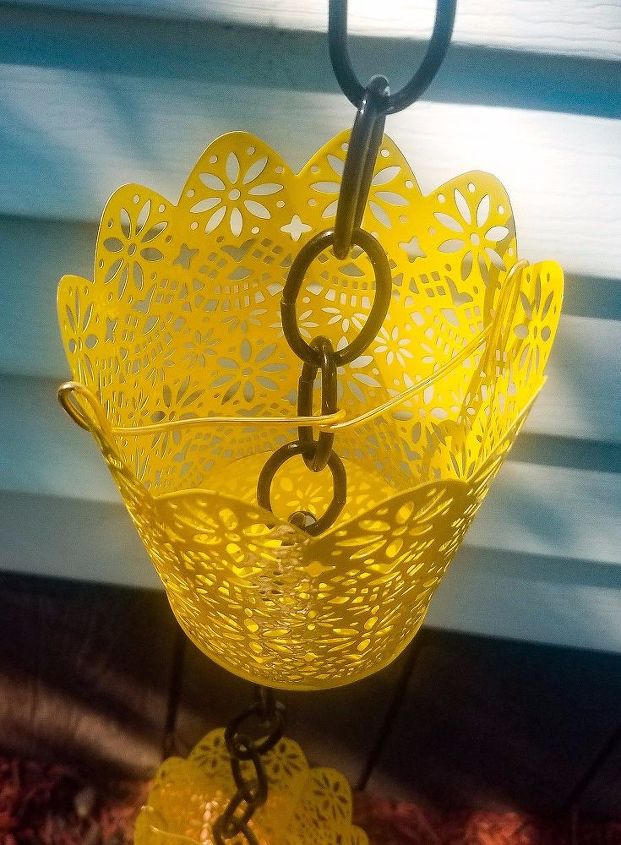
Then we connected each cup with 10 links of chain between each. I liked the tilted look of the cups, but Super Hubby did not. He won that debate. So I used a piece of wire to stabilize each cup and make it stand mostly upright.
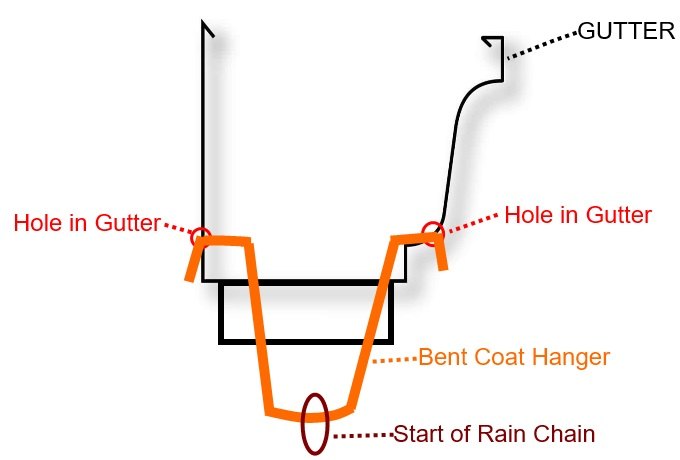
To hang our rain chain, we fashioned a V shaped bracket from heavy-duty wire (ok, it was a coat hanger!) and ran it through two holes in the gutter that were left when we removed the downspout. We hung the V section out of the downspout hole and bent down the sides of the wire to secure. The Rain Chain was then connected to the V section coming out of the downspout hole. I have drawn a diagram to explain it best I could. It was kind of a ‘get up there and figure it out as we go’ endeavor.
Last step was to secure the Rain Chain at ground level. We put the planter directly beneath so the chain dropped to the bottom. We ran an eyebolt through the center hole in the bottom of the planter and connected the last link of the Rain Chain to it, making sure the chain was as taut as possible. This way, the chain does not swing in the wind and hit the house. We then filled the planter with river rock to help disperse the water and weight down the planter.
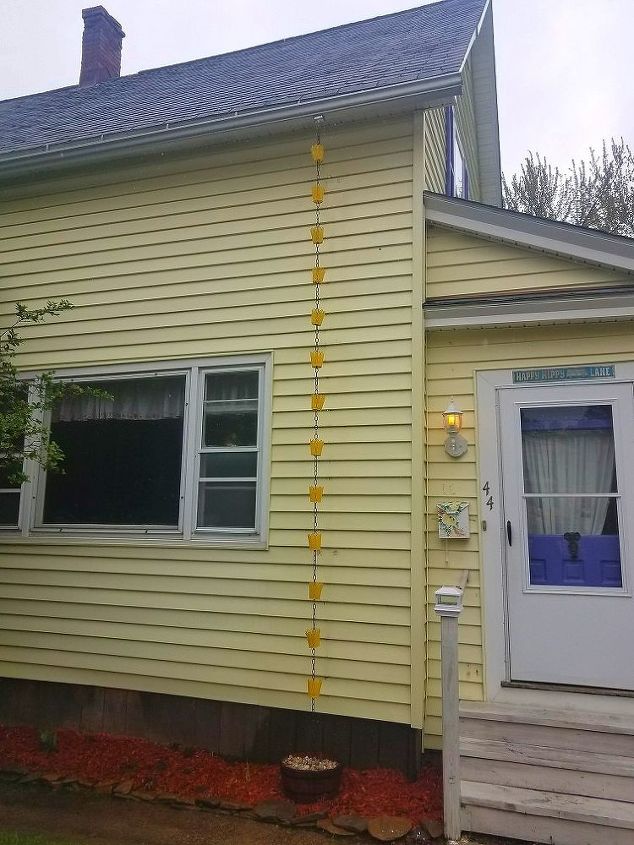
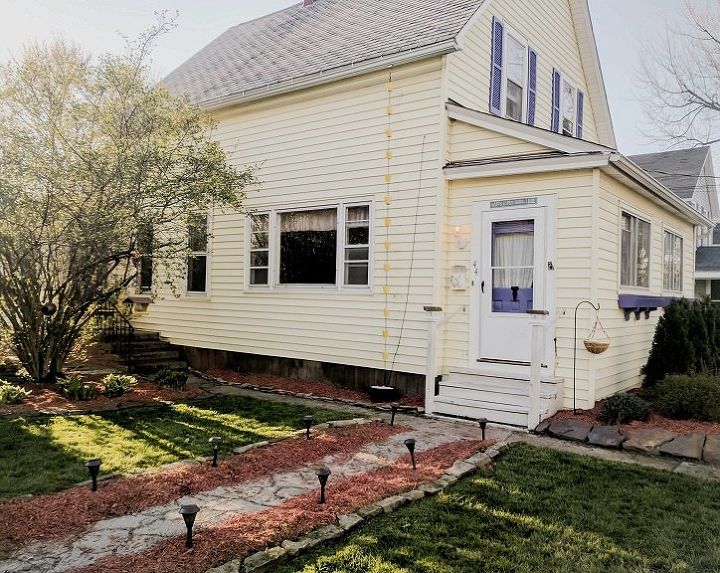
Here is the finished product in place! We have had several neighbors comment on how cute it looks. We think it was a much more attractive option than the boring 16 feet of ugly white gutter! My favorite part is that it makes such a pretty tinkling sound as the rain pours down the chain.


Any price and availability information displayed on [relevant Amazon Site(s), as applicable] at the time of purchase will apply to the purchase of this product.
Hometalk may collect a small share of sales from the links on this page.More info
Comments
Join the conversation
3 of 46 comments
-
I had never heard of a rain chain; so I read the whole article - very interesting!! And really you explained step-by-step in detail for anyone who wants to make one. I have gutters on my house but have an extension on the ground to drain the water away from the foundation...
-
Love your rain chain ! Like you, I have seen very small cupped chains. I like your chain so much better than those at the stores. Will try this idea. Thanks for sharing this.


Frequently asked questions
Have a question about this project?
Turned out really lovely! I do have one question and feel kinda stupid for asking. Do you spread the links to go through the 2 drilled holes? How does that work exactly? I really want to do this one. Thanks in advance.
I don’t have a gutter But I have a Valley on my roof where rain pours off the roof how do you attach the rain chain to the valley of the roof?
Interesting idea! Does the painted metal bubble and rust? Some indoor metals items have poor longevity outdoors.