


No Drawer? No Problem!

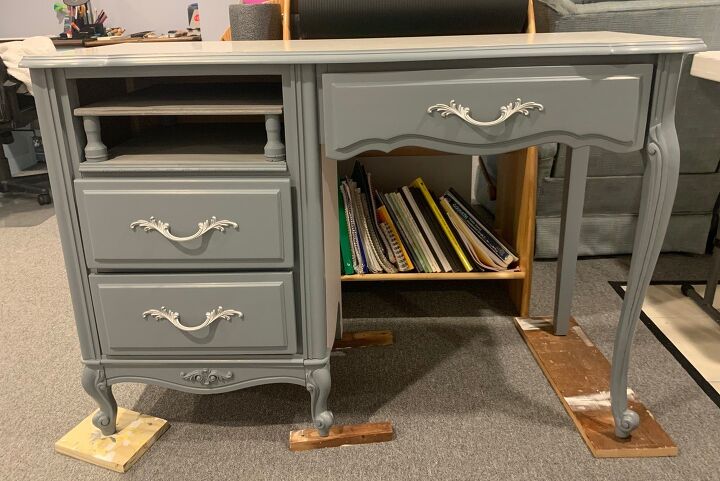
My daughter was in need of a desk. Once again I was shopping at Curb-Mart, and was just lucky enough to find one. There was one issue, however. The desk had 3 drawers, but had openings for 4. Whoever was discarding this item managed to put a similar drawer in the empty spot, but, once I got it home, it quickly became clear that that drawer was not part of this desk.
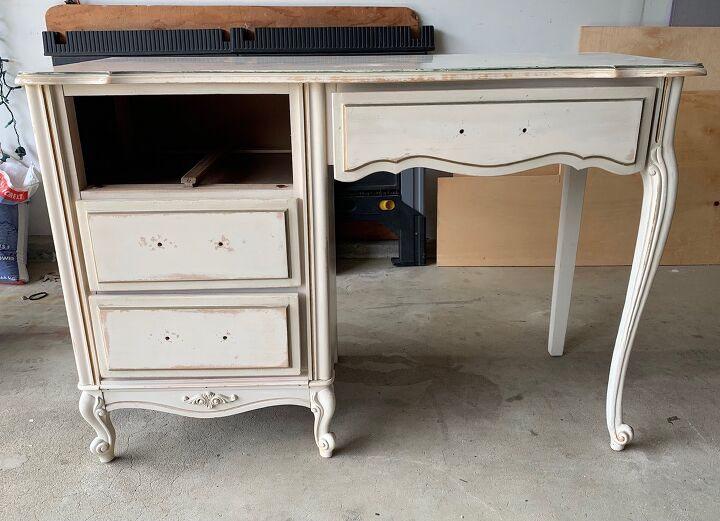
Ok-no biggie. There were a lot of things about the desk that she liked, like the elegant handles (sorry not in this pic) and curves of the legs. I liked that, despite being short 1 drawer, it was sturdy, had a top that needed no more work than a little goo-gone, and was a project that would not take a lot of time.
Storage of and charging of electronics is of considerable interest in our living areas these days. She uses 2 computers for school, and needs a space to charge them and store them where they will not be taking up valuable real estate on her desktop when they are not in use.
 That empty drawer slot was going to be a good thing.
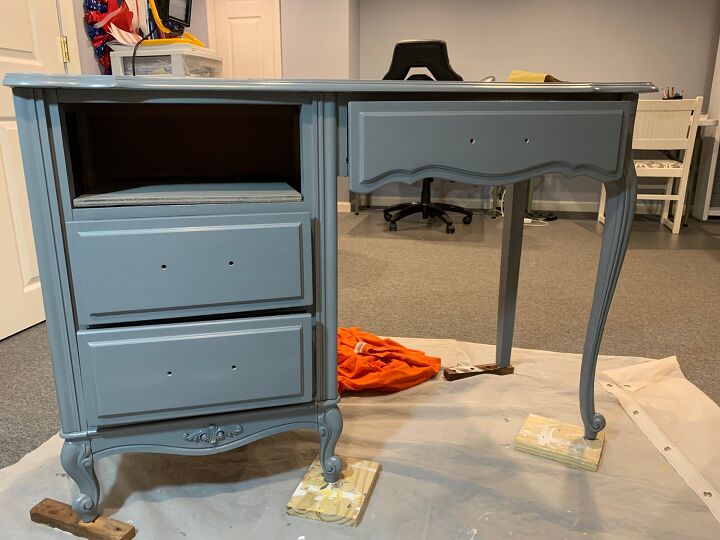
After a good scrubbing and sanding and the removal of the center rail in the top drawer compartment, 2 coats of DecoArt Satin Enamel paint in Smoke Gray were applied.
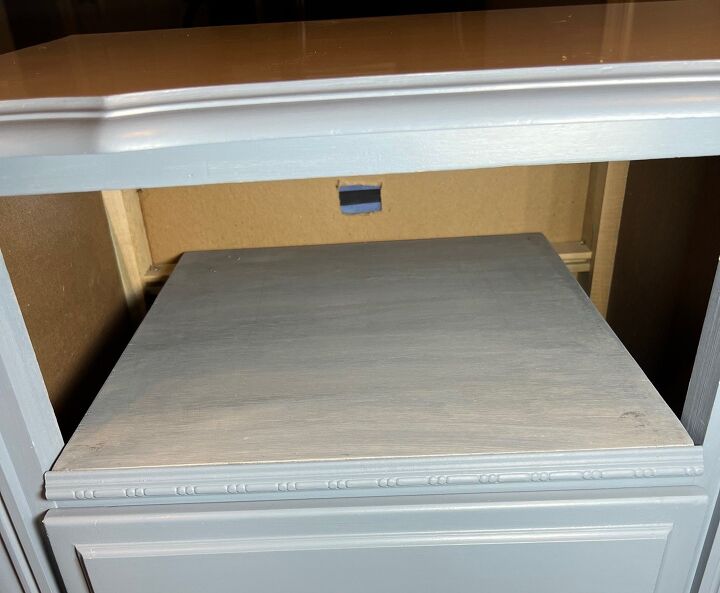
 A piece of plywood was cut to the dimensions of the empty drawer space and adhered with E6000. I used a wash of craft paint and water to tint the plywood.
A small piece of decorative moulding was added to cover the joint between the desk and the plywood.
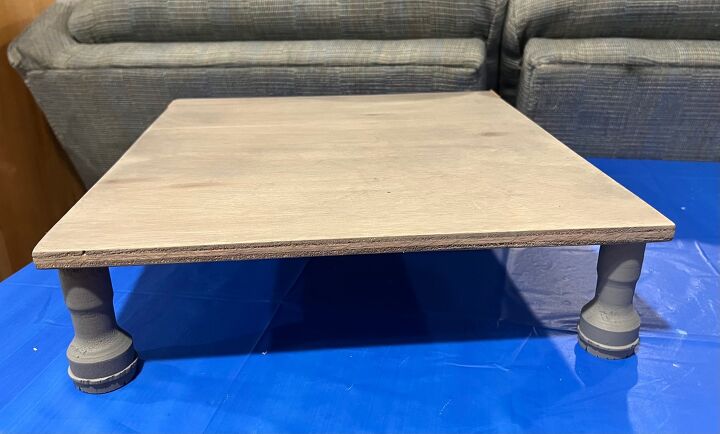
A second piece of plywood was cut to the same dimensions as the board above and fitted with 4 feet, making a riser.
I used the same paint & water wash on this board.
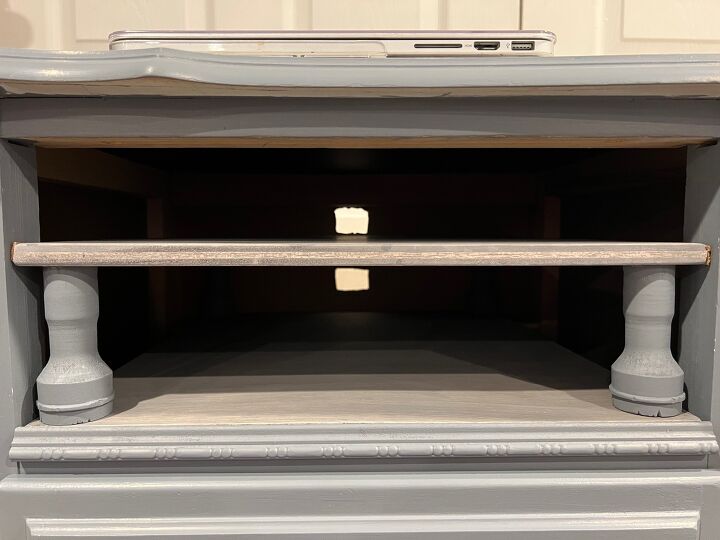
This riser could now be inserted in the open space in the desk. Looks like plenty of room for 2 computers to me!
On the back of the desk, I cut 2 holes for charging cords in line with both levels of the storage center.
I wanted to be sure that the cords would stay accessible and not fall down the back of the desk every time they were unhooked yet still be able to move a bit.
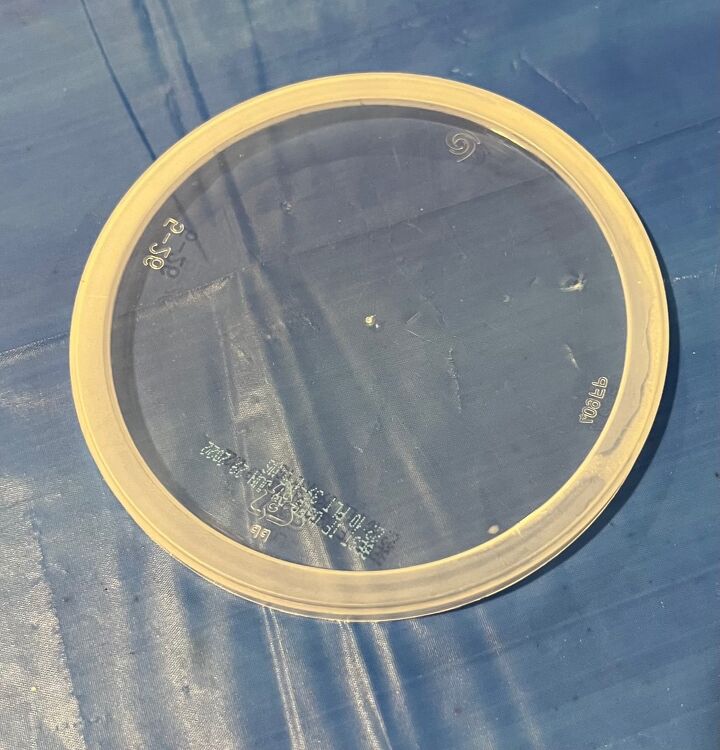
I salvaged 2 plastic lids from our recycling.
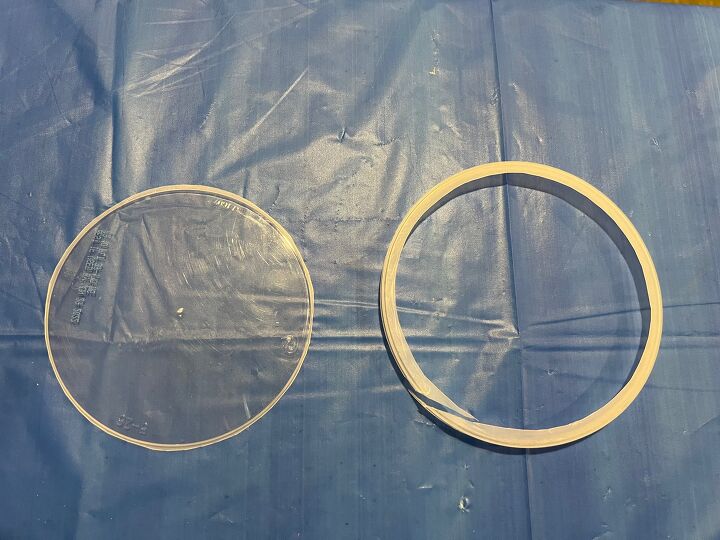
I cut off the outer ring so the remaining plastic circle would lay flat.
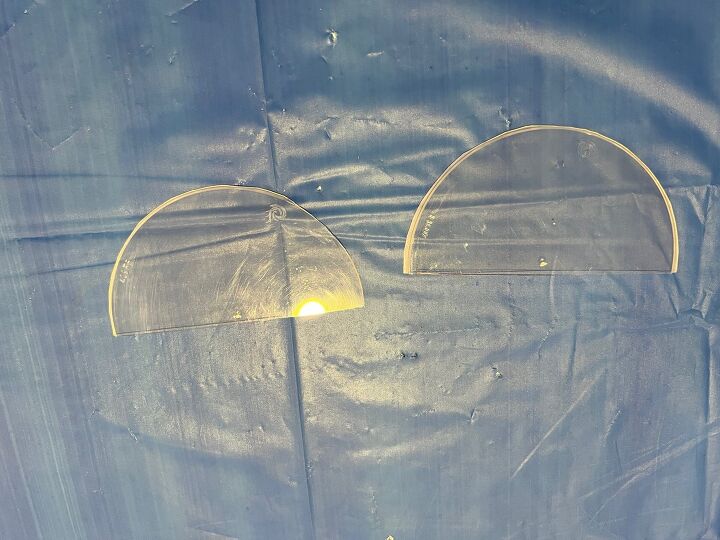
The holes for the cords I had cut in the backboard of the desk were too close together to use 2 complete circles and 2 far apart to use only 1, so I cut them and used about 2/3 of each.
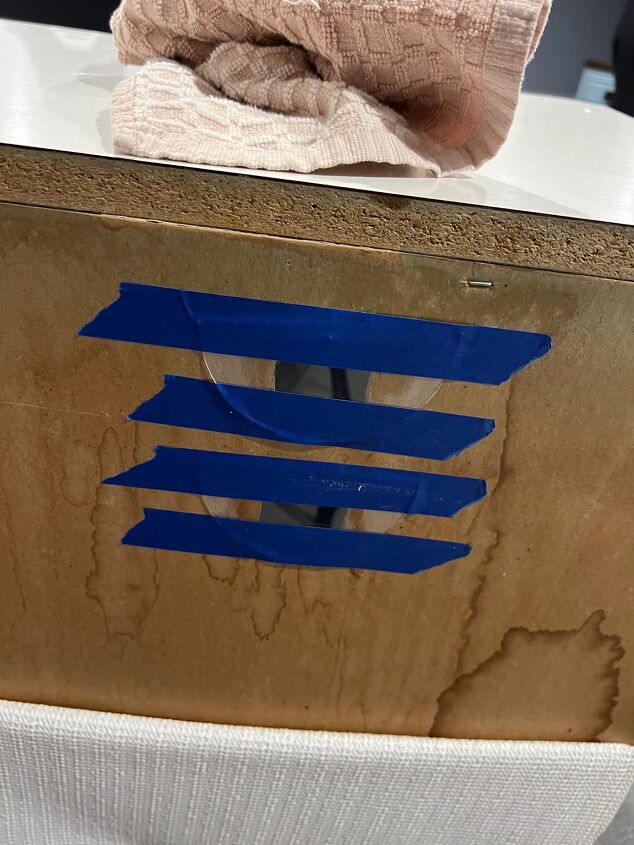
I applied E6000 around each opening and attached the plastic pieces.
[Please do not ask about all those drippy marks on the back of this piece. I don't know what they are and don't want to know:(]
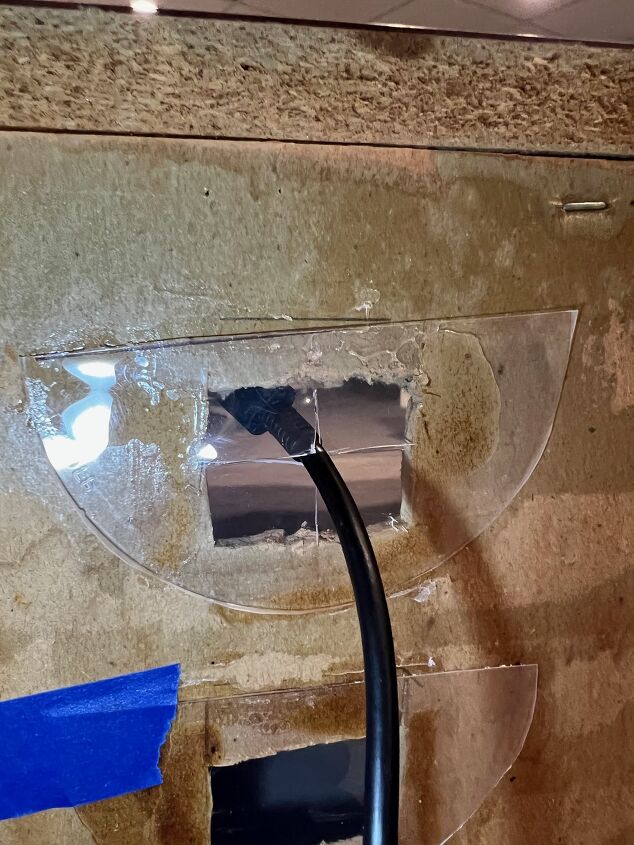
Once the glue was dry, I used a sharp blade to cut a cross in the section of the plastic over the opening. [Not my neatest work for sure, but nobody is going to see it]
 This provided enough support that the cords would stay put and not fall down the back of the desk when unplugged from their computers.
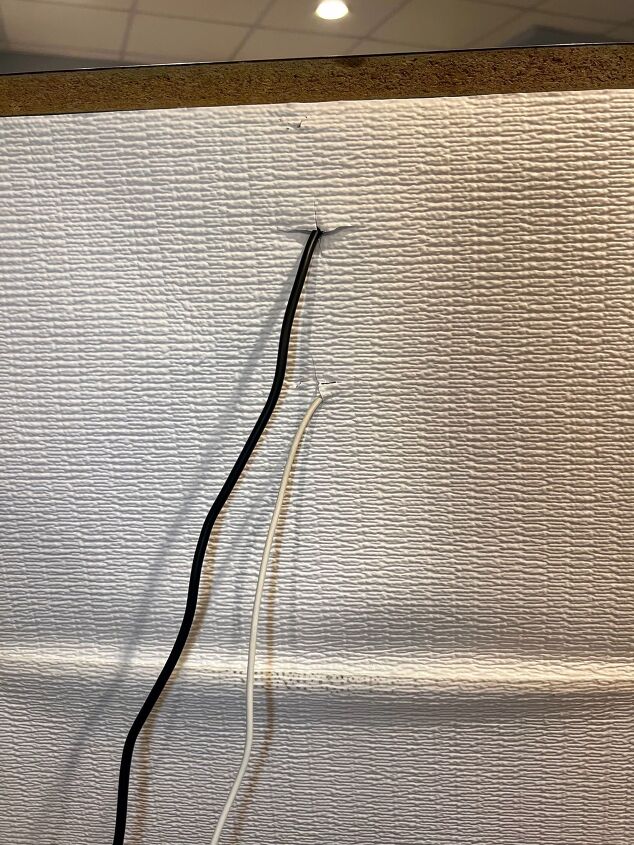
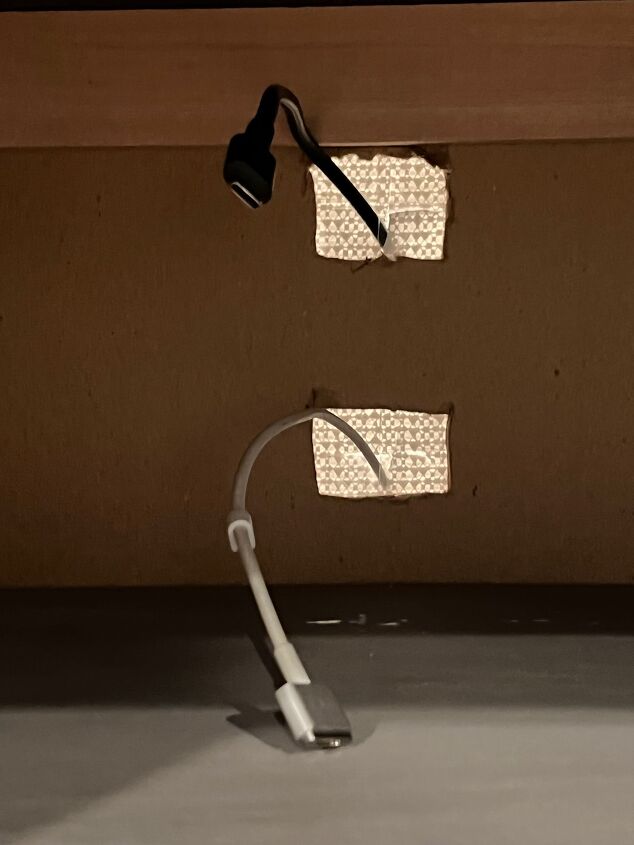
I added a piece of drawer liner to cover the back and put the same cuts on it that I did on the plastic and fed the cords through.
The cords stay nicely in place.
The last thing to do was to paint the drawer handles. They were given a few coats of Krylon Fusion spray paint in Hammered Silver.
Finished.
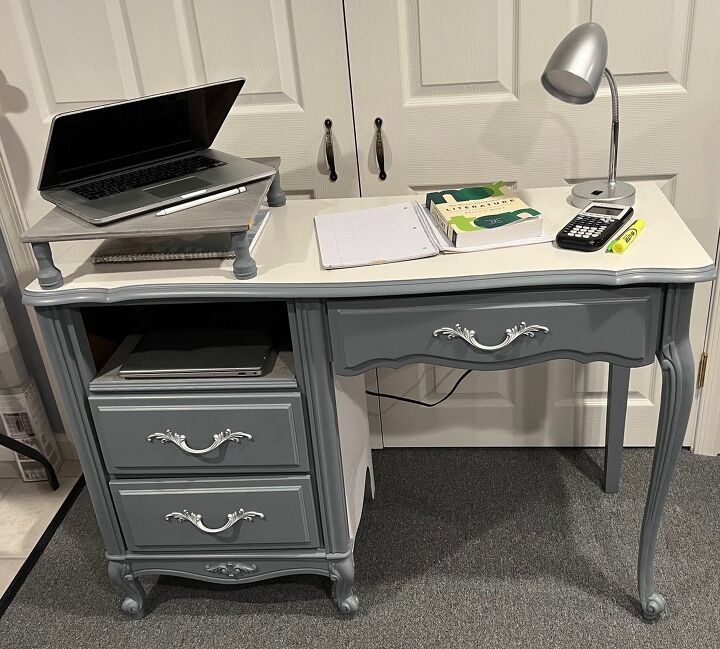
 The beauty of the mobile riser is that it can be used on the top of the desk...
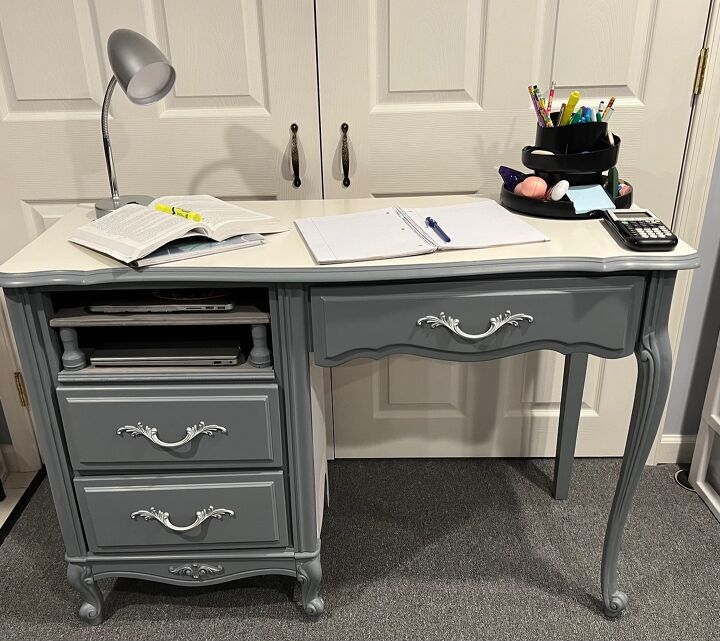
 or it can be put in place and serve as the second level of a double charging port.
1 Desk---check! Now we need a chair....that's a problem for another day
Resources for this project:
See all materials


Comments
Join the conversation
-
It looks like it was meant to be. Nice job!
-
Love this ❤


Frequently asked questions
Have a question about this project?