


How to Properly Clean Paint Rollers and Trays

By Brooke Ressell
Painting projects are the best because they’re simple to DIY but can change the look of a whole room in just a few short hours. Whether you’re warming up your space or giving it a cool, coastal vibe, a little paint can take your room all the way from boring to striking with very little cost upfront.
And while it may be tempting to save more money by purchasing inexpensive supplies, your best bet is to buy good quality paint rollers, roller covers, and paint trays the first time, and just take really good care of them so they’ll last.
In this guide, we’ll show you how to clean paint rollers, roller covers, and trays the right way so that they’ll last for a long time to come. We’ll also share our secrets on the best way to clean paint rollers for each particular type of paint that you may be using at home.
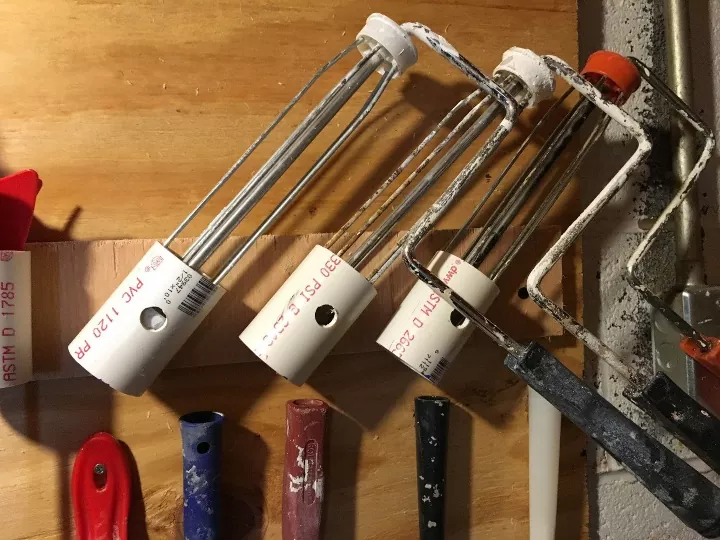
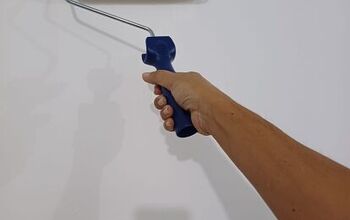
Photo via Mary from Real Girl's Realm
How to Clean Paint Roller Frames
It’s important to learn how to wash a paint roller frame correctly because failing to do so can leave the frame full of hardened paint gunk, making it much harder to slide the paint cover on or to take it off in some cases.
It’s in your best interest to clean paint roller frames before roller covers; the paint will dry on the frame much sooner than it will on the cover.
Latex/Water-Based Paints
The process of cleaning latex or water-based paints from roller frames is quick and easy. Plus, you don’t need any chemicals in order to make your roller frame look good as new.
Tools and Materials Needed:
- Rubber gloves
- Safety glasses
- Bucket
- Warm water
- Dish soap
- 5-in-1 tool
- Stiff-bristled brush
Step 1: Protect Yourself
Roller covers are like big sponges that soak up a ton of paint. So be sure to put rubber gloves on before you get started and protect your skin from the paint.
It’s also possible for the paint to splatter as you remove the cover so make sure to wear safety glasses to protect your eyes just in case.
Step 2: Fill the Bucket
Next, fill the bucket halfway with warm water and a few drops of liquid dish soap.
Step 3: Remover Roller Cover
Use a 5-in-1 tool to remove excess paint from the paint roller cover. Then remove the cover and set it off to the side for cleaning later.
Step 4: Clean the Paint Roller
Dip the paint roller frame into the basket of warm, soapy water and use the stiff-bristled brush to remove any paint on the metal roller frame and handle.
Step 5: Rinse the Paint Roller
Rinse the paint roller off in the sink.
Step 6: Air Dry
Lay the roller frame flat to air dry. Check out this paint roller storage unit.
Step 7: Dispose of the Water Properly
Lastly, dispose of the water properly by dumping the bucket into any drains in your house that go directly to the water treatment plant—not a storm sewer.
Oil-Based Paints
The process of cleaning oil-based paints from roller frames is also quick and easy, but you will need to use chemicals to get the job done. Since oil (from the paint) and water don’t mix, mineral spirits will help penetrate the paint and lift it off the roller frames.
Tools and Materials Needed:
- Rubber gloves
- Safety glasses
- 5-in-1 tool
- Towel
- Mineral spirits
Step 1: Protect Yourself
Rubber gloves are incredibly important when cleaning oil-based paints off of a paint roller. Not only will you be touching materials covered in paint, but you’ll also be working with mineral spirits, which is poisonous. So protect your skin and eyes by wearing rubber gloves and safety glasses before opening the can of mineral spirits.
Step 2: Remove Roller Cover
After using a 5-in-1 tool to remove excess paint from the paint roller cover, remove the paint roller cover itself, and set it off to the side. Learn how to remove rust from your 5-in-1 tool.
Step 3: Clean the Paint Roller
Using an old towel dipped in mineral spirits, wipe any oil-based paint from the paint roller frame and handle.
Another option is to place your paint roller in a small container, pour enough mineral spirits into the container to cover the paint roller, and let it sit for a few minutes while it removes the paint for you.
Step 4: Dispose of the Mineral Spirits Properly
Since mineral spirits is a chemical, it’s important to handle it properly. Do not pour it down your sink, where it’ll contaminate pipes and groundwater. Instead pour any leftover liquid into a disposable bottle and wait for the paint solids to settle. Meanwhile, wipe the bucket out with a clean towel and then rinse it with clean water.
Once the paint solids have settled in the bottle, pour the clean solvent into a new disposable bottle to be used again later, and allow the small amount of mineral spirits and paint solids in the first bottle to evaporate outside. Then you can dispose of the empty bottle in the trash.
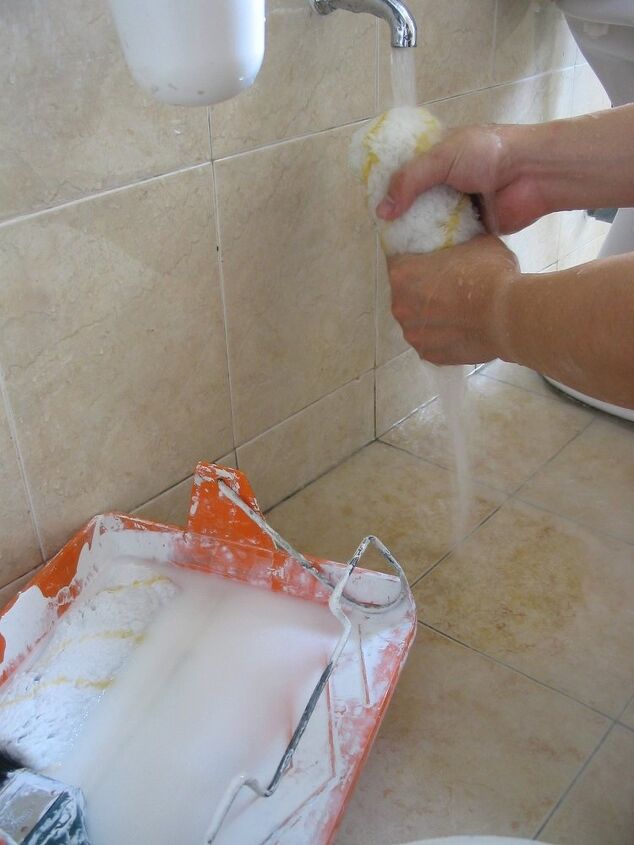
Photo via Shutterstock
How to Clean Paint Roller Covers
When you use a paint roller once, you may be tempted to just throw it away. However, it is possible to get all that residual paint out of a roller cover so you can use it again. We’ll show you how.
Latex/Water-Based Paints
The process for removing latex, or water-based paints, from a roller cover is very similar to removing it from the roller frame itself—you just need water, dish soap, and a few tools.
Tools and Materials Needed:
- Rubber gloves
- Safety glasses
- 5-in-1 tool or putty knife
- Bucket
- Warm water
- Dish soap
Step 1: Protect Yourself
Be sure to always wear rubber gloves when working with paint so that it does not end up all over your skin. Also, getting paint directly in your eyes can cause eye irritation, so put safety glasses on before you start.
Step 2: Fill the Bucket
Fill a bucket halfway with warm water and a few drops of liquid dish soap.
Step 3: Remove Excess Paint
Using the curved edge of your 5-in-1 tool, scrape the excess paint off of the roller cover and back into the bucket of paint.
Step 4: Roll It Out
Once most of the paint has been removed with your tool, roll it out on newspaper or even on the wall to get the last little bit off.
Step 5: Remove the Roller Cover
Next, remove the roller cover from the roller frame and set it off to the side while you clean the roller frame first using the steps we outlined above.
Step 6: Clean the Roller Cover
Once you’re done cleaning the roller frame, it’s time to clean the roller cover. You’ll want to dip it in the bucket of warm, soapy water, and use your gloved hands to rub the paint out of the roller cover for several minutes.
Step 7: Rinse Roller Cover
When you think all of the paint is out, rinse it off in the sink. Surprisingly, it still may take several minutes to rinse paint out of the roller cover. But you’ll know when it’s cleaned of paint once the water starts running clear.
Oil-Based Paints
It takes more than water to fully strip oil-based paints off roller covers. Here’s how to do it.
Tools and Materials Needed:
- Rubber gloves
- Safety glasses
- Mineral spirits
- 5-in-1 tool or putty knife
- Bucket
- Warm water
- Dish soap
- Towel
Step 1: Protect Yourself
You will be working with mineral spirits during this process and coming into contact with harmful ingredients. Be sure to wear rubber gloves and safety glasses before opening the container.
Step 2: Fill the Bucket
Next, take a small bucket or container that the roller cover can fit in and fill it with mineral spirits. Do not fill it all the way to the top since you’ll be placing the roller cover in the bucket as well.
Step 3: Remove Excess Paint
Scrape all of the excess paint from the roller cover into the bucket of paint using the curved edge of your 5-in-1 tool or a putty knife.
Step 4: Roll It Out
Then, roll the paint roller on newspaper or even on the wall to get the last little bit of paint off before cleaning it.
Step 5: Remove the Roller Cover
Remove the roller cover from the roller frame and set it off to the side. Clean the roller frame first using the steps we outlined above and then move on to the roller cover.
Step 6: Clean the Roller Cover
Place the roller cover into the bucket or container of mineral spirits. Use your gloved hands to work all of the extra paint out of the roller cover by rubbing it. This process can take anywhere from five to seven minutes.
Step 7: Remove the Roller Cover
Carefully remove the roller cover from the bucket, making sure that any mineral spirits drip back into the bucket instead of onto any other surfaces. Then set it in the sink to allow it to dry for a few moments.
Step 8: Wash Roller Cover
Wash the roller cover in the sink with warm water and a few drops of liquid dish soap.
Step 9: Rinse Roller Cover
Rinse the roller cover under the faucet until the water runs clear.
Step 10: Dispose of the Mineral Spirits Properly
To dispose of the mineral spirits properly, pour them into a disposable bottle and wait for the paint solids to settle. Meanwhile, wipe the bucket out with a clean towel and rinse it clean. Once the paint solids have settled, pour the clean solvent into a new disposable bottle to be used again later, and allow the small amount of mineral spirits and paint solids in the first bottle to evaporate outside. You can now dispose of the empty bottle in the trash.
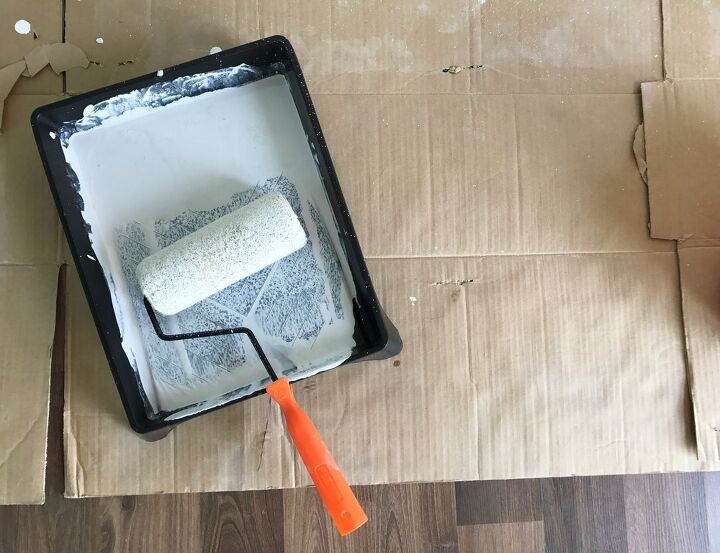
Photo via Shutterstock
How to Clean a Paint Tray
Now that you know how to properly clean a paint roller and cover, we’ll show you how to clean the paint tray so you can use it time and again.
For water/latex paint, simply let the paint dry and then peel it out of the tray. You can also use your 5-in-tool to scrape any stuck-on paint from the tray.
For oil-based paint, wipe the entire paint tray out with paper towels after pouring excess paint back into its container. Then use a small amount of mineral spirits on a rag to wipe away any remaining paint residue from the paint tray. Then, wash it with warm, soapy water.
Paint Tray Covers
How to Dry Paint Rollers
Once you have the technique for how to clean a roller brush down, it’s time to learn how to dry paint rollers properly.
For the paint roller itself, it’s as easy as laying it flat to dry.
However, the roller cover will need some extra attention. Laying a roller cover flat to dry will crush the fibers on one side, and then it won’t roll correctly the next time you use it to paint. Instead, insert string or wire through the center of the roller cover and hang it to dry or carefully stand it on its end.
Do you have any paint roller cleaning advice? Share it down below!


Frequently asked questions
Have a question about this project?