


Farmhouse Backsplash Makeover on a Budget

Backsplash Makeover on a Budget
Looking for a creative, inexpensive way to update your kitchen backsplash? Got leftover vinyl plank flooring?
If you have ever laid a vinyl plank floor and saved the left-over pieces this might be for you. I have 4 boxes of left-over flooring taking up space and every time I have to move them to get to something else, I swear I’m going to throw them away but never do. Glad I didn’t!
This vinyl flooring is the type with a faux wood grain texture, so it is perfect to give the look of wood. It is thin, flexible and easily cuts by scoring it with a utility knife.

What you will need:
- Leftover flooring, or get a box of laminate flooring at your local hardware store. I used Allure ironwood vinyl flooring.
- Nail gun, I’m in love with my cordless Ryobi.
- Nails
- Utility knife
- Straight edge ruler
- White Ice Shabby Paints
- Sand paper
- Spray bottle of water

Install
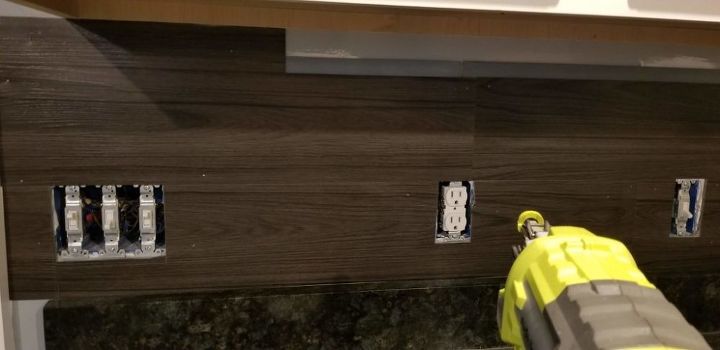
Remove all plug/switch covers and prep the area. Measure your first piece and mark any outlets that need to be cut out.
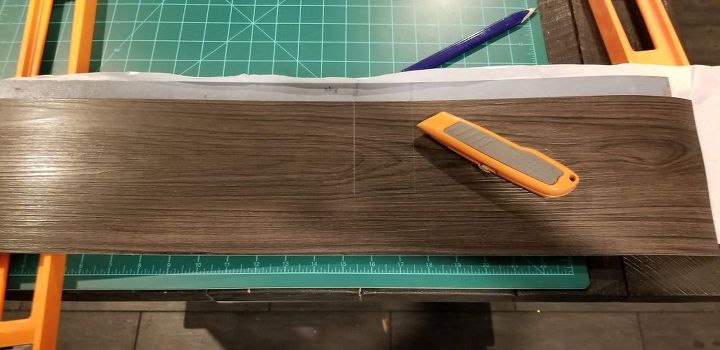
Use a utility knife to score and cut your vinyl pieces.
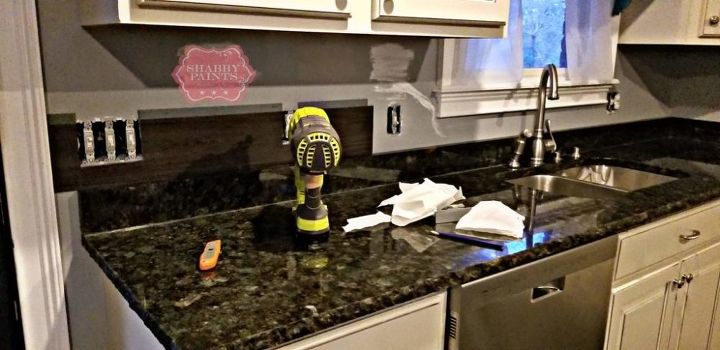
Apply using your nail gun. Continue until your entire backsplash is done.
We're making progress :)
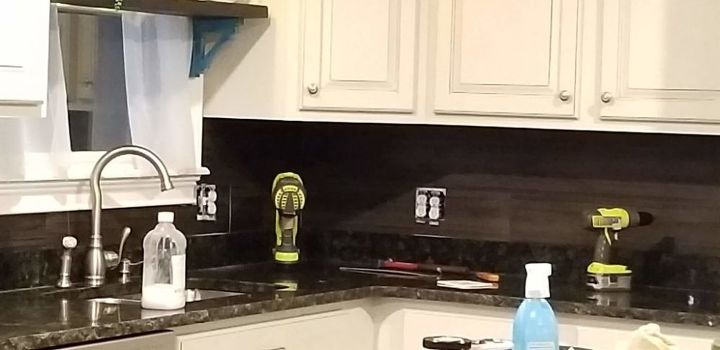
Ready for paint!
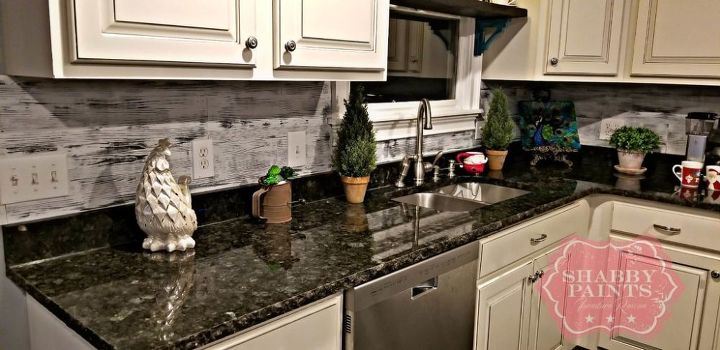
Paint
Paint with one coat of White Ice, let dry.
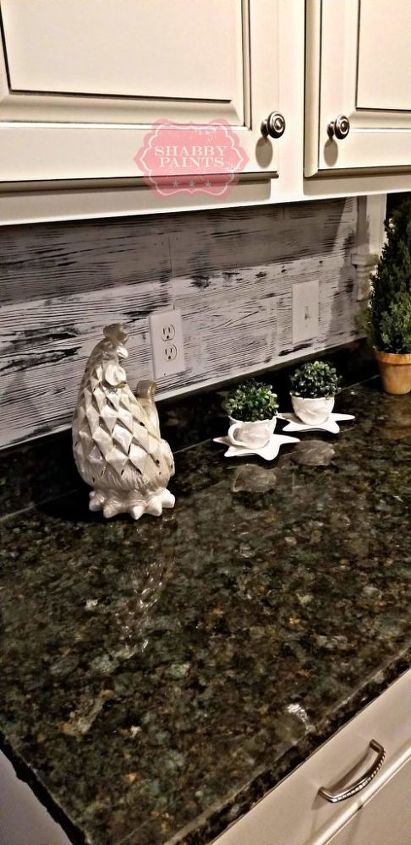
Wet Sand
Spray sections with water and sand while wet to show the grain texture. (don’t spray water near outlets). You can wet your sanding sponge first and tape over the outlets.
Wet sanding is a great way to distress a strong paint. Some paints come off easier than others and spraying with water helps to weaken the paints adhesion long enough to help remove enough to show the faux grain. It also helps cut down on dust.
Finish
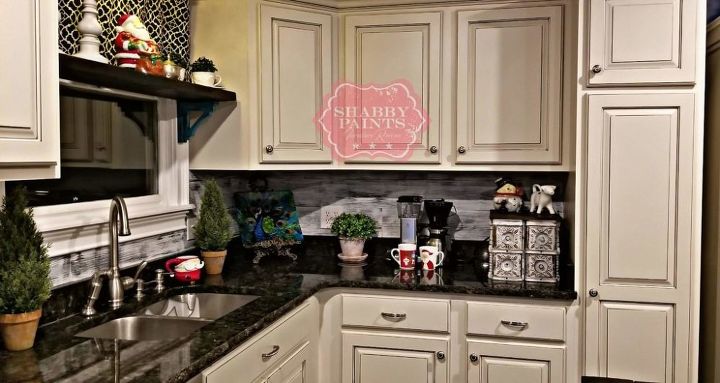
Safely extend your outlets to fit flush with your new backsplash.. If you aren’t comfortable with this ask for help.
Set back and enjoy your inexpensive backsplash!
Enjoy!
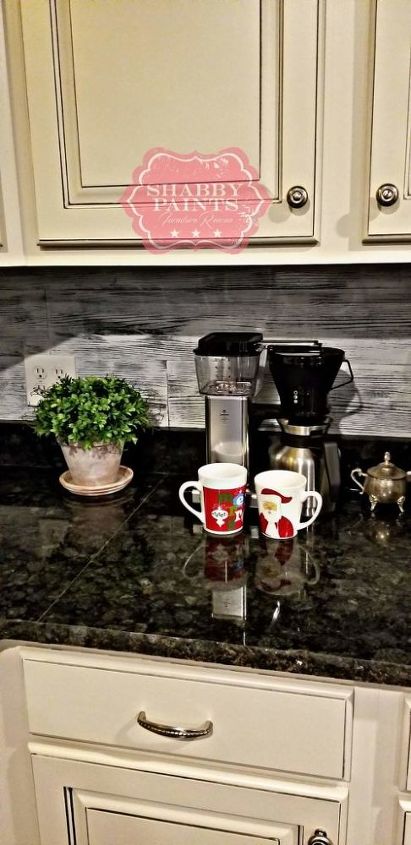
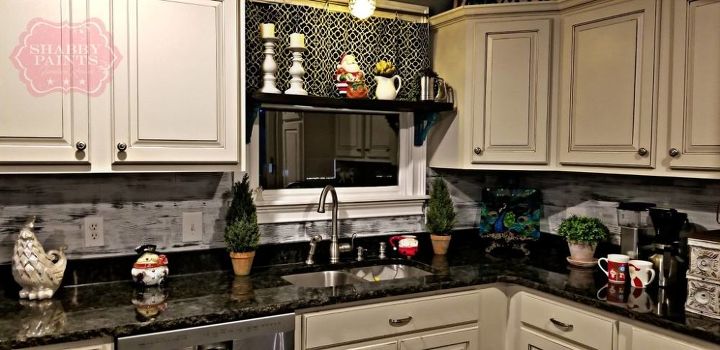
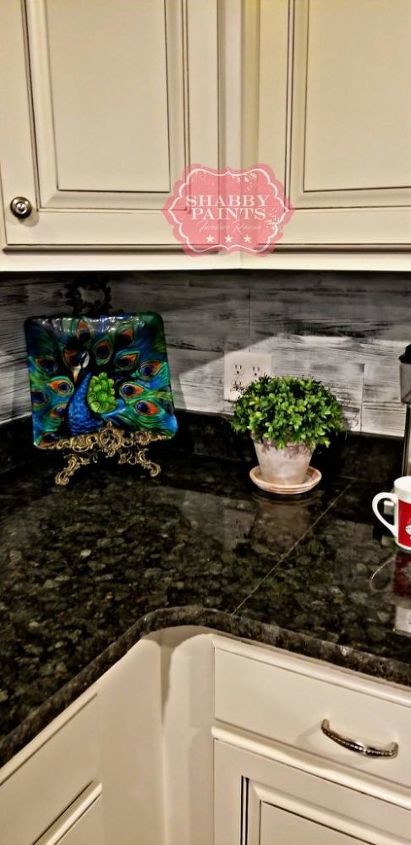
Farmhouse backsplash complete!
Resources for this project:
See all materials


Comments
Join the conversation
-
I love your little plant-cups. Wish I had even a six inch square I could devote to purely decorative items.
-
Yes I love this idea and I have the flooring and chalk paint, I wonder if I could cover my countertop the same way, it's really ugly. Someone asked about sealing the paint. I think people do that with a wax like they do on the furniture pieces or maybe a regular sealer that goes over paint. It's worth a try, I also like the shelves half way up the window.
Thank you for the ideas!
Mary Ann


Frequently asked questions
Have a question about this project?
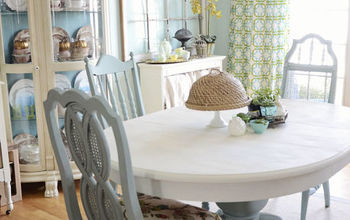
I absolutely LOVE your peacock bowl shown in one of your pics. Can you plz tell me more about it? Did u make it? How? It looks hand painted but yet EXTREMELY vibrant. Lol just curious!. Thanx
dont you need to put a finish on it? i would think if you dont the chalk paint would come off.
What did you do between the window trim and the cupboards?