


DIY Faux Marble Painted Granite Tutorial
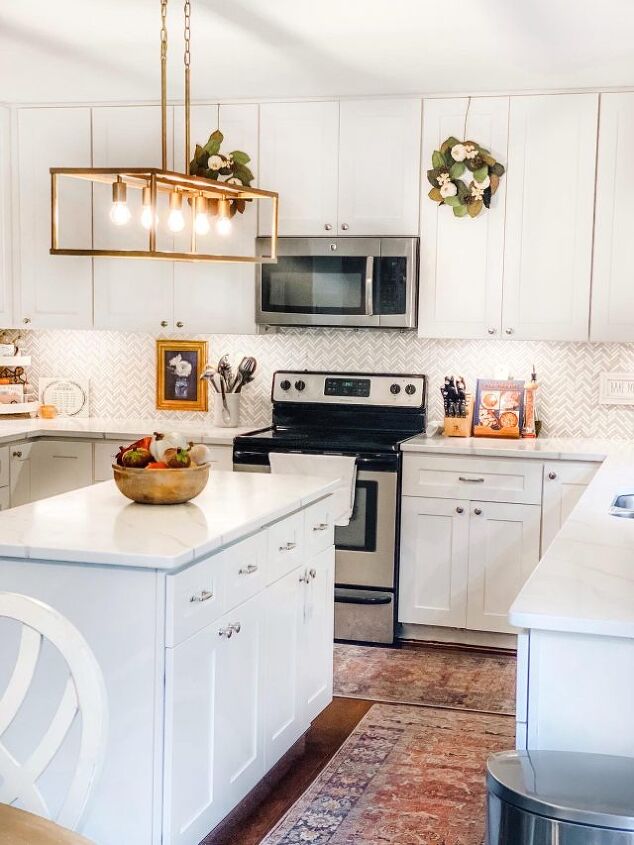
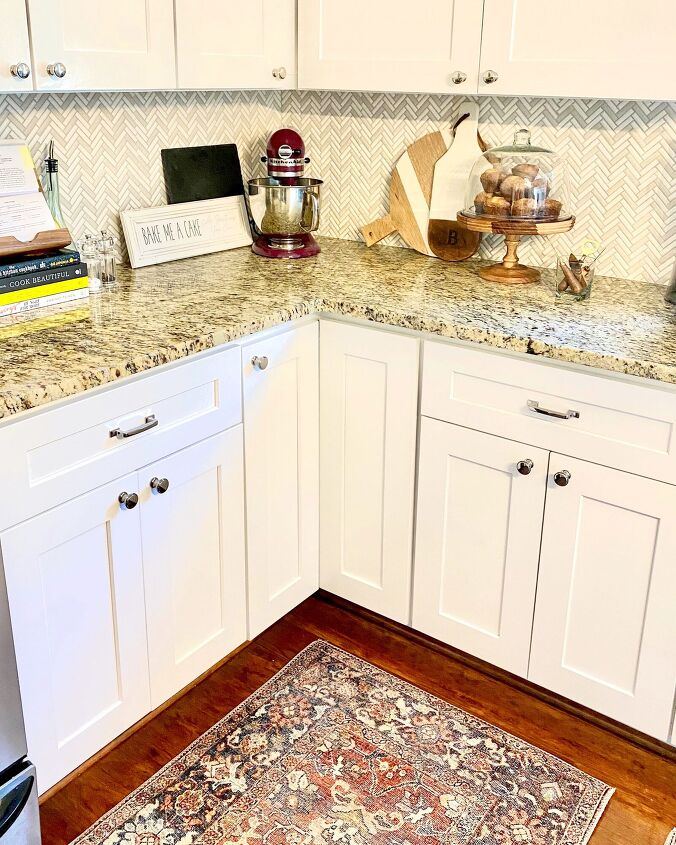
I’ve had several people over since we transformed our outdated and mismatched kitchen countertops and not one person knew our countertops were DIY faux marble painted granite. Several people asked when we got new countertops!
While we love how they brighten up and modernize the kitchen design, one of the best parts about the project was how easy it was.
You may see on my site that I originally split this tutorial up into 2 posts. However, for Home Talk and for the people who find it easier to have it all on one page, I’m making this tutorial with the full process here.
Be sure to check out my Web Story of part 1 and part 2 for a quick video refresher! AND you can find all of the sources for this room HERE.!
This post may include affiliate links, which means I may earn a small commission if you click on the link and/or purchase from that site. I use that money to keep this blog running. You can read my full disclosure policy here.
Why We Painted Our Granite Countertops
When we purchased the house, it was very clear that a few cheaper upgrades were added to try to help sell it. One such upgrade, we think, was the kitchen backsplash and they did NOT match the countertops AT ALL!
I saw a few people on Instagram who had gorgeous countertops they had painted so I reached out to a few. They all used the Giani kit and they were all thrilled with the results. I was sold! SO, I purchased a kit and worked with the company to have a second kit gifted since I had more square footage than one kit could cover.
Some Important Information
One kit covers 35 square feet or 16 running feet of standard 24″ wide counters – the average amount of countertop area in a kitchen. I needed an extra can of white paint and epoxy.
For an average size kitchen from start to finish, it takes about one weekend.: 4 to 9 hours of actual painting time; 48 hours drying time; FULL CURE TIME = 7 DAYS
Shut all windows, turn off fans, keep kids and pets out of the area. Keep temperatures between 72-75 degrees F.
It is possible to paint surfaces other than granite, but this is where I have my experience.
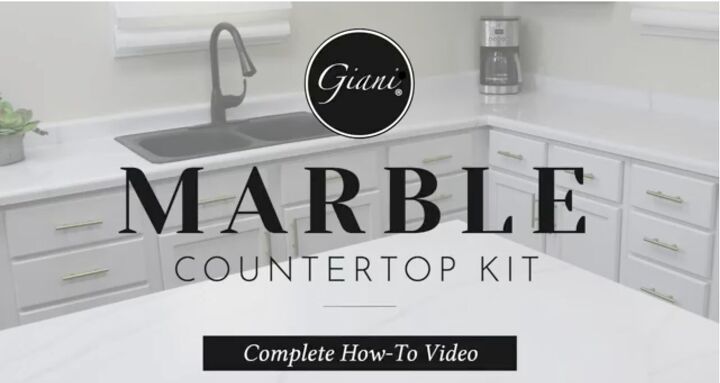
First Step: Watch the Tutorial Video
Giani has a very good tutorial video on their website and on their Amazon listing. I would start there by watching the tutorial.And then watch it again.
I did read the written instructions, and there are a couple things you may learn from that, the video has a hands on demonstration of each step. It’s well worth the time to start and then again before you move from prep, to paint, to epoxy. It helped me feel confident in what I was doing as I almost certainly permanently changed our granite.
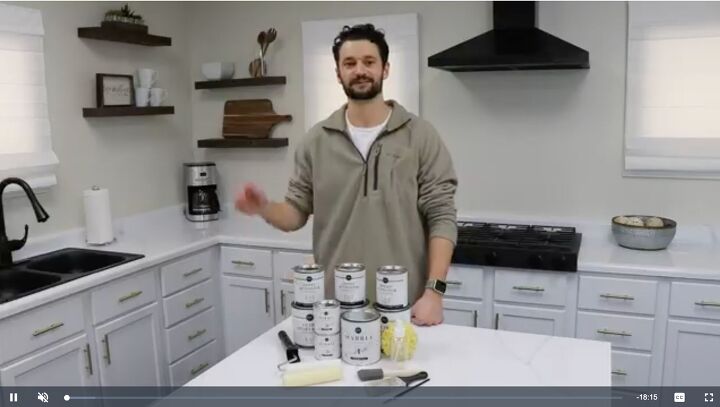
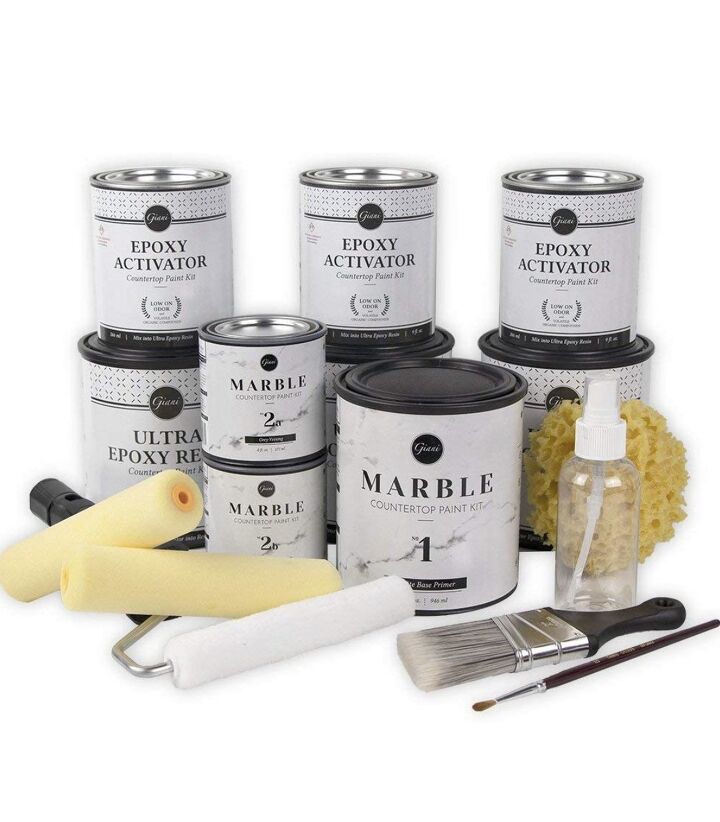
Gather Your Materials
The Giani Faux Marble Painted Granite Countertop Kit includes most of what you will need.
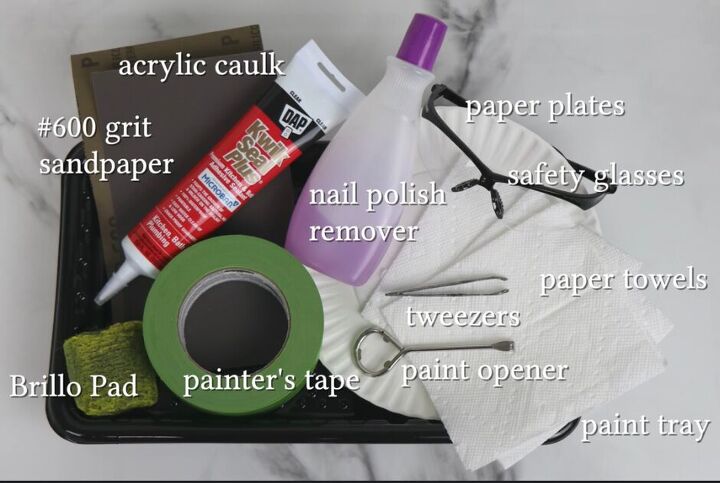
However, Giani recommends that you have a few other things on hand (to the right) that will be helpful in completing this project. I used everything but the nail polish remover.
Prep Your Granite Countertops
Wash your countertops well. Hot water and a bit of Dawn dish soap with a microfiber towel and an SOS pad–that’s all I used. Rinse counters twice to make sure they’re clean/clear of soap.
Do NOT sand or rough up counters. DO fill in gauges/chips with wood filler & sand smooth with 600 grit.
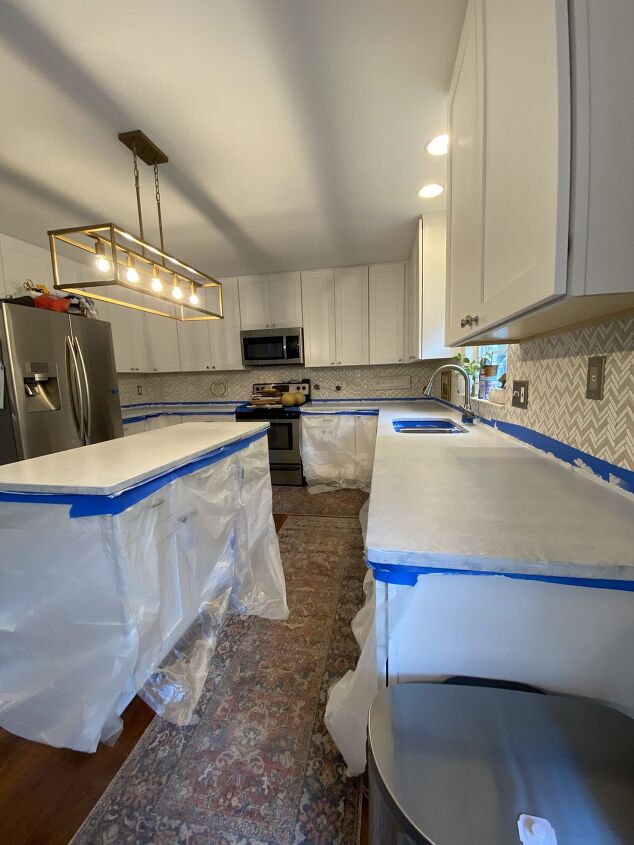
Cover every surface you do not want to be painted. There’s plenty of plastic sheeting provided with the kit. I used painters tape to secure the plastic to protect every surface I didn’t want painted. Drips on cabinets are very likely, especially the epoxy, so it is really important to cover them.
More Important Tips
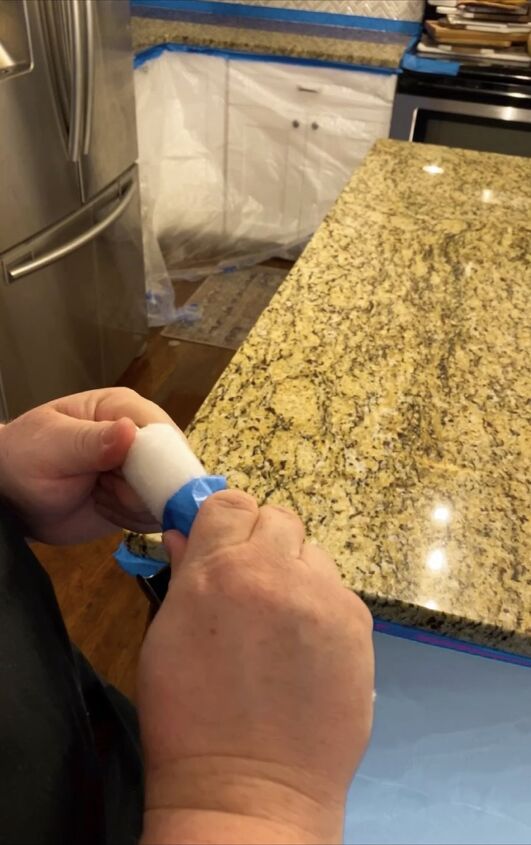
DO use 2 rows of high quality painter’s tape on the backsplash.
DO remove all caulk and clean up with rubbing alcohol.
DO NOT use paintable caulk.
DO use silicone caulk after counters are cured.
This post may include affiliate links, which means I may earn a small commission if you click on the link and/or purchase from that site. I use that money to keep this blog running. You can read my full disclosure policy here.
REMINDER: Be sure to check out my Web Stories of part 1 and part 2 ! AND you can find all of the sources for this room HERE.
Take a Breath!
Ok this is where part 1 ends in my other posts and it’s also a good point in the project to take a quick breath and remind yourself about how to do the next steps. The painting portion and then the epoxy portion really need to be done all at once. It will NOT work if you paint part of your countertops white and then try to pick back up painting in the middle of a countertop. You’ll have lines and you will not likely be able to get rid of them. The same can be said with the epoxy–each section needs to be done all at once. You could epoxy your island one time and then epoxy the rest of the counters on a different day. However, keep in mind that once you mix your epoxy, you have a limited amount of time to use it and if you do not use it all on your island, you’ll waste the rest if you do not use it right away. This leads me to this next step:
Quick Tip: Prep your roller before painting
After you’ve prepped your counters and covered the lower cabinets and backsplash, prep the small roller brush they gave you by picking up any loose fibers with painters tape.
Begin Painting
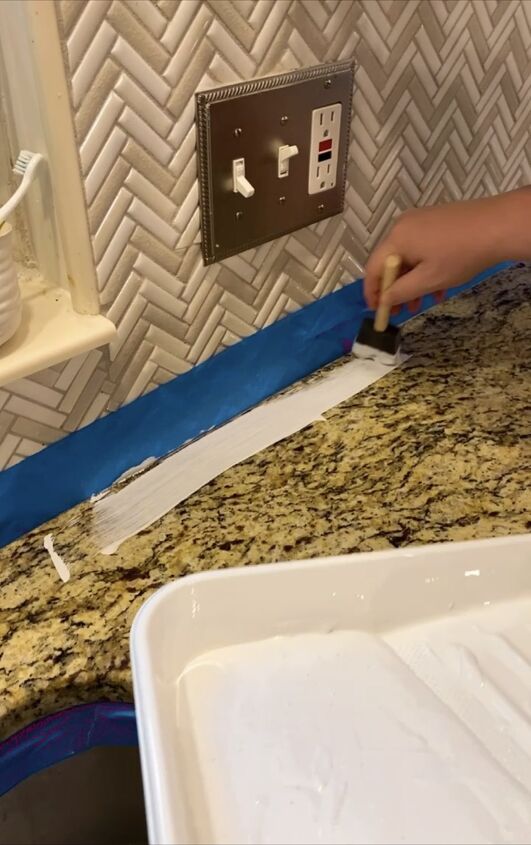
Work in 3-4 foot sections at a time.
Use the 2-inch foam brush from the kit to paint a strip along the backsplash. Then use the roller brush to paint over the remaining countertop in that section.
Make sure to overlap your strokes so you blend the lines more.
Once you cover that section, roll backwards over the pain from the backsplash to the edge of the counter. That is called back rolling and will help you make sure you do not have any paint pooling and you blend the lines.
More Important Tips
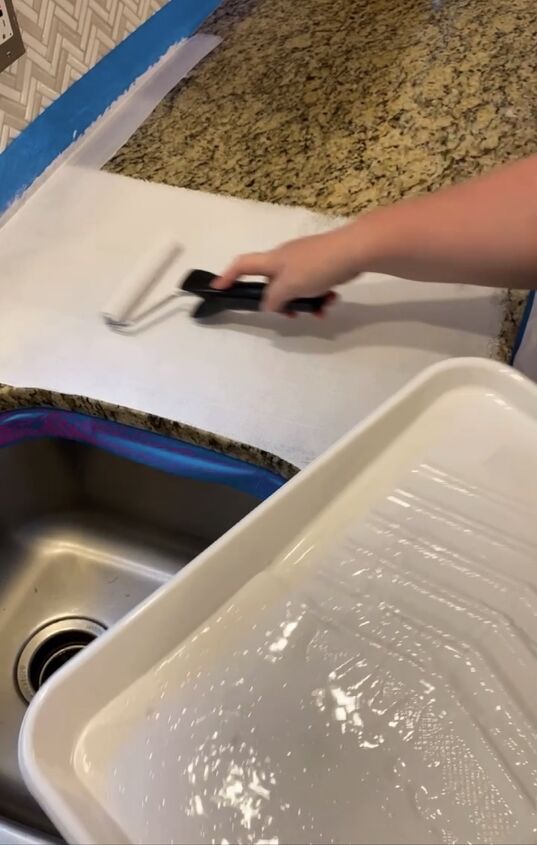
DO back roll every section as soon as you’re finished filling the 3-4 section.
DO NOT over work the paint. Once it starts to try, continuing to paint will mean sections may pull up off the granite.
DO keep an eye out for paint pooling on the counter AND the roller brush.
Make sure to roll over the edges of the counters to smooth pooling paint. Then dab the ends of your roller brush with a towel.
Continue Painting, 2-3 Coats
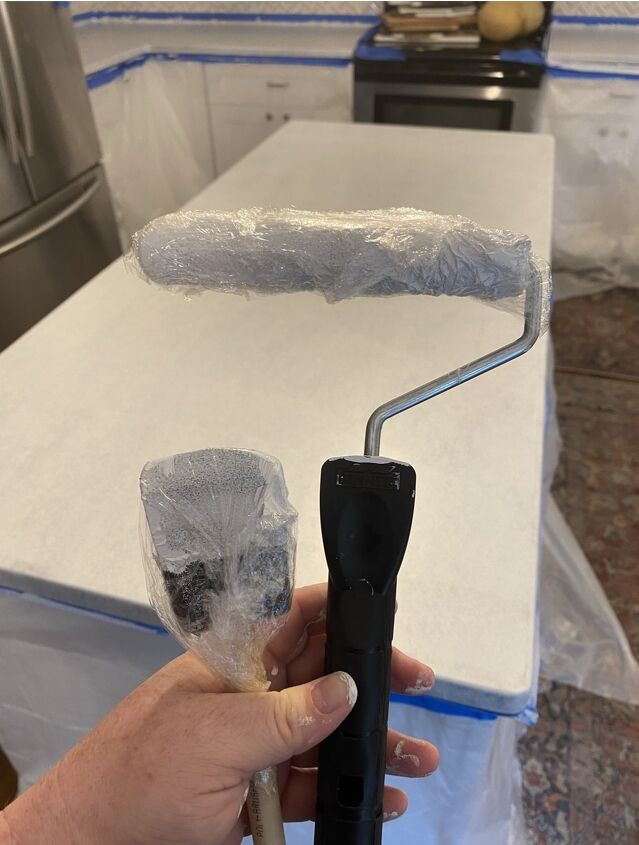
It will take 2-3 coats of white paint with a 4-hour waiting period between each coat.
If you need to pause for the day, wrap your brushes in plastic wrap and store in the refrigerator until the next day.
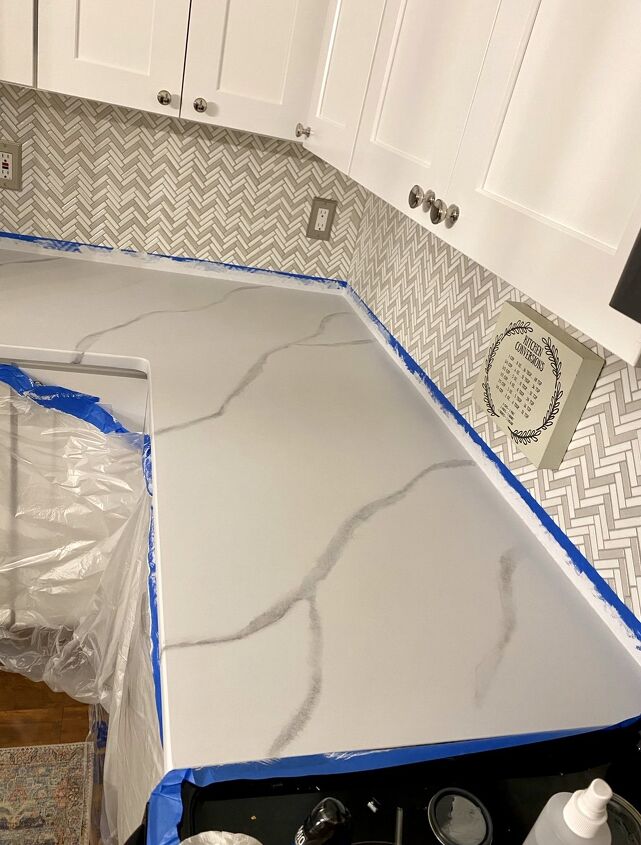
Paint the Grey Veining
I highly recommend that you watch the video tutorial again to watch the technique.
Then, practice on the white board provided in the kit. Try to map out on paper where you want your veins to go.
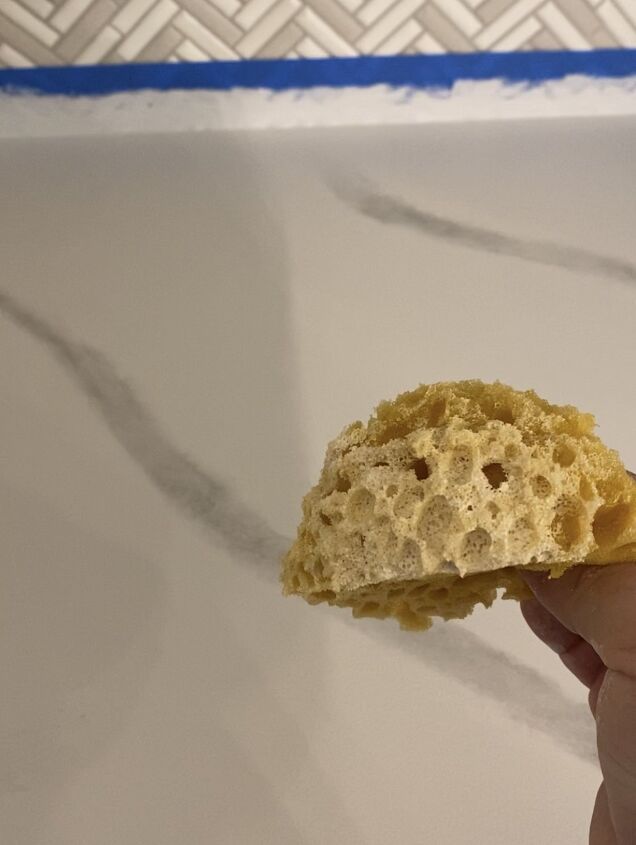
You’ll want the little spray bottle in the kit to be filled with water. Grab extra paper towels.
Keep in mind that once you add a vein, if you do not like it, you can spray water over it and wipe it away.
Use the small paintbrush to draw the veins, then the water and 2-inch brush to feather it out.
Tips On Painting the Veins
It is better to go back and add to the veining than over do it and notice after it’s dried.
If you decide that some of your lines look too fake, dark, or rigid, you can use the sponge and highlighting paint to feather and lessen the lines further.
Don’t forget to continue the veining on the front sides of the countertops.
Time for Epoxy
Make sure your surfaces are clear of all dust and small fibers.
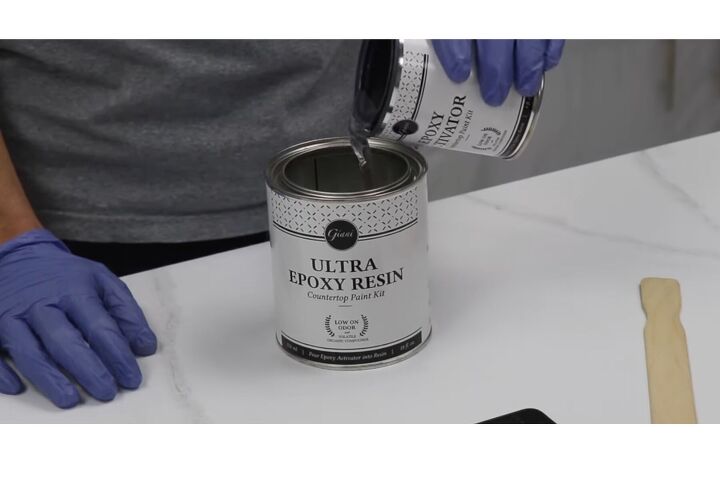
Pour your first can of Epoxy Activator into the first Ultra Epoxy Resin and mix it well using the stir sticks in the kit.
This mixture will cover a 6-foot long section of countertop.
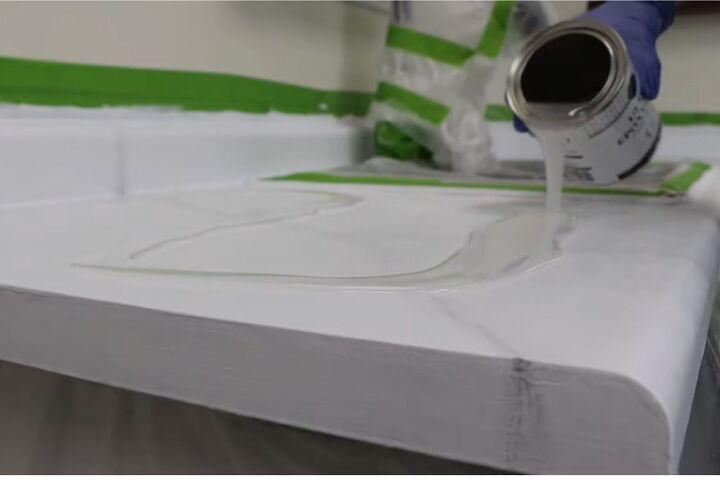
Apply Epoxy
Pour the entire mixture in 3 lines across your first 6-foot section, along the backsplash, across the middle, and then along the front edge of the counters.
Use the 2-inch bristle brush to brush the epoxy up the back portion of the countertop if it goes up towards the backsplash.
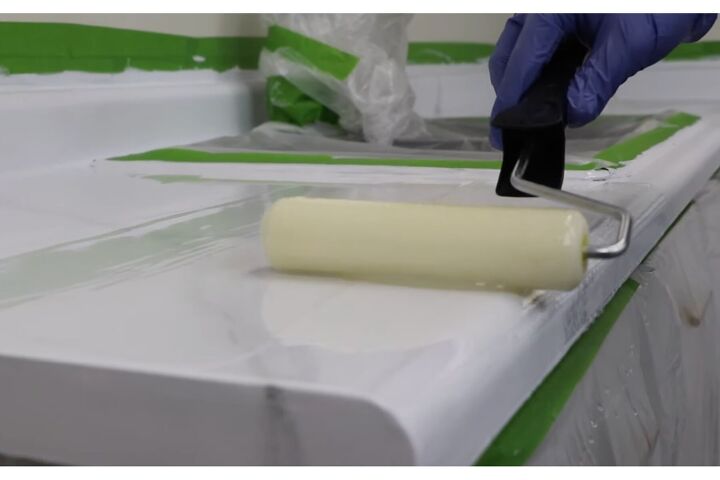
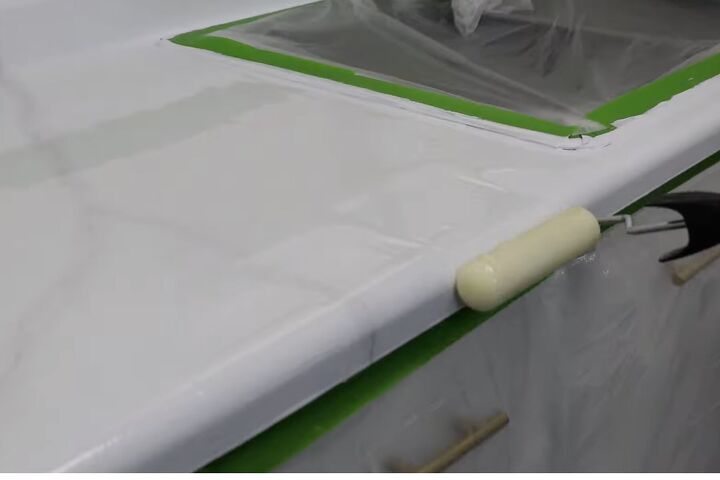
Then use the foam rollers to roll the epoxy across the counters.
Lightly grip the roller handle between your thumb and fingers so you do not press down too hard.
The epoxy is self-leveling, so do not over work it.
Lightly roller down the front edge of the counters.
Once you finish each section, use a bright light to look for any fibers in the epoxy.
Also, use a needle or safety pin to pop any bubbles that appear.
Repeat for every section of your counters.
Remove the painters tape between 1-2 hours of finishing epoxy application. THIS IS IMPORTANT! If you do not remove them between this time frame, you’ll either mess up the epoxy or be unable to remove the painters tape.
The instructions say to keep everything off of the counters for 2 days and everything heavy for 7 days.
I personally would recommend you wait the full 7 days before putting anything on them to allow them to fully cure.
Then, ENJOY YOUR NEW COUNTERTOPS!
Remember be sure to check out my Web Story of part 1 and part 2 ! AND you can find all of the sources for this room HERE.
So what do you think? Do you like how they turned out? Do you think you could or will paint some of your own counters? I would LOVE it if you tagged me on social media (@designofyourlife on all platforms) and/or comment below!


Comments
Join the conversation
-
I have used this product several times at different homes. I absolutely love it!!!! I am getting ready to contact the company about ordering a special "base" color. Done correctly, I do not believe you will be disappointed.


Frequently asked questions
Have a question about this project?
How can I paint my bathroom counter top I think it's made of granted?
Why would you paint a decent looking granite counter⁉️