


How to Paint Your Kitchen Cabinets, Step-by-step, With Cost Breakdown!

Are your kitchen cabinets outdated and a total eyesore? Not to worry, mine were too! Before you start to even think about painting your kitchen cabinets be prepared for the process. It is A LOT of work, but I am here to tell you that you can do it! I had watched lots of Youtube videos and read other’s blogs and have compiled all that I learned and experienced first hand to help you! This post is meant to help you through the process and hopefully answer any questions if you plan on painting yours! I have listed everything I could think of, and typed out the entire cost breakdown at the end of this post along with an update a year later on how the cabinets are holding up!
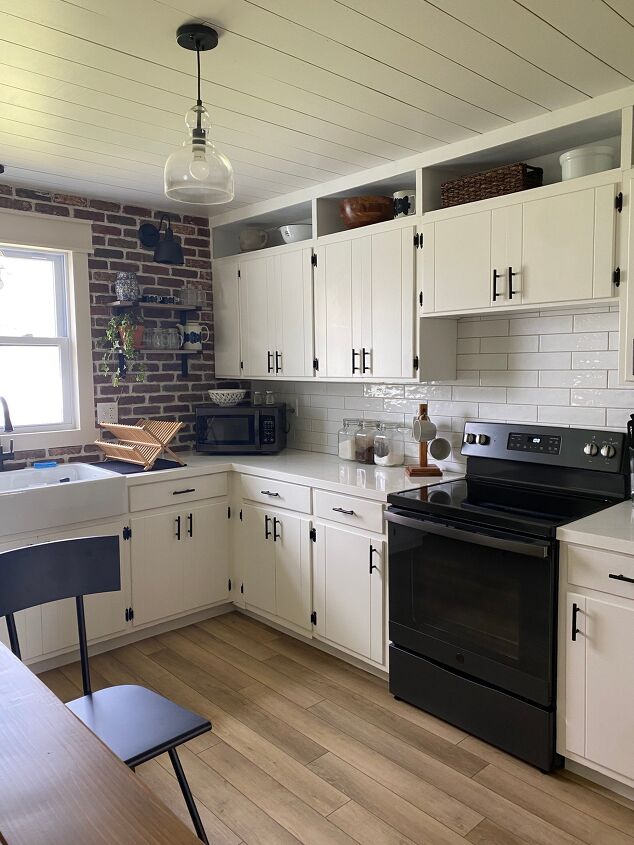
Here is the “before” of my kitchen cabinets! Yikes… I know! Painting my kitchen cabinets was the first step to updating my kitchen, and I love them! A fresh coat of paint and some new hardware makes such a difference!
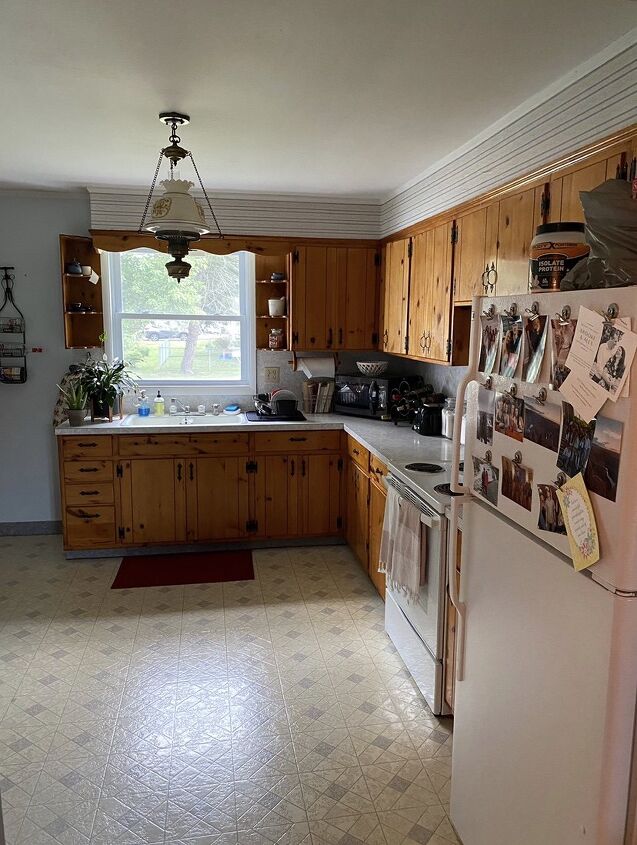
Yes, the whole kitchen is a hot mess. So much work to be done in here! First project is to get rid of those nasty cabinets! I believe the house was built in the 70s… and the cabinets look like they haven’t been updated since! Not only are they old but they had a glossy finish on them that I was mostly worried about getting rid of because I did not want any bleed through. I had painted my bedroom doors white a couple years ago and noticed some yellow bleed through, which I definitely did not want on the cabinets. After doing some research, this bleed through is a tannin from the wood. And to prevent this, the prep of the cabinets is the most important part!
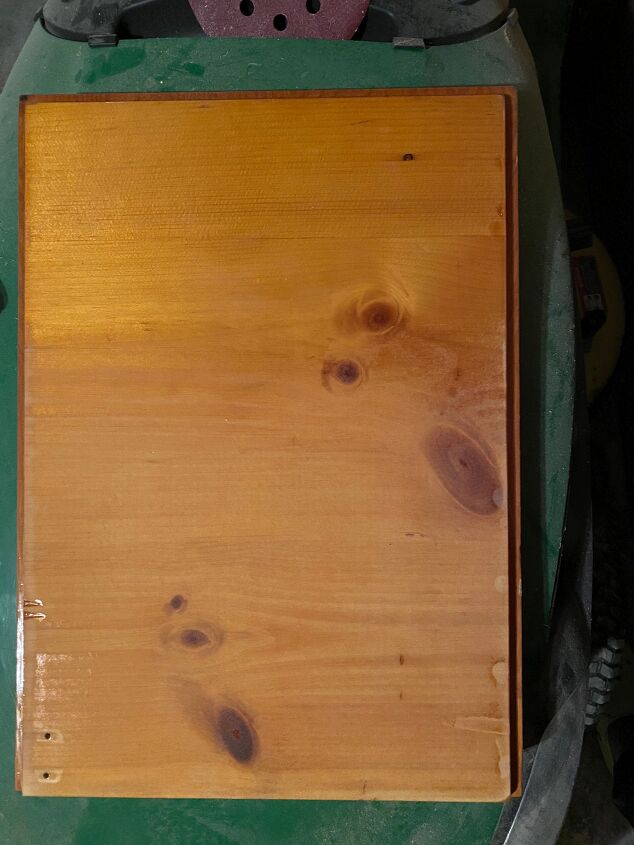
First thing I definitely recommend doing is taking one door down, and using it as a tester. I did this with the door pictured and it really helped me decide what process will work best for me! No matter how much research you do, there are a lot of different cabinets out there with different stains, paints, and finishes so it is worth it to take this extra step in my opinion. I took the picture of my “tester door” to show the difference between using a liquid deglosser and sanding down the cabinets with an orbital sander. The upper portion of the door is just using liquid deglosser, and it barely removed any of that glossy finish even after three coats. So, in my opinion sanding was a must. I skipped using liquid deglosser all together because in my opinion is was a waste of time if I was going to have to sand them anyways.
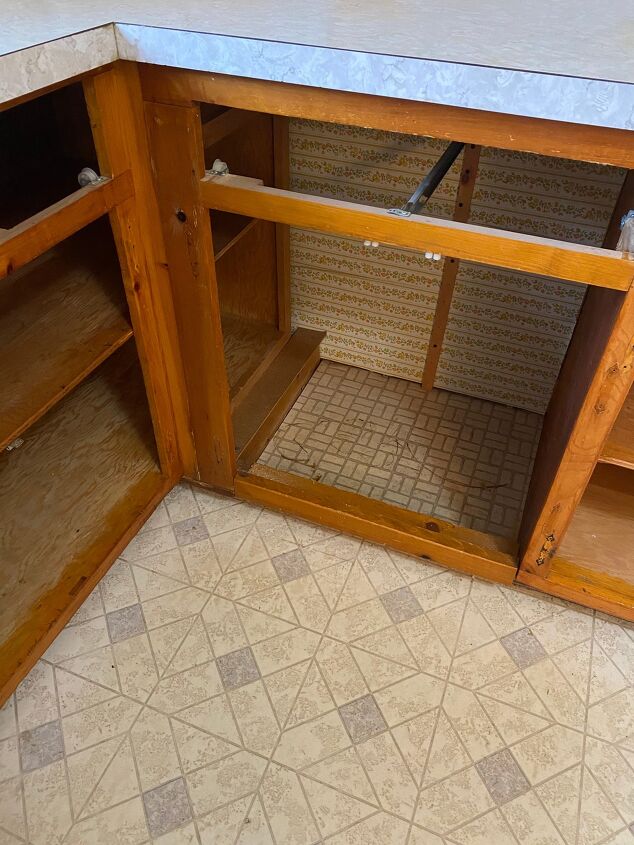
Okay, so after I did my tester door I felt a little more confident to start the process. First step, remove all hardware (hinges and handles). Keep in a zip lock bag if you plan on re-using them. In my case I knew I wanted new ones, so I threw them out! I went a little crazy during this step and started to completely demo my whole kitchen (got into one of those moods haha) because I knew it needed to be done eventually anyways. I ended up removing a cabinet completely and will be doing open shelving on that wall once my kitchen is complete. So, if you’re like me and need to demo anything, now is your time. I also completely took down the upper cabinet because in order to remove my old ugly laminate backsplash that was tucked under the cabinets, the cabinets had to come down. You definitely do NOT need to do this step, just leave them up! Just in my case it was easier to do this now, rather then after the cabinets were painted, because I knew I wanted new backsplash.
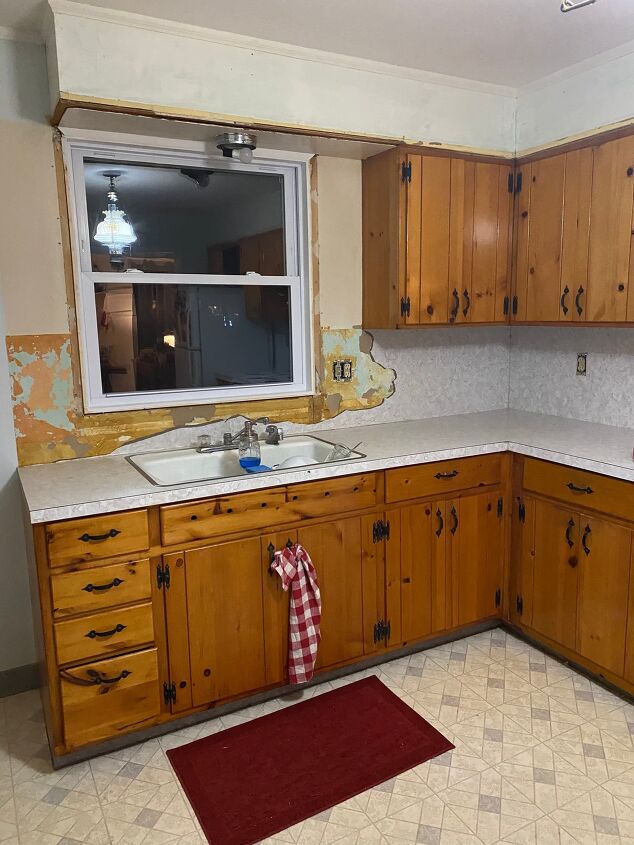
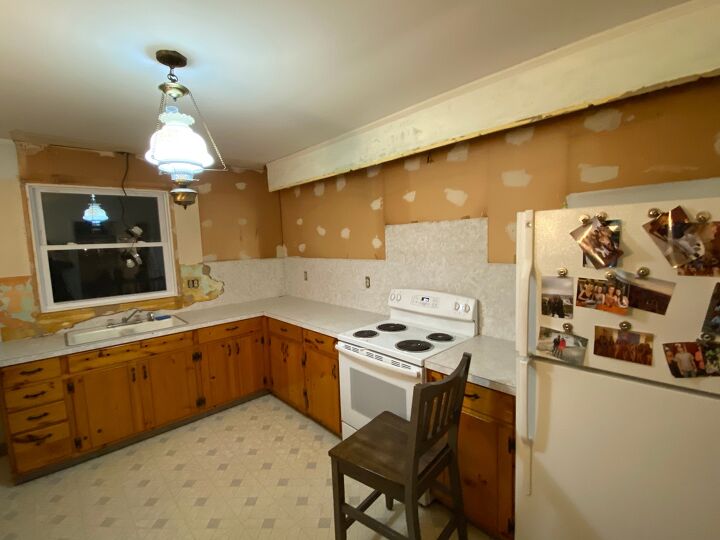
Here you can see where I began ripping the old backsplash out. Not pictured, I also tore down the soffits above the cabinets. Get all of your demo done now if you are also updating your whole kitchen. That way you don’t need to demo after and risk something chipping your brand new painted cabinets.
After the demo, clean those bad boys thoroughly! Get rid of all of that grease and grime. I just used Krud Kutter and dish sponges/rags from the dollar store and went to town!
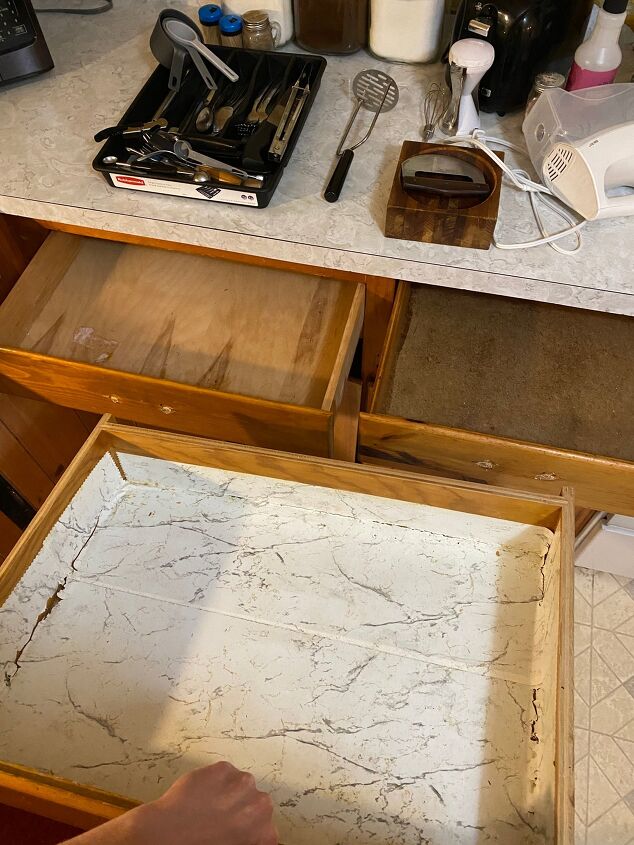
If you have any of this beautiful shelf liner (totally sarcastic) in your drawers, peel/scrape it out! Then clean thoroughly afterwards, this is the most time consuming, part but totally worth it in the end!
After you’re done cleaning every inch of those cabinets, time to fill any holes with wood filler. This will make your cabinets look that much better in the end! Especially if you’re getting new hardware and hinges, this step is a must.
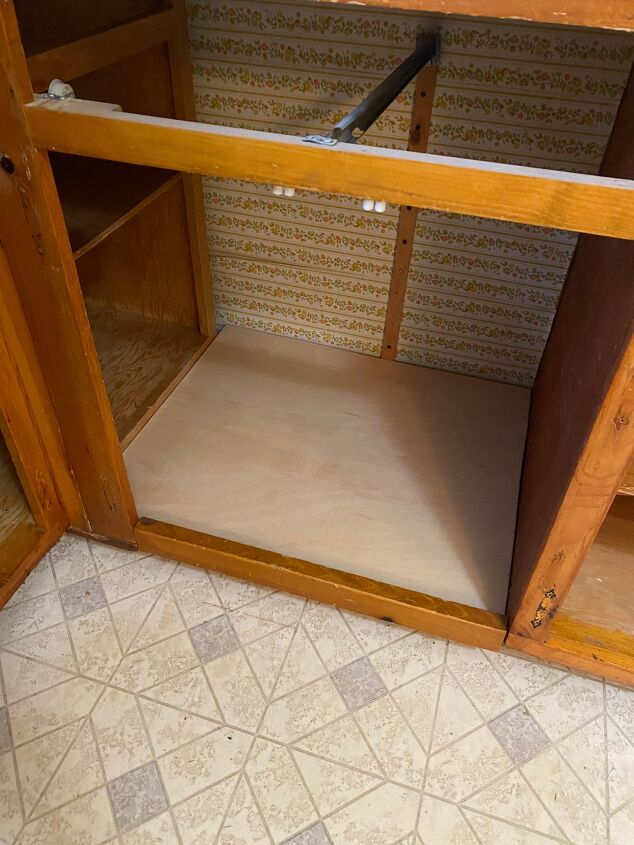
Next, replace shelving (if needed). You might be able to skip this step if it doesn’t apply to you. But I am attempting to be very thorough because I know I can’t be the only one with nightmare cabinets right?! As you can see pictured below this cabinet was just randomly missing a shelf. All I did was place a piece of plywood down, cut it to fit, and placed a thicker piece of wood in the back right corner underneath to support and to level the plywood out. I also removed that wallpaper in the back. Prepping the cabinets will take a while just be patient and remind yourself that it will all be worth it in the end, and that wine helps! 🙂
Okay, so after you are done cleaning, it is time to sand. I used an orbital sander with 80 grit sandpaper then 120 grit sandpaper to smooth out the surface. Because I didn’t know what finish was on my cabinets I wanted to be safe rather than sorry and sand that glossy finish off so that nothing bled through after painting.
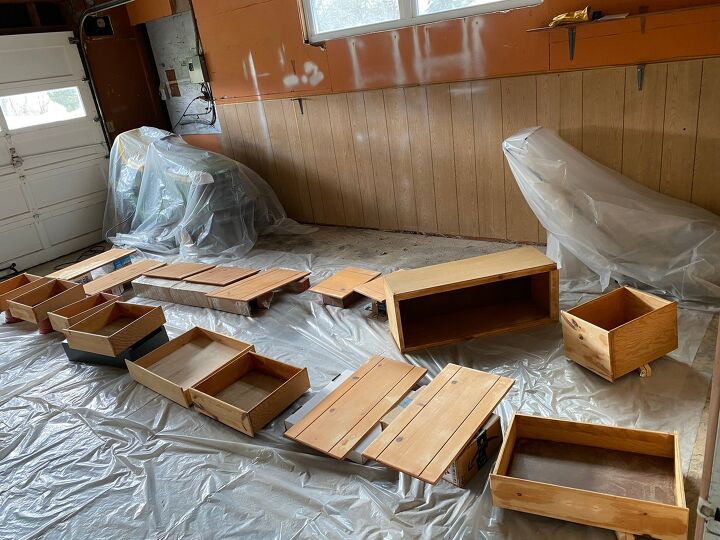
After sanding use a tack cloth to clean away any dust/debris. Then lay your cabinet doors and drawers in a well ventilated space. I chose my garage. Organize them in whatever way you will remember best. If you have a larger kitchen it is probably best to label each door with what cabinet it belongs to. In my case, I have a small kitchen and organized my doors left to right in where they came from in my kitchen. Do whatever works best for you and your memory haha. I placed plastic sheeting on the ground underneath and over my lawn mowers to try and protect them since I will be using a paint spray gun. I placed my cabinets on pieces of scrap wood mostly, and also used empty boxes and both of these options worked well for me and were free! There are also tripods you can purchase, which are a great and inexpensive option to prop your cabinets up as well!
As far as prepping the base of the cabinets goes. Follow the same steps, clean, fill holes with wood filler, sand, use a tack cloth to wipe dust/debris. I fully covered my kitchen with plastic sheeting because I used a paint sprayer and did not want any over spray going into the rest of my house or onto the appliances. This is when I started to think I was going to loose my mind in the process 🙂
Yay now you’re finally done with the prep work and ready to paint! First up, primer. I researched this step lots because once again I did not want any yellow bleed through! After lots of googling, I found Zinsser BIN shellac based primer to be by far the best primer option. I chose this shellac based primer because not only did it have amazing reviews but it will dry harder and be more sturdy long term than water based primers. It sticks to all surfaces, seals knots, blocks odors, and dries in 45 minutes! Sold! I bought a Wagner HVLP paint sprayer and applied my first coat. My biggest suggestion would be to buy a paint sprayer! It is 100% worth it! After all of the time you spend prepping those dang cabinets, trust me you will be thankful you bought the paint sprayer. I was not willing to spend tons on it, but $100 was worth it to me because I knew I would get use out of it in future projects as well. After your first coat dries, lightly sand by hand with 120 sand paper to even everything out and roughen up the surface again for another coat of primer. Then, use a tack cloth again to wipe away dust/debris! I am not going to lie, after my first coat I almost had a mental breakdown… I had some yellow blead through and almost just gave up completely. I was going to call Lowes and get a quote for new cabinets and just give up on the process all together because I was convinced it wasn’t going to work as well as I had hoped. But I took some deep breaths and a few sips of wine and decided to do another coat of primer. THANKFULLY, a second coat of primer was all they needed. No more bleed through. Phew.
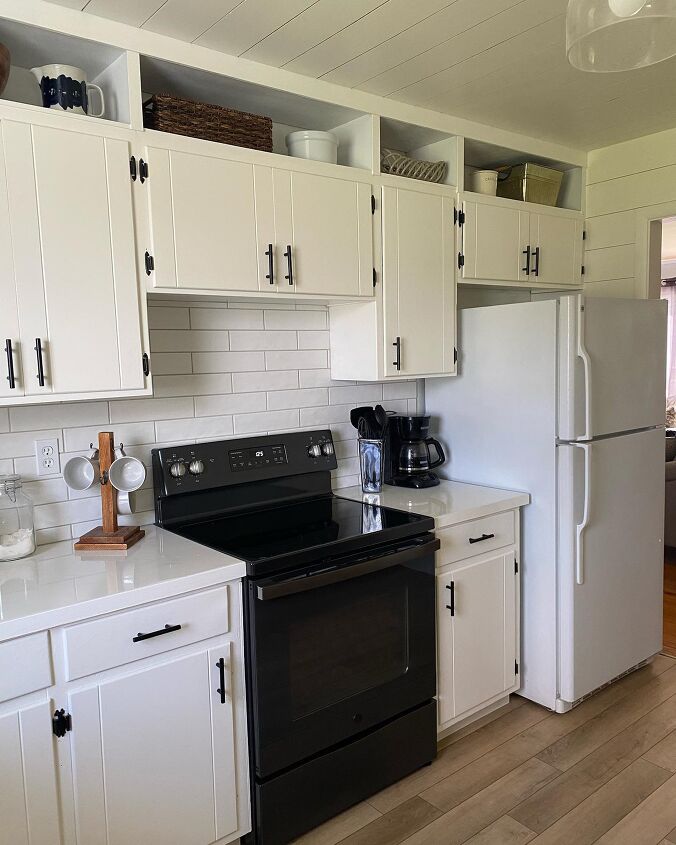
After two coats of primer, sanding lightly in between, you’re now ready for paint! I went with Benjamin Moore’s Cabinet Coat in Simply White. I also applied 2 coats with my paint sprayer, sanding lightly in between! After all of that painting you are probably exhausted, and rightfully so but you did it! Take a break and admire all of the hard work. Pictured below are my cabinets, don’t mind the torn apart walls, that’ll be the next project and blog post haha. I screwed my upper cabinet base back into the studs so that it is nice and secure! Another perk of using the paint sprayer is the finish. Notice there are no brush strokes, nice and smooth!
Last step! Put on your hardware! This is the fun part that really pulls it all together. I bought mine relatively cheap off of amazon, and went with simple matt black finished hinges and pulls!
I have come back to update this blog post one year later. The cabinets have held up wonderfully. I have only had one to two very small chips in the paint in areas that we have been rough on the cabinets. In this case I just dabbed a small amount of the cabinet paint on the chipped area and it was back to new! Totally worth all of the hard work. Hopefully this helped inspire you to paint your cabinets or answer any questions that you might of had. Do you feel more prepared now?! I sure hope so! For more DIYs like this you can follow me on my Instagram @abbbclark_homeee. Continue reading for a full cost breakdown!
Cost Breakdown (including tax):
Zinsser BIN Primer: $43.19 x 2 = $86.38
Benjamin Moore Cabinet Coat Paint = $72.35
Paint gun = $117.72
3M Sanding blocks x4 = $21.51
Painters Plastic sheeting = $14.02
Krud Kutter = $15.64
Dish sponges & gloves = $3.24
30 Cabinet Pulls = $29.15
Hinges = $41.02
Sandpaper = $21.56
Tack clothes = $4.83
Cost of Takeout = ??? 🙂
Total = $427.42
Resources for this project:
See all materials


Comments
Join the conversation
-
So beautiful!
-
Thanks for including the price breakdown; it’s really helpful 😻


Frequently asked questions
Have a question about this project?
Did you paint the insides of the cabinets the same color as the outside?