


Faux Wallpaper With Homemade Hand Stamp

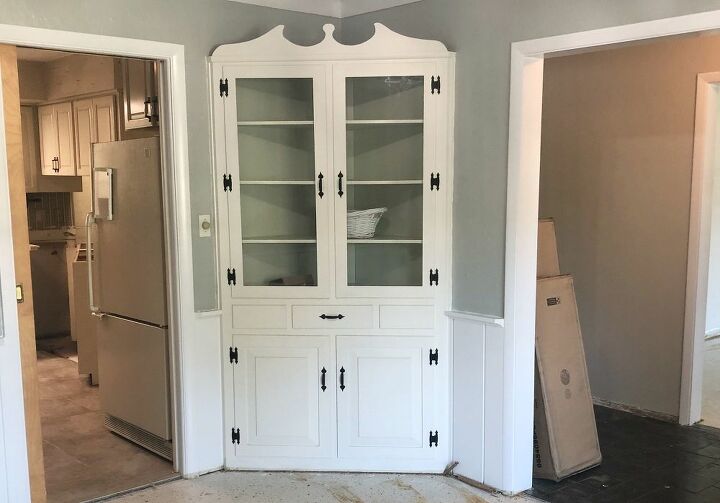
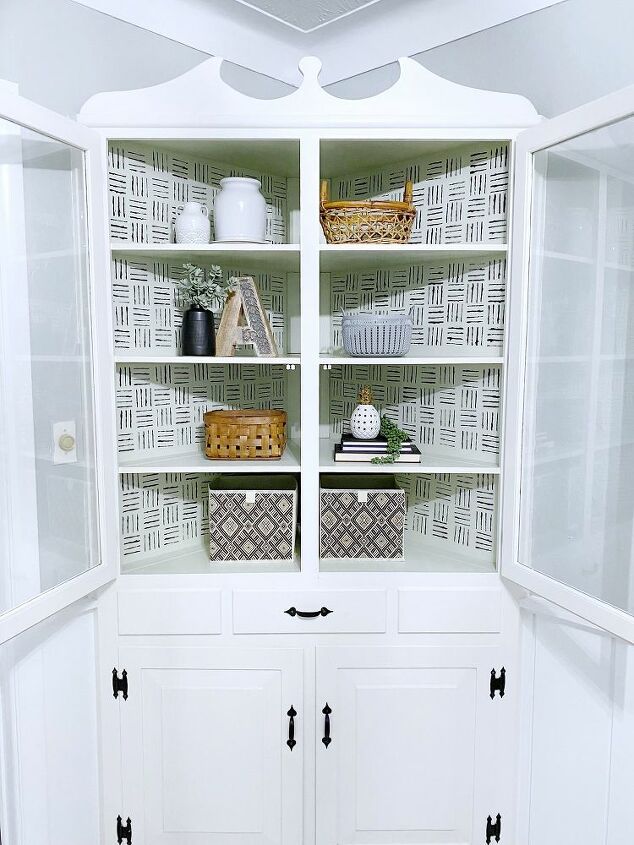
When we bought this 1960’s home I knew we would never use a formal dining room. Even with the original built-in china cabinet in the corner, I knew this space would make a perfect office. It never crossed my mind once to remove the china cabinet. I knew it would make great storage and I could dress it up to make it go with my style. I really wanted to cover the inside walls of the cabinet with wallpaper but never found a wallpaper I could commit to. I hopped on Pinterest and started looking at wallpaper and stenciling. Somehow I stumbled upon stamping which led me to hand-made stamps. I saw the idea to wrap rope or twine around a piece of wood and use it as a stamp. The rope was wrapped around the block of wood three times giving the look of three short lines. I loved it!
I recommend wiping down the surface you plan to stamp to ensure it is free of dust and debris.
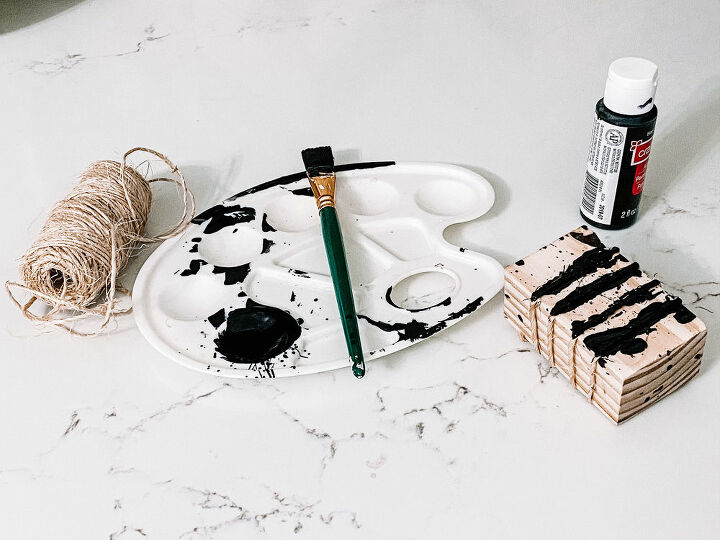
All you need for this stamp is a piece of wood, twine or rope, push pin, and paint. The size of your piece of wood and twine/rope will depend on how large you want the stamp to be. Since my cabinet walls were a relatively small space, I decided to use a scrap block of wood in my garage that measured 3.5"x2"x1.5" and twine. For a larger surface, like a wall in your home, I would recommend using a larger piece of wood and rope. If you are using twine like me, just tie it around one end of the wood, wrap it around the wood 2-3 times, use a push pin to secure the end of twine to the back of the wood block, and then cut off the excess twine. If you are using a larger rope, you may need to nail or glue the end of the rope to the wood.
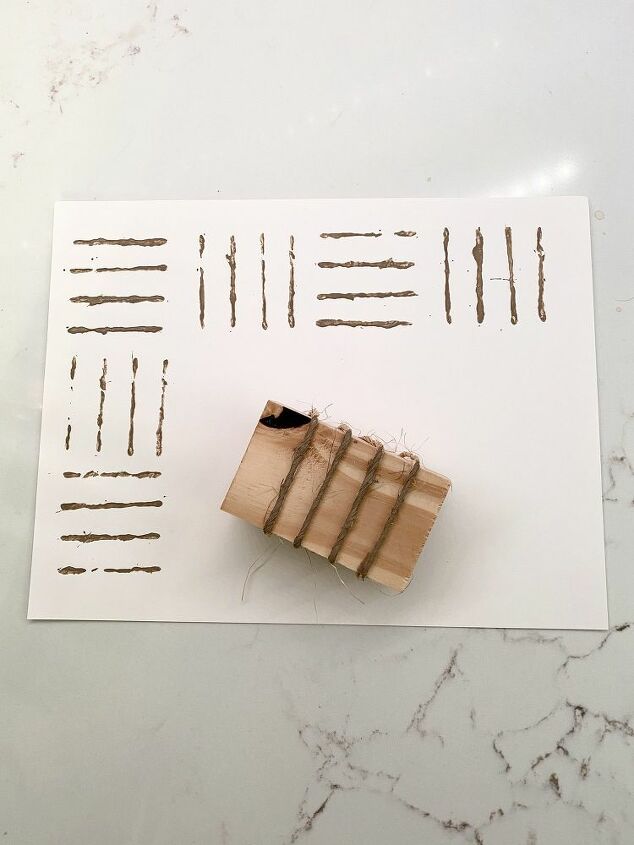
I decided to use leftover acrylic craft paint I already had. First I practiced on a piece of paper to get the feel for the stamp and to decide on a stamping pattern. I pressed the stamp with the rope lines vertical and then pressed the stamp with the rope lines horizontal right next to it and continued the pattern. The result was exactly what I wanted. It was modern and on-trend and I loved it!
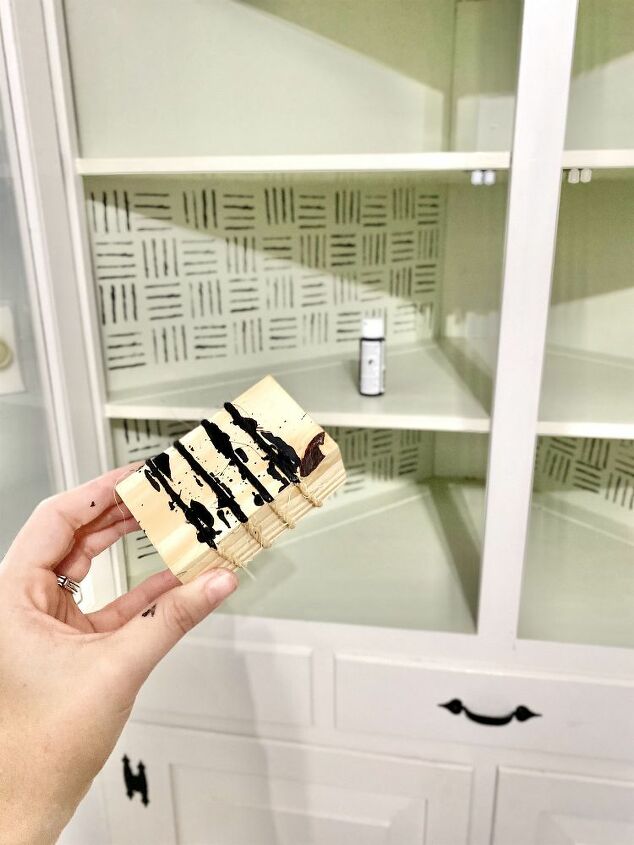
For a fear of getting too much paint on the stamp, I decided to use a paint brush and dab the paint directly onto the pieces of twine before stamping. You could easily pour some paint onto a paper plate, dip the stamp in the paint and stamp away. I alternated the stamp from horizontal to vertical in straight rows across the cabinet wall. I totally winged it without a level and it turned out amazing!
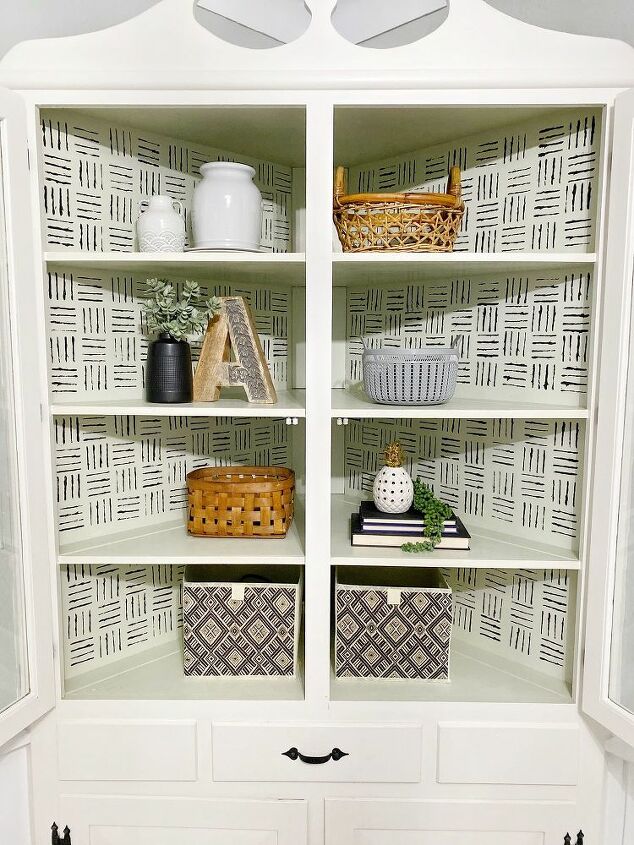
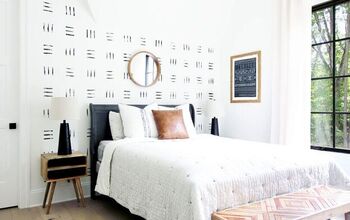
My favorite part about this stamping technique is that the pattern you get is totally unique. I could see this pattern working in any room of a house! For such a cheap and easy DIY, this transformation made a big impact. I am so happy I could bring new life and purpose to this tired, old china cabinet!
Resources for this project:
See all materials


Comments
Join the conversation
-
incredible...when i was a young teen, Mom let me pick out wall paper for my room. i found a gray background with darker gray lines just like you made, only with 5 lines. Loved that wall paper and never saw the design again except when i would doodle it. thanks for reminding me. will find a place to do this pattern in my home. mj
-
That setup with that corner hutch fits into that corner with all the white wainscot, with the chair rub rail, would fit in a corner of our dining room perfectly.We have a curved oak breakfront sitting in that space now and we both like it,but all that bright white sure lightens up that room.Our trim is oak and matches our dining room set,the breakfront,and I,ve been looking for the'just right'oak corner hutch.I'm thinking maybe come spring,I'll make that hutch,but in oak.Put in oak rub rail with off white wainscot.Finish the top in a nice light contrasting shade.


Frequently asked questions
Have a question about this project?
How did you get the pattern to come out evenly?
Yes with probably different design but great affordable idea. Was enormously inspired as well, ALSO with displayed corner cabinet which does not seem to take up as much room in either kitchens or dining areas. Beautiful design! Is this shared as well? If so, Please send this to stracy4evr@yahoo.com Thank You!
Did you mean extend by 30 cm or 30 mm?