


How to Recover a Chair: Step by Step DIY Guide
Follow this how-to guide for reupholstering a chair and keep your sanity! I’ll show you exactly how I gave these old dining room chairs with curved backs a beautiful makeover.
I gave two chairs of my mother’s dining room set a makeover with vintage mailbags. I learned so much from doing this DIY upholstery project myself, and I am here to show you all how you can tackle a DIY project like this too.
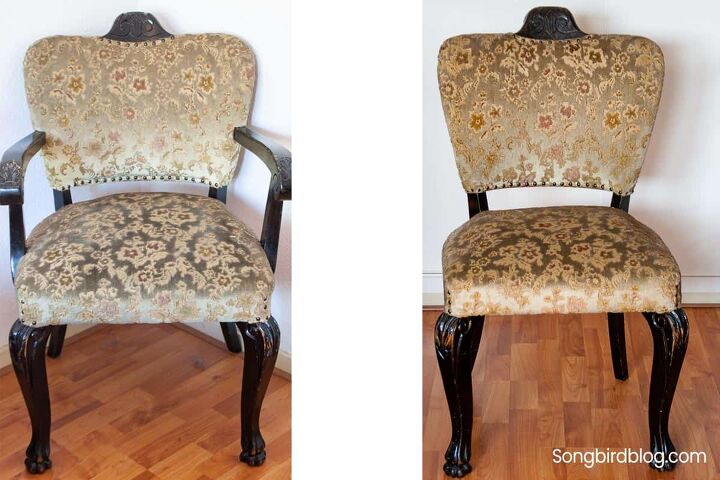
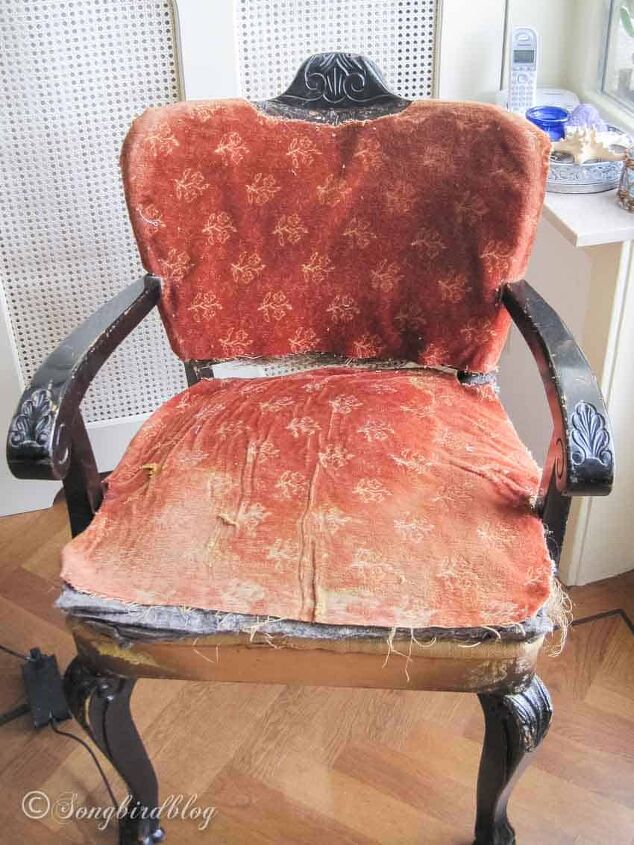
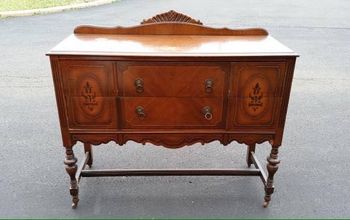
When I got the chairs they looked like this.
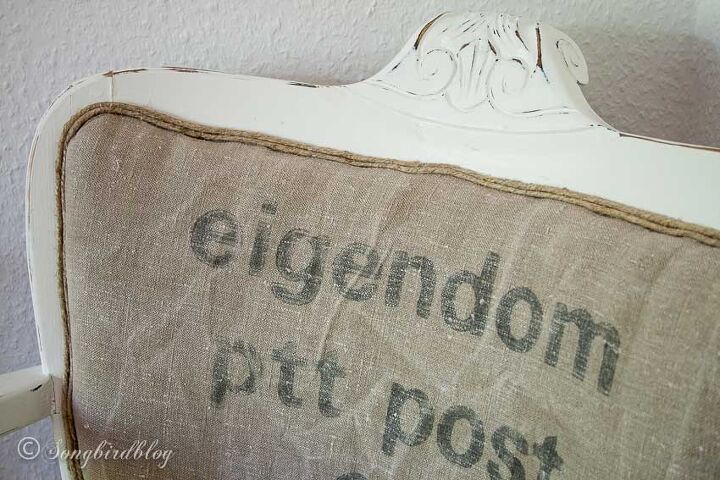
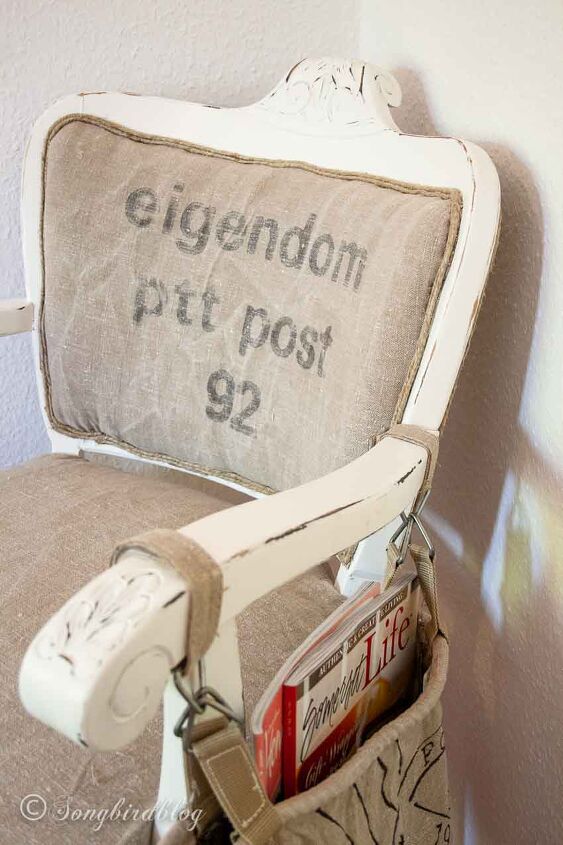
The vintage mailbags have the text ‘eigendom PTT post’. Eigendom means property of, PTT stood for Post Telephone and Telegraph and used to be our States’ postal service. Then we got TNT for a while. And now the company has a different name again.
The slightly less old TNT bags were used for my second chair.
Before you start the chair makeover
Tools you’ll need
- Screwdriver (works) or an Upholstery Staple Remover (works sooo much better), pliers
- Hand stapler (works) or an Electric Staple Gun (way better), staples (order more than you’ll think you need)
- Bread knife (works) or an Electric Knife (easier to use)
- Optional: painting supplies
Materials you’ll need
- Durable fabric of your choice (measure the current material, add at least 20% and you’ll know how much fabric you need. Add a bit extra if you are working with patterns).
- If your chair has springs you’ll need upholstery grade burlap
- Very sturdy cardboard or plywood if you need to replace the curved backing
- Foam rubber padding (thick and dense)
- Medium density upholstery foam
- Upholstery grade batting
- Spray adhesive
- Marker
- Upholstery tacks, jute rope, piping, twine or trim
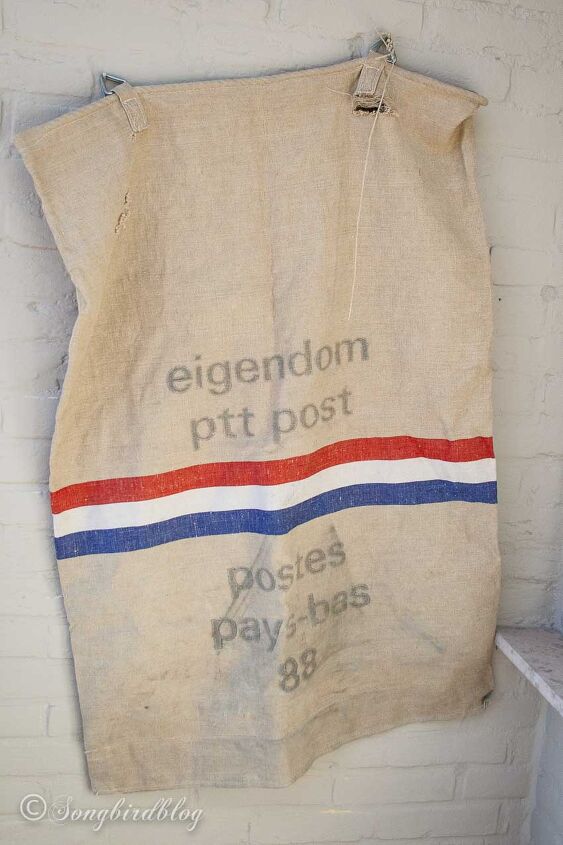
This is what I mean with a mailbag:
It is not the bag that is used to deliver the mail to your house, but they are bags that are used to collect the mail from the public mailboxes and to transport it to the distribution centers. The one you see here is another vintage mailbag I have and intend to use on another chair.
Choosing your fabric
Seat covers have to endure a lot of wear and tear. Unless you are planning on giving your chairs a frequent new look, it really pays off to use upholstery grade fabric for recovering the seats and back of your chair.
Fabric stores and upholstery stores generally have a nice selection. But you can also different types of fabric that are sturdy like grain sacks, drop cloth, denim, or as I did vintage mailbags.
To resolve any confusion of the non-Dutch readers of this blog.
My step-by-step guide for reupholstering chairs
Step 1 Remove the fabric
Removing the old fabric is the logical first step when recovering a chair. Start with visible upholstery tacks and move on to nails and staples. It might be tempting to try to rip them out by pulling on the fabric but trust me, those nails and staples are much more resilient than your fabric.
Besides if you can get the fabric piece more or less intact, this will come in very handy in a later stage because you can use it as a template for your new layers.
I used a screwdriver and pliers when I removed the fabric from the first chair. It made the job really hard, tiresome, and actually painful.
And the inside was quite impressive:
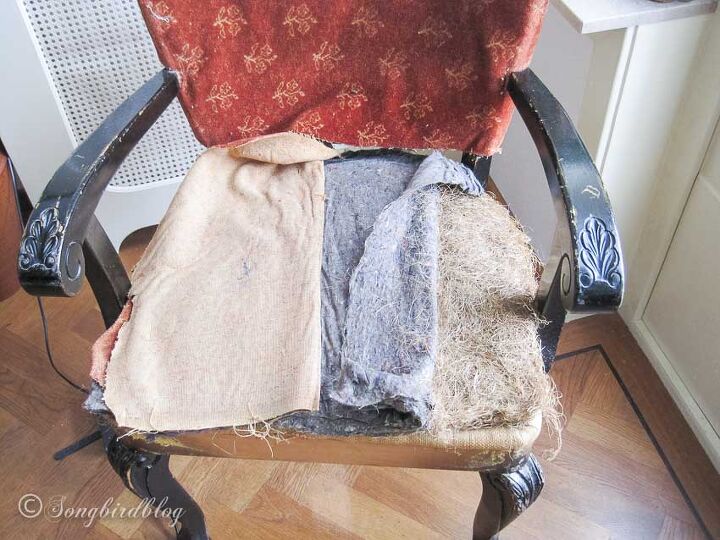
The stuffing was some kind of seagrass, and underneath I found a little surprise from the upholsterer before me.
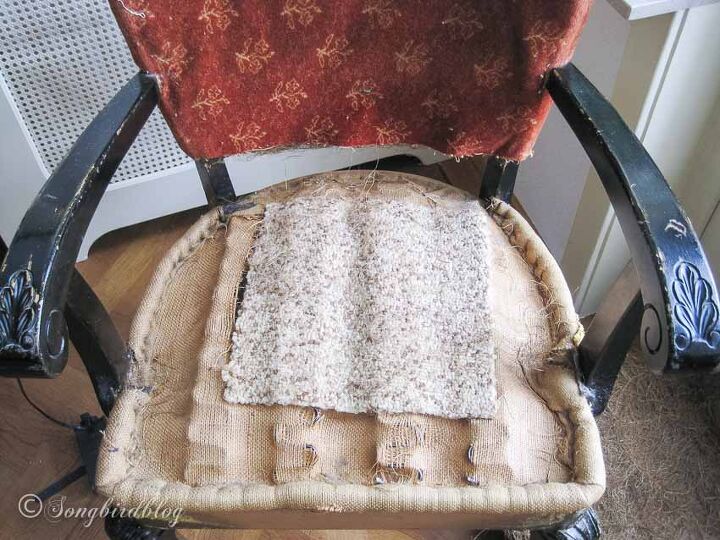
The burlap that covered the springs apparently was torn even then so he put a piece of carpet over it to cover it. But even with the carpet that burlap was beyond rescue. So it had to come off.
Which meant more nails…
The next step is optional. I removed the cardboard that covered the curved back too. I wanted to paint the chairs and this made that much easier. If the cardboard (or plywood) on the back is in good shape and not in your way, you can leave it on.

Step 2 Refinish the chair.
With all the materials removed from the chair, you are left with the bare frame. This is the time to reassess what you have to work with. If armrests or legs are wobbly this is the time to repair them. If the chair needs repainting this is also the moment to properly paint the chair.
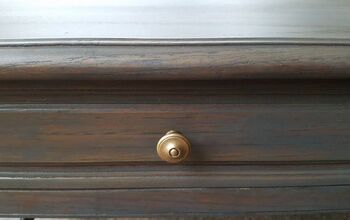
I opted for painting my chairs. The dining room chair with armrests got a nice white makeover, and the other one was painted black. At this step, my chair looked like this: a bare frame with fresh paint.
I consulted an expert for the next step. I bought all my reupholstery materials at a specialty store and the owner was kind enough to tell me exactly how to do it and he even drew me a little sketch and gave me lots of tips.
Step 3 Rebuilding the chair seats
Covering the seat springs
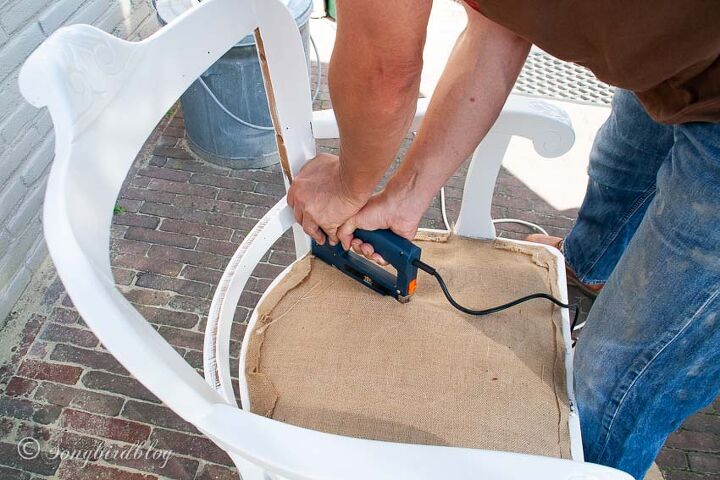
My chairs were old and had springs. So I really had to work my way up to rebuilding all the necessary layers of the seat. If your chair is more modern and has a wooden base, you can skip the first burlap layer and go straight to layer two.
But I had to first cover those zig-zag springs with new burlap. I used the old seat fabric as a template to cut it to size.
Layering the seat cushion
To make the chair comfortable you’ll need a very thick and dense layer of foam. Make sure you ask for firm furniture foam, especially when you have a seat made with springs.
To cut the new foam to size I used two steps. First I cut it roughly to the right size using the old fabric as a template. Then I put it on the chair to make markings for the precision cuts.
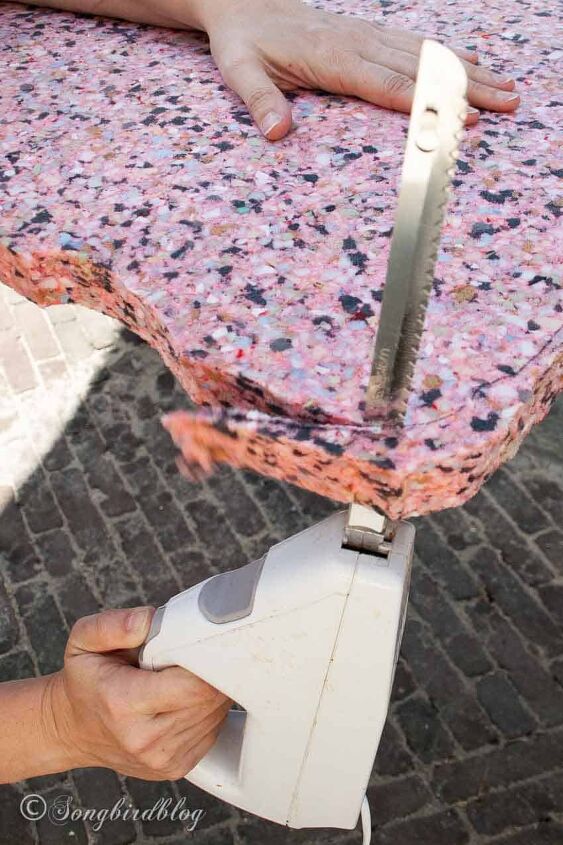
I used spray adhesive to attach the foam to the burlap seat. But not before I had used the foam to draw the template for the next layer, a thinner and more pliable foam.
Go to the original post (link at the bottom) for all the details about the various steps. And my two top upholstery tips from a real pro!!
Step 4 Putting the fabric on
This picture is obviously taken later in the process but shows what I did.
Fold under the edge and staple really close to the edge.
I followed the line of my sticky tape to make sure I went in a straight line.
To make the corners in the fabric I made small pleats. In order to make sure I could round the corners nice and tight, I carefully cut away some of the excess fabric with scissors.
If you are working with a fabric with a pattern you have to take extra care that your fabric goes on straight. Take your time with this step.
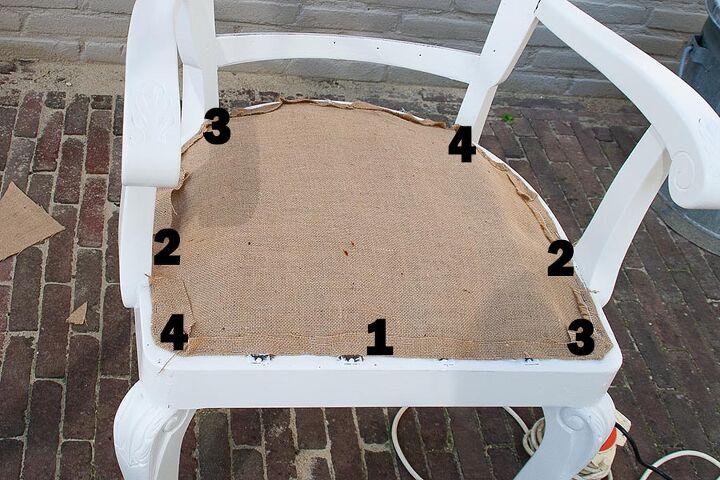
When stapling the outer fabric to the seat this is the order to follow:
Notice that staple number two is not centered on the side but at the point where the armrest is attached to the seat. This is an important instruction for when you are reupholstering a chair with arms! Staples 3 and 4 are exactly where the back is attached to the seat.
When you have these first staples in, it is time to fill all the gaps with lots of staples. Lots of staples! You really will need an electric stapler for this. Stapling through several layers of fabric into the wood is tough and hard work.
How to reupholster a curved back chair.
Now that the seat is done it is time to recover the back of the chair.
The back of the chair is actually a lot easier and requires fewer layers and steps.
The backside of the chair back got only covered with fabric, so after painting the frame I just reattached the cardboard and stapled a layer of fabric to the back (I used the cardboard as a template) with folded in edges.
The front of the backside got one layer of the middle (whitish) foam cut the same size as the cardboard and glued on.
The order to staple the fabric to the curved back is different than the one for the seat. Because the back is curved you’ll need your fabric to follow that curve. So use the diagram in the post for stapling the fabric to the curved back, working top to bottom.
Adding the finishing touches to your chair
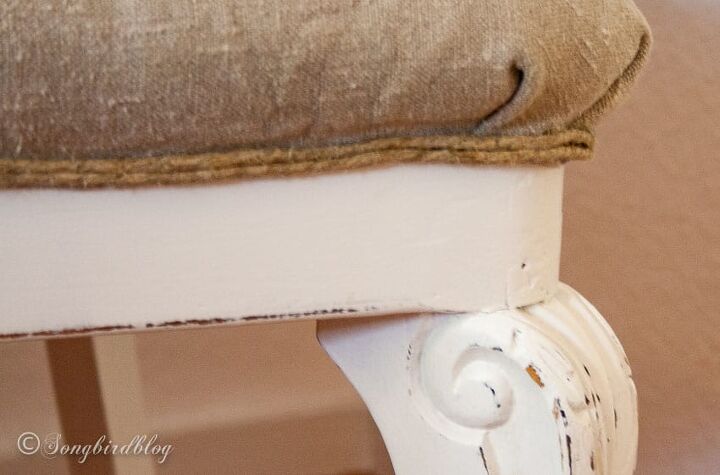
Now that all the real work is done the final and most fun part of the whole chair reupholstering project can begin. You’ll need something to finish off the edge of the fabric.
Originally they used a row of upholstery tacks. I like that look and now that they sell upholstery tack strips it isn’t even that hard to get a neat straight line with them.
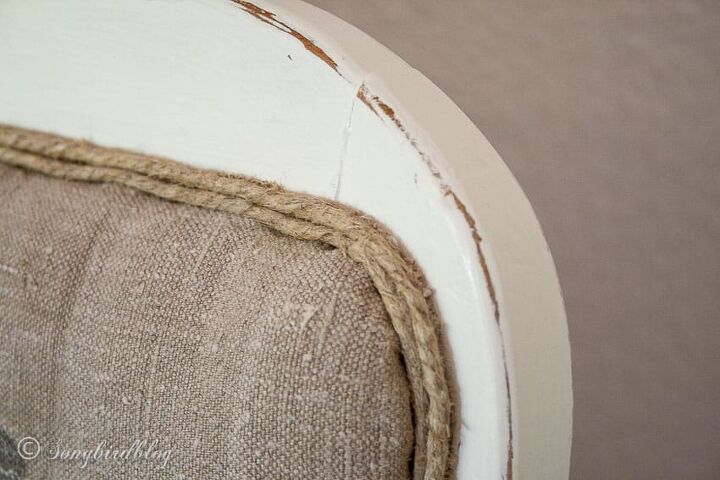
But I felt my vintage mailbags needed a bit more rustic look. For the white chair, I used a very thick jute rope to cover the edges. I attached the rope with fabric glue. I went around twice.
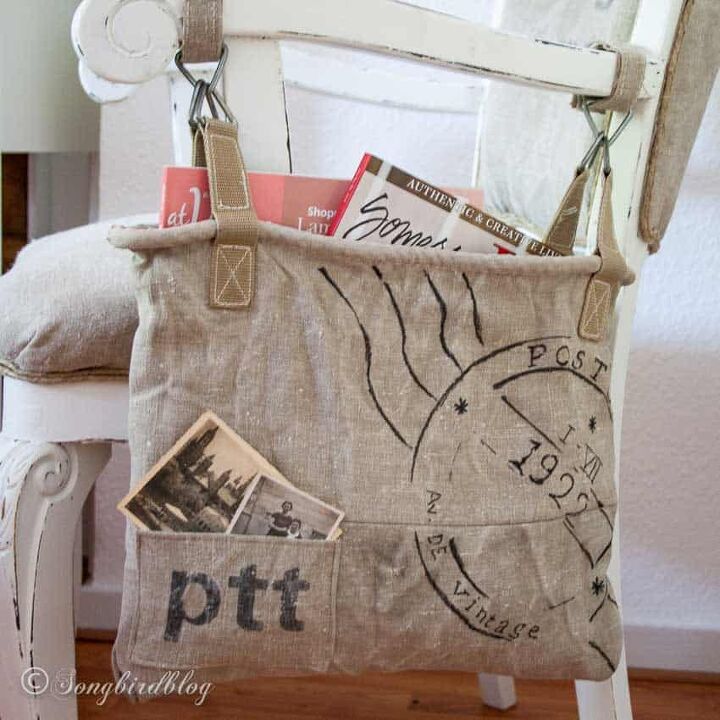
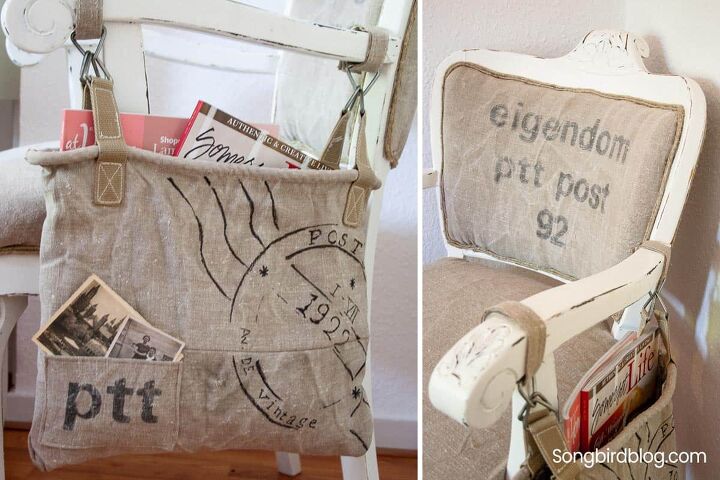
After the basic reupholstery of my postal bag chair was done, I had some material left. So I decided to add one more finishing touch to my chair.
I made a postal bag for my postal chair…
I used leftovers to sew a basic bag, added a little pocket and freehanded a postal stamp on it. I think it turned out really cute.
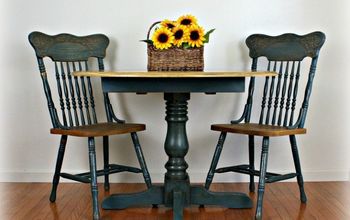
If you like furniture makeovers like this. Then check out
how I turned in indoor kitchen table into an outdoor patio table,
and
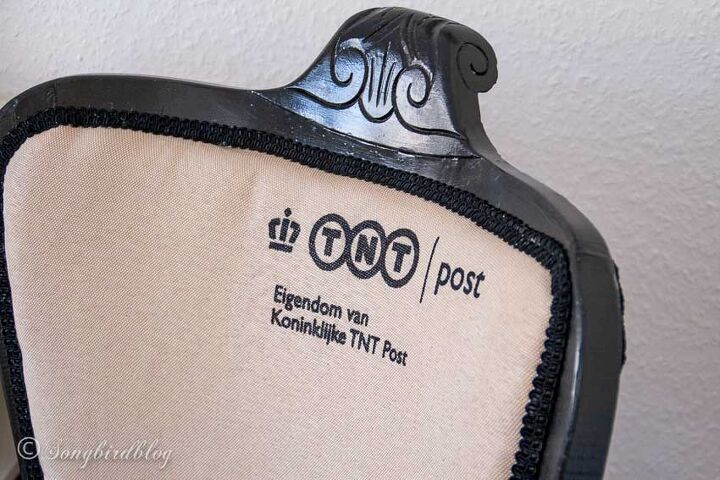
The mailbags I used for the second chair are a little less vintage than the other ones. In fact, they are quite new. But I thought they would be perfect in my craft room.
The material is a kind of plastic/ canvas mix and I am hoping that I can wash stains right of and I’m sure threads and floss will not stick to it.
Funny, in the Netherlands TNT could call themselves a Royal company for a while.
Since this chair will stand in front of my desk, I made the back extra special. Quite the makeover isn’t it?!
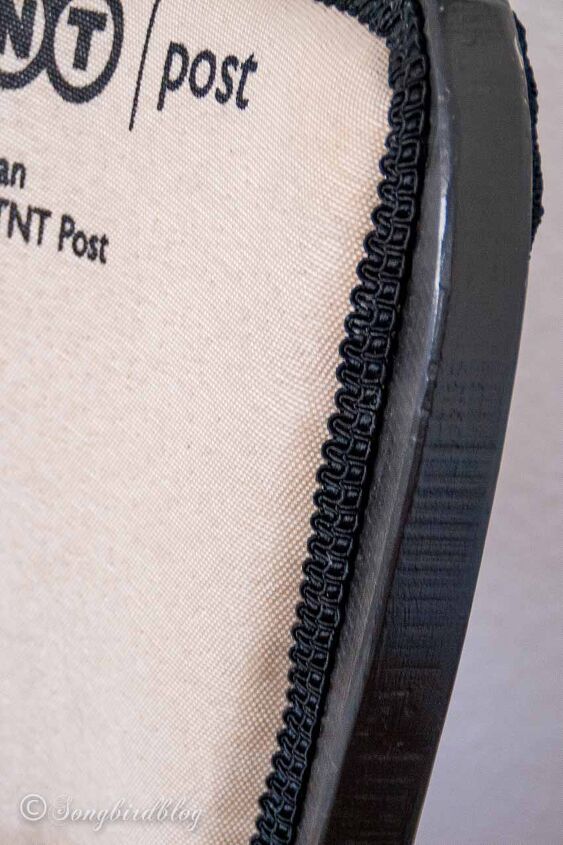
For the black chair, I glued on a black decorative ribbon to finish the edges.
This held up really well. (I did this project about ten years ago and the chairs look as good now as they did then).
I did a little distressing on the white chair and that was that. She was finished!
And here is one more before and after look of my chair makeovers.
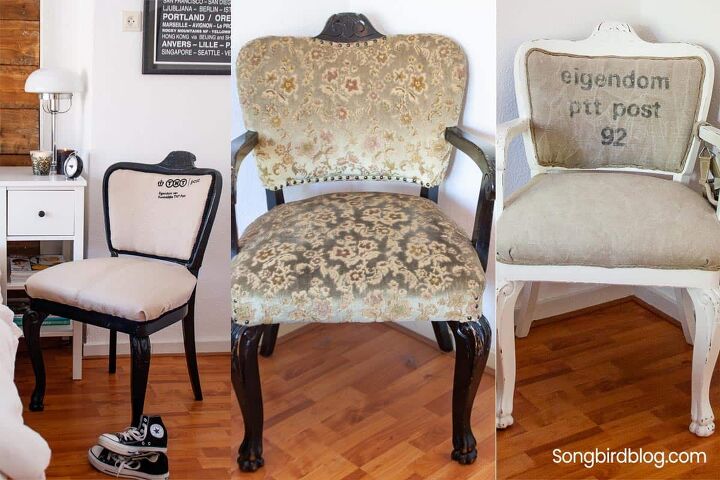
One last look at the before and after of my mailbag chairs.
Quite an impressive makeover don't you think?


Comments
Join the conversation
-
The mail bags are made and used in the Netherlands. I noticed that this was not reported, I am from the Netherlands so I'm proud of the mail bags !
-
I'm excited to see this. I have my great grandmothers antique rocking chair which is wooden and upholstered, and I have been dreading starting the reno process. But this gives me hope that I can do it. I got an estimate from an upholstery company of around $600 and I just can't do that. Your suggestion to use an electric stapler is brilliant. I'll get one tomorrow! I hope you can let me know how to find the link you mentioned, to find out more details. I've looked everywhere for it.


Frequently asked questions
Have a question about this project?
Where is the link you mentioned? I dont see it.
I LOVE the postal-bag that you made!! Do you have a tutorial for making these..?