


How to Reupholster Dining Room Chairs (using Only FOUR Supplies!)

A step-by-step tutorial on how to reupholster dining room chairs yourself! Using only four supplies, this tutorial is quick, easy and perfect for beginners.
I completed this dining room chair Facebook Marketplace flip about a year ago. I got this set of 6 chairs for $10/piece. They are solid wood and well built. Much better than anything I could find in that price range brand new. However, with most Facebook Marketplace finds they were dated.
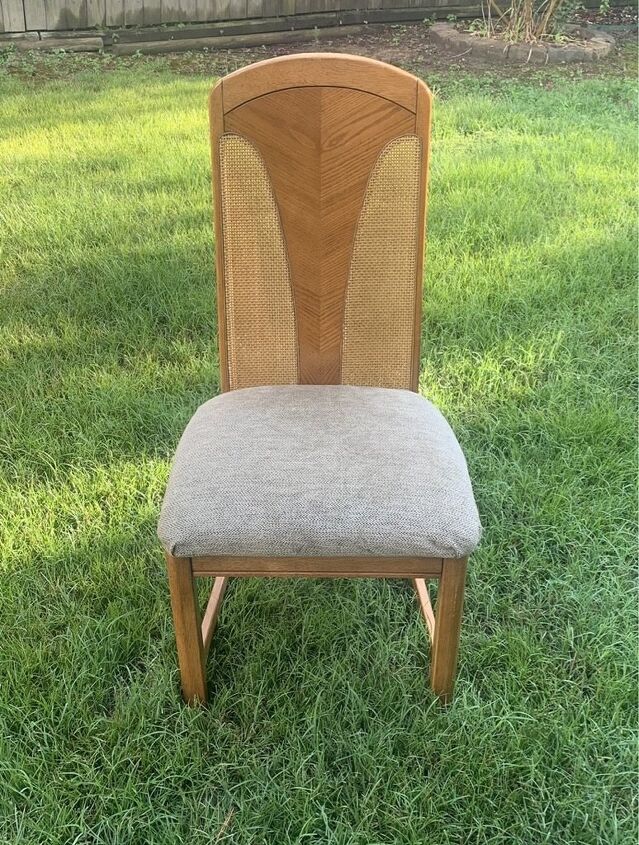
The chairs and the table I also got second hand did NOT go together, so I knew I had to work a little DIY magic to achieve cohesiveness. I had so much fun refreshing the table and chairs the first time. But to be honest, despite the fun, refinishing furniture is a LOT of work. After the big reveal,I settled with well enough and enjoyed the dining room for about a year just as it was.
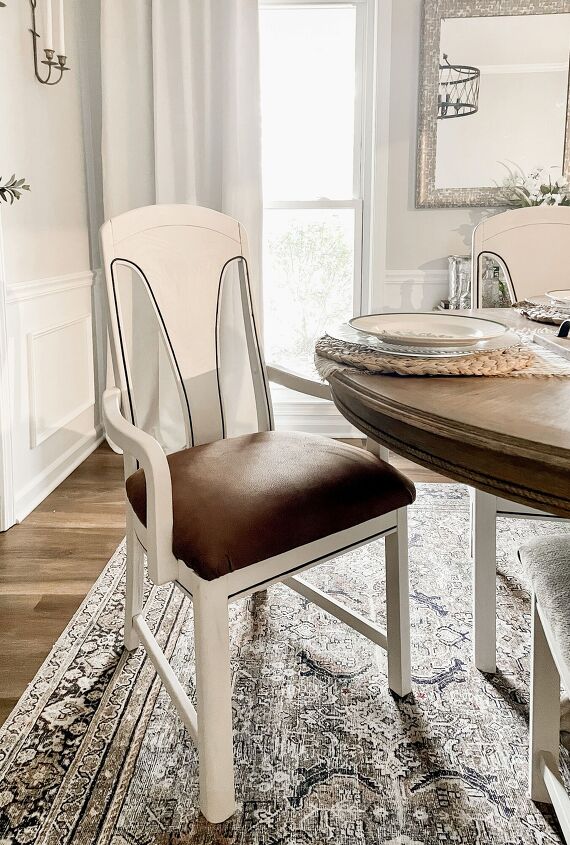
For better or for worse, something you should know about me is I can never leave well enough alone. My wheels started turning, thinking about a phase two dining room refresh. I thought adding wall moulding would bring character and elegance, so I installed DIY picture frame moulding and wrote a step by step tutorial here. Project #2 was reupholstering the captain chairs! I’m going to walk you through that process today.
This post contains affiliate links for your convenience which may reward me in the event of a sale. Note that I only recommend tools and products I have personally used and loved.
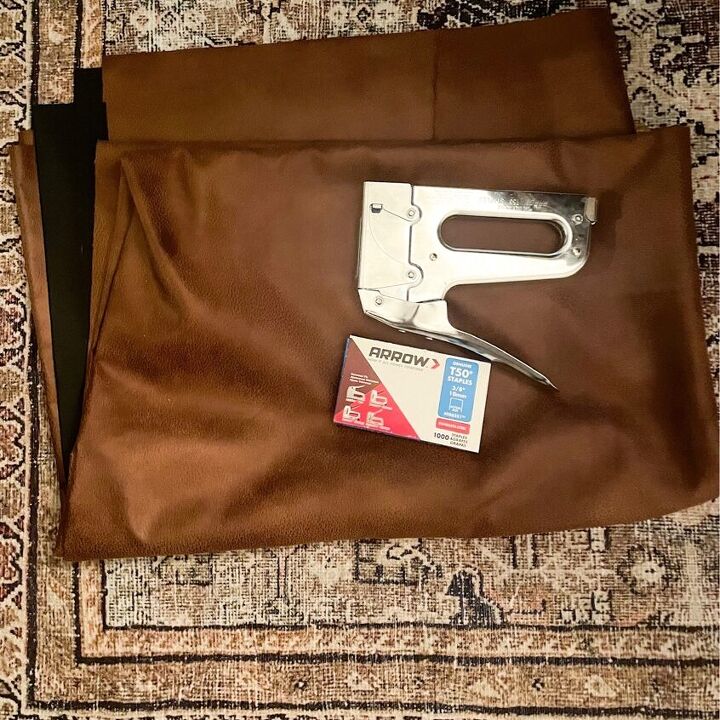
SUPPLIES TO REUPHOLSTER YOUR DINING ROOM CHAIRS
– Fabric
– Staple gun
-Screwdriver
-Scissors
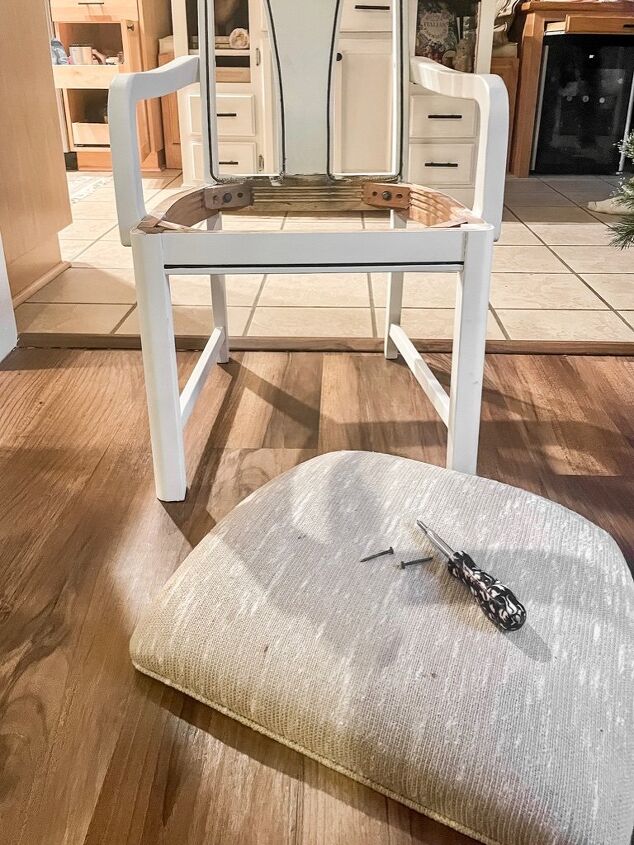
STEP 1: Remove cushions
I’m not sure if all chairs are the same, but my cushions are screwed in and the hole is accessible from the bottom of the chair. A plain old screwdriver does just fine to remove all four screws. Make sure and keep track of the screws to make sure you don’t lose them! I usually keep them all together in a baggie.
STEP 2: Measure and Cut Fabric
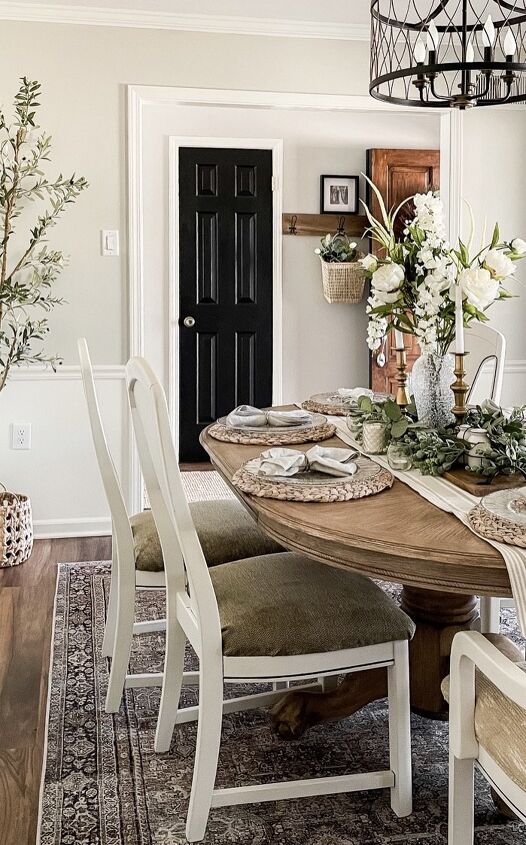
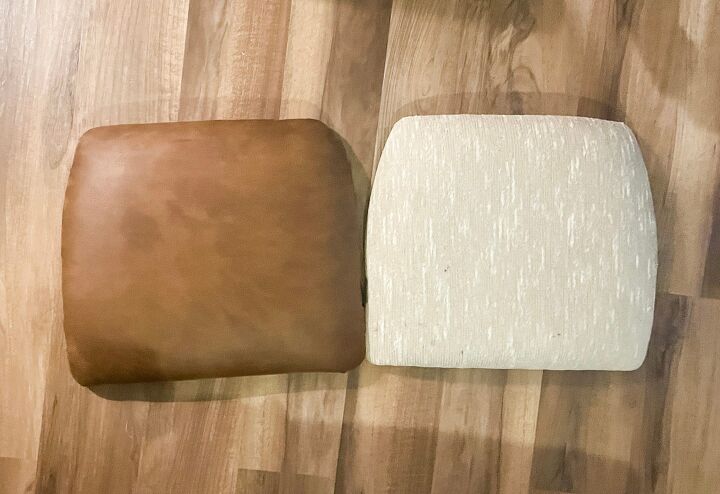
After browsing for fabric online, I narrowed it down to a few options and went to Joann’s to look at the fabric in person. I chose a soft, faux leather from Better Homes and Gardens (linked in the original post here). I liked the olive green fabric that was already on the other 4 chairs, and thought this brown color would help to bring out the earthy tones in the rug.
For two chairs, the recommendation I found online recommended 2 yards of fabric. This was honestly twice the amount I needed- I could have done both chairs with just one yard. You live and you learn.
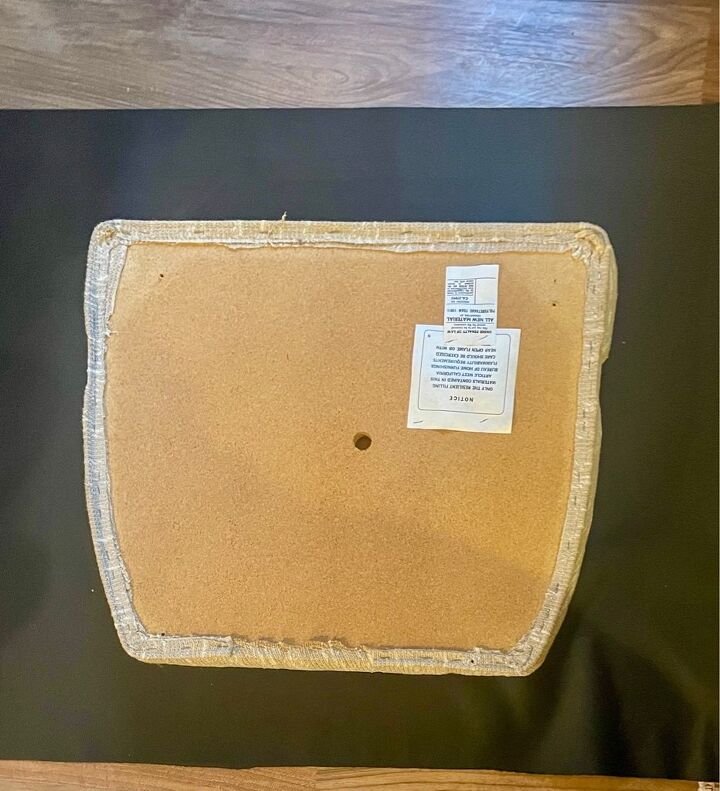
First you will want to lay out your fabric, then place the cushion face down on top of it. Just like you would measure wrapping paper to wrap a box, you want to make sure you have enough extra on all the sides to pull up and around the cushion to staple.
STEP 3: Staple
After your fabric is laid out and has been cut, it’s time to secure it with staples. I used the same staple gun I used when recovering my camper cushions, and in much the same manner.
First, I pulled the fabric up and stapled the top. Next, do the sides. You want to make sure and pull the fabric as tightly as possible. To help, I kneeled on top of the cushion and pulled to get a taught wrap.
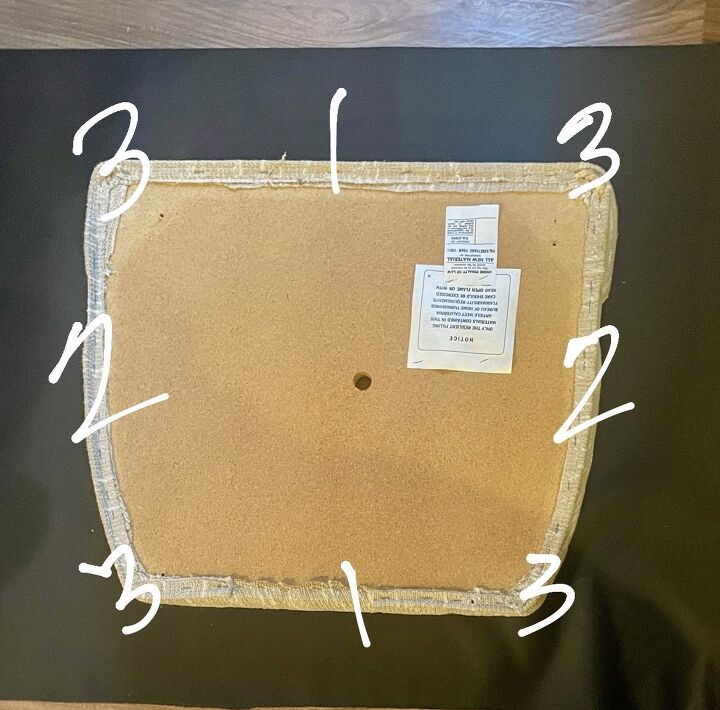
I will also note- be mindful of your screw holes! I tried to staple the fabric shallow of the hole when possible, but on 2 sides the hole was so near the edge I had to pull the fabric up and over it. To mark the holes, I pushed a finishing nail through the fabric and into the hole.
Once the four sides are finished, gather and staple the corners. Just make sure you gather it as evenly as possible. There will be extra fabric, but it looks fine as long as it’s pulled evenly across the corner.
STEP 4: Screw Cushions Back On
Once you have completed steps 1-3 on all cushions, it’s time to reattach them to the chair frame. Find the screws and use your screwdriver to screw all sides back in. If you had to mark any holes with nails through the fabric, remove them first before trying to replace the screws. Mine pushed through the fabric just fine, and easily screwed back on to the chair frame.
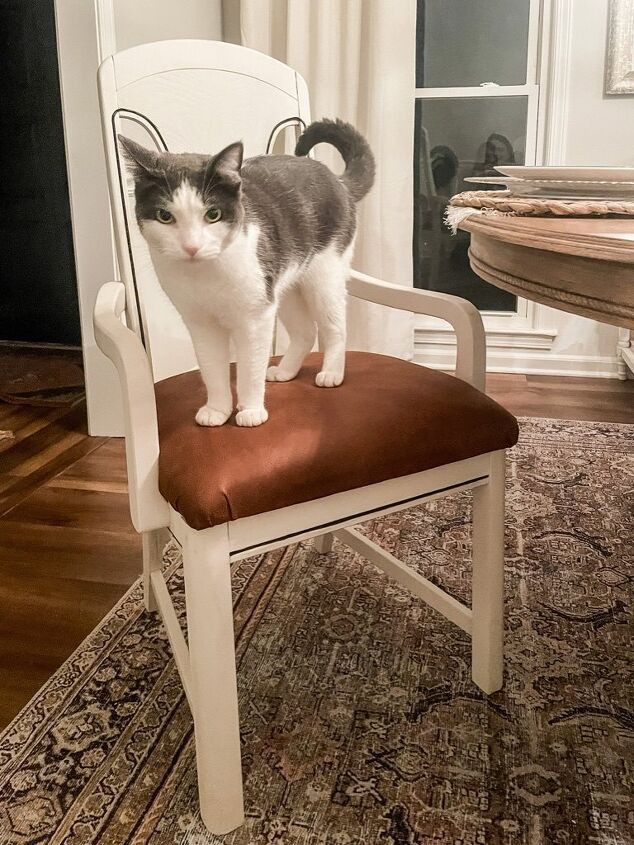
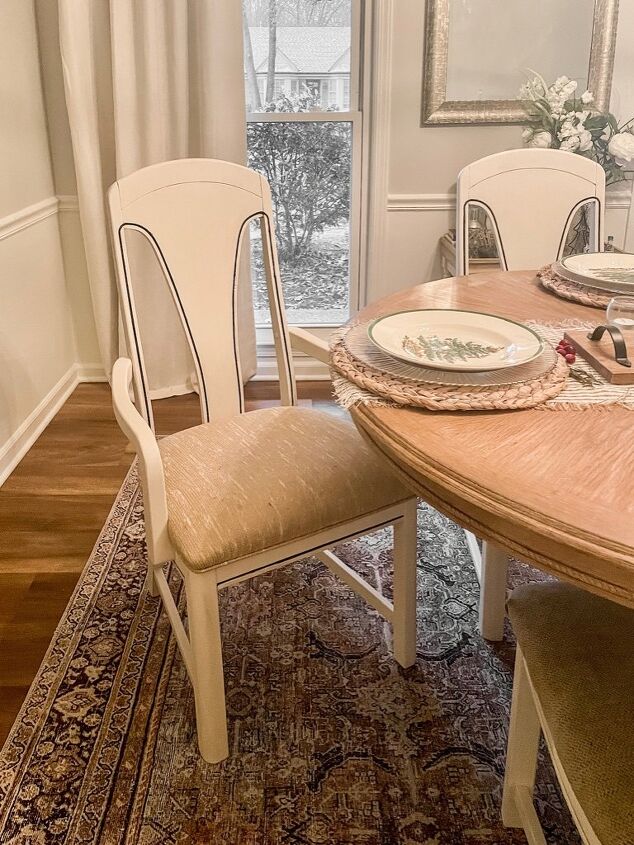
I like this fabric so much better than the old, stained beige fabric that was original to the chairs. This is such a doable DIY, and very beginner friendly. I hope you enjoy.

Tags: cushions, Dining room, DIY, how to, recover, remodel
Comments
Join the conversation
-
I recently re-upholstered an old captain's chair that we found upstairs in my sister's house, where they had been for almost 40 years! (with 4 others yet to be done!) I had done some years ago, but at 75, details escaped me! The found chairs were down to bare wood and scraps of original material around edges. The biggest problem we had was getting the screws out! We ended up having to put W-D 40 into the holes and letting it soak in for 2 days. We finally got them out. After ripping out the old staples and remnants, I measured the 2 inch foam and cut new upholstery material (I used vinyl woven look from Walmart at $9.99 a yard) After it was done, it looked great, but it is not really comfortable! I realized 2" was not enough foam and cutting to size of original wood seat left front edges of seat almost unpadded. I am probably going to re-do, and use egg crate foam from mattress pads and some poly fill on top. I'm glad I didn't redo all of the chairs and got interrupted by another project. I plan on getting the one redo and others done by Thanksgiving!! HA!! What year??.... :os
-
Perfect timing! I have to redo four side chairs and two captains chairs. For the most part, the cushions after the last redo 35 years ago, are in great shape , just stained and not as pretty. BUT one cushion has a chew mark on it from one of my boxer puppies. I will need to replace that one but I cannot find foam thick enough to get the same height. Any tips for that? I remember I glued the foam, slightly, to hold the foam in place while I trimmed it with an electric knife. It was a long time ago! And I'm not young anymore so the memory, well its on permanent vacay! Thank you for this!


Frequently asked questions
Have a question about this project?
You didn't’ remove the original fabric and then put new fabric over cording that went around chair, right? Removing fabric and cording from one of my chairs was so hard I never completed project.
What if chair needs new cushioning?