


Kitchen Island Makeover (Updated)

by
Ene19230
2 Materials
$450
4 Days
Medium
Some of you may recall my Pottery Barn console which I re-purposed to create this kitchen island design which I was unable to find in any stores.
I just wanted to post some photos of the updated version. After reading many of your comments on my original post for this project about baskets being a better way to hide clutter as opposed to a curtain, I had to agree. I replaced the curtains with baskets in a lighter color than the originals.
I love the versatility of this piece. Putting casters on it allows me to move it any place I want it. I store it my office where I use it as a bar when I need space in the kitchen/dining area for entertaining a larger number of guests!
For a list of materials you can refer to my original post of this project.
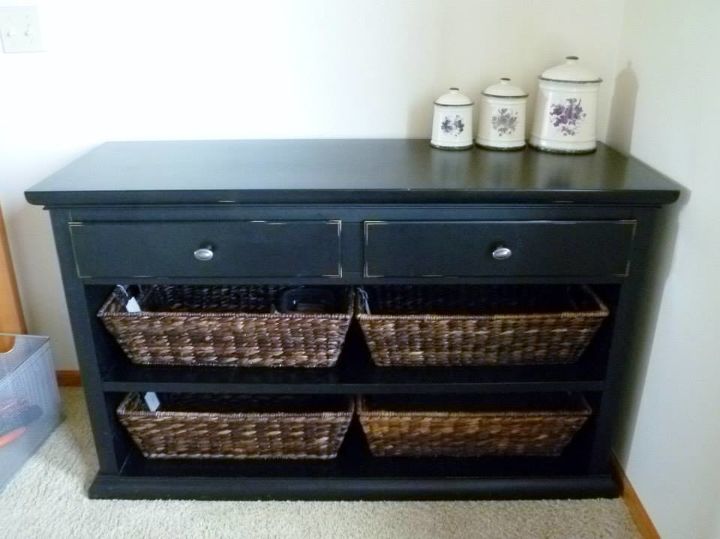
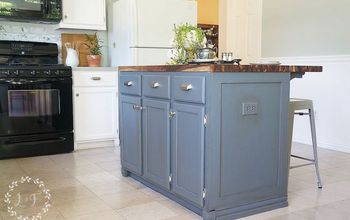
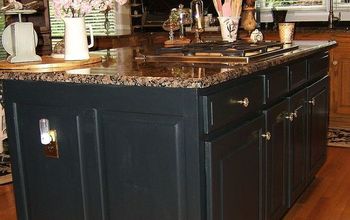
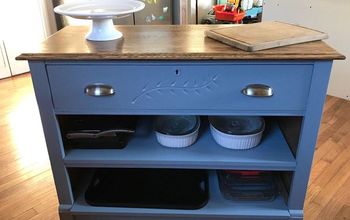
Before: This piece was black and didn't work at all in my space but it had good bones. With a little thinking outside the box I envisioned it as a kitchen island on casters that I could move as needed. I set out to brighten it up and make it useful as a baking island.
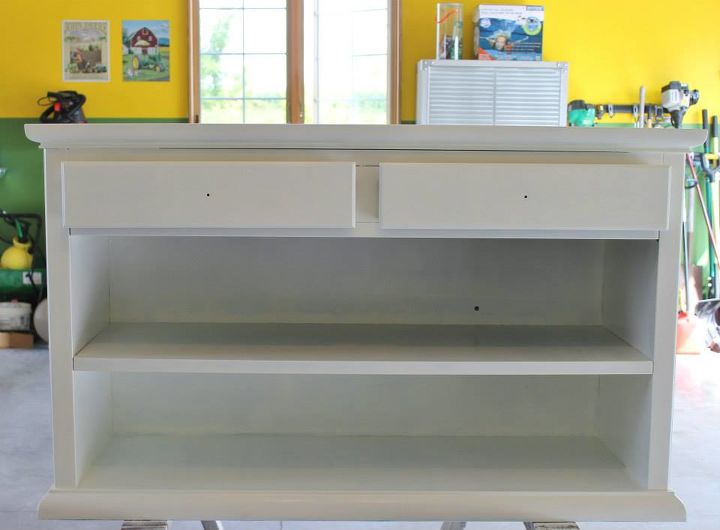
Phase 1: Painting commenced first. I used a paint that included primer and put on a base coat making sure I painted every nook and cranny. After this I could tell it was going to take several coats of paint even with a paint/primer combination.
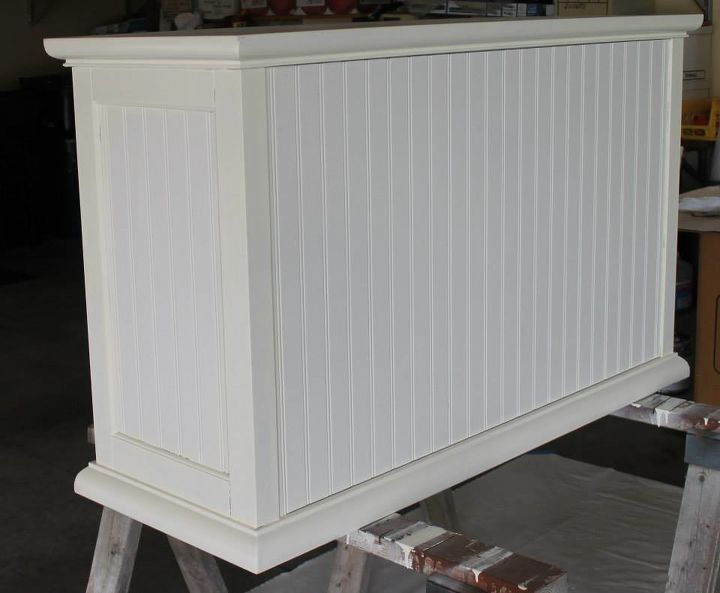
Phase 2: After measuring, I cut pre-primed bead board into panels to fit into the insets on the three closed sides of the original console. I then glued them using liquid silicon glue so that there wouldn't be any nail heads showing on my completed piece. I used a generous amount of glue on each panel, but not so much that it oozed out the sides making a mess to clean up. I allowed the glue dry for 24 hours. After that, I put another 3 coats of paint on it, for a total of 4 coats.

Phase 3: I added this butcher block top that I purchased from Ikea. My husband helped with this part because I wasn't sure how to attach it for best results. After getting lots of good advice from others here on the site, we decided to go with adding furring strips to the top of the piece to allow for expansion and contraction of the natural wood in the Butcher block top. I used a butcher block sealer to begin with. Ultimately, I sanded it off because the consistency was thick, gooey, and unattractive. After sanding that off I used food grade mineral oil. I repeat this every month, or so. It keeps the butcher block looking lovely bringing out all the beautiful wood grains!
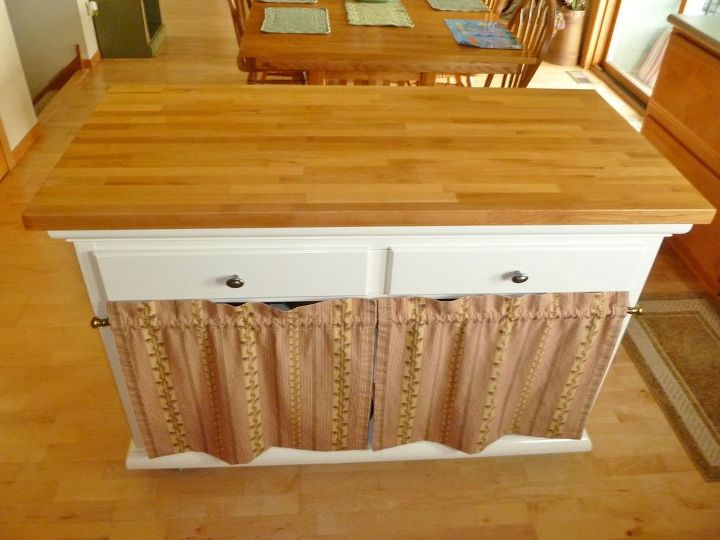
This is a photo of the finished piece before the current updates. I had put a curtain across the front to hide the clutter of all of my baking pans, mixing bowls, etc...Many of you commented that the baskets looked better. I admit, I had to agree with you.

The finished piece: I purchased lighter colored baskets to store all my supplies and keep the clutter hidden. In this photo I have it stored in my office because we needed more space in the kitchen and dining area to extend our dining table to it's full size of 10 feet to entertain family and friends for the holidays.
Finished Piece: I now have it back in the kitchen after the holidays while the number of guests to entertain will be fewer. This has been a very functional piece and is well loved!


Frequently asked questions
Have a question about this project?