


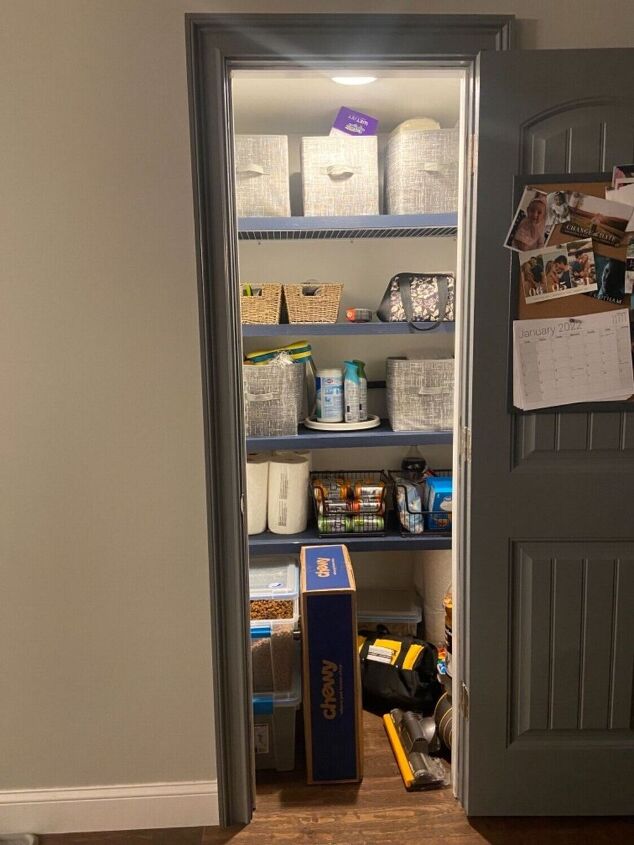
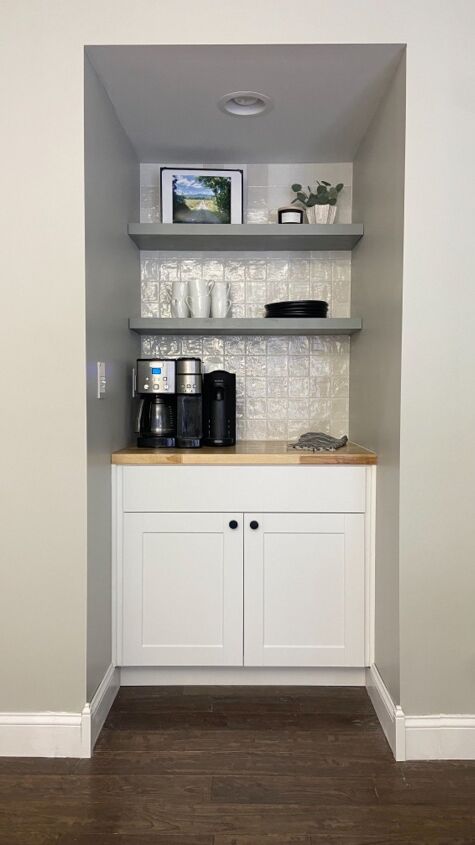
Closet to Coffee Bar

This was our most spontaneous project yet! We decided to turn a closet into a coffee bar and started demoing all within an hour. There are a lot of steps to this project, but overall it wasn’t too difficult!
Best peel and stick backsplash
What we used:
Sheetrock and mud
Stock cabinet
Butcher block countertop
1x2s and 1x3s
Plywood
Tile
Tile adhesive and grout
Some friends on Instagram were concerned about the storage we lost by doing this. We did need to do some reorganizing, but we’re not too worried about it- If we were, we wouldn’t have done this project!
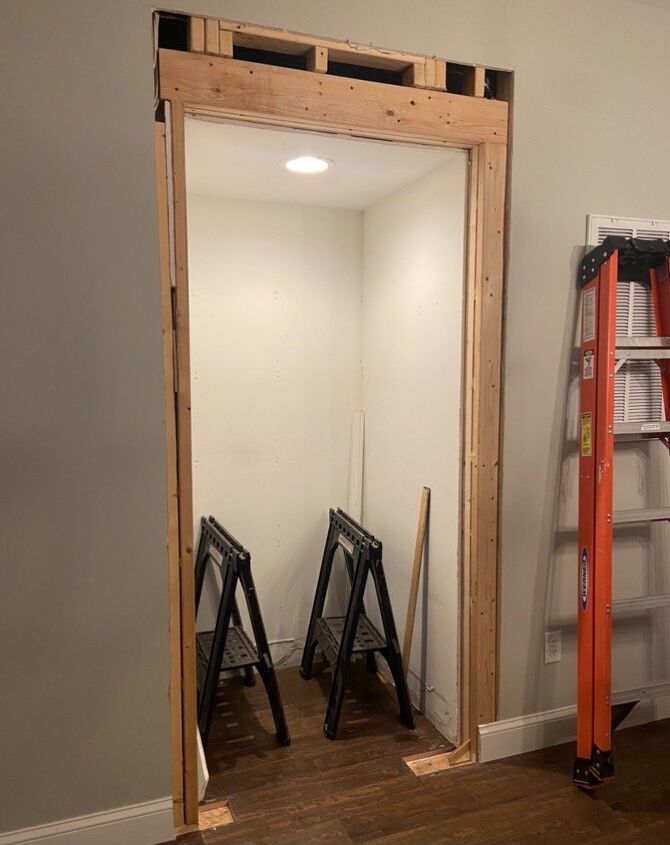
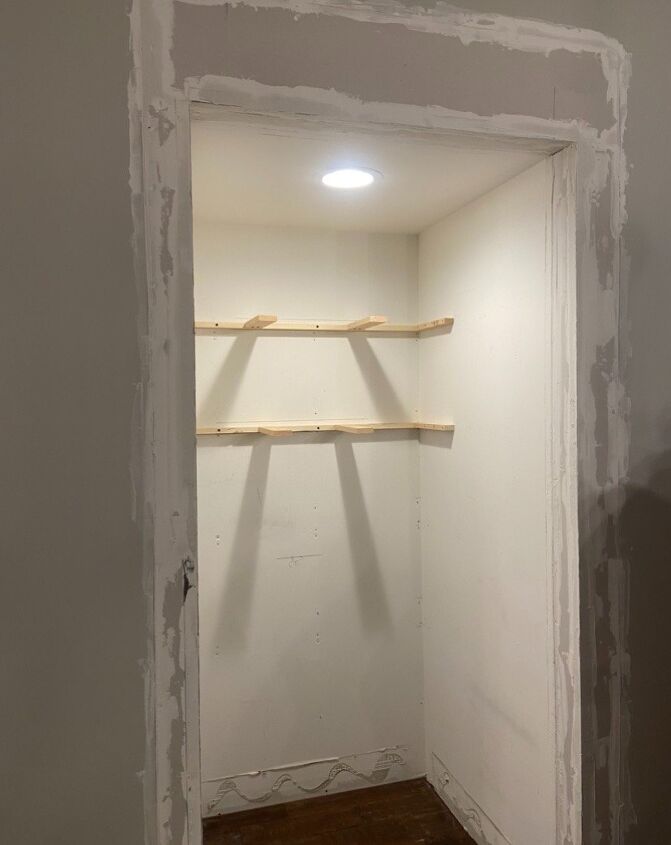
Step 1: Demo
We started by ripping out the door and door frame. For us this required some reframing. If you’re not sure about this part, consult an engineer.
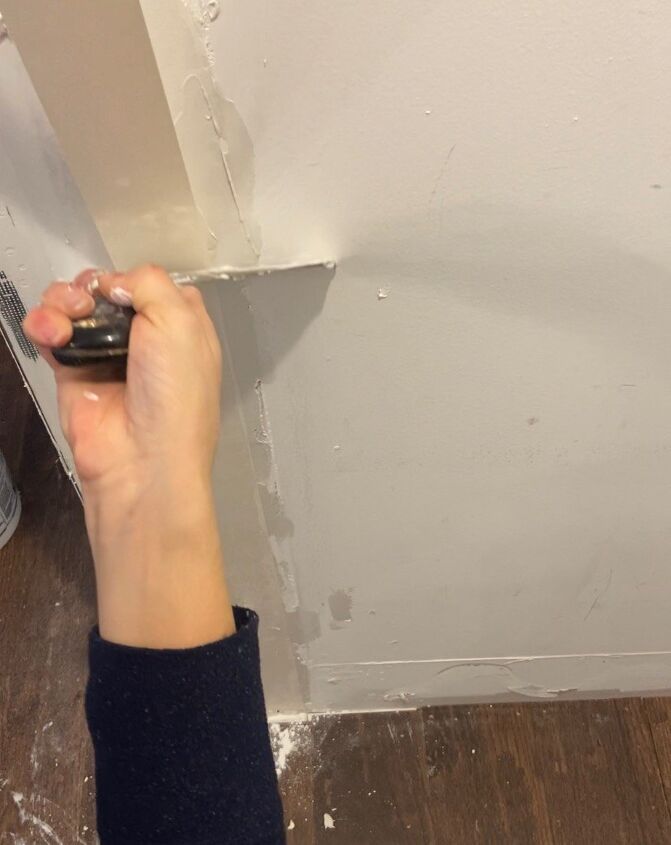
Step 2: Re-Sheetrock
Once we were all framed out, we re-sheetrocked the new alcove. This was the most difficult part - it was our first time sheetrocking! It also was the slowest step because we had to wait for the mud to dry in between coats, so be patient! Once everything is dry and sanded, we primed and painted to match the existing walls.
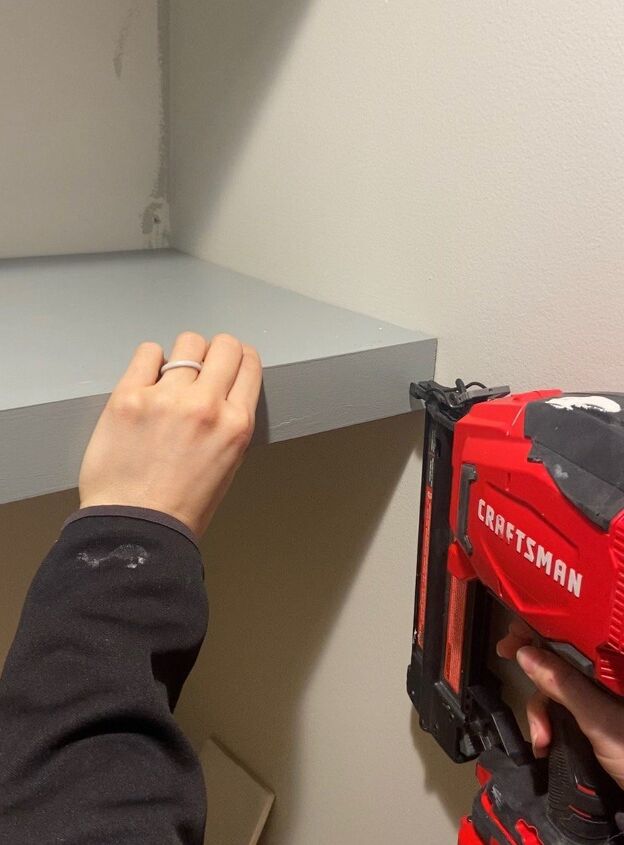
Step 3: Add shelves
Next we used 1x2s, 1x3s and plywood to create shelves. We opted for two shelves and painted them before installation.
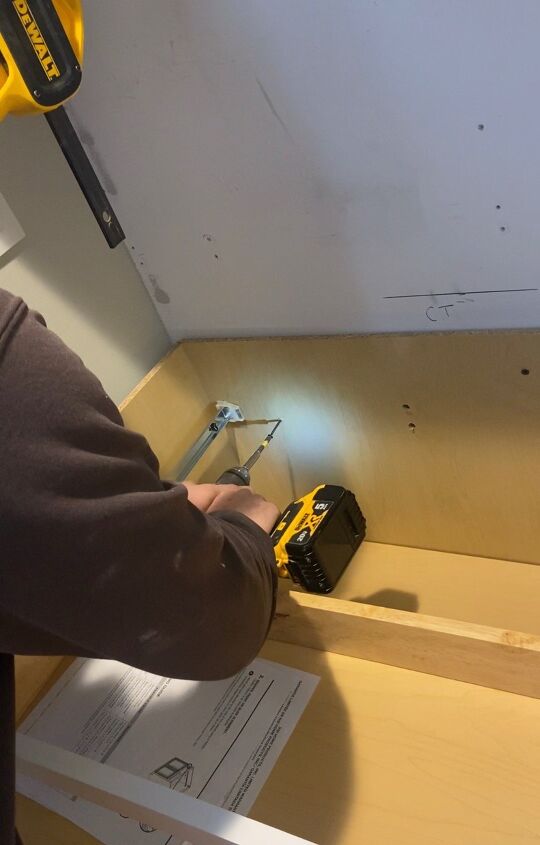
Step 4: Add cabinet
Next we installed a stock cabinet from Home Depot by screwing it into the studs. Our closet was 38 inches wide and our cabinet was only 36 inches, so we framed it out with filler strips to make it look “built in”.
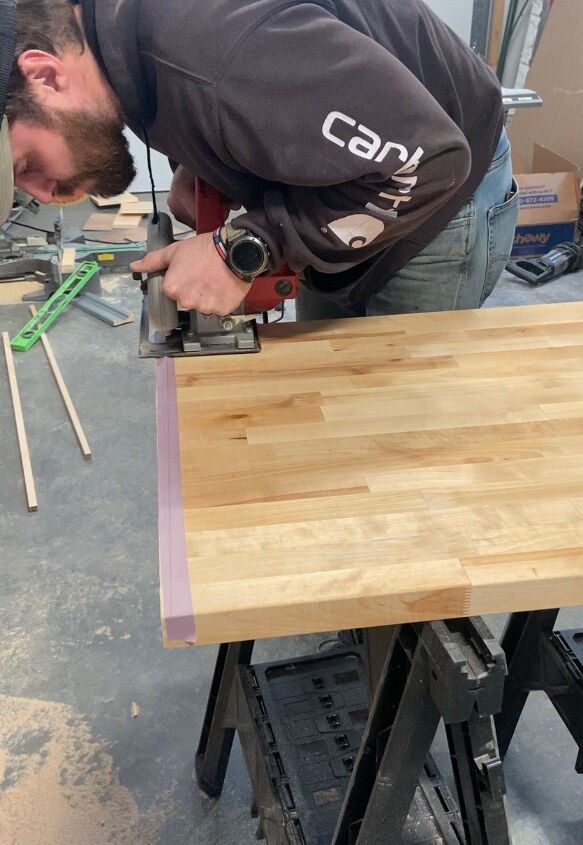
Step 5: Countertop
We went with a butcher block counter top. We sanded and sealed appropriately, then attached it to the cabinet top with liquid nails.
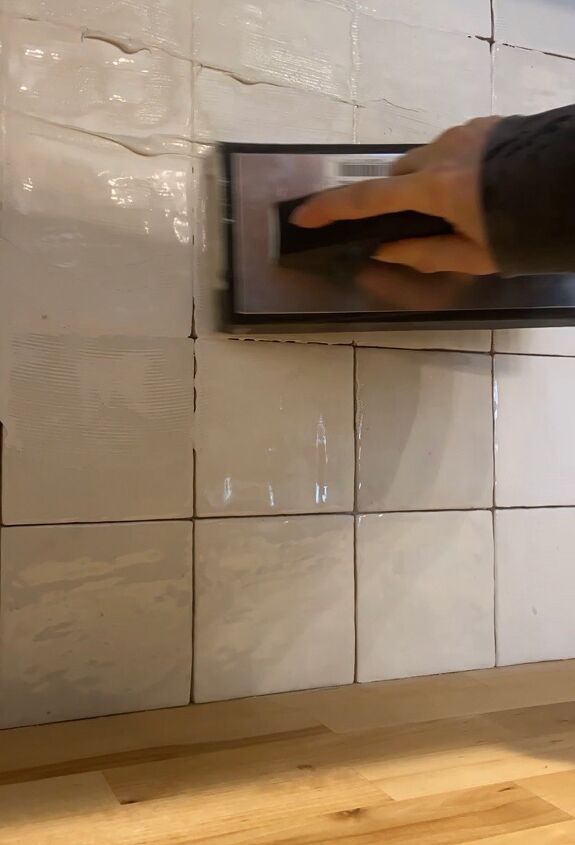
Step 6: Backsplash
We decided to tile the whole back wall for added texture in the space. We tiled just like we did for our kitchen backsplash - tile adhesive, then finished it off with white grout.
Step 7: Finishing touches
To finish off the space we added molding around the cabinet and caulked all of the seams between the cabinet and shelves and walls.
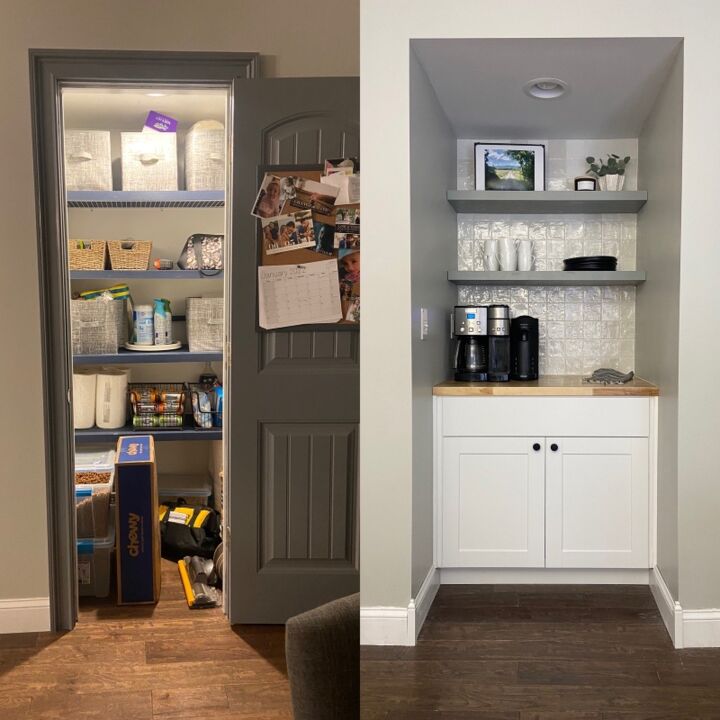
I can’t believe how much this opened up this area- it doesn’t even look like the same space! We love our new coffee bar and don’t miss the pantry at all.


Comments
Join the conversation
-
You did a lovely job. Very nice. I am doing this but in reverse and turning my space into your before (but decorated). I can’t wait for a pantry!
-
Looks great. I wish I had an extra closet or a pantry.


Frequently asked questions
Have a question about this project?
this looks amazing .... but what did you do with all the stuff in your closet lol? I don't have a basement and I need all the closet space I can get
I've never had a closet with an electrical outlet in it. Was yours there already or did you have to add it?