Converting Bifold Doors to Double Doors With Storage

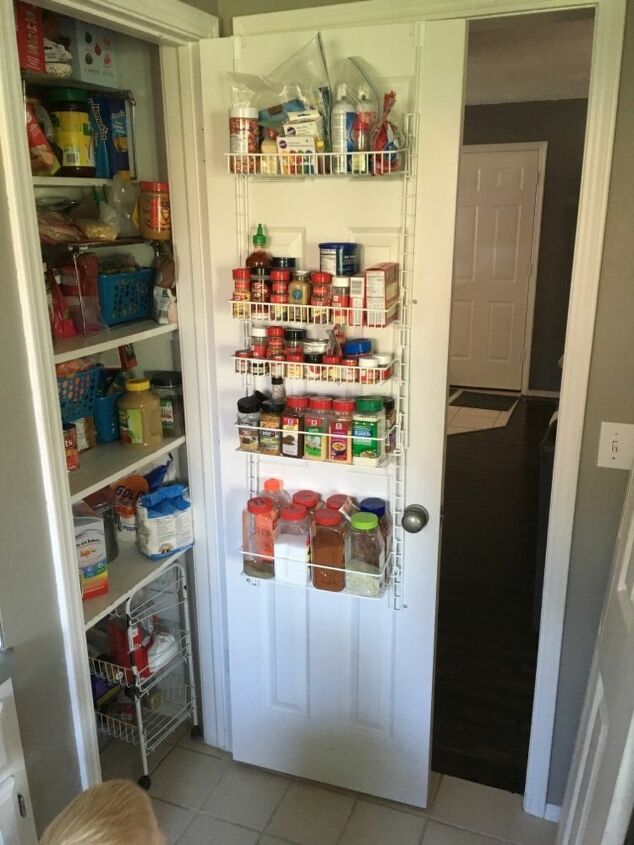
I recently converted my pantry from a large single door to double French-style doors using bifold doors. I also added spice racks to the back. Here’s how you can do the same!
Before. The pantry door blocks the doorway to and from the kitchen any time it is open, which is all the time in our house.
My solution: converting it to double French doors.
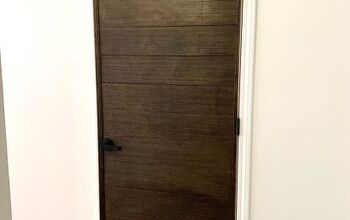
I found these bifold doors that fit the existing opening perfectly at our local Habitat Restore for $10. Score! I could have converted our existing door by cutting it down the middle and adding new frames on the cut sides, but I would also have to fill in the old door knob hole and that would be much harder to make it look nice with the faux wood texture on the door. If you do not have a textured door, this may be an option for you.
My main reason for converting them to French doors instead of bifold was that I did not want to lose my storage on the back of the door. I could not find pre-made racks to fit such narrow doors, so I decided to make my own. First step for that was laying out my items to figure out shelf sizes.
This will be different for everyone based on what you have and how many of each size. Our new doors are 78 7/8” tall, 11 3/4” wide, so please adjust your measurements as necessary.
General guidelines:
-the gap between the top of your items and the next shelf needs to be at least 1.5” for the tiny spices, and 2-3” for the larger items in order for you to easily take them in and out. You will also need to add the thickness of your shelf material to your spacing.
-width of your shelving unit will also depend on your doors and situation. The biggest concern here is that your shelving will clear the side of the other door when you are swinging them open and closed (you’ll see what I’m talking about below). You also need to leave a small space on the outer edge of your door for the door stops if you have them.
-make note of the clearance you have on the inside of your doors. (The front of our pantry shelves are just over 4” away from the back of the door when it is closed, so our new door storage had to be 4” or less. The pieces we put at the front to keep the items from falling off (later I call them supports) stick out farther than 4”, so we had to make sure they were not at the same level as the shelves to clear.)
After laying out my items, I drew out my shelves.
The wood I used is actually 5/8” wide, but for simple math sake, I rounded up to 1” on my shelf planning.
Now for the actual building! I used 1x4s for the sides and shelves. Of course, the actual dimensions of the boards are different. Mine were actually 5/8” x 3 3/8”. Our large spice containers are 3 5/8” deep, so we also added back rails, which I will explain later.
My shelves are each 8 1/2”, making the main shelf width just under 10” wide. **Again, this will need to be adjusted based on your exact door width!**
Your rack height should also be at least two to three inches shorter than your door to leave room for the attaching hardware. Our tall rack is 76”, the other rack is significantly shorter because I wanted to hang our plastic bag holder beneath the rack. I also cut the front corner of the top of each side off at an angle.
Each piece was sanded and then the shelves were attached using a nail gun and brad nails, making sure each shelf stayed square.
**If you do not have a paint sprayer, I recommend at least priming your boards before assembling. It gets pretty tough to get a brush in the corners, especially on the shelves where your smallest spices will go.
For the back rails, we ripped a 1x3 in half width-wise. This gave us a little more depth to the shelves to accommodate our large spice containers, and also gave us additional framing to attach the racks into to door frame. The rails were just a little too deep to allow our rack to fit between the door and our existing pantry shelves, so we used a belt sander to make the total depth of the main shelf sides plus rails 4” (taking off about 1/8”).
We put wood glue along the back of the shelf sides, then the rails were attached using brad nails. The cut edge (where we ripped the 1x3 in half) was put to the inside edge of the shelves, and the belt sanded edge goes to the very back and will rest against the back of your door.
The front supports were made by ripping a 1x2 in half width-wise, then cut to 9 3/4” pieces (slightly narrower than the shelf sides). They were placed 1 1/2” up from the shelf top for most shelves (1/2” on the super skinny shelves for the tiny spices), then attached using a brad nail on each side.
My extra tall shelf had two supports; one at 1 1/2”, and a second 2” above the first one.
I did not have a good picture of these from while we were building it, so I took a few of the finished shelves to help explain visually.
You will also need to sand the sides of the supports down to allow the doors to close without hitting each other. We had to sand them down more after hanging everything up, so I will show you a picture of what I mean later.
Here is what the top of the shelves should look like with all of the wood put together.
Now you can finish painting all of the wood. Again, if you don’t have a paint sprayer, it is much easier to paint the pieces as you go, but be prepared for touch up at the end.
We bought four of these strap ties for the top of the racks.
We measured the thickness of the door and bent that much of the top to a 90° angle. This was done by clamping the strap tie with a board on top onto a solid surface with a 90° side, leaving the section to be bent hanging over the edge. We then hammered the overhanging portion down until it was resting flush against the side.
These became our over-the-door brackets. I placed the brackets so the racks were 1 1/2” below the top of the door and marked where the bottom of the bracket hit. Then we sanded out a little more of our rails to allow the brackets (with their screws) to be flush with the rest of the rail against the door, and used three lath screws (made to attach metal to wood) from the back of each bracket into the back of the rail. These strap ties have several holes, so I staggered the screws to provide the most strength. I painted them to match the back of the doors and the racks, and then attached them to the back side and top of the doors.
As far as where to place these horizontally on the door, you want them as close to the hinge side of your door as possible. Our door stop sits out 1/8”, so that is how far our shelf is from the outside edge of the door.
**We also had to drill into the rails slightly to accommodate the heads of the screws used for the new door handles. Like countersinking, but for the opposite side.
For the bottom support, we placed two L brackets at the bottom of our racks. These should go into the frame of your door (if you have a full length rack, it will go into the bottom frame). This picture is of our shorter shelf, so the bracket on the right is in the side frame of the door, but the left side is not. If you plan to have a lot of weight on your shelves, you can also add screws from your side rails into the frame of your door for security.
This is why your supports must be sanded down on the sides! We sanded ours down some before installing the racks on the doors, but had to sand them a little more after installing. You can make narrower shelves if you think this will be an issue for you.
Also, here is why it is important to measure everything carefully for your situation so it fits where you need it to!
As far as installing the actual doors, we removed all of the bifold hardware. The right door is installed using the hinges from the old pantry door, and matching hinges were added for the left door. A double magnetic catch was used at the top to hold the doors closed.
We gained a little more door storage with our custom built rack than we had with the standard wire shelving, but I’m mostly excited about the doorway not being blocked!
A recap of the supplies we used:
-(5) 1x4 furring strips [~$1.75 each] (we like to use furring strips because they are cheap, but you have to sort through to find decent boards). Cut the pieces for the sides first, then use the remaining pieces to cut the shelves.
-(2) 1x3 furring strips [~$1.50 each] ripped in half on the table saw for back rails.
-(1) 1x2 furring strip [~$1] ripped in half on table saw, then to rack width for supports
-(4) strap ties [$0.98 each] (official name of ours is 20 gauge 1-1/4 in x 9 in strap tie)
-(4) 1 1/2” L brackets [~$2.50/ 4 pack]
-(1) double magnetic catch [~$1]
I hope this inspired you to tackle your own pantry doors!
Visit the link below if you’d like to see how I painted the hollow core doors to look like wood.











Frequently asked questions
Have a question about this project?
I'm confused. Was the door a hollow bifold or a solid wood door? The bifolds I have, since they're hollow, wouldn't support the screws and weight.
So are your racks in the outside of the bifold doors? Because I’m thinking it they were on the inside the wouldn’t close with racks on the both sides on the fold. Great idea just curious about it?
Excellent job! Love this idea andci'm going to try some version of it!