Disaster Zone Pantry Makeover

Who would have ever thought that a tiny little ole pantry would almost be the death of me? HA. I say that jokingly, but I am a little bit serious too!
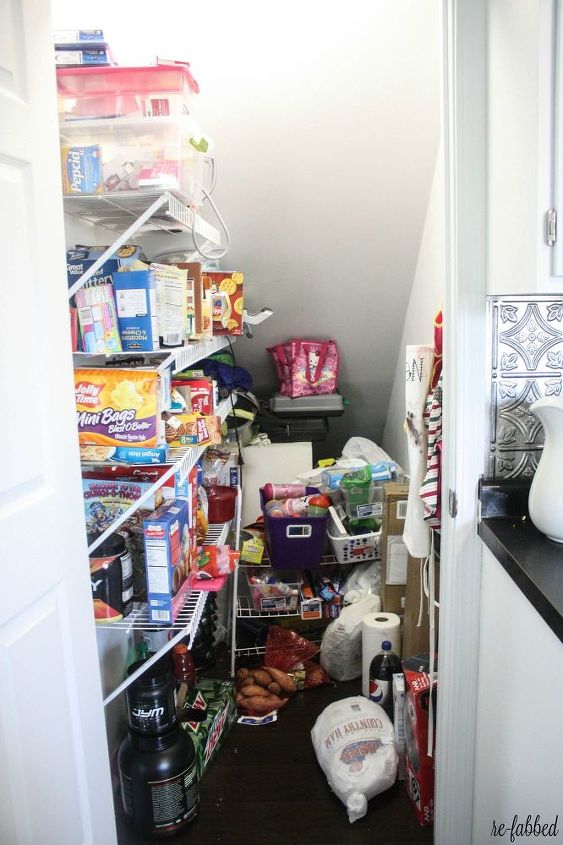
For months, I have watched this tiny room becoming an anxiety attack waiting to happen, but instead of tackling it, I just kept shutting the door. I literally could not move in there, nor could I find anything. It was flat out embarrassing, so I kept the door shut so that nobody ever had to see what was going on in there. I prided myself in a kept house, yet I couldn’t even find my own bread. How pitiful.
When I submitted my pantry for consideration in the “Disaster Zone” room challenge for Good Housekeeping, I knew that there was no way that it wasn’t one of the worst out there. How could it not be? I felt like if it got picked for the makeover, I would FINALLY get my tail in gear to make it what it should be. Thank God, that is what finally happened. {You can read here for the original post about my submission.}
Here is the photo I submitted for my “Disaster Zone”!
I look at this picture and see such chaos. I see a little bit of EVERYTHING, and most of it should not be in a pantry. Let’s look closer at what we can see in this picture! There are lots of medicines in totes, drills, aprons, a cordless vacuum, blood pressure cuff, boxes of unused items that I am not sure what they are {I need help.}, etc…oh yeah, and some food!


When I received my detailed advice from the marvelous Maeve Richmond, founder and coach of Maeve’s Method, she was very honest about the state of my pantry. She called it a “catch all”, and she nailed that. I was using it as a catch all, and I had lost complete control. She told me that this room was working way too hard, and it was very important for me to set a clear intention for the room. She mentioned that I have tons of cabinet space in the kitchen, and she went on to say that perhaps I should utilize some of the space better for some of these items. Great idea, Maeve! She also said to completely take everything out of the pantry, one shelf at a time, in order to evaluate what I have and what goes with what. She put it like this- “Like Things Live Together.” She said to ask yourself the story of each item on the shelf in order to find the purpose of that specific item. By doing that, it is easier to figure out why you have each item and where it needs to be.


This process took a little time, but I went through and got everything out and accounted for. Here is my blank slate!
And here is my behind the scenes dining room! It pretty much looks like mass chaos, but there was some method to this madness, believe it or not!
This big box is our return air. It makes for a very interesting layout, but it can’t be moved…so we make do :)
One tip that Maeve gave me as a “freebie” was actually something I had always meant to do, but just never got around to doing. She mentioned painting the pantry, or at least a portion of it, in the same blue as my kitchen. This was the perfect time to get this done, so I went for it. I had just enough left over paint to paint the entire room. Man, it changed the look big time!
Another thing I decided to do was use laminate adhesive to cover the return air box. While I could have just painted it, I thought it would be cute to have a little extra design all of its own. This is the first time I have ever used this, and I really recommend it. It was very easy to use, and I still had quite a bit to spare. I got it at Walmart for around $5.00, so it is reasonable too!
I love how the blue brightens this room up! By the way, the color is Valspar Gentle Wave. It is an awesome color.
After 1 more coat throughout, Brandon hung the shelves back on so that I could get to the fun part, putting everything back together!
When it came to putting everything back into the pantry, Maeve stressed the importance of dedicated shelving. While she said there are good rules of thumb for where to put certain items, she also said that it is ultimately my space and needs to function for me, so to trust my gut. I liked that advice because that is so true. While some systems of placement work great for some people, it may not work for everyone, so we need to do what fits our own lifestyle best.


For me, I honestly don’t keep a ton of pantry items on hand. I KNOW that is hard to imagine after seeing that first picture, but in reality, I truly don’t. I don’t buy a lot of food in advance, and I do have other storage areas in my kitchen for most of my canned goods or certain boxed items, so the pantry is more an area for me that acts as a convenience room. In saying that, I mean that I want the items that we use the most often to be readily accessible. I want the kid’s snacks, cereals, breads, etc to be easy to get to because those are the items that we use the most. Other “easy” foods also end up in here for easy access as well, because it functions well for us that way.


We also don’t have a good place to keep all of our “wraps”, such as foil, saran wrap, wax paper, etc…so the pantry is the perfect fit for those items too! {I had this large basket on hand, and even though it is pretty big, it holds everything in place perfectly, and it fits- so I am happy!}


Maeve also mentioned how helpful trays are in organizing your foods. By doing this, she said it would have a big impact on how I would perceive my space. With each tray being a “zone”, it divides the shelves so that things can stay better organized. I loved this idea, because, like Maeve, I love trays. I did have 1 problem when it came time for me to implement this part of the plan. Because of time constraints, I was unable to find any trays locally that fit into my price range for this project. Had I been able to start on this project as soon as I received word that I was chosen, I would have had a little extra time to order some, but I couldn’t start right then, and time was getting away from me.


While I totally understood what she meant by creating a “zone”, I decided to use baskets that I found on clearance from TJ Maxx instead. These baskets would still create the same effect as the trays, and I could move them around just as easily. I also found several clear containers from Dollar Tree and Walmart to use on my shelves to keep from having so many distracting boxes.
After careful consideration of what should be re-introduced to my new and improved pantry, this is the end result!
For LOTS more details and pictures of this makeover, as well as other room renovations and before and afters- head over to my blog for a visit!
Brooke Riley-Re-Fabbed
Want more details about this and other DIY projects? Check out my blog post!
Go
Frequently asked questions
Have a question about this project?
3 of 14 questions
  • Judy Robinson Judy Robinson on Jul 19, 2017

    Where can you buy plexiglass?

  • Lena Parker Lena Parker on Feb 16, 2021

    Where you get the shelving and did it come with the pieces for hanging it. Thanks

  • Maddy Maddy on Apr 26, 2023

    Good afternoon, I have a birthday coming up, an anniversary. I want to cook a lot of food. I also want to make appetizers with caviar. Where can I get delicious caviar?

Comments
Join the conversation
2 of 120 comments
  • Sue George Sue George on Jun 25, 2019

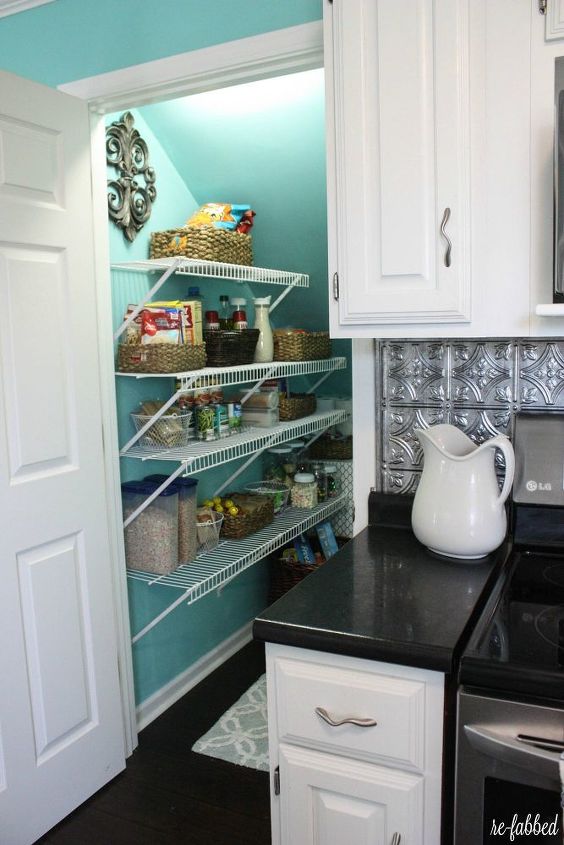
    Very nice! You're an inspiration! I keep thinking 'I'm going to paint my walk in pantry' - one of these days...but it hasn't happened in 23 years - maybe 'this' is the Summer! Love the color too! I'll have to see what would work best with my colors. Thank you for sharing!

  • Ilene Ilene on Dec 29, 2020

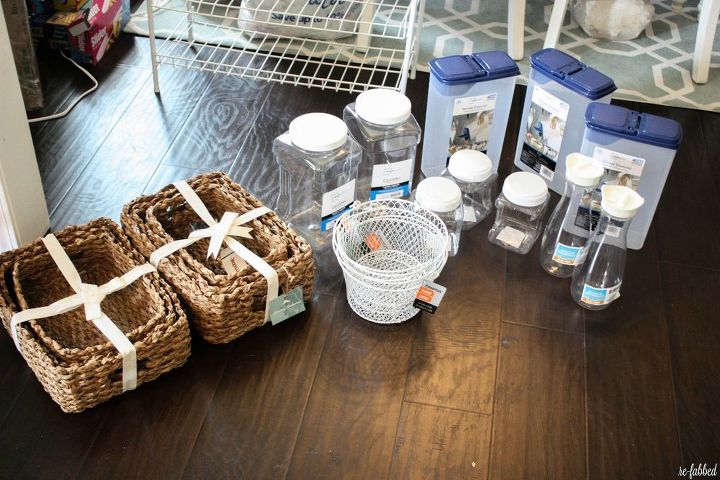
    I have a small "bonus" room in my apartment. It has many functions; office, pantry, vacuum cleaner & rolling cart storage, computer... you get the idea. My pantry shelves have to multi-purpose; not only food but office & some craft supplies as well. I am the "Queen of Storage" so I've used every inch of my apartment efficiently. I find using boxes & bins works really well. Makes things easy to see and, when I don't fill a large box anymore, I simply get a smaller box for the remainder. Boxes? I cold build a house with the Amazon boxes I get and/or have access to. Used to make them pretty but gave up. Too much work & some weren't around that long. I'm happy when I walk into the room and see an organized space (considering all the functions it has to perform) and pantry shelves that serve me in the most efficient manner.

Next