


How To Paint A Fabric Chair To Look Like Leather
How To Paint A Fabric Chair To Look Like Leather
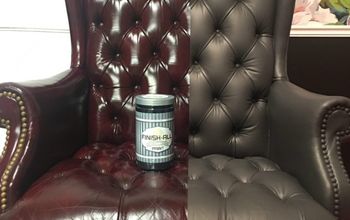
How to paint any piece of furniture to look like leather without a million coats
Anyone else all about the faux life?
I love faux plants, faux wallpaper, & most recently faux leather!
When we moved into our new house, Eli’s room was the first to be renovated.
We wanted to create a fun room perfect for a growing toddler, but we really only had time to do the basic things.
New floors, paint, lighting, & building a cozy reading nook were the only things we were able to accomplish before we had to move on to the rest of the house.
Now, I am ready to finish his room up & add the sweet little touches I didn’t get to the first time.
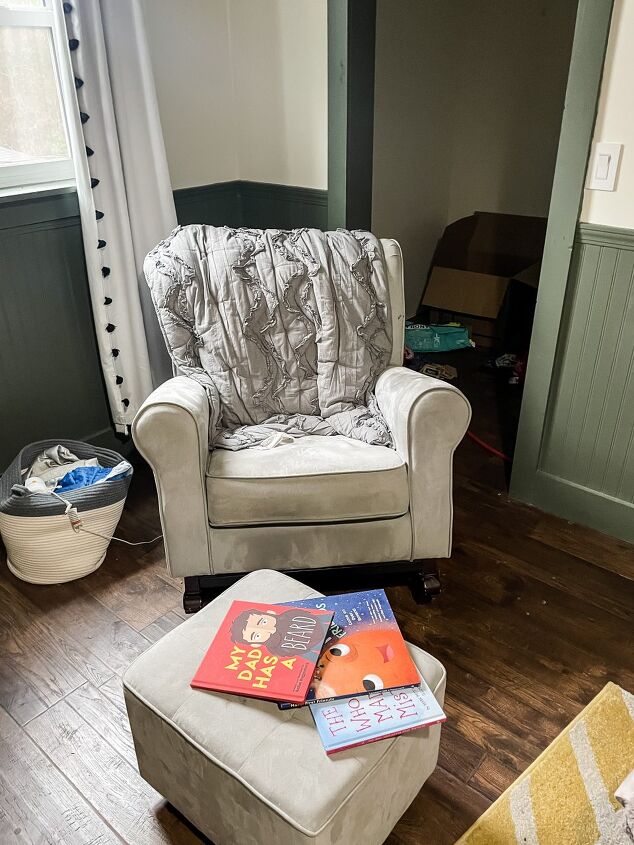
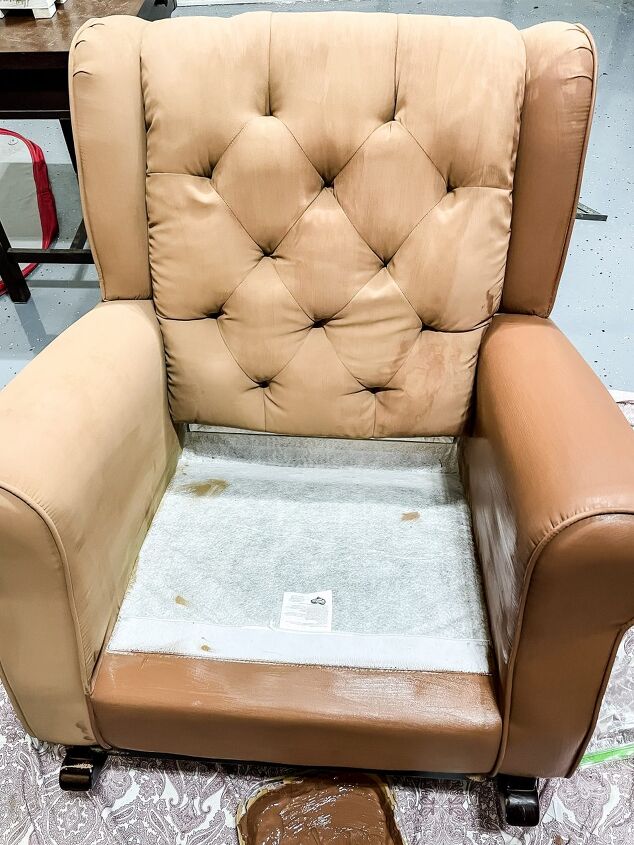
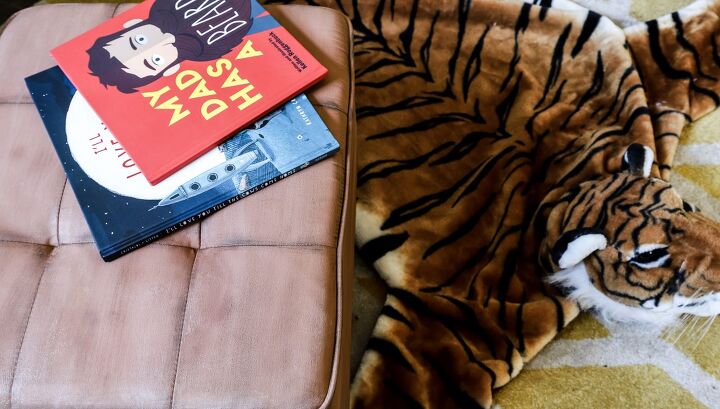
Starting with making over his old, stained rocker.
This rocker has traveled with us from the old house & has definitely seen some better days!
The chair itself is solid, but the fabric is faded, dull, & stained, plus it doesn’t really fit the new room’s style anymore.
So this was the perfect opportunity to partner with Eclectic Products to give it a complete makeover!
How To Paint A Fabric Chair To Look Like Leather
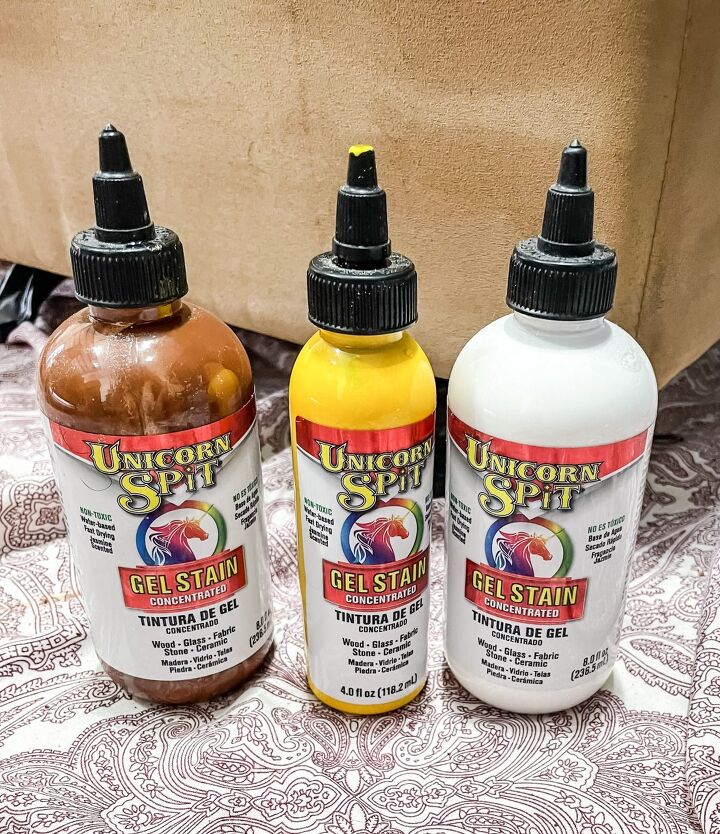
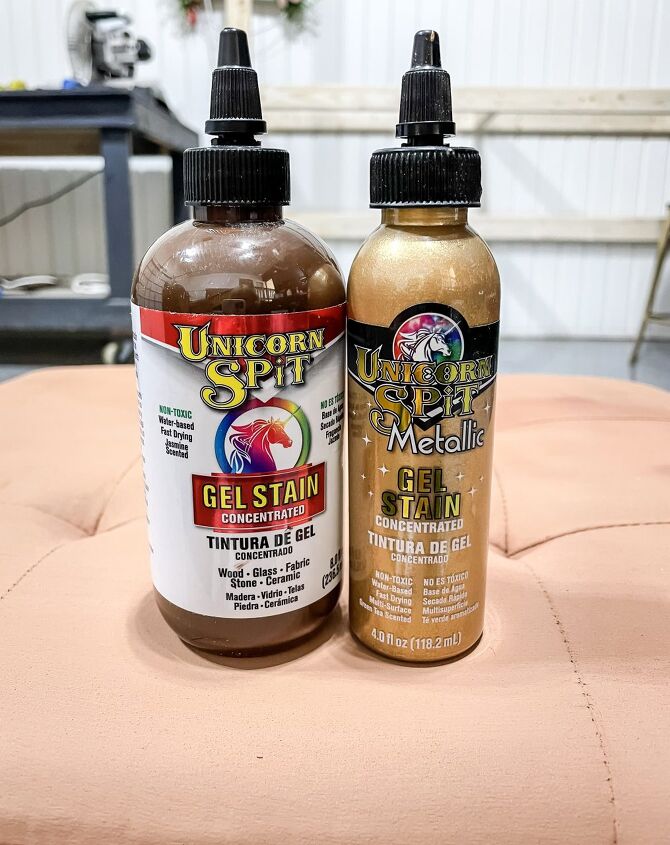
Supplies:
- Unicorn Spit: Lemon Kiss, Squirell, White Ning, Rustic Reality, Metallic Gel Stain (NEW)
- Paint Brush
- Microfiber Cloth
Which Paint Is Best For Fabric
If you have been following us for a bit, you know this is not my first time painting fabric furniture…
The first time I learned a lot of lessons & exactly what not to do!
This time I know the main ingredient to doing it right is picking the right paint.
That’s why I went with Eclectic’s Unicorn Spit!
I used it on fabric chair covers not too long ago, so I already knew it worked the best on fabric.
It keeps the fabric soft without having to add any fabric softener & it smells so good!
No-one likes crunchy furniture that smells like it has 9 million coats of paint on it…
Prepping The Furniture

Before we get to the fun part, it’s important to prep the furniture.
Vacuum the entire chair & separate the cushion from the base.
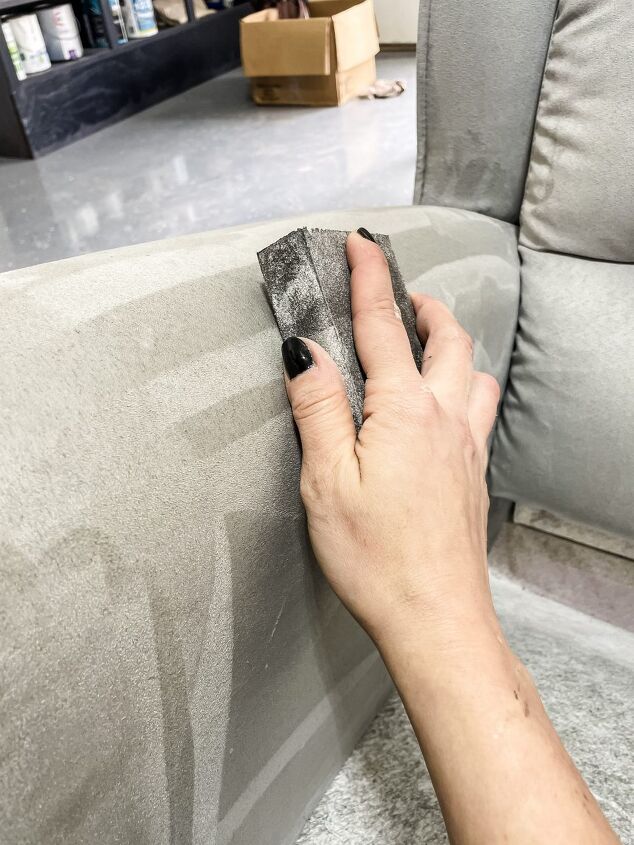
Next, I used a medium grit sanding block to lightly sand the chair.
This will remove the pill on the furniture, which will help the paint adhere better.
Applying The Base Coat
For the base I wanted a coppery light brown color, something not too dark because I will be doing multiple layers.
I mixed together 1 bottle of Squirrel, 1/2 a bottle of Lemon Kiss, & 1 bottle of White Ning Unicorn Spit per batch.
This is the perfect color combination for that coppery brown leather color!
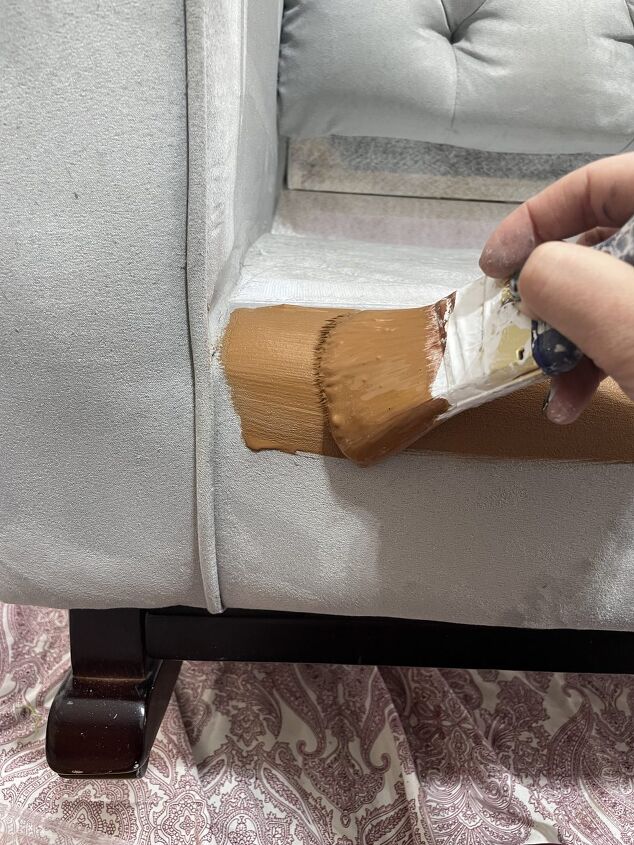
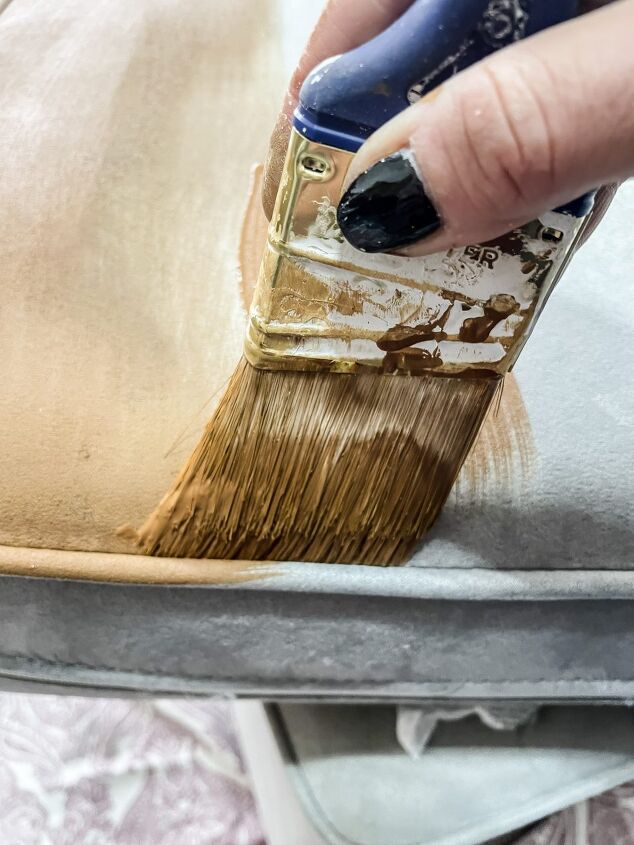
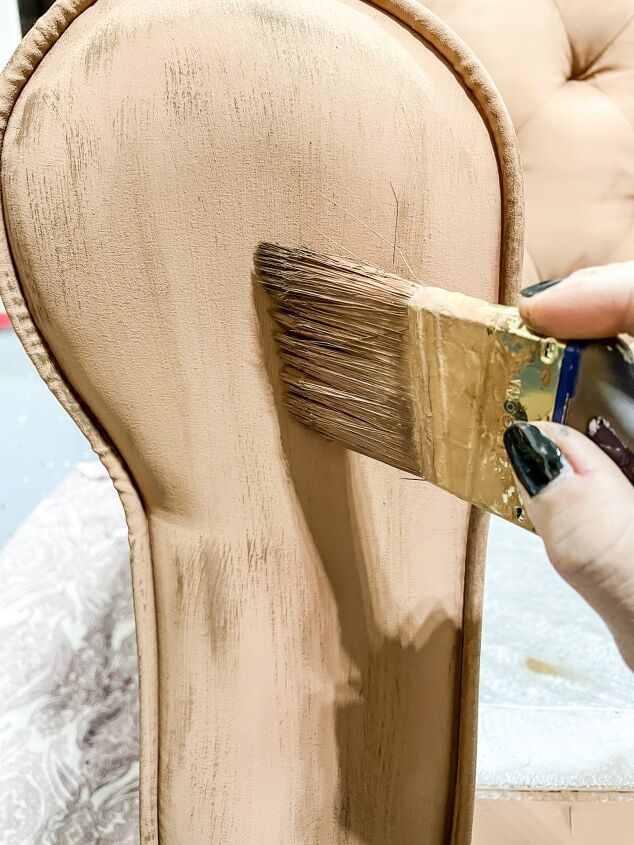
Paint the base using a regular paint brush.
I like to put the first coat on nice & thick for the best coverage.
Since we are using Unicorn Spit there is no need to add fabric softener like you do with regular paint.
This is a huge bonus because fabric softener can make the furniture feel sticky, even after it dries.
Be sure to coat all the crevices & corners really well.
Make sure to pull at the fabric to reach all the places that will be seen later when someone is actually sitting in it 😅
The Unicorn Spit went on really smoothly & evenly.
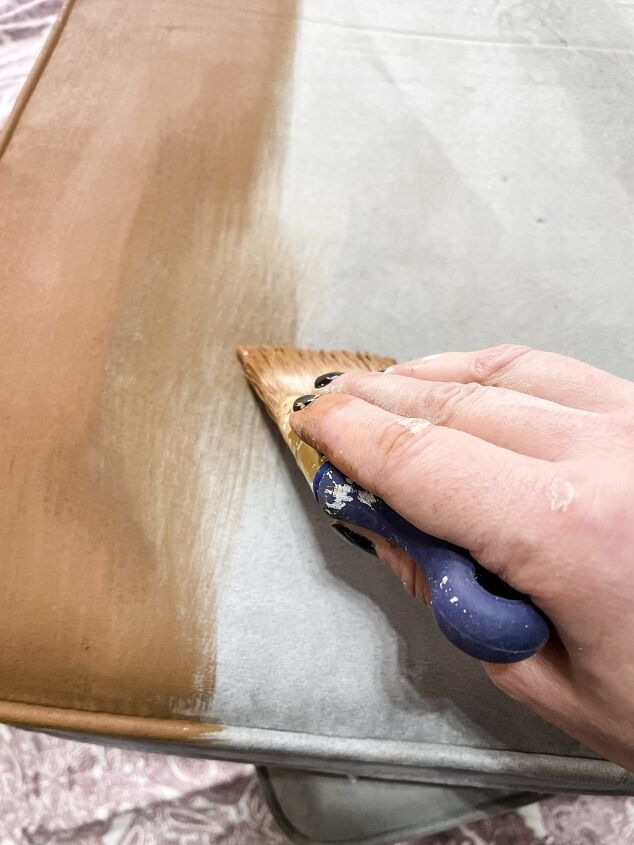
The base will require two or three coats depending on what color the furniture originally was when you started.
Here is what the first coat looked like after sitting overnight.
The paint will absorb differently on different areas of the chair, but don’t worry it will all be blended together by the end!
I am already in deep love with the base color.
Finishing The Base Coat
Make sure to let the piece dry in-between each coat.
This will make it easier to apply even coverage.
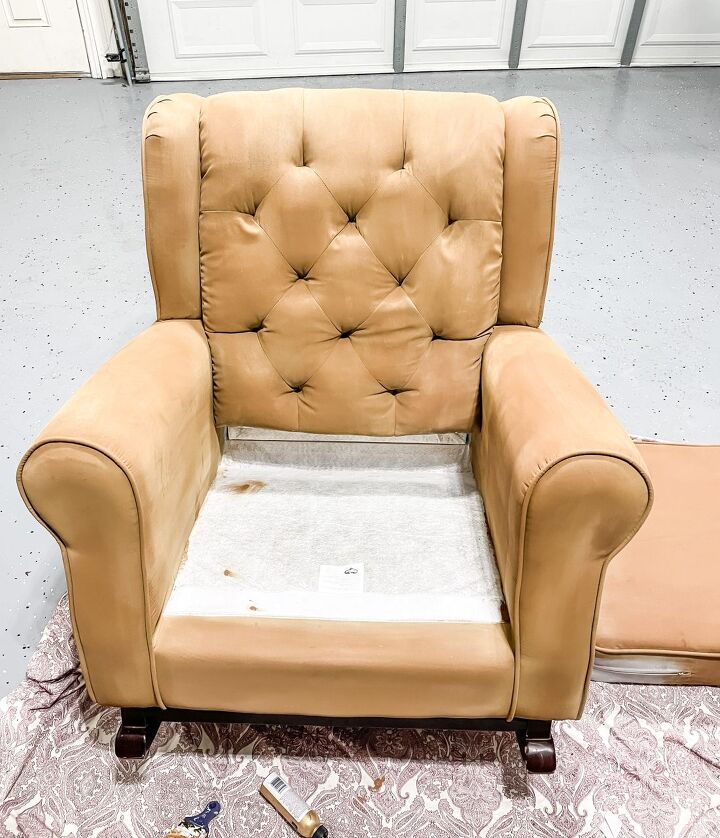
For our chair I only had to do two full base coats!
Once the last coat was dry I moved onto the darker final color.
For the final color I mixed 3/4 a bottle of White Ning & a full bottle of Rustic Reality.
It is the perfect final coat & exactly the color I was hoping for!
Aging The Chair
The color is already amazing, but for it to resemble real leather I wanted to age it a little.
I mixed together Rustic Reality & Eclectic’s new metallic gel stain!
This color combination is a deep rich brown perfect for the aged look.
Lightly dry brush the aging mix onto the chair & cushions, making sure to add a darker pass to the seams & edges.
Finishing The Chair
Finally it’s time for the finishing touches!
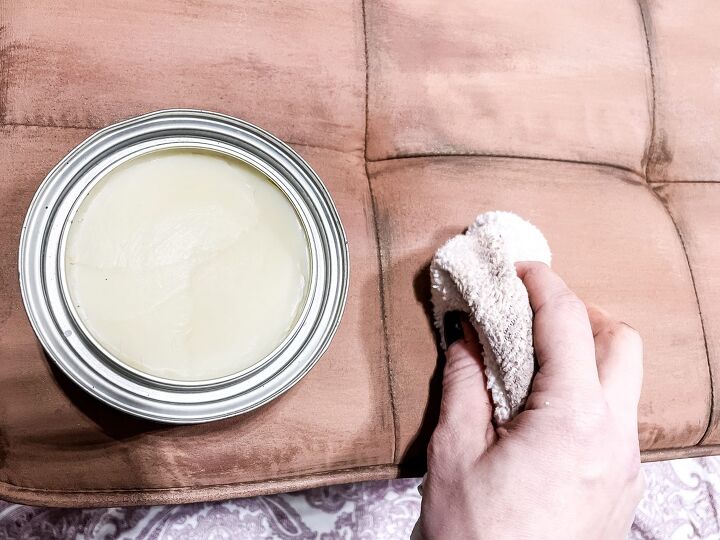
After the chair has dried completely, use a clear wax to seal the paint, apply with a clean cloth or brush.
I used a clear wax because I didn’t want the color any darker, but you could also use a dark wax if you wanted an even more aged look.

Unicorn Spit works on glass, fabric, & wood so if you don’t love the color of your chair’s legs you could paint them with the same paint!
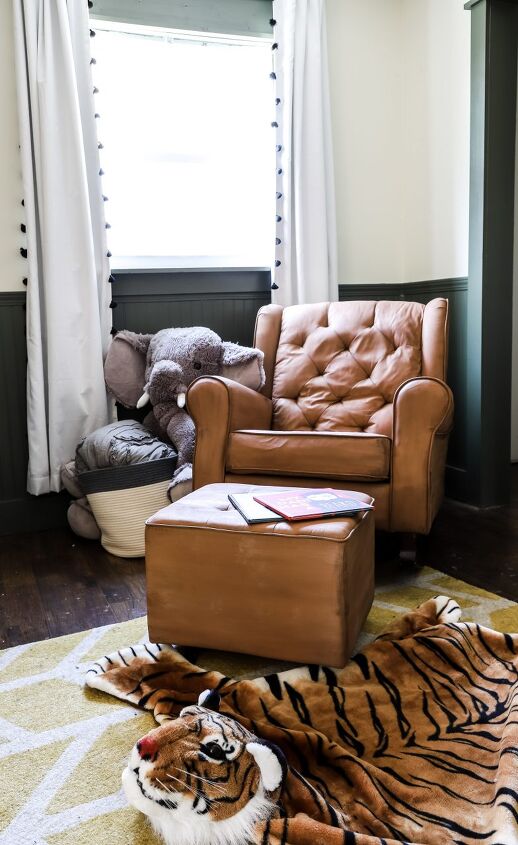
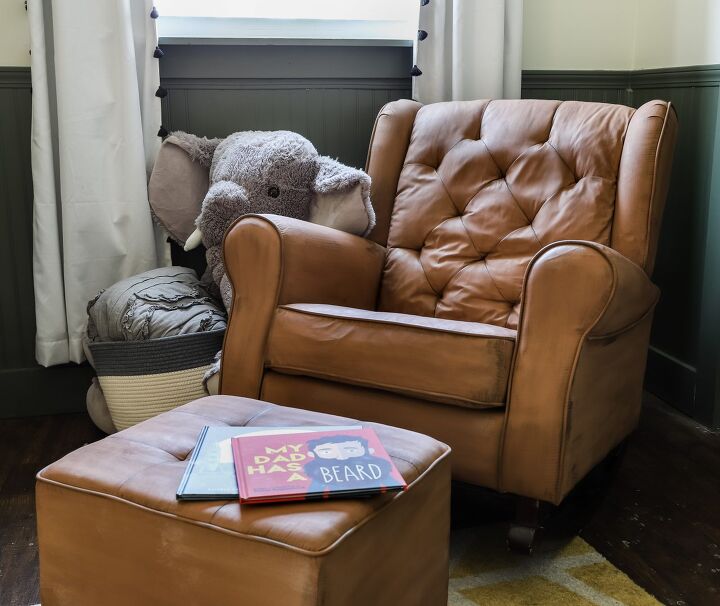
This chair came out even better than I thought it would y’all!
It is the perfect leather color & even looks like it has a real leather texture.
The Unicorn Spit paint didn’t make the chair crunchy at all, which is a big win in the upholstery painting game!
I am so excited that we get to continue to love & use this rocker in Eli’s big boy room, I wasn’t ready to part with it & now I don’t have to.
We still have a couple of projects to do in here before Eli’s room is up to snuff, but this is an amazing step.
Let me know what you think of our faux leather upholstery makeover & which Unicorn Spit color you are dying to use!


Frequently asked questions
Have a question about this project?