Stylish Chair Makeover on a Budget

5 Materials
$50
12 Hours
Advanced
My favorite old chair really needed some help.
It had great bones and was absolutely not going to the landfill OR a professional repholsterer (too expensive).
I looked into all my options for updating furniture and even tried painting a small test area in the back - this was a total waste of time. The chalk paint I used did not cover the green and made the fabric very coarse, not comfortable at all. Unless you are painting a faux leather or plastic sofa or chair, I don't see how this method would ever be OK.
At this point I was committed to recovering, because of the paint... I was checking out fabric options and noticed a lot of DIYer's are using the heavy canvas painter drop cloths for modern looking curtains ....LOVE this idea and love the price compared to decorators fabric.
I started by sanding and stripping the wooden portion of the chair.  Because the wood was very grooved and not easy to sand, I used the orange stripping paste and mineral spirits for most of it. 
This took three to four coates because the manufacturer had used a combination of products to get the greenish wood look.
Once the wood was as clean as I was going to get it, I used a small brush to add some darker stain to the creases of the wood...for more character.  Then added a little cherry stain and finished with two coates of polyurathane.
I attempted to wait to remove the green fabric until after the wood work was completed because I wanted to keep the filler/lining of the chair clean, but some areas had to be removed to get to the wood.  When removing your fabric try and save the entire piece without ripping because you can use those pieces as patterns for the new fabric.  
My chair had grooves to nail the fabric to, which were then covered by the piping.  I folded about 1/4 inch of fabric under and then again before I nailed the fabric to the chair.  This gave it a solid feel and clean look.icon


The piping went around the entire chair's wooden frame inside and out.  I looked into fabric glue, but in the end went with my trusty hot glue gun.
Once I was done with the piping, I took an old alpacca rug that I had from my college days, cleaned it and added it to the bottom cushion. The original cover had a zipper and was easily removed. Then I cut the lining of my alpacca rug on one side and slipped the cushion into it...fits perfect but I may tack down in the future. For the pillows, I purchsed a throw blanket from TJ Max, in this cool woven fabric which I think is a good contrast to the alpacca and the drop cloth.
I am really happy with the results and can't wait to do this again with some of my other old furniture!
Suggested materials:
  • Painters Drop Cloth   (amazon)
  • Upholstery nails   (amazon)
  • Tack stripping   (amazon)
See all materials
Flawless C Designed
Want more details about this and other DIY projects? Check out my blog post!
Go
Frequently asked questions
Have a question about this project?
  3 questions
  • Ess23733707 Ess23733707 on Jun 10, 2017

    I'd love to try this on an old chair. its quite worn out. Every time I'm tossing it out, everyone gets frantic they all love the chair. It's a fireside chair. All fanr all around. The piping is in the fabric, how could I do this? I definitely need new fabric as the old is worn on the arms.

    Thank you, your chair looks fabulou!

  • Ardale Ardale on Jun 10, 2017

    Good job and looks nice and comfy but I think I would have splurged and bought more traditional Victorian fabric to DIY it. It's a stunning Victorian chair and which now looks more like a run of the mill nice chair but nothing about it now looks Victorian. Sorry just my opinion! I love Victorian furniture and have both antique and reproduction furniture in my home. I've recovered several pieces myself and it isn't any harder to do with upholstery fabric then with a drop cloth and you can use any color or pattern you want and still keep the integrity of and look of your period furniture intact. I know upholstery material isn't cheap but it's not all that costly when your doing the work yourself and you only have one piece to recover. Another plus is upholstery fabric is thicker and softer so it will hold up under constant use far longer then a drop cloth will so in the end it cost you a lot less.

  • Darlene Chinchar Darlene Chinchar on Jun 10, 2017

    What Is the orange stripping paste?

Comments
Join the conversation
2 of 51 comments
  • Leslie Leslie on Jul 17, 2021

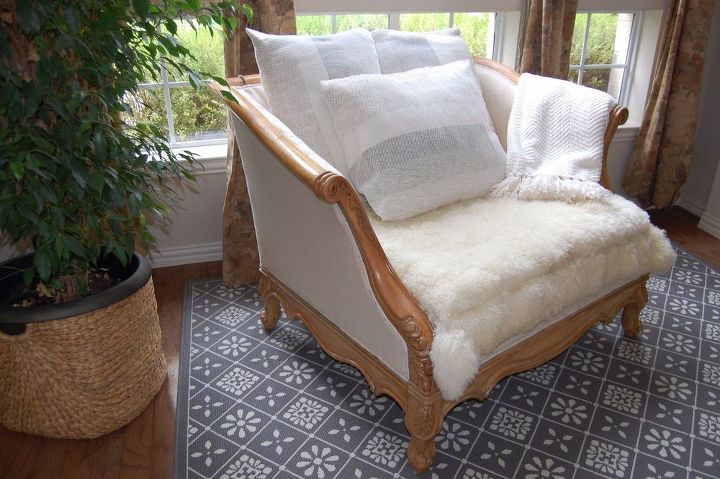
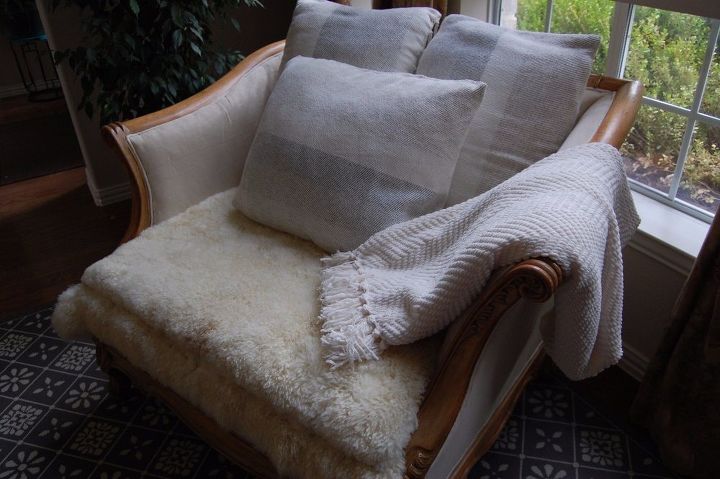
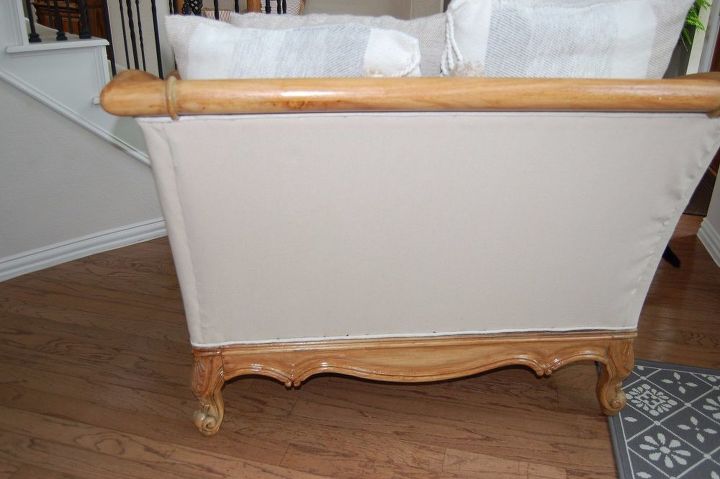
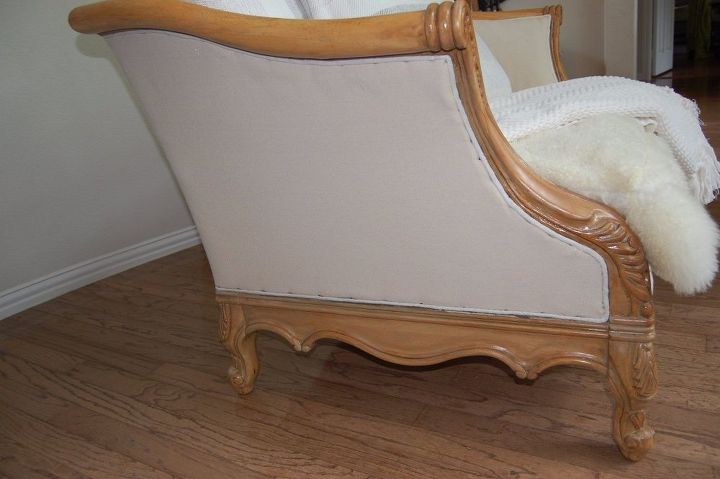
    Hi Flawless, I have not seen your post before and when I first saw the picture of the original chair I said OMG, FUGLY and she is going to paint the wood and cover with a gawd awful fabric choice. BUTTTTT....I still had faith and read on. You stripped the wood...ok lets seen what's next, then you started to apply the fabric which was a beautiful neutral. My dear the outcome took my breath away. What a GORGEOUS chair this is now and if I had room in my home I would look for a similar chair and follow your lead. I have a mid century wingback that I want to redo and I will tell you It frightens me to start because reattaching the new fabric to the front back and wing parts looks like a night mare to me but I have some Googled sites that kind of describe how to accomplish this part of the upholstering. One of these days I will pull up my big girl pants and just dive in. Thank you for sharing your project and keep the good stuff coming. :)

  • Carmen Comrie Carmen Comrie on Jan 08, 2024

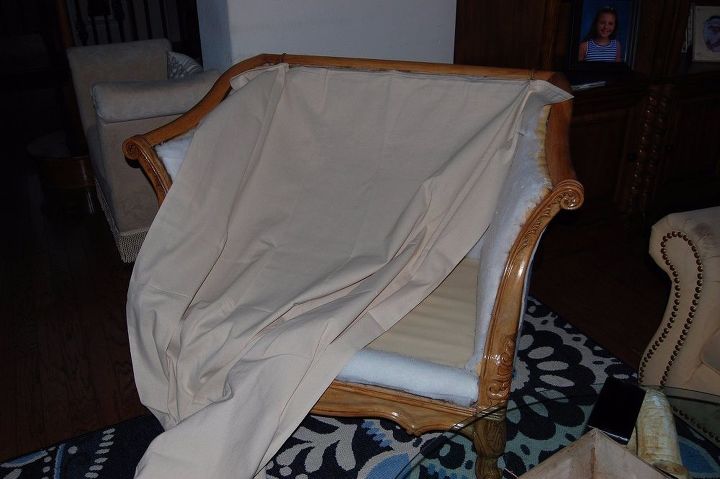
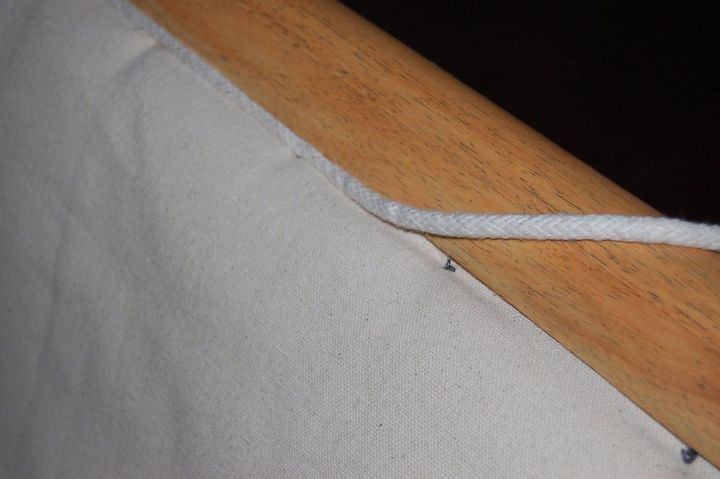
    I have a similar chair and want to recover it as well. You've given me the spark to try it. I like the ease, you mentioned, of using the old cover as a pattern; that simplifies the project a lot. Thanks for sharing your beautiful project and instructions.


Next