689 Views
Convert a Box Into a Walker Basket

by
Stephanie Rountree
(IC: homeowner)
8 Materials
$5
1 Hour
Easy
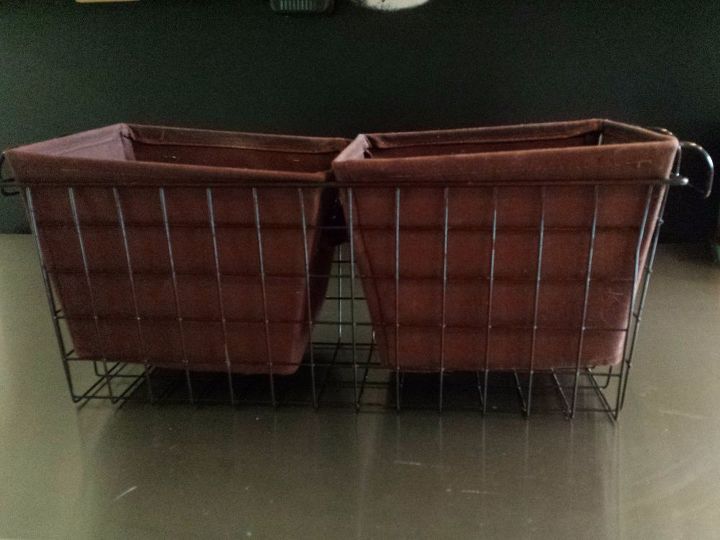
My 92-year-old dad uses a walker that had one of those wire baskets - you know the kind with the gaps so little things were always falling through. It also was narrower at the bottom. We tried fitting fabric baskets inside, but there was a lot of wasted space and they never fit properly. So, I took it upon myself to create a new basket for him.
Here's what he was using beforehand - fairly inefficient with wasted space.
I used the approximate measurements of the original basket. Fortunately, I found an old printer box that was the perfect length and width. I simply had to cut it down to the right height with a box cutter.
After consideration, I opted to use tag board from the dollar store to cover the box. If this doesn't hold up, I will cover it with fabric, but I like the look.
I overlapped the outside pieces to the inside just over the lip of the box. I went from the back side, over the bottom, and up the front, securing with a hot glue gun. I made sure this piece overlapped on the sides, too, so it would have a more finished edge. For the sides, I started at the side base and had it overlap to the inside bottom. Then I cut a piece for inside that went from the back side over the inside bottom and up the front side.
There are multiple tutorials on youtube on how to cover a box.
How was I going to attach the box to the walker? I found a simple solution - shoelaces! I used a paper punch and cut 2 holes into each side and threaded the laces from the inside to the outside of the box.
I found wooden letters at the dollar store, painted them white with acrylic paint and hot glued them onto the front. Good thing his name is short!!
Because the space was so open, I used a remaining piece of tag board and made an oragami box as an insert for small items.
You can find videos on youtube for how to make an oragami box.
The laces were wrapped around the bars of the walker and threaded back through the holes. I simply tied them into a bow knot on the inside.
Here it is, finished and filled with all his "stuff" - my 92-year-old Mom was also quite pleased, as she didn't have to see all his mess. They are so cute together!!!!
Enjoyed the project?
Suggested materials:
- Box (On Hand)
- Tag Board (Dollar General)
- Wooden Letters (Dollar General)
- White Acrylic Paint (Dollar General)
- Hot Glue Gun & Glue (On Hand/Dollar General)
- Shoelaces (On Hand)
- Box Cutter (On Hand)
- Hole Puncher (On Hand)
Published August 4th, 2017 11:12 AM















Frequently asked questions
Have a question about this project?