


Build a Potting Bench With Barn Wood and Old Porch Columns
Build a potting bench and add some vintage charm with upcycled chippy porch columns, reclaimed barn wood and pressed tin roof tiles.
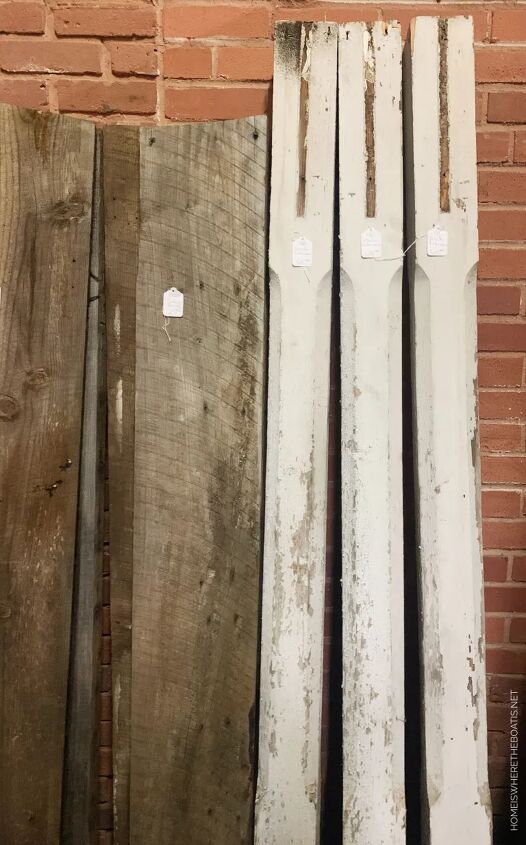
I wanted a roomy work bench for planting and projects, as well as a place to display garden collectibles, like bird houses and watering cans. After spying these old porch columns and barn wood at an antique mall, I asked my hubby if he could *pretty please* build a potting bench for me. He’s not a carpenter but he’s an excellent handy man!
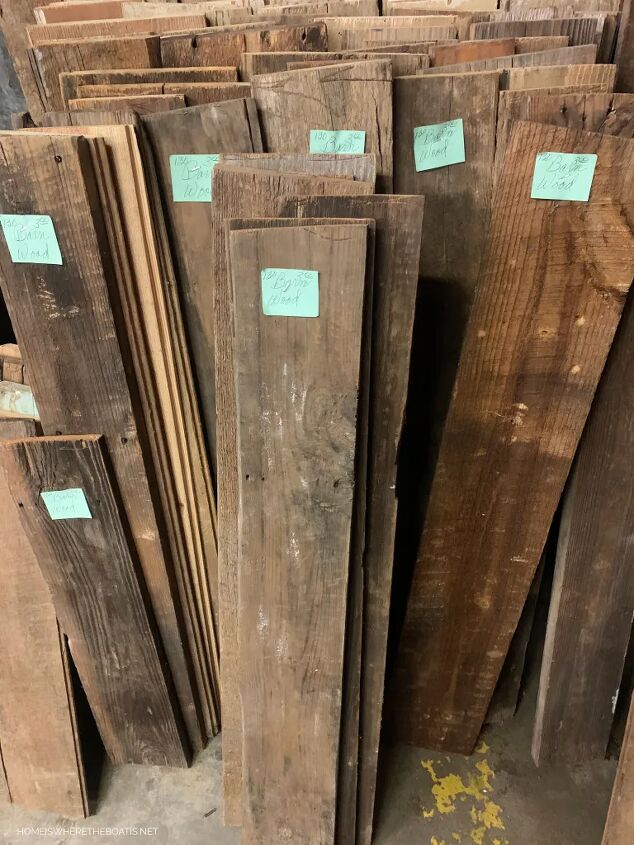
We cherry picked our way through the barn wood, bypassing split boards or those that were warped or too cupped to use. I love the character of reclaimed wood so I didn’t object to nail holes or large knots. Given the price of lumber these days, the barn wood boards were a bargain. We bought the longest boards available, not sure how many we might need, thinking we could go always go back if we needed more.
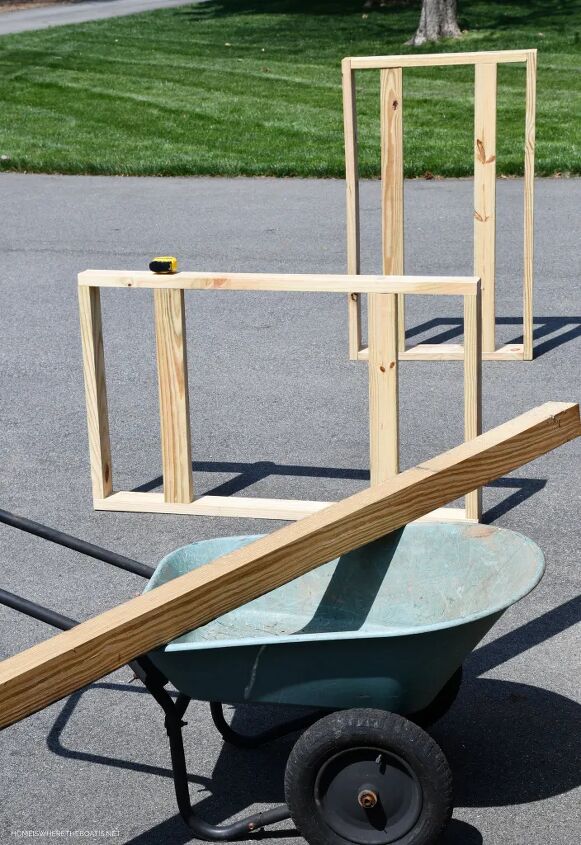
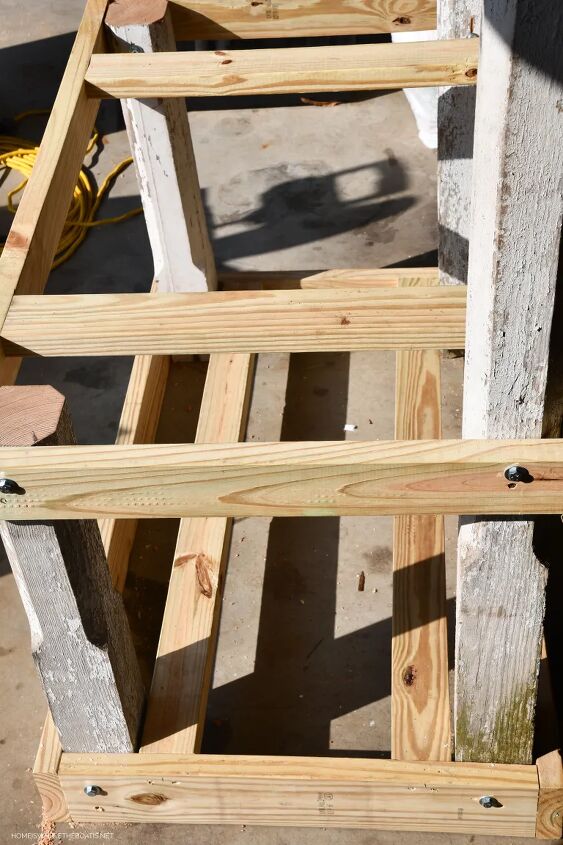
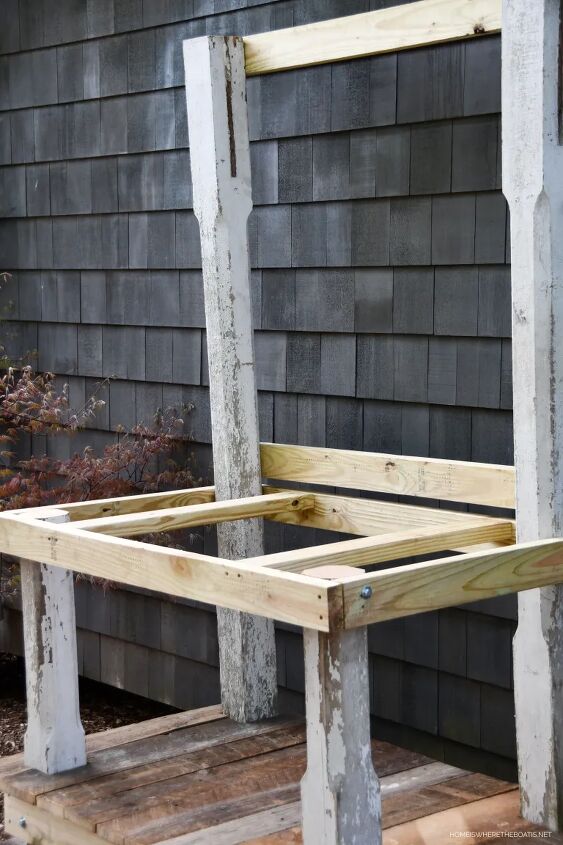
The size of the barn boards dictated the overall size of the bench, which ended up being 35 inches deep x 56 inches wide. He started with pressure treated 2 x 6s and 2 x 4s to build the frames for the bottom and the top of the potting bench. The 2 x 6s were used for the bottom frame to anchor the 4 legs of the columns in place.
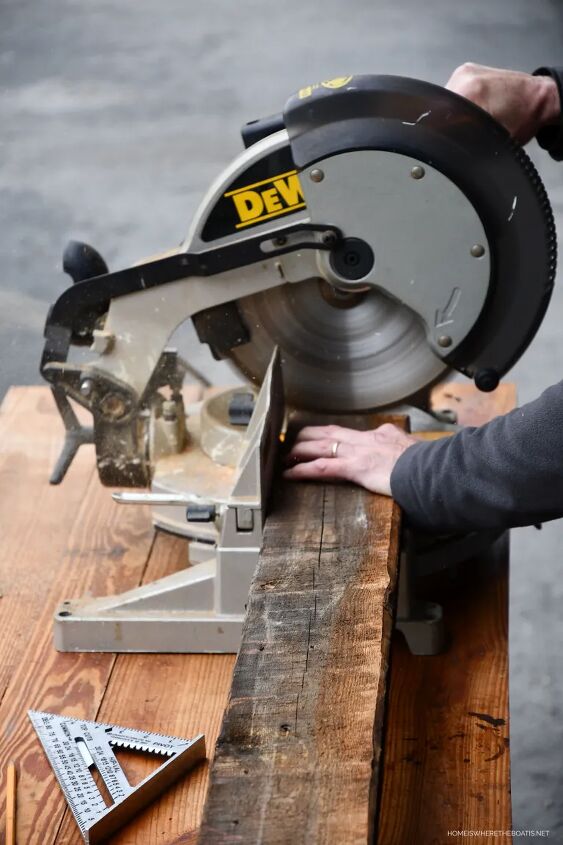
All the boards were sorted and cut to even them up. You could use a circular saw or a miter saw to cut your boards.
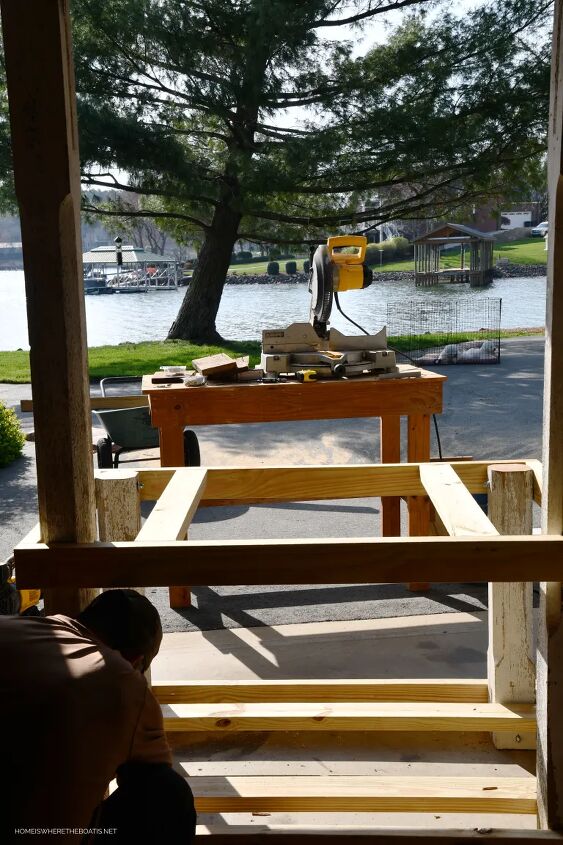
He cut one of the columns in half to make the front legs of the bench.
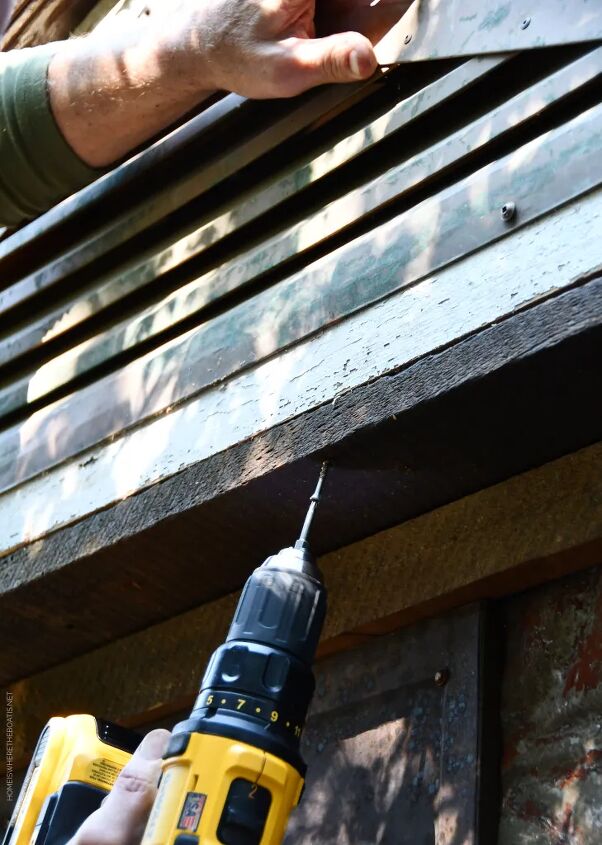
You could assemble this bench in a weekend if you have all your fasteners (correct length screws and number of lag bolts, washers and nuts, etc). It took longer for us than planned as we were interrupted by rain, a debilitating high pollen count. . . *achoo*. . . and The Masters. :)
The porch columns were attached to the frames using 7-inch lag bolts to provide stability. Those posts aren’t budging!
Once the frame was attached to the columns it was time to place the boards.
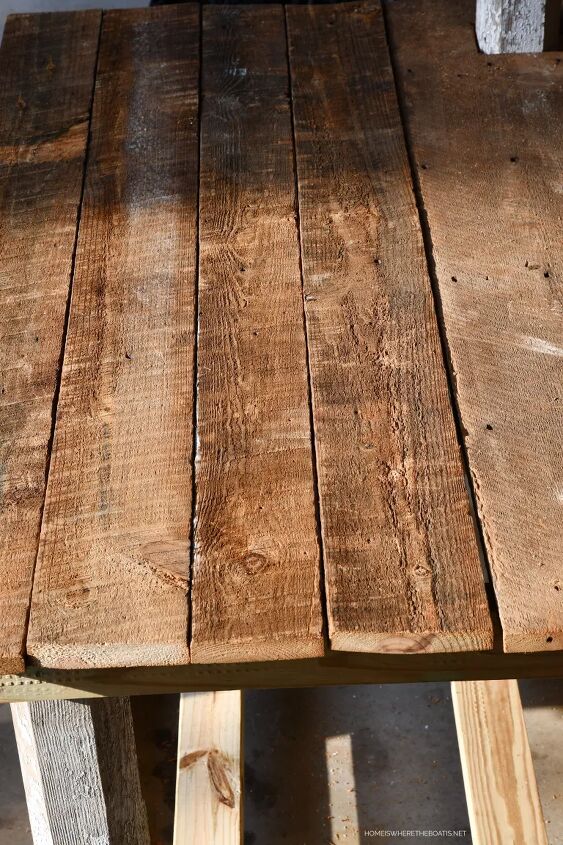
It took a little playing around to see where the boards worked best, shuffling them and flipping them over to find the best sides and alignment. The best looking boards were chosen for the top.

We didn’t have enough board length to span both the top and bottom horizontally, so shorter length boards were placed so they ran vertically on the bottom.
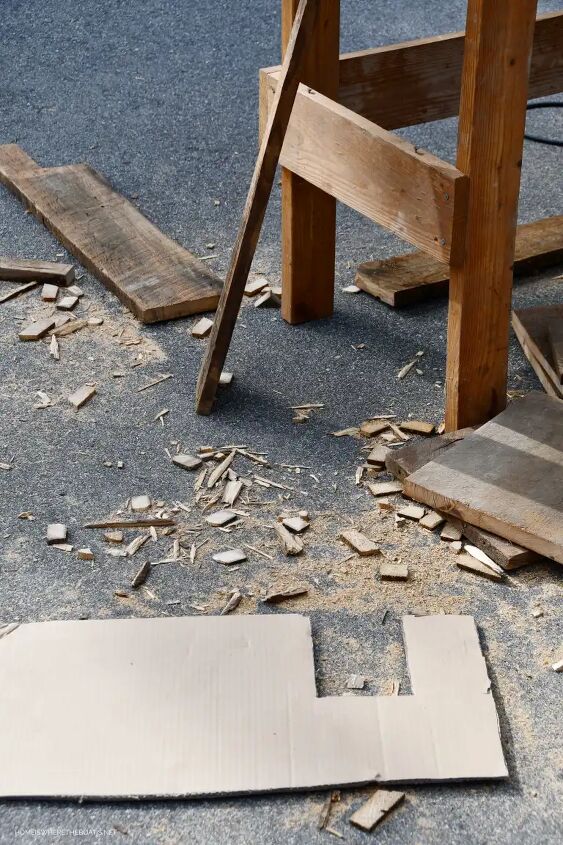
A few of the boards had to be cut and notched to fit around the posts. He made a cardboard template for easier cutting.
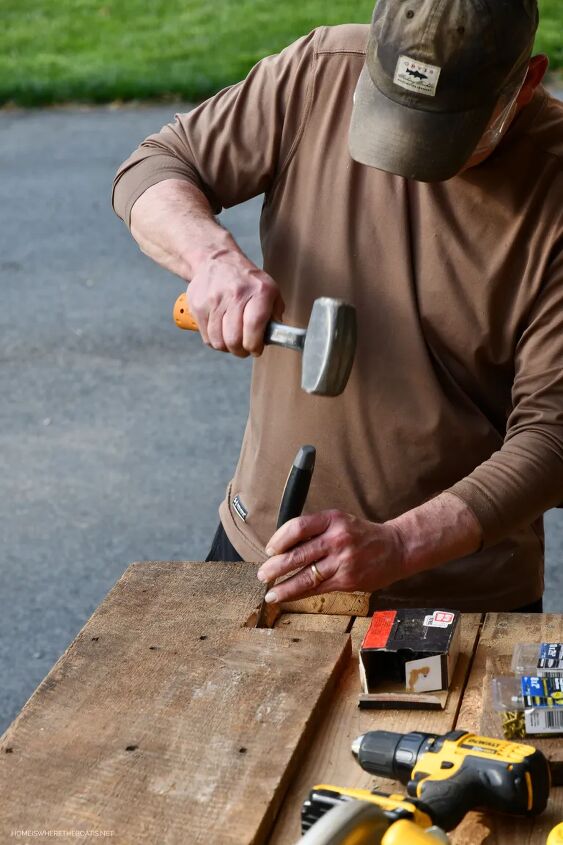
Having a jigsaw would have made cutting the boards to fit around the columns easier. He made do with a chisel and hammer to notch out the wood after making the cut with his circular saw.
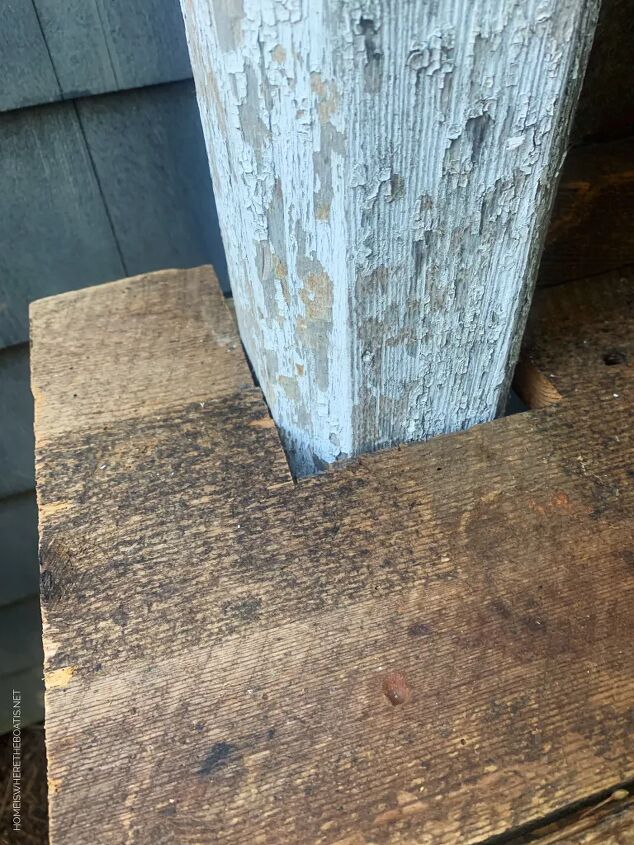
Here is how the boards fit around the columns.
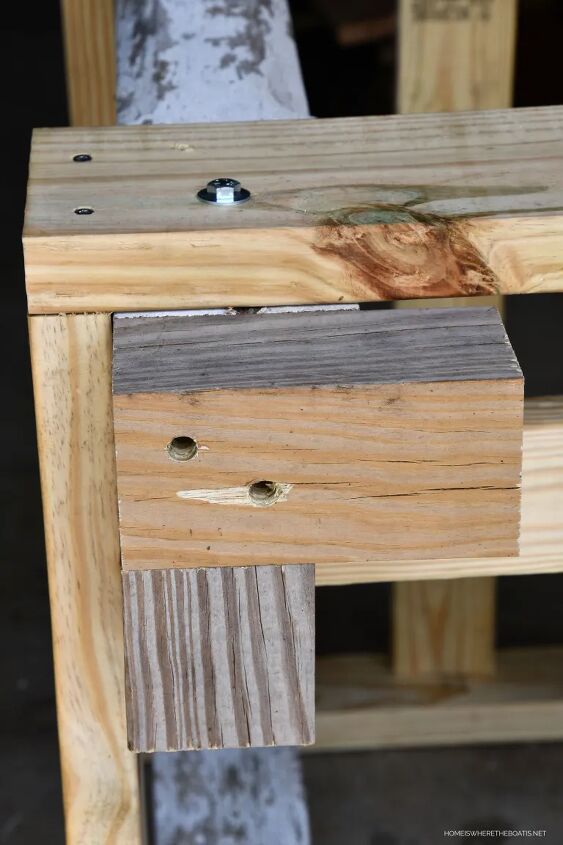
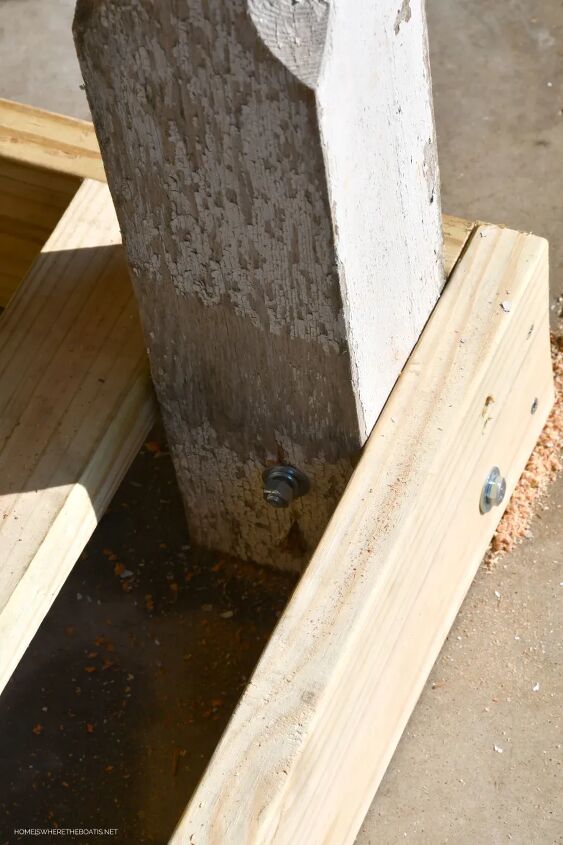
Blocks from a 4 x 4 pressure treated wood post were cut and screwed to the bottom of the columns to protect them and raise it off the bench off the ground.
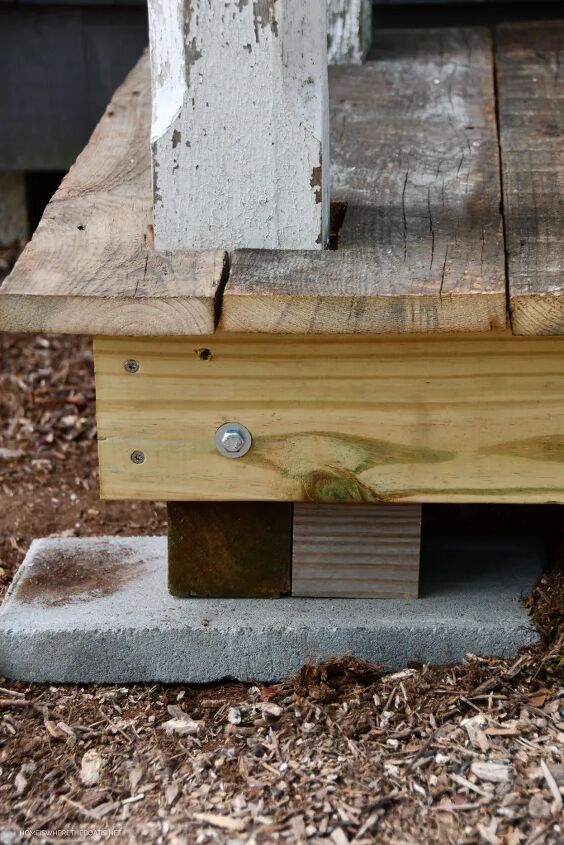
The blocks were also placed on concrete pavers to minimize ground contact.
We moved the bench to the side of The Potting Shed to where it will stay, to finish assembling. . . it’s a beast and heavy!
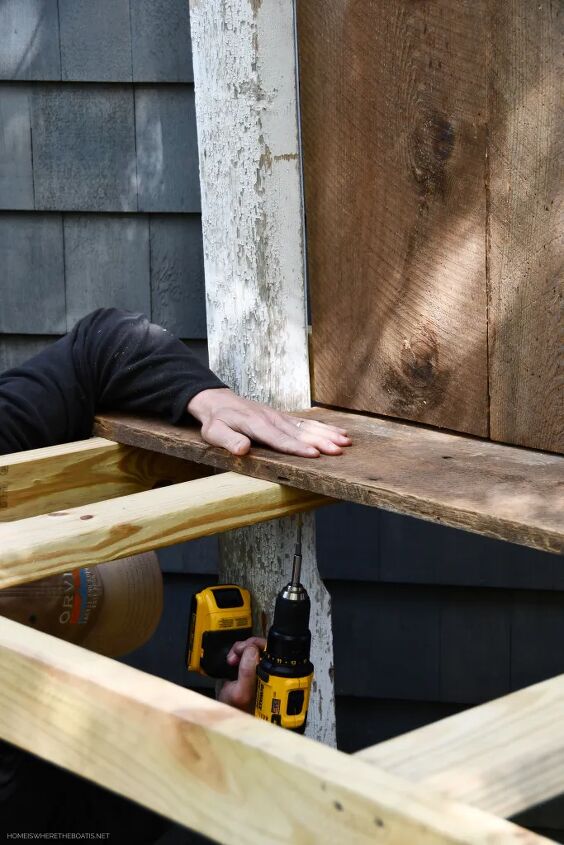
Boards were attached to the back and then the top boards were screwed in place.
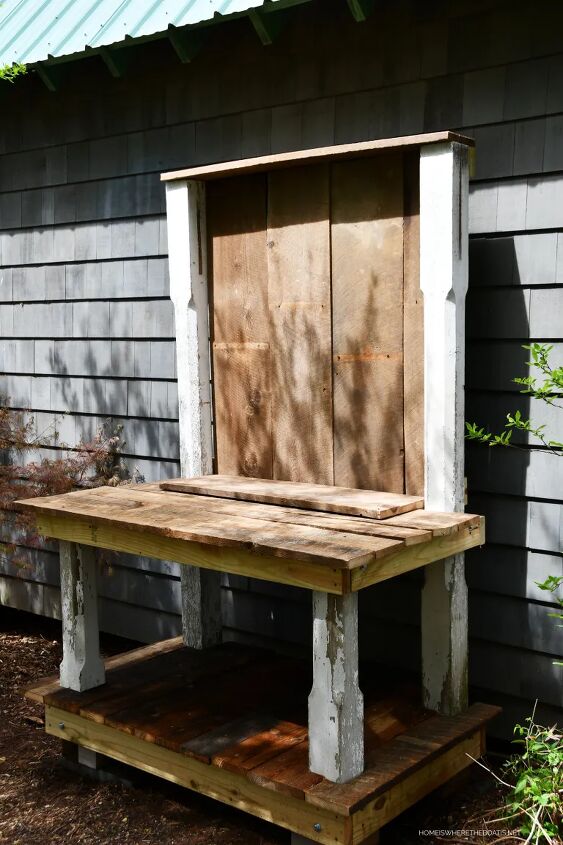
The barn boards on the back weren’t perfectly flush but I had an idea and plan to conceal that. . .
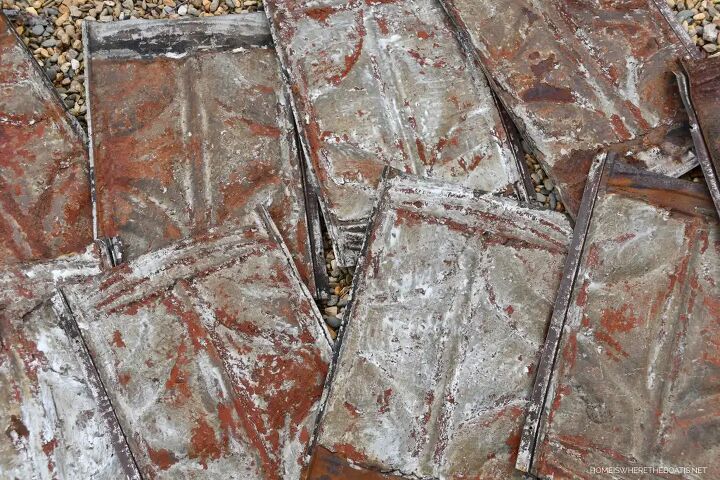
I had some salvage tin roof tiles, purchased when we built the Potting Shed. I paid $1 each for them when we bought the rusty metal tin for the porch roof.
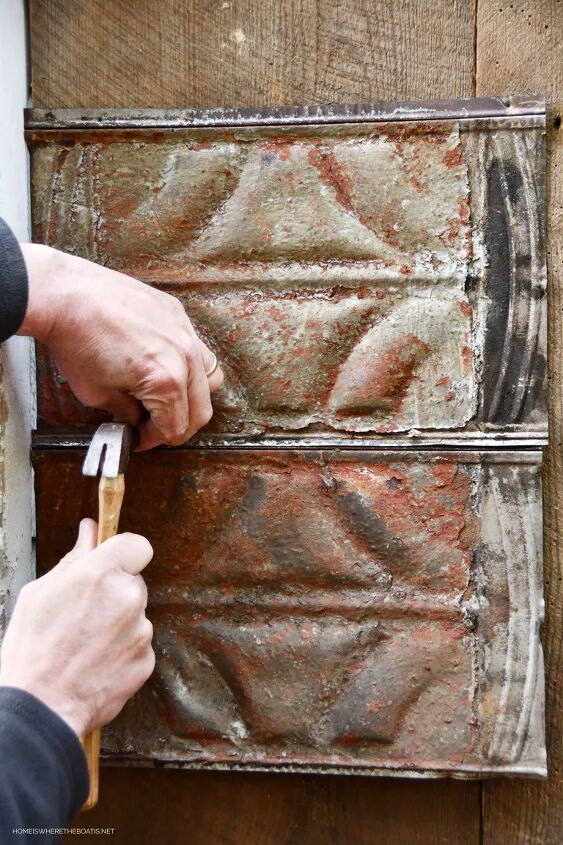
Panel nails blended with the rusty patina of the roof tiles, used to tack them in place.
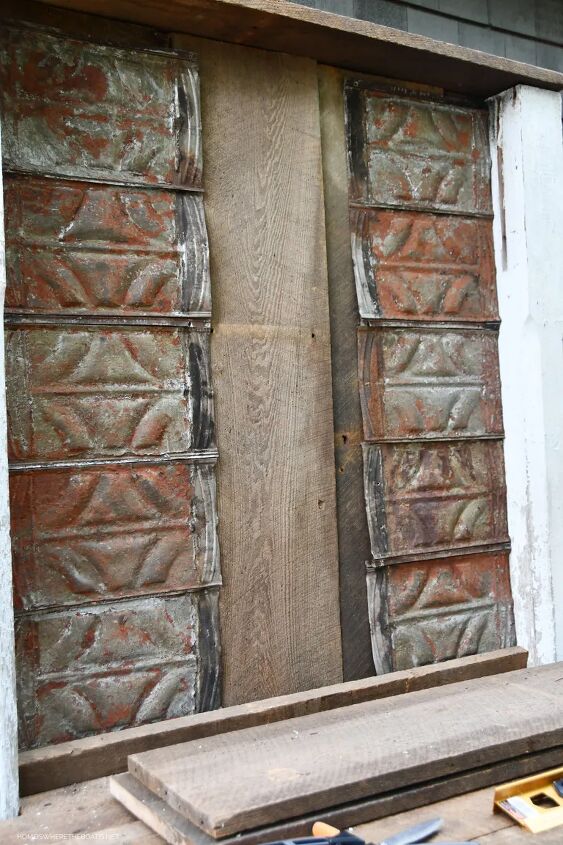
The roof tiles were shingled along each side of the back, leaving a gap in the middle.
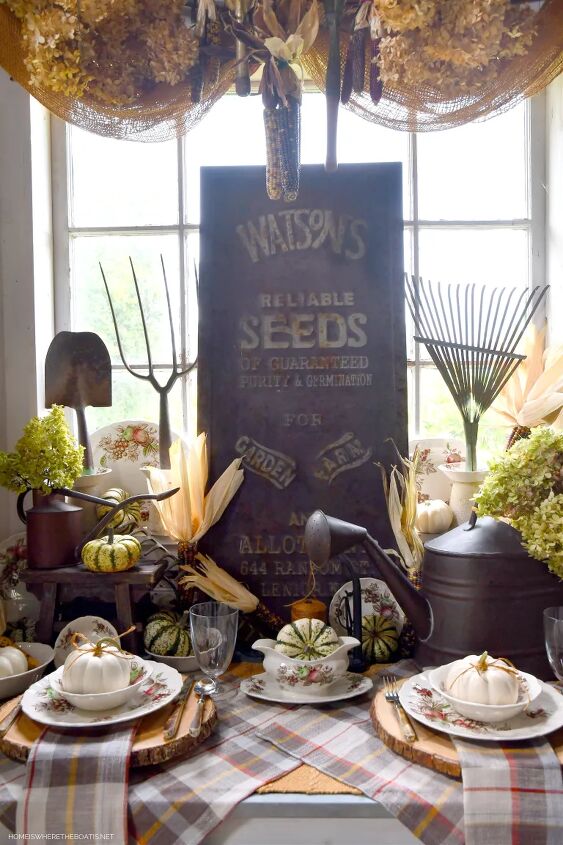
My vintage-inspired reliable seeds sign used for a Harvest Time Garden Table provided the backdrop of the potting bench.
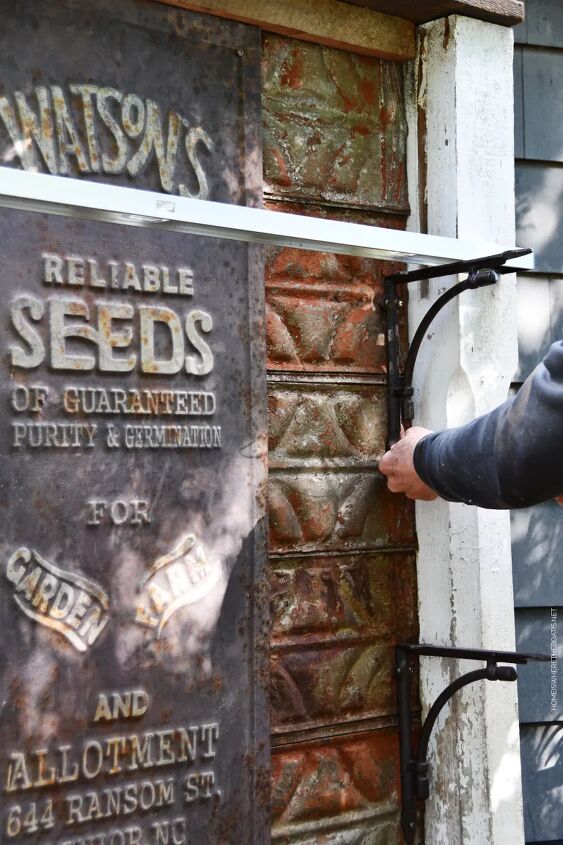
The sign was attached between the tiles with screws. Two lengths of wood were used like molding at the top and bottom of the back to eliminate the need for cutting and piecing the roof tiles along the edges, and preventing the need for a tetanus booster!
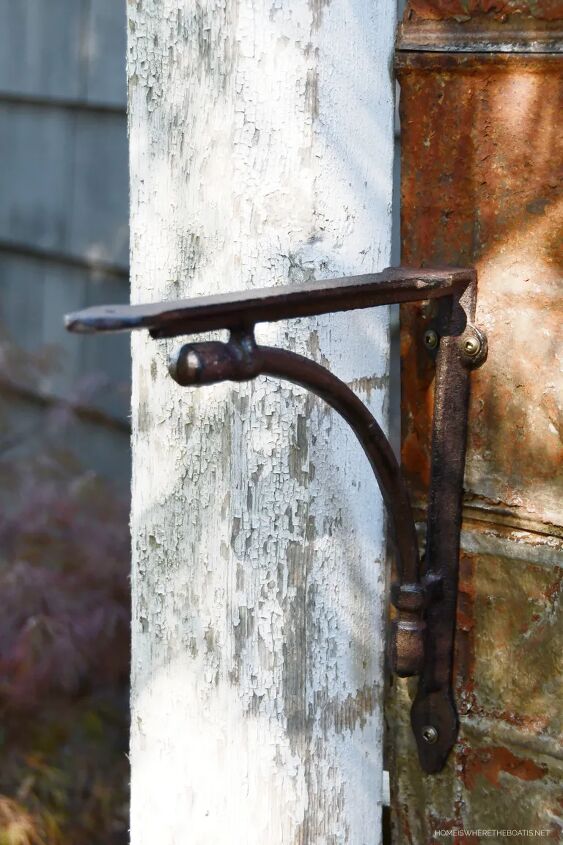
A set of 10 x 10 cast iron shelf brackets were screwed to the back to support the 12-inch deep shelves.
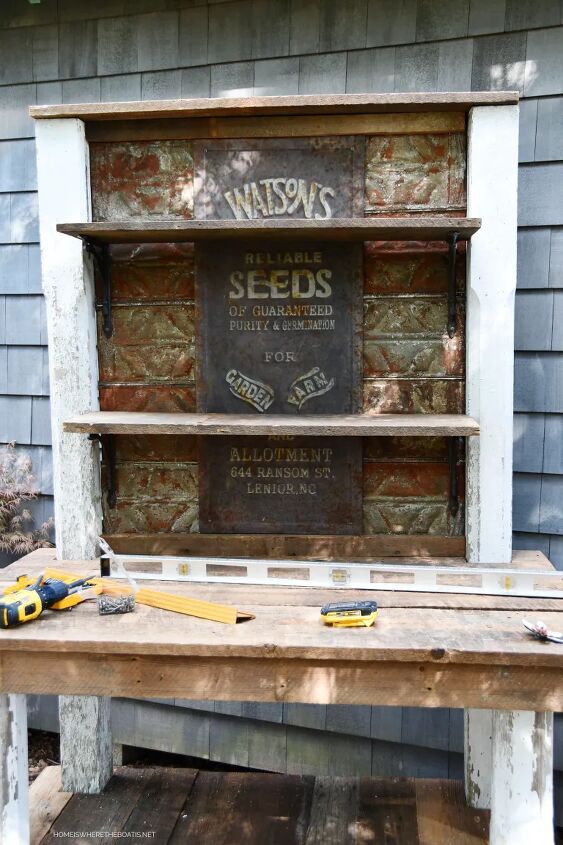
The shelves were strategically placed so the graphics and words on the sign were still visible.
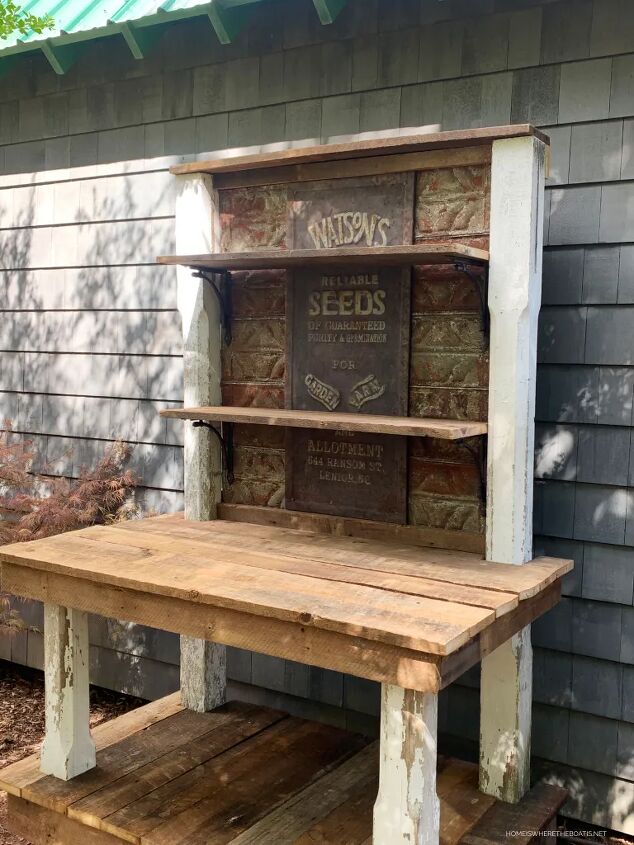
See her, HERE, in all her chippiness, imperfections and reclaimed-materials-glory, ready to plant seeds and pots! I plan on using a waterseal product to protect the wood and porch columns.
Resources for this project:
See all materials


Comments
Join the conversation
-
That’s really cool! ♥️
-
Absolutely Beautiful! My dream!!


Frequently asked questions
Have a question about this project?
Where did you find the shelf brackets you used? They’re different from the supply link.