


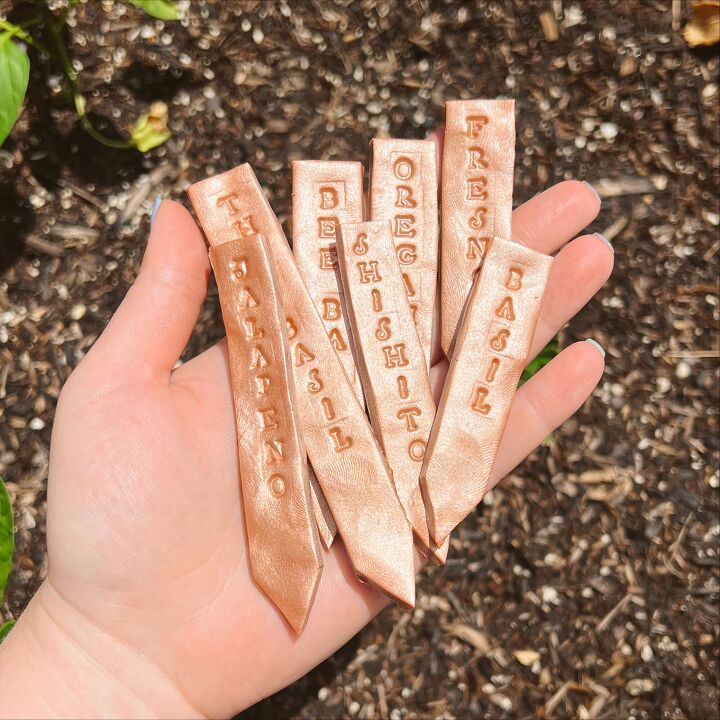
DIY Clay Garden Tags

I recently moved from San Francisco to Napa and was so excited to finally have a space for a garden. Once I got my garden all set up, I realized I needed some garden tags and decided to make some! This blog will go over how to make these super easy and cute DIY garden tags that are made from polymer clay.

Let’s get started by gathering all the supplies you need:
- Oven Bake Clay ( I used the Premo! Sculpey® Oven-Bake Clay, in Cooper)
- Alphabet stamps
- Clay cutting tool or something to cut your clay into strips
- Baking sheet
- Parchment Paper
Now that we have all of our supplies, let’s get started!
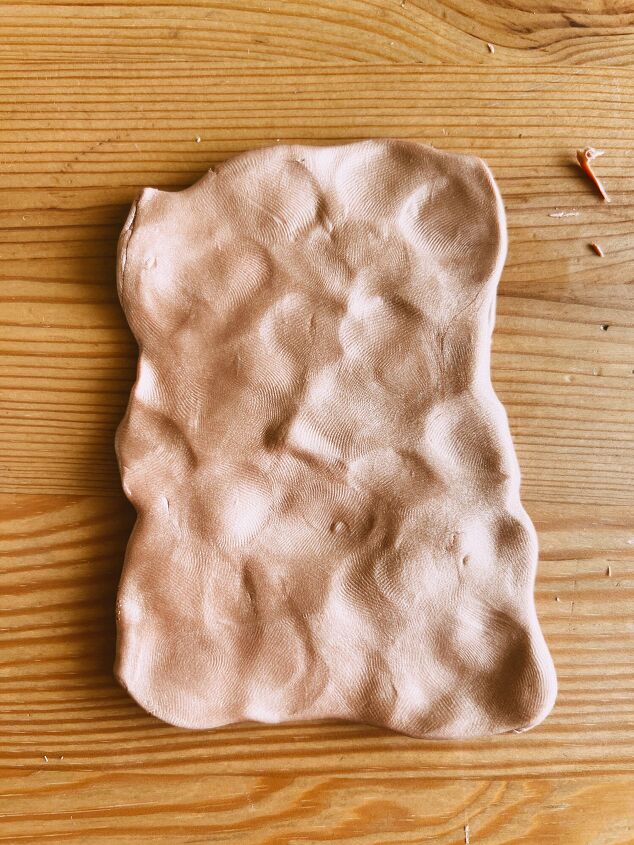
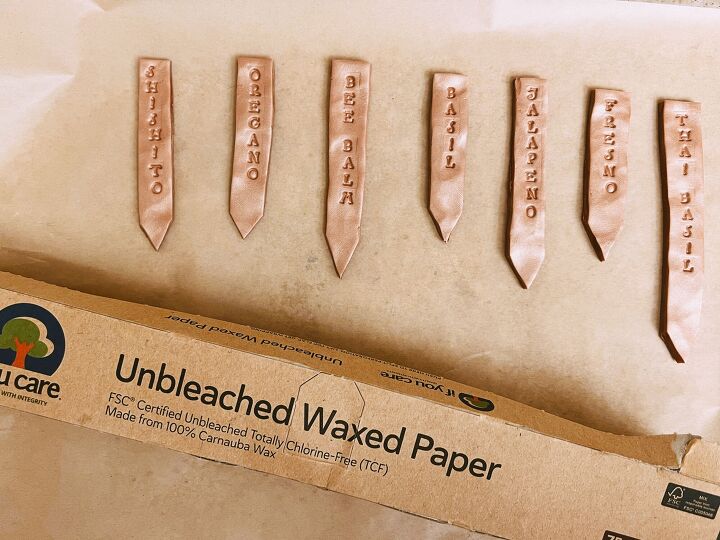
Roll out your clay in a rectangular shape that is a bit longer than the length of the tags you want. The length of my garden tags varied based upon the name being stamped on but were about 3-5 inches long. I did make them all the same width and thickness which was 3/4 inches wide and 1/4 inches thick. You can play around with the stamps you'll be using to get a better feel of what size works best.
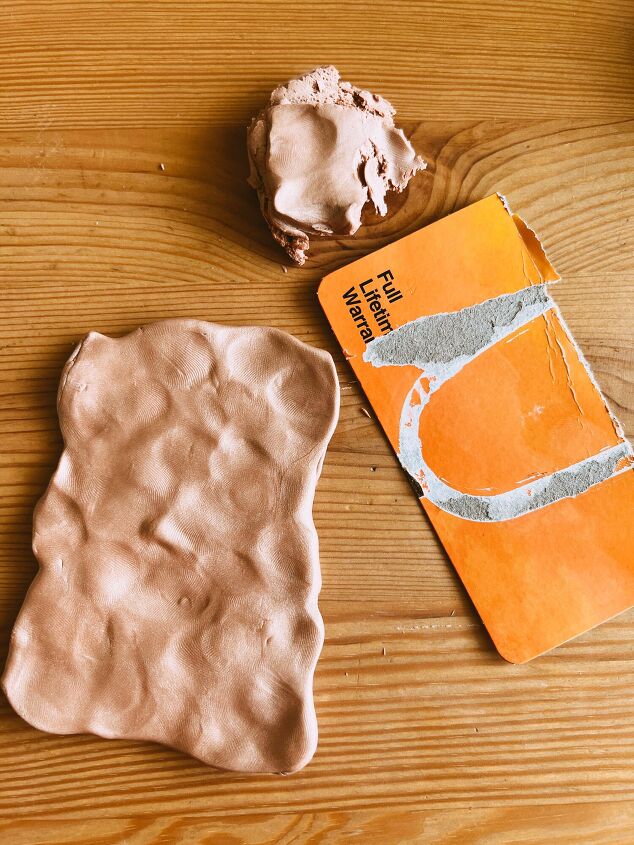
Once you’ve rolled out and flattened your clay, it’s time to take your tool to cut them. I started doing this with a piece of scrap cardstock and it worked just fine! I had to make sure that it went all the way through the clay and move it back and forth a few times for a clean cut. But then I saw my fabric roller and decided to give that a go. It worked great, was a bit easier to use, and the clay residue cleaned off super easily.
When you cut out your shape, make sure that the bottom of the tag you cut in a pointed shape so you have a sturdy base to tag in the dirt.
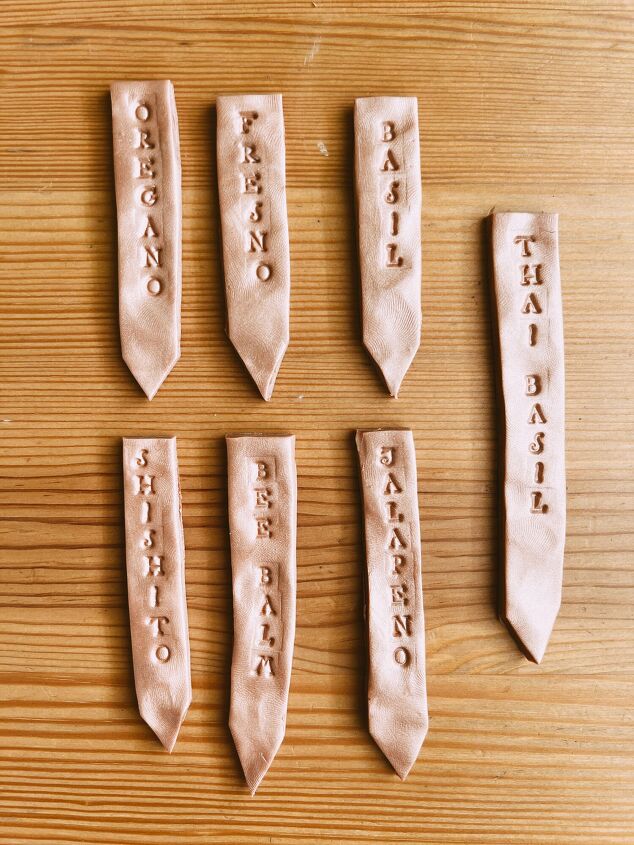
Once your shapes are complete, it’s time to stamp them! I used rubber alphabet stamps for this part that worked great. I also had metal stamps that I’ve used for jewelry in the past and I gave those a try as well. They worked but were much smaller and I preferred the larger rubber stamp letter. See if you already have something you can get creative with! Otherwise, I think the rubber stamps are the way to go.
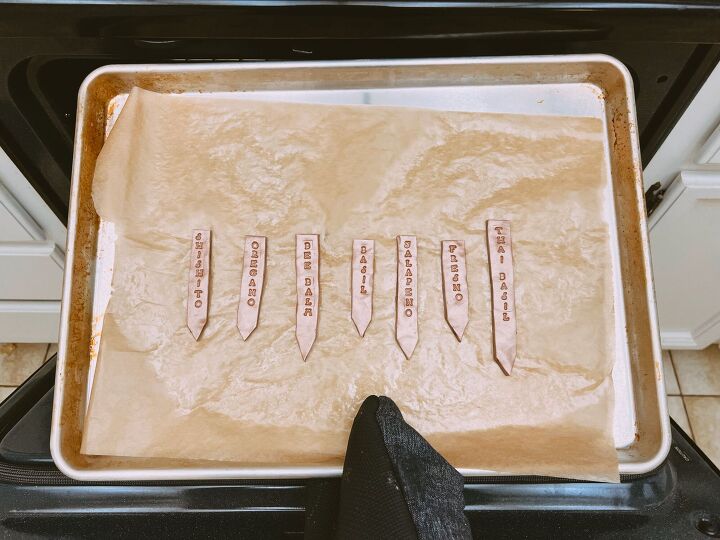
Once all your tags are stamped, it’s time to put them in the oven. Pre-heat your oven to 200 degrees fahrenheit. Grab a baking sheet and put some parchment paper on it. Then, place all of your clay garden tags on the baking sheet and place them in the oven for about 20 minutes. The time in the oven depends on the thickness of your clay. My clay was about 1/4 inch thick and took 30 minutes in the oven.
When they are done cooking, pull them out of the oven and let cool. I did mine in the evening so let them cool over night and they were ready to go in the morning.
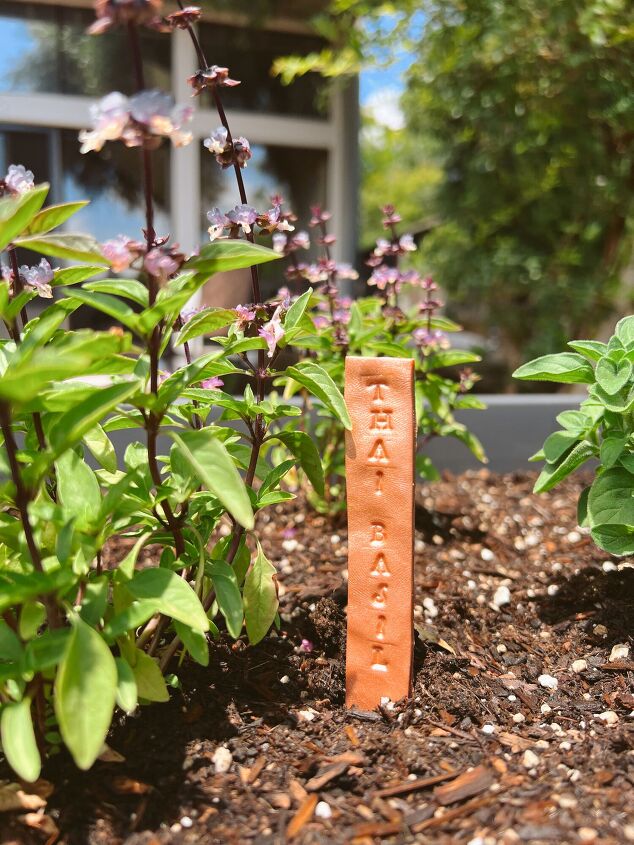
And that's it! They're ready to add to the garden!I love how these turned out and hope you enjoyed this DIY! Put your own creative touch on it and have fun with it!
Resources for this project:
See all materials


Comments
Join the conversation
-
Super inspiring! Now I'm curious to take it a step further and perhaps try making a large garden-stone, shaped like a star or circle! Imagination running wild here. Thank you so much for sharing!

-
Great little project! I love them.


Frequently asked questions
Have a question about this project?