From a MIG Welding Wire Spool to a Bird Feeder

Karen Manasco
by Karen Manasco
3 Materials
$10.00
3 Days
Medium
Years ago, my husband brought home a stack of metal spools used
to store MIG wire. He sewed wire cloth onto the spool in a somewhat
rudimentary fashion, and called it a bird feeder. A raccoon demolished
it, the spool was chunked into a pile, and that was the end of that.
Fast forward a few years, and I found myself with a backyard that had
become a bird oasis. It seemed like a good time to drag out the old
feeder, and give it an overhaul.
The result is a large feeder that is very durable, can be painted, easily
filled, will feed many birds at once, and will also last a very long time.
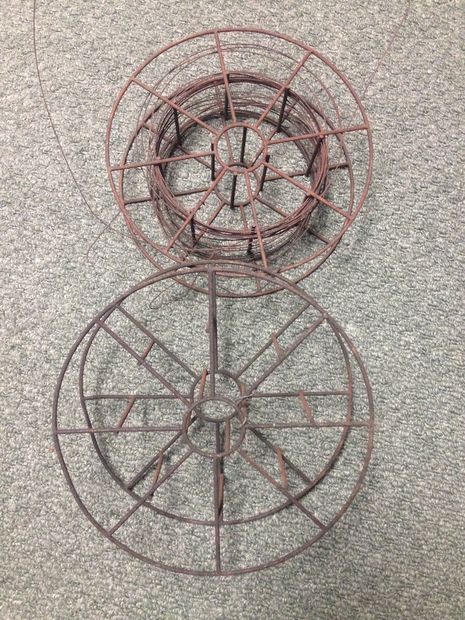
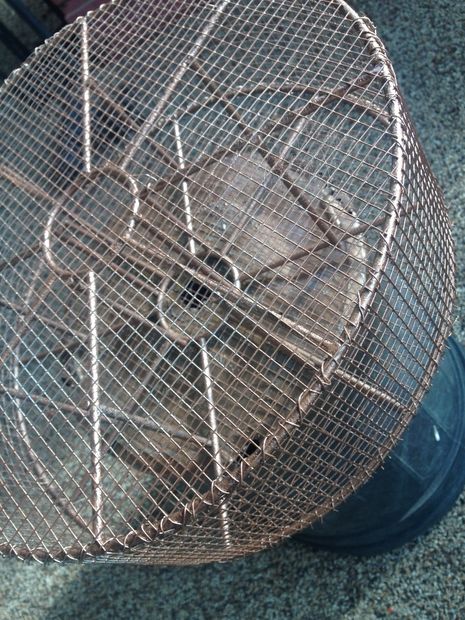
Empty welding wire spools.
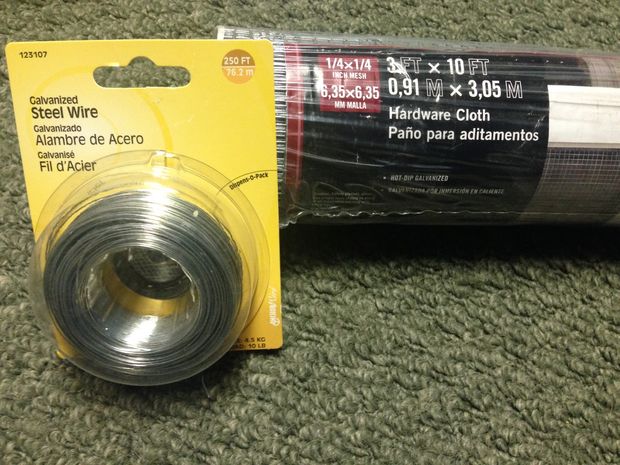
Galvanized wire for outdoor use is fine.
Supplies and tools needed...


Gather the following materials for your feeder:


1 large metal spool (mine is a 12" spool)


These spools are typically used to hold MIG welding wire, but can also


be used to hold other wire. Check with local welding supply stores. Any


welder should be able to steer you toward a pile of these spools, free of


charge.


1 roll of hardware cloth


You will need enough cloth to cover the front, back, and circumference


of the edge of the spool. A 10' x 3' roll will cover almost nine 12" spools.


1 roll of galvanized steel wire (I used 24 gauge, with a 10 pound work load)


A short length of chain that can be shortened, used to hang the feeder


The following tools are necessary, if not very helpful:


Sheet metal scissors


Felt-tip pen such as a Sharpie


Durable hand protection, such as leather gloves


Needle-nosed pliers


Wire cutters


A tool with a tiny hook on it, such as a small latch-hook or crochet hook


Optional:


Spray paint
Using a Shaprie pen to draw the outlines.
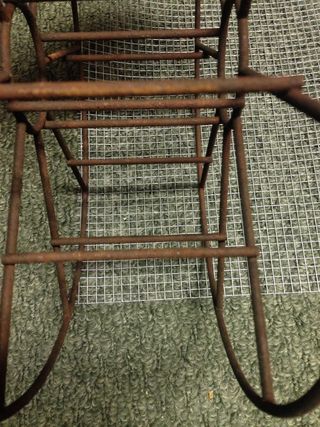
Use the spool to determine the side panels.
Lay out and cut the screen...


Unroll the wire fabric on a flat surface. You may wish to use gloves at this time, to protect your hands from scratches caused by the wire.


Place the empty MIG spool on the wire, then trace around the outer edge


in order to draw the size you will need to sew the fabric to the spool.


Repeat, making two circles.


Place the spool on its side, at a straight edge of the fabric. Using the Sharpie,


mark the width that will be required.


Holding the fabric against the spool, roll the spool and the wire in a complete


wheel rotation in order to determine the length. You can also simply use a tape


measure. It all works, right? Be sure to leave a gap in the side length in order to


fill the feeder. Keep in mind, the gap should be small, to avoid birds getting stuck


inside the feeder. You might also consider closing the gap, then creating a hole


that is large enough for a funnel tip to fit into, for filling.


Once you have drawn the two circles, and one long rectangle, use the sheet metal scissors to cut out the shapes.
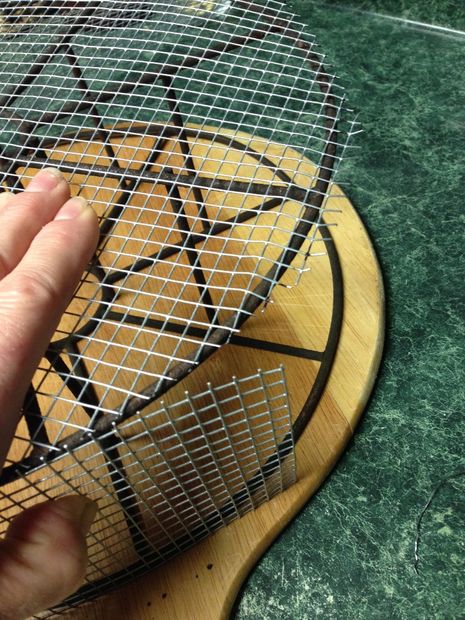
Be sure there is not much overlap, at all.
Align and secure the top and side with temporary ties...


Place the spool on a flat work surface. Lay one of the wire mesh


circles on top of it, and secure the circle to the spool with temporary


ties. You may use small pieces of wire, trash / bread ties, etc.


Align the side wire to the side of the spool, using temporary ties to secure it.


You may wish to combine a tie to secure both pieces of wire in the same place.


It is not necessary to make multiple ties, but do make certain the pieces will not


move around while you are stitching the edges.
Twist ties will temporarily hold wire.
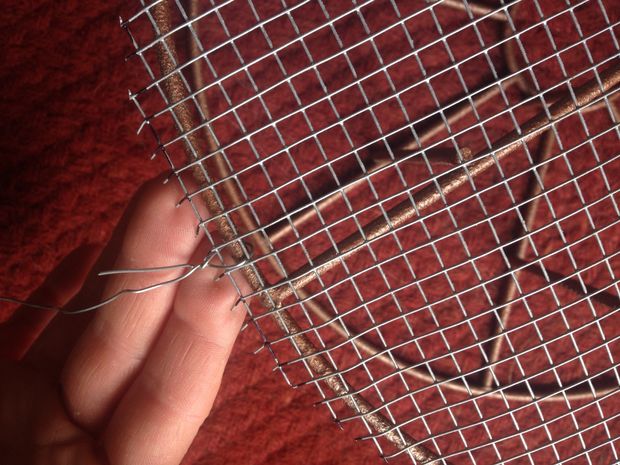
Begin stitching the top and side to the spool...


Using a length of wire, secure it to the spool by twisting, or even


wrapping it around the spool wire a few times. You may then begin


stitching, just as if you were sewing clothing with a whip stitch.


It is not necessary to place a stitch into every single 1/4" space, but


do sew the stitches close enough so bird food will not fall out.


Pull the wire taut, using needle-nosed pliers, to save your fingers.


I found it easier to not use gloves during the stitching process.


You will not be using a needle to sew in the traditional sense, but rather


will rely on the stiffness of the wire to act as the needle. It is difficult to


guide the wire exactly where you want it to sew, which is where the


hook tool will come in handy, to pull it through the 1/4" squares.


Don't use a piece of wire that is excessively long, as it will tangle, bend


and get in the way. No more than a yard's length is easier to work with


than a lengthy amount.


Stitch through the top screen, go through the spool, then exit the


outer mesh. Repeat this process all the way around the spool. If


you encounter sharp bits of wire edge, you can crimp them down


with a tool, or press them with a gloved hand. Don't worry about


imperfections, as they can be hidden by spray paint.


Also keep in mind, you should press or trim any sharp edges of the


wire, to avoid harming our feathered friends.


See the next step for additional stitching tips.
A stitch in time saves nine!
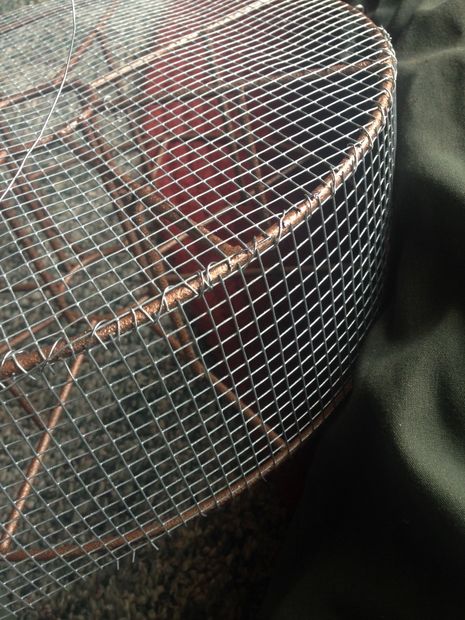
The gap is used to fill the feeder.
Stitching tips...


Needle-nosed pliers will save your fingers, especially after all the stitching that will be necessary.


If you run out of wire, simply wrap a strand around the spool, or twist it onto the previous wire, and continue stitching.


Not all of the holes will be complete. No need to worry, simply stitch into the nearest hole that is secure.


The wire sticky-outties are dangerous for both humans and birds.


Be sure to either fold them down, and include them in the stitching,


or snip them off, making certain to press the sharp edges down with a tool.


Occasionally, all that yanking on the wire, and a crimp now and then, will


cause the wire to break. Simply wind the remainder onto the spool, add


a new piece of wire, then continue.


There are several options to end a short piece of wire. Just run the remaining length along the spool, then stitch over the tail of the previous wire.


You're halfway finished at this point. Flip the spool over, place the


remaining piece of wire on top, and begin stitching in the same manner


used for the other half. I find it is easiest to complete this project when


working at waist level, especially in a brightly lit area.
To paint, or not to paint...
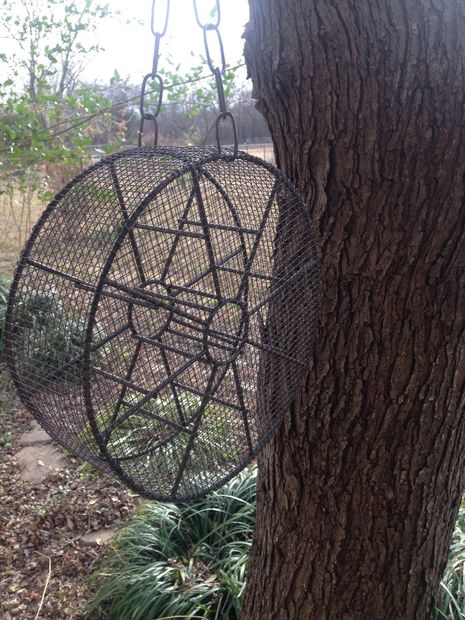
Add a chain...


Once you have completed the stitching process, be sure to crimp down


any sharp edges.


You may now add a way to hang the feeder. I just dug through an old junk


drawer, and found a short length of chain. Using two pair of pliers, open a


link on one end of the chain, then secure it to the wire of the spool, and close


the link. Select the length of chain you desire, open the end link, secure to the


spool, and close the chain.


You could also use string, rope, or other hanging material, though it would be best to select something that is durable, and able to withstand the elements of nature.
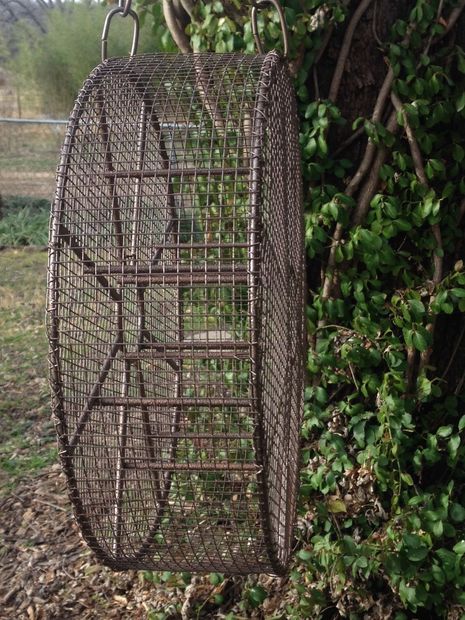
Your feeder is now heavy duty!
Paint it pretty, let it dry...


Once your feeder is complete, and hanging, you may want to give it


a good mist of spray paint. This will not only protect the feeder, but will reduce


the sharpness of any wires you may have missed. Gotta protect those little


birdy feet, you know.


It is easiest to suspend the feeder while painting, so you can access all of


the angles at one time. Be sure to let the paint dry thoroughly before adding


bird food.
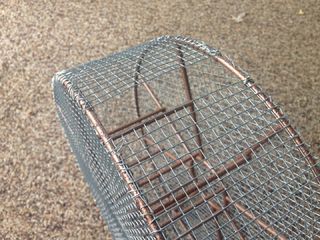
Just waiting to be filled.
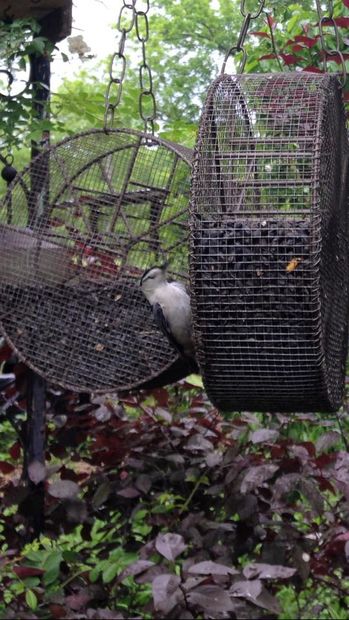
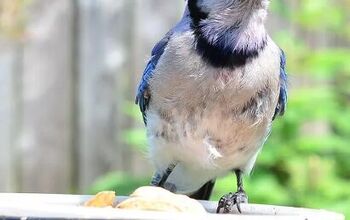
If you hang them, they will come. :-)
This particular MIG wire spool is rather large, and as a result, holds


a lot of bird food. If you have quite a bird population as we do, don't


worry about the food mildewing, but if you only have a few visitors, try


to find a smaller spool, then you can hang many of them.


In our area, the Cardinal population is quite large, so we tend to fill the


feeders with black oil sunflower seeds, though there are other choices.


Just be certain the seeds are not too small, such as Nyjer / Niger Thistle


(Guizotia abyssinica) seed, or too large, such as striped sunflower.


We have many other visitors to the feeders, including:


Cardinal


Red-Wing Blackbird


House Wren


Sparrow


Tufted Titmouse


Occasional Bluejay


Occasional Indigo Bunting


Chickadee


Uninvited Starling


Be sure to hang a Thistle sock near your feeder, to attract the


Purple and Golden Finch.


For a complete tutorial with plenty more pictures, please visit the link provided.


Happy Birding!
Suggested materials:
  • Wire welding (MIG) spool   (Welding supply / junk pile)
  • Galvanized wire   (Hardware store)
  • 1/4 inch hardware cloth   (Hardware store)
Karen Manasco
Want more details about this and other DIY projects? Check out my blog post!
Go
Frequently asked questions
Have a question about this project?
  1 question
Comments
Join the conversation
5 of 30 comments
  • Kwinters Kwinters on Nov 19, 2016
    I have to try this ...so clever & it looks squirrel proof.
    • See 1 previous
    • Vio20238747 Vio20238747 on Feb 09, 2017
      Hi Karen, I just read to try hot pepper flakes in your bird food. Squirrels do not like hot and I was told that birds can not taste so it does not keep them away or hurt them! I'm going to give it a try!
  • Jim10498479 Jim10498479 on Dec 05, 2016
    as soon as I can find the spools. this looks to be squirrel proof too.
    • Karen Manasco Karen Manasco on Jan 02, 2017
      Hello Jim and Ann, actually, the squirrels are pretty good about still hanging on to get a few seeds out. They are pretty durable feeders, but raccoons will tear them up. :-)
Next