


Easy and Inexpensive DIY Garden Art Flowers
One of the enjoyable things about having gardens and outdoor spaces is creating things yourself that you can then display in them.
Garden art flowers can easily be made using inexpensive everyday things that you find at thrift stores or garage sales.
Like silver plate trays. They're an excellent backdrop for these flowers because they really help make the glass marble gems sparkle.

Sometimes when I tell my hubby my project ideas he thinks I’ve lost my marbles, but thankfully I found them for this easy flower garden art project. ;)
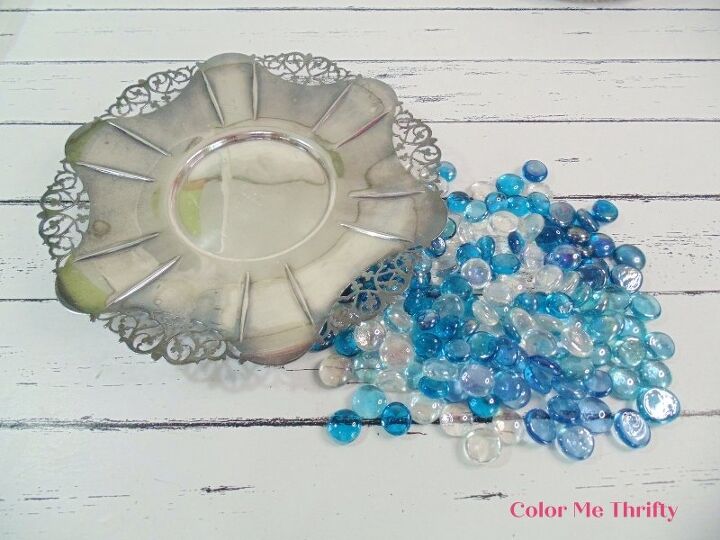
I've had this tray in my stash for quite a few years. I see them here all the time, usually for a dollar or less. They come in all shapes, sizes, patterns, and weights.
Most of these vintage silver plated trays have some sort of decorative edging that always reminds me of flowers.
Maybe you already have a silver tray that you’re not using that can be repurposed as one of these flowers.
You’ll also need some glass marble gems. I’ve collected mine over time from thrift stores, but they can be found at dollar stores as well.
Supplies needed for silver plate tray flowers
- silver plate tray
- glass marble gems
- E6000 glue
- stainless steel tablespoons
- painter’s tape
- pipe for stems
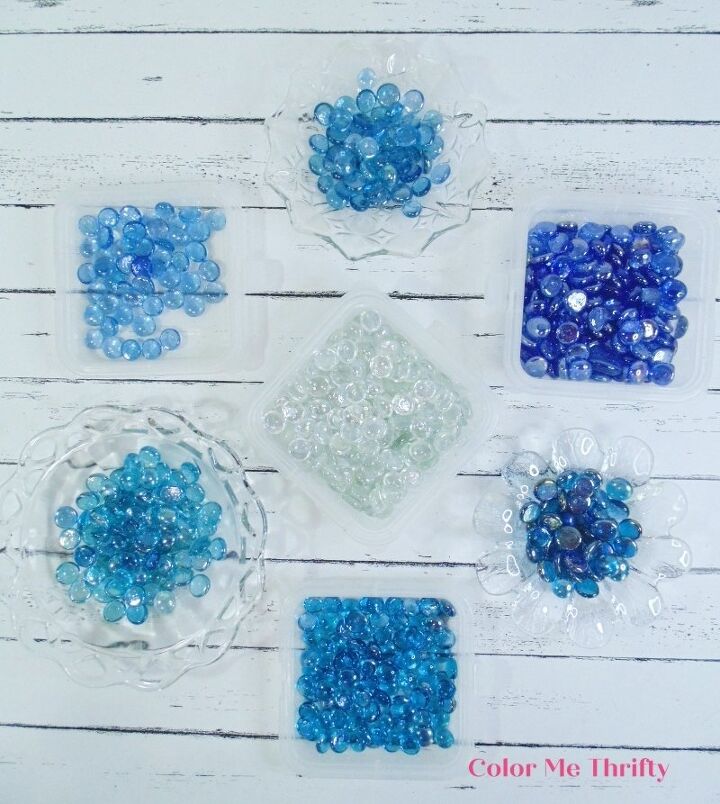
Since blue is a color that isn't found in living flowers very often, I decided to create my silver tray flowers using a variety of blue marbles gems. But whatever colors work for you will work too.
These are the gems that have a flat bottom, which makes them great for a project like this.
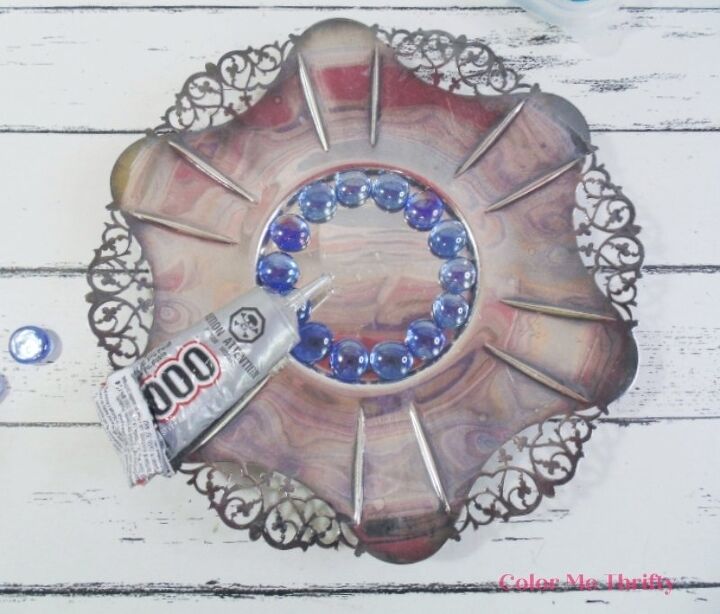
The best place to start is in the middle of the silver tray by gluing some glass marble gems around the middle section using E6000 glue.
E6000 glue is great for projects like this because it dries clear. Marine GOOP Adhesive is a glue that I often use for outdoor projects as well. It dries clear also. Whatever glue you use it’s important that it dries clear. You don’t want to see the glue through the glass marbles.
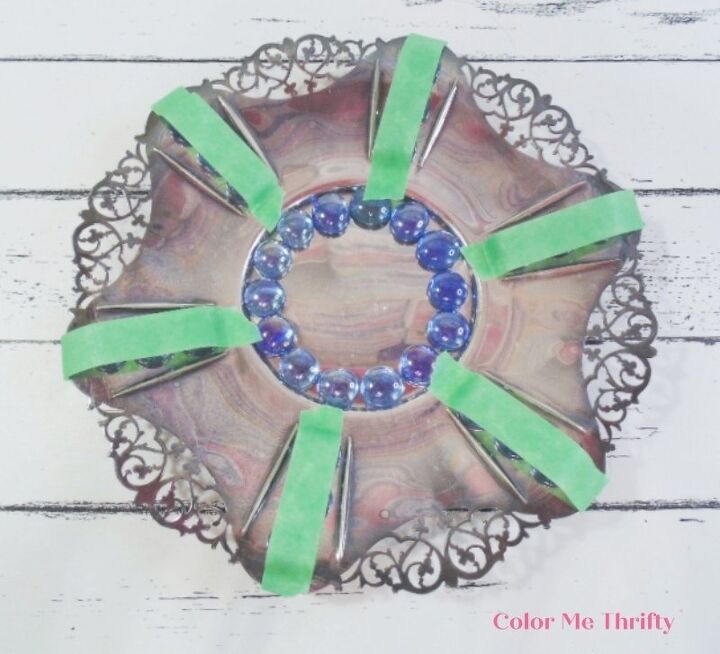
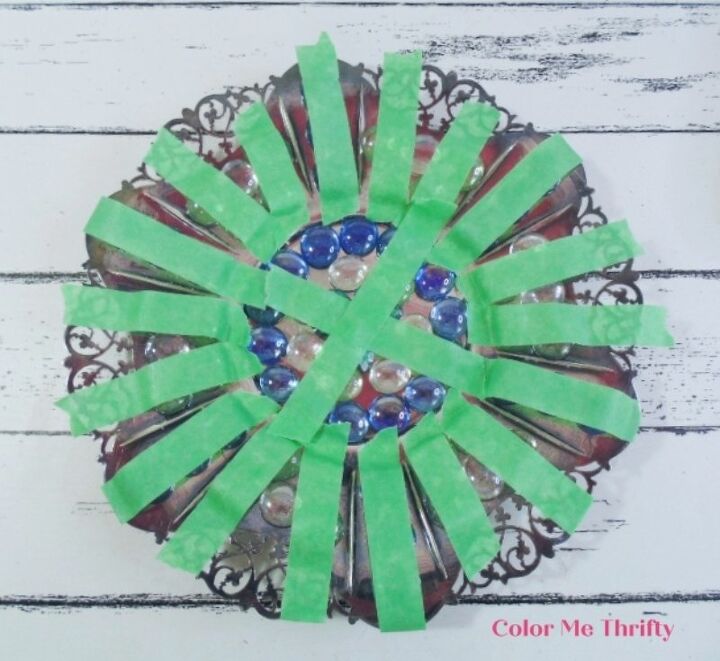
After deciding on the pattern to create with the glass gems, I glued some in place. Because these silver tray are usually slanted, use painter's tape to keep the marbles in place while the glue dries.
TIP: Do a dry fit of your glass marble pattern before gluing into place.
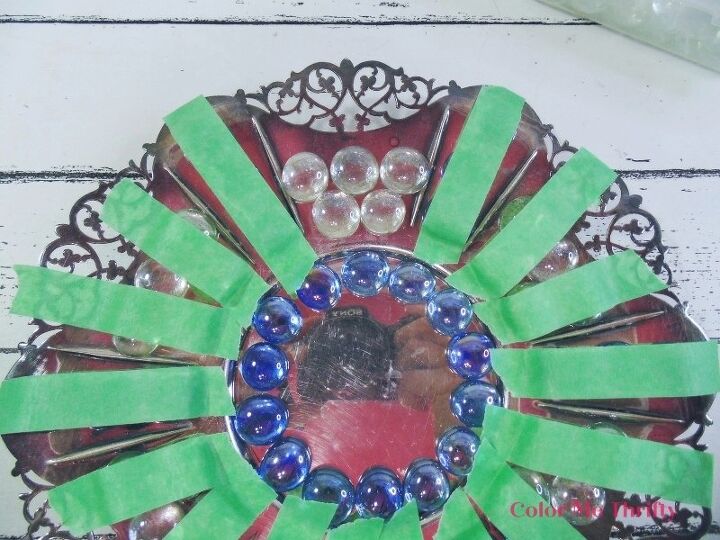
Keep gluing and taping until you make your all around the tray.
I glued some gems and a pretty bracelet piece into the middle of my flower and taped that in place. Use whatever decorative bits and piece you have to create your own unique flower.
When you're done gluing and taping, put the whole thing aside just like this to let the glue cure for about 24 hours.
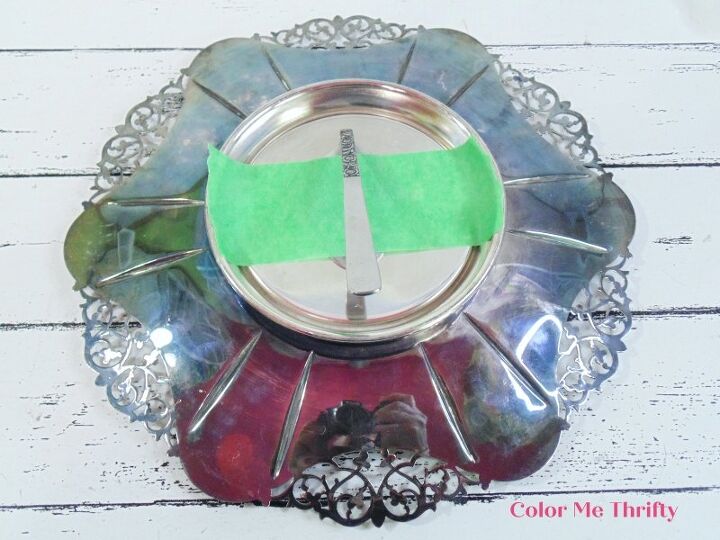
Once the front of your silver tray flower is all glued and cured, glue a stainless steel tablespoon to the back to act as a stem.
Tips for creating spoon stems for garden art flowers
- For large or heavy flowers use tablespoons. For smaller and lighter flowers teaspoons will work fine.
- Use stainless steel spoons, which can be found very cheaply at thrift stores. I use silver plate spoons for creating wind chimes, but I don’t waste them as stems on the backs of flowers.
- To flatten a spoon successfully, you need a nice strong flat surface, and a hammer with a good weight. Alternate from the front and the back of the spoon until it is nice and flat.
- Choose a spoon that you can tell you can bend at the neck easily.
- Before choosing what spoon to use as a stem, make sure the handle isn’t too wide to fit inside whatever pipe you’ll be slipping it into.
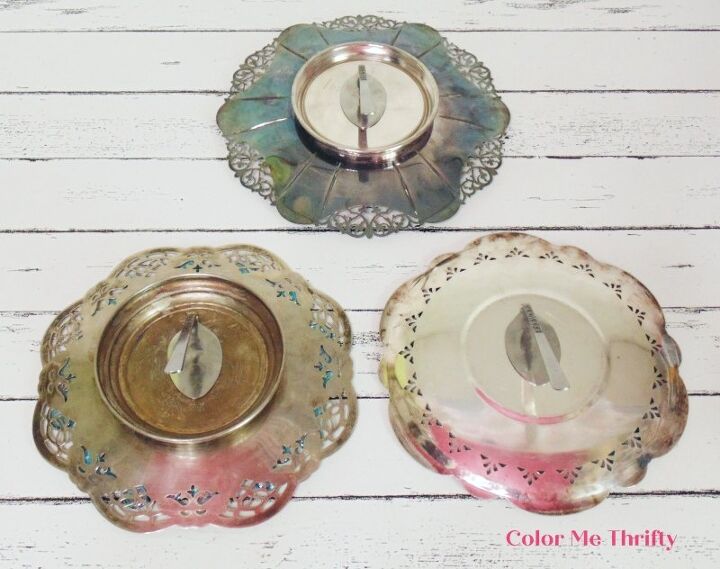
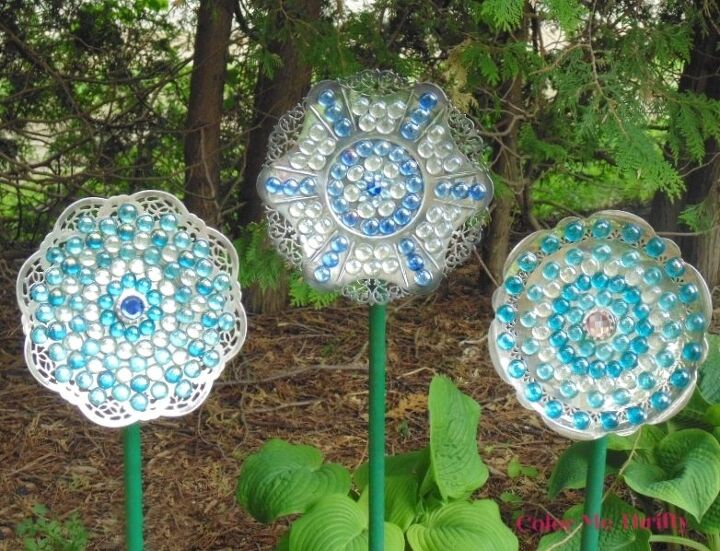
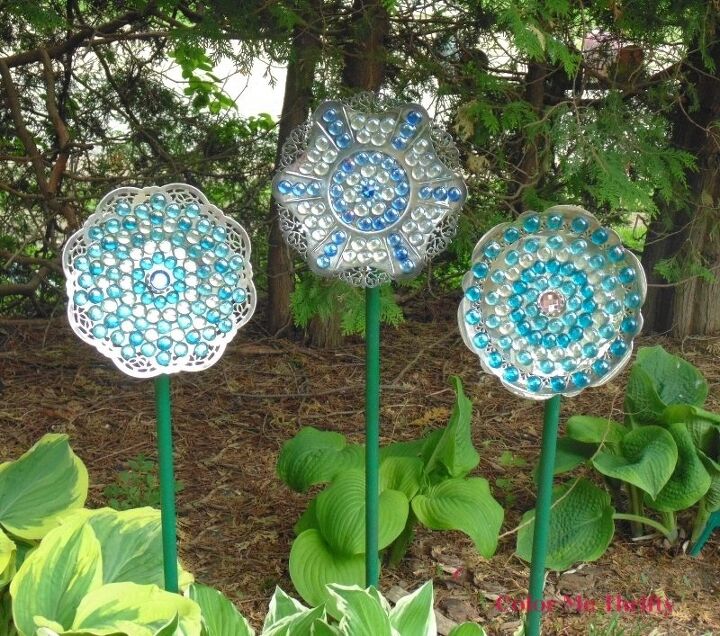
I didn't want my one flower to be lonely in the garden so I created two more to keep it company. After all, the more the merrier, and it always looks good to display things in threes.
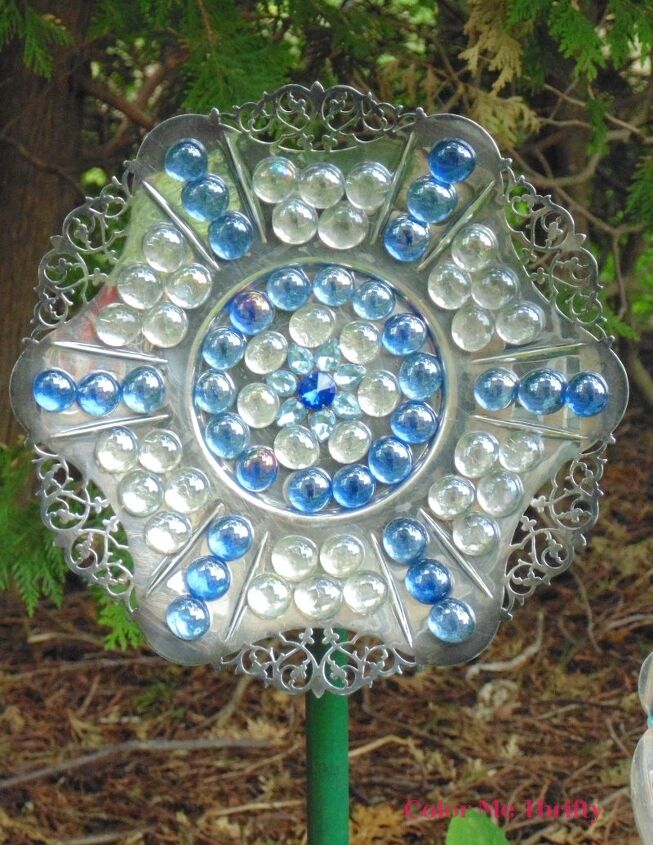
This is the first one that I made. I used the pattern of the tray to create the design with the marbles.
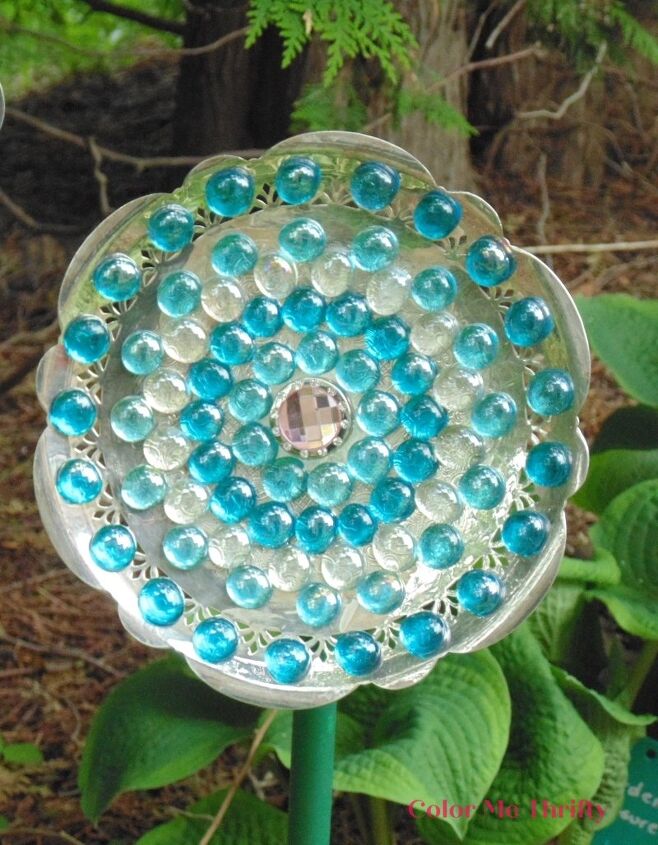
This tray was less detailed but had some lovely cutouts, which I incorporated into the design.
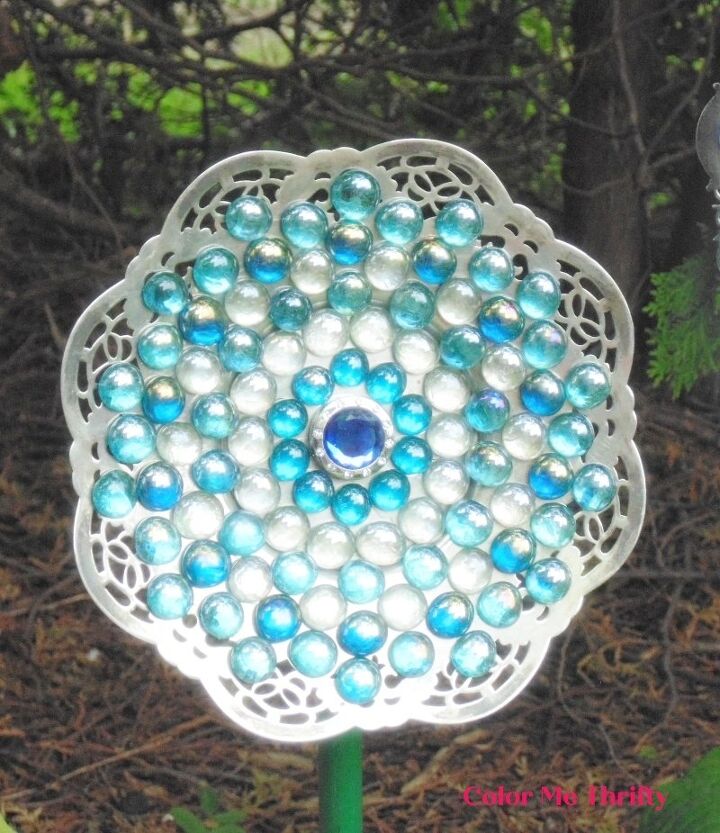
That’s what’s so fun about using these old silver trays to create these garden art flowers… every tray is different so every flower will be one-of-a-kind.
The pipes that I used for stems are left over from a broken deck swing that we got rid of years ago. I spray painted them a lovely dark green.
Tips for using pipes for flower stems
- You can use whatever pipes you have or can find. If you don’t have left over pipes to use, PVC and copper work fine. You can easily spray paint both.
- Make sure the pipe stems are pushed at least 10-12 inches in the ground for strength, especially for heavier flowers like these. You don’t want your flowers blowing down in heavy winds.
- When you know a big storm is coming, simply lift my flowers out of the stems and store them away until the storm is over. Better safe than sorry.
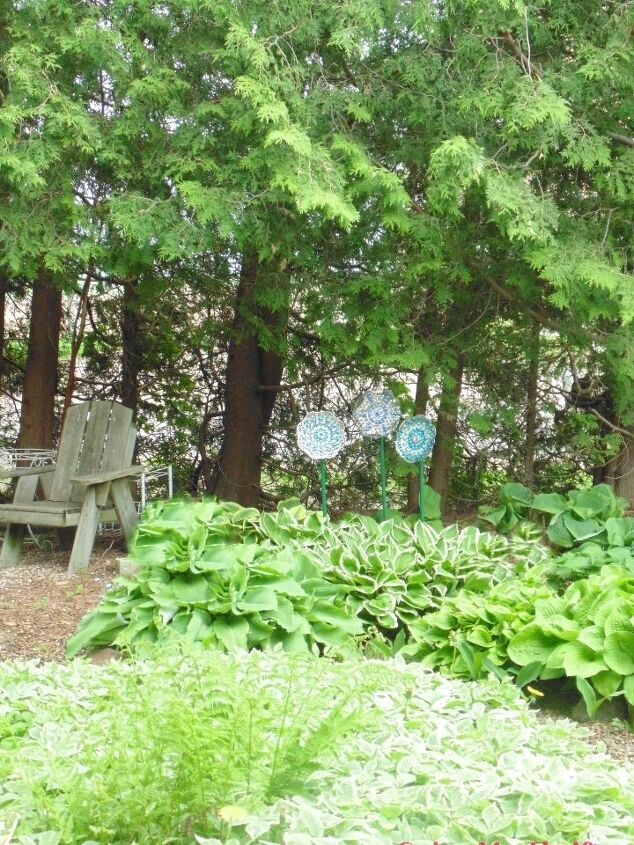
I took this picture so you can see how the glass gem flowers look from far away. They really sparkle, even from a distance.
Your version of these flowers would sparkle in your garden or outdoor space too. Or maybe you know someone who needs a little extra sparkle in their life. These flowers would make great gifts.
These garden art flowers are so easy to create and will instantly add some fun to any garden or outdoor space. And they'll also put a smile on anybody's face.
If you enjoyed this project you can find more garden art flower projects here.
Resources for this project:
See all materials


Comments
Join the conversation
-
These are so beautiful! I love the fancy edging that really does look life flowers. Will try if I can find similar trays.


Frequently asked questions
Have a question about this project?
Are these actually silver? I’d think they’d eventually turn black as the silver oxidizes.