


How to Whitewash Brick

My parents just moved into a new house that was built in the 70's that needed some renovations! We already painted the cabinets & next, we decided to whitewash the brick to take it to the next level!
All of the materials for this project were found my parent's garage! So it was nearly free - but estimated cost would be $20-$50 depending on the supplies you choose!
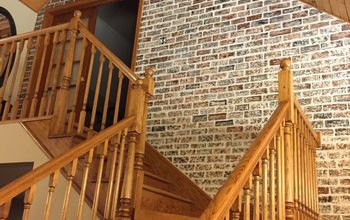
The brick in their house is a faux half brick that was already installed when they moved in. My mom was dreaming of the perfect white wash but really didn't want it to turn pink so we were very mindful of that during the whole process.
First things first, remove all items from the countertop & lay a tarp to protect the floor. Next, we cleaned the brick by rubbing a broom in-between the grooves to remove any dust or spider webs.
After that, we gathered the paint - they had some black & white leftover from some other projects in the house so that's what we used!
We had 3 containers: one full of black, one full of grey & one with the whitewash paint. (Which is white paint mixed with water - about 2/3 paint 1/3 water).
We then cut a large grout sponge into 4 sections. (You can use any kind of sponge this is just one they had in their garage).
After that, we painted on a few "test bricks" from a box my mom found in the garage to see how the paint was going to react. We tested a few there & took what we learned over to a section on the wall behind where the trashcan sits. This is a great thing to keep in mind - you'll want to test it out! You won't know how it's going to look when it's actually painted until you try it out & see! From here we were able to tackle the rest of the wall!
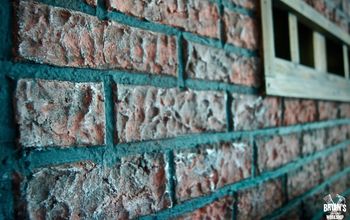
We decided that the original grout was too dark so we started by brushing white paint into the grout followed by rolling white paint over the brick to reduce any pink areas! Rollers & a paintbrush did the overall trick - but we got detailed & used a toothbrush for those hard to reach sections. Let this dry for a few minutes.
Next, add some texture! We sponged on some black & grey paint spacing it out on the wall so no two colors were clumped together & let it dry. Next, we grabbed the white washing solution & sponged it on & rubbed off the excess with a wet rag. The great thing about this technique is you can add more or less of each color - You can add more black or grey depending on the the effect you are wanting & if it's too dark for you in some areas you can always add more white washing solution!
Keeping a wet rag with you is very important to make sure any drips don't damage the countertop. You could also add a drop-cloth to it but we decided the rag would do the trick!
After you're happy with your ratio of dark & light areas, let it dry & you're done!
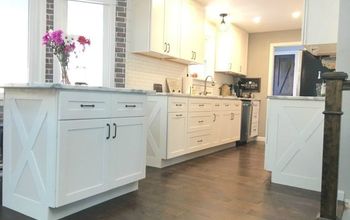
The cabinets were already such a shocking makeover, but this really brought the kitchen to the next level! The whitewashing really brightened up the room & made it so much more open!
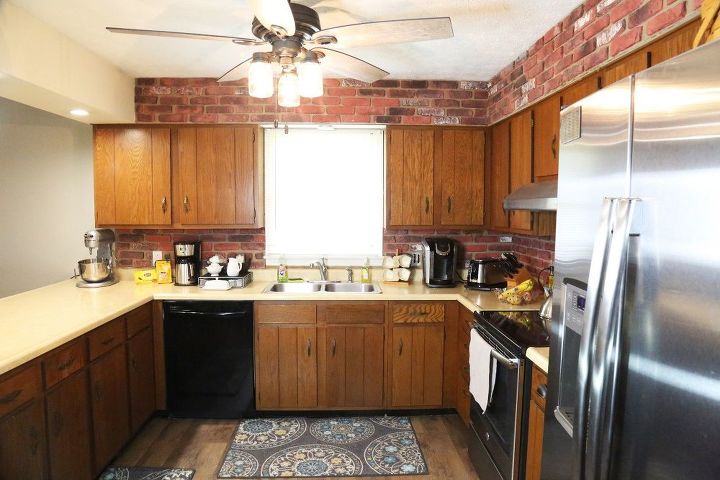
Before cabinets
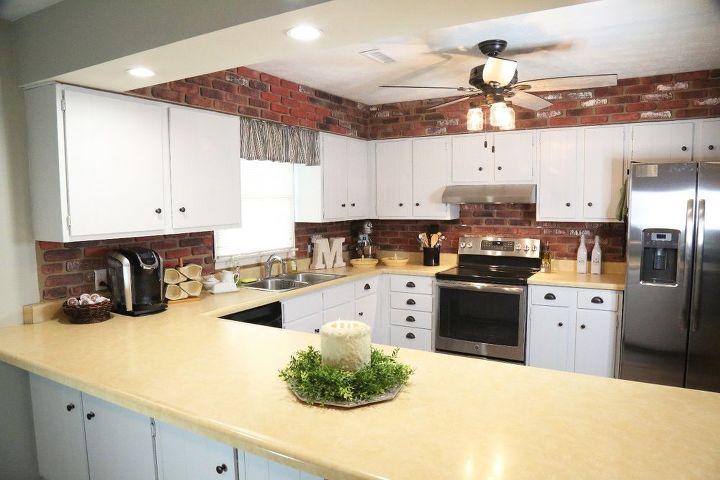
After cabinets
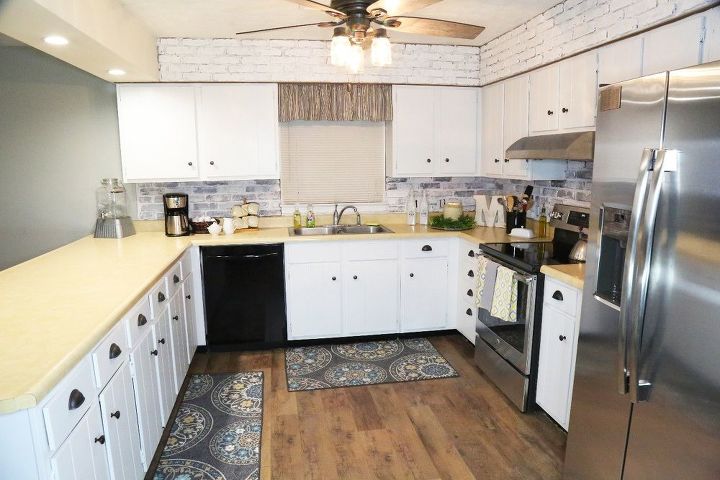
After transformation!
Check out that incredible before & after 

The cabinets were already such a shocking makeover, but this really brought the kitchen to the next level! The whitewashing really brightened up the room & made it so much more open!
Check out the video for more how - to's!
Comments
Join the conversation
-
Bravo👏 the brick looks awesome and the overall transformation is truly beautiful 🥰


Frequently asked questions
Have a question about this project?
hi,
but but how did you paint the kitchen cabinets?
Elena