I could have told you my self, but here are perfect instructions I found from SFGate.
1.Turn over the table and remove the legs, if possible. If there are bolts with wing nuts, which are nuts with two small tabs, twist the nuts counterclockwise to remove them and pull off the table legs. Where screws fasten the legs, turn the screws counterclockwise with a Phillips or flat-head screwdriver to remove the legs. If legs appear glued or you can’t see fasteners, don’t attempt removal.
2
Set the legs aside, if you removed them, and place the tabletop on a sturdy work table.
3
Sand the tabletop by hand using a fine-grit sanding sponge or sandpaper and a sanding block, working in the same direction that the wood grain runs. Sand through the finish just enough to reveal the bare veneer.
4
Remove the finish around the tabletop edge using a fine-grit sanding sponge or sandpaper.
5
Wipe off sanding dust using a dry rag, and wipe again using tack cloth, which is beeswax-coated cheesecloth.
6
Sand the table legs until you begin to see bare wood using a medium-grit sanding sponge or sheet of sandpaper. Legs are usually solid wood. The flexibility of a sponge or sandpaper lets you sand around square or rounded legs easier than with a sanding block.
7
Remove the last bits of finish on the legs using a fine-grit sponge or sandpaper, then switch to super-fine grit for final sanding.
8
Wipe the table legs with a rag and again with tack cloth.
Stain the Table
1
Spread out a drop cloth and set the tabletop and legs on the cloth.
2
Open and mix a can of oil- or water-based wood stain if you plan to stain the table. If you’ll only seal the bare wood, don’t apply stain.
3
Put on chemical-resistant gloves and dip a rag into the stain.
4
Wipe stain onto the tabletop and around the edge, keeping with the direction of the wood grain. Work in the stain to penetrate the wood pores.
5
Remove excess stain with a clean rag, still working with the grain.
6
Dampen the staining rag with more stain, work it into the table legs, then remove the excess with a rag. In most cases, it’s better to lay the legs flat and stain the portion that you can reach, then turn over the legs once dry to stain the other side.
Seal the Table
1
Shake and open a can of wipe-on, oil- or water-based polyurethane. If oil-based stain was used, you’ll need oil-based polyurethane. Both oil- and water-based polyurethane work with water-based stain and on bare wood.
2
Dampen a clean rag with polyurethane.
3
Wipe the polyurethane around the edge and on the tabletop, aiming for a smooth, thin, even coat.
4
Wipe polyurethane onto the part of the table legs that you can reach. Once dry, turn over the legs to seal the other side.
5
Apply at least two additional coats of polyurethane on the tabletop and legs, letting each coat dry before applying the next.
Things You Will Need
Screwdriver, Phillips or flat-headSanding sponge or sandpaper; medium-, fine- and super-fine gritRagsTack clothDrop clothWood stain, oil- or water-basedChemical-resistant glovesWipe-on polyurethane, oil- or water-based
Tips
All-in-one stain and sealer lets you change the table’s color without sanding off the finish. Sand lightly to dull the old finish and brush on the stain/sealer combination.Brush-on polyurethane an option for a thicker, more durable finish coat.
Warnings
Veneer is thin, and sanding too deep can ruin it. Don’t use a power sander.Avoid flooding wood with stain. Too much liquid can loosen the adhesive under some veneers. It’s better to wipe on the stain and work it in.
If it is an unfinished surface, use Woodbeams from GoodiesUnlimited. It is a beeswax based product which will nourish and revitalize wood's natural beauty. I use it on spinning wheels, spindles, cutting boards, salad bowls, and anything else with a soft finish. Get it from goodiesunlimited.com.
I would definitely try the Howard's Restore-A-Finish before anything else. It will cover scratches and remove gunk and dirt down to the original finish, but won't remove the original finish. I recommend using a 0000 steel wool with a small amount of the Howard's and rub in the direction of the wood grain. Wipe off with a soft rag. It is available in various colors, and you probably want to use a mahogany if your wood is dark, or if it is light, I would go with light oak maybe.. I'm pretty sure Lowe's sells it, and they would have a color chart available for you to compare to your wood. This stuff is truly amazing!
We were able to gently sand our wood veneer kitchen table and then restain it. Venee.r is real wood, it's just a thin layer so you need to be careful with sanding, but it can be done
If it has been polished a lot, it could be you need to remove all the build up by using a mild washingup liquid in water to remove it. Go with the Grain. Then use Mayonnaise to bring back lustre.
You'll need to either strip and refinish or have it done. Do not attempt to just "sand it down to bare wood" You'll go through a lot of sandpaper, not effectively remove all the finish and stand a real risk of sanding right through the veneer to the substrate. Use a chemical stripper. Sand out the fuzzies with a light sanding, stain and reapply a finish. A reasonable finish both in terms of ease of application and durability would be a wipe-on varnish.
I realize I'm just hitting the peak of the steps here, While it's not a difficult process, it's way more to give detailed directions than there is room here.
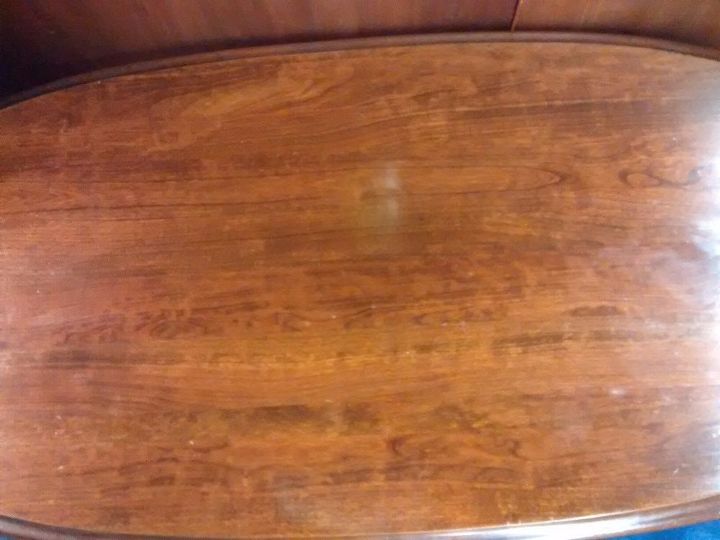
I thought I would remove the veneer, sand and stain. But.. I found out that it was not solid wood underneath, but compressed wood. I would like to keep this table, bu...
See more


I could have told you my self, but here are perfect instructions I found from SFGate.
1.Turn over the table and remove the legs, if possible. If there are bolts with wing nuts, which are nuts with two small tabs, twist the nuts counterclockwise to remove them and pull off the table legs. Where screws fasten the legs, turn the screws counterclockwise with a Phillips or flat-head screwdriver to remove the legs. If legs appear glued or you can’t see fasteners, don’t attempt removal.
2
Set the legs aside, if you removed them, and place the tabletop on a sturdy work table.
3
Sand the tabletop by hand using a fine-grit sanding sponge or sandpaper and a sanding block, working in the same direction that the wood grain runs. Sand through the finish just enough to reveal the bare veneer.
4
Remove the finish around the tabletop edge using a fine-grit sanding sponge or sandpaper.
5
Wipe off sanding dust using a dry rag, and wipe again using tack cloth, which is beeswax-coated cheesecloth.
6
Sand the table legs until you begin to see bare wood using a medium-grit sanding sponge or sheet of sandpaper. Legs are usually solid wood. The flexibility of a sponge or sandpaper lets you sand around square or rounded legs easier than with a sanding block.
7
Remove the last bits of finish on the legs using a fine-grit sponge or sandpaper, then switch to super-fine grit for final sanding.
8
Wipe the table legs with a rag and again with tack cloth.
Stain the Table
1
Spread out a drop cloth and set the tabletop and legs on the cloth.
2
Open and mix a can of oil- or water-based wood stain if you plan to stain the table. If you’ll only seal the bare wood, don’t apply stain.
3
Put on chemical-resistant gloves and dip a rag into the stain.
4
Wipe stain onto the tabletop and around the edge, keeping with the direction of the wood grain. Work in the stain to penetrate the wood pores.
5
Remove excess stain with a clean rag, still working with the grain.
6
Dampen the staining rag with more stain, work it into the table legs, then remove the excess with a rag. In most cases, it’s better to lay the legs flat and stain the portion that you can reach, then turn over the legs once dry to stain the other side.
Seal the Table
1
Shake and open a can of wipe-on, oil- or water-based polyurethane. If oil-based stain was used, you’ll need oil-based polyurethane. Both oil- and water-based polyurethane work with water-based stain and on bare wood.
2
Dampen a clean rag with polyurethane.
3
Wipe the polyurethane around the edge and on the tabletop, aiming for a smooth, thin, even coat.
4
Wipe polyurethane onto the part of the table legs that you can reach. Once dry, turn over the legs to seal the other side.
5
Apply at least two additional coats of polyurethane on the tabletop and legs, letting each coat dry before applying the next.
Things You Will Need
Screwdriver, Phillips or flat-headSanding sponge or sandpaper; medium-, fine- and super-fine gritRagsTack clothDrop clothWood stain, oil- or water-basedChemical-resistant glovesWipe-on polyurethane, oil- or water-based
Tips
All-in-one stain and sealer lets you change the table’s color without sanding off the finish. Sand lightly to dull the old finish and brush on the stain/sealer combination.Brush-on polyurethane an option for a thicker, more durable finish coat.
Warnings
Veneer is thin, and sanding too deep can ruin it. Don’t use a power sander.Avoid flooding wood with stain. Too much liquid can loosen the adhesive under some veneers. It’s better to wipe on the stain and work it in.
I use Howard's Restore-A-Finish.
If it is an unfinished surface, use Woodbeams from GoodiesUnlimited. It is a beeswax based product which will nourish and revitalize wood's natural beauty. I use it on spinning wheels, spindles, cutting boards, salad bowls, and anything else with a soft finish. Get it from goodiesunlimited.com.
I would definitely try the Howard's Restore-A-Finish before anything else. It will cover scratches and remove gunk and dirt down to the original finish, but won't remove the original finish. I recommend using a 0000 steel wool with a small amount of the Howard's and rub in the direction of the wood grain. Wipe off with a soft rag. It is available in various colors, and you probably want to use a mahogany if your wood is dark, or if it is light, I would go with light oak maybe.. I'm pretty sure Lowe's sells it, and they would have a color chart available for you to compare to your wood. This stuff is truly amazing!
We were able to gently sand our wood veneer kitchen table and then restain it. Venee.r is real wood, it's just a thin layer so you need to be careful with sanding, but it can be done
Here is a tutorial https://www.architecturaldigest.com/story/how-to-refinish-a-table
Sand with a fine grit sandpaper. Stain (if you wish) and apply a top coat. It can be wax, tung oil, or poly.
If it has been polished a lot, it could be you need to remove all the build up by using a mild washingup liquid in water to remove it. Go with the Grain. Then use Mayonnaise to bring back lustre.
Hello Catherine, hope this helps you out. If you just want to repair
https://www.youtube.com/watch?v=A0Cnfs8XFiM
If you want to paint it
https://www.youtube.com/watch?v=eZ6CvSc242Q
You'll need to either strip and refinish or have it done. Do not attempt to just "sand it down to bare wood" You'll go through a lot of sandpaper, not effectively remove all the finish and stand a real risk of sanding right through the veneer to the substrate. Use a chemical stripper. Sand out the fuzzies with a light sanding, stain and reapply a finish. A reasonable finish both in terms of ease of application and durability would be a wipe-on varnish.
I realize I'm just hitting the peak of the steps here, While it's not a difficult process, it's way more to give detailed directions than there is room here.