


How I Painted Wallpaper to Create an Accent Wall

Have you ever painted wallpaper? I know that some people have done so but I had never tried it; probably because once I got tired of wallpaper, I just took it down. I've been helping one of my sons refurbish his first home. We've been painting, removing & replacing trim, etc. I had already removed a wallpaper border in the kitchen and had planned to remove the wallpaper in the master bath....that is until he suggested we try painting it.
The wallpaper in the master bath was installed on just one wall. The wallpaper is heavy, the print is raised, and looks like seagrass. As I mentioned, I had planned to take it down. I was so surprised that my son wanted to leave it. I was more surprised to hear that he wanted to paint it silver. Not grey, but silver so that it would have some shine to it.
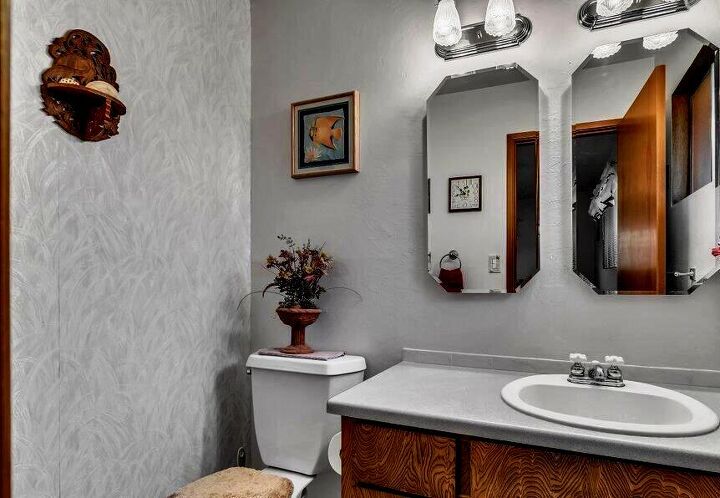
This is a picture from the real estate listing. We've since removed the mirrors, painted the vanity dark grey and the walls a light grey.
I had my concerns over painting the wallpaper. I thought the seams would lift and curl once they got wet. If that happened, would we just take it down or find a way to fix the seams? After talking about my concerns, the son was still intent on seeing how it looked painted. We found silver paint at Michaels and picked up two 8 oz bottles.
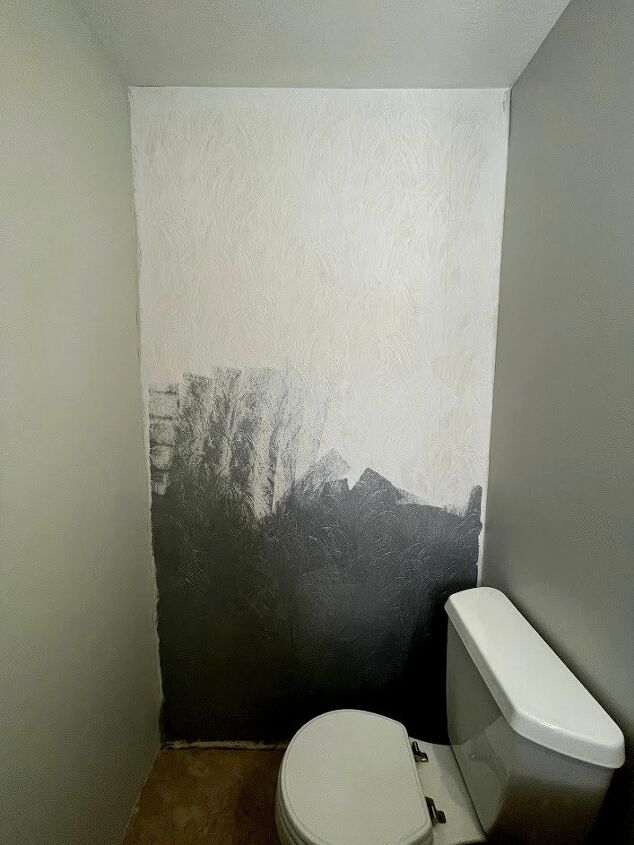
I started painting the main part of the wallpaper with a 4" roller. I then used a 1" angled paintbrush, to paint along the top, sides, and bottom of the wallpaper. One coat was enough to cover the paper really well so I only needed 1 bottle of the silver paint. Now, I just needed to wait for it to dry to see how the seams held up.
After allowing the paint to dry, I took a look at the seams. My concerns were realized, they did lift a little and the upper right corner of the wallpaper bubbled. I figured I could glue down the upper corner but the seams were obvious.
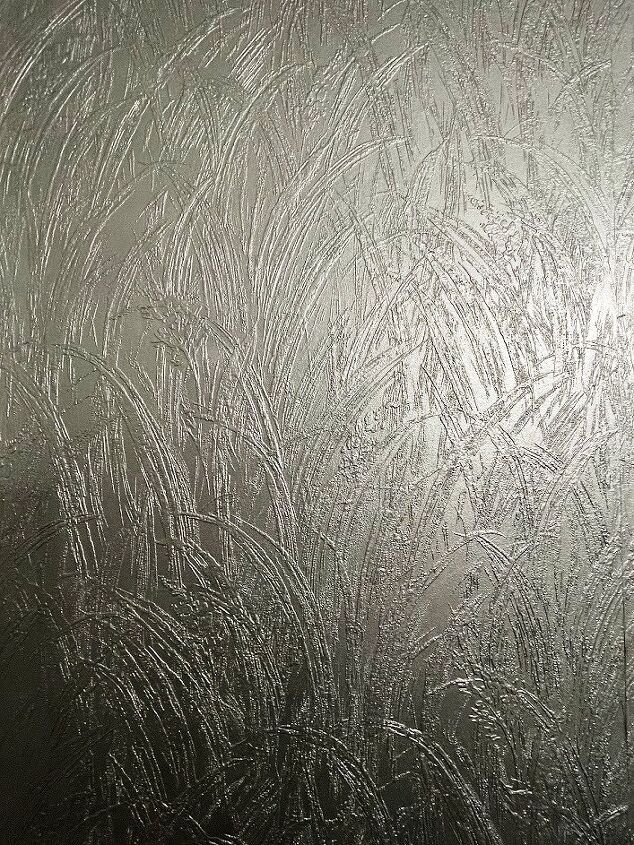
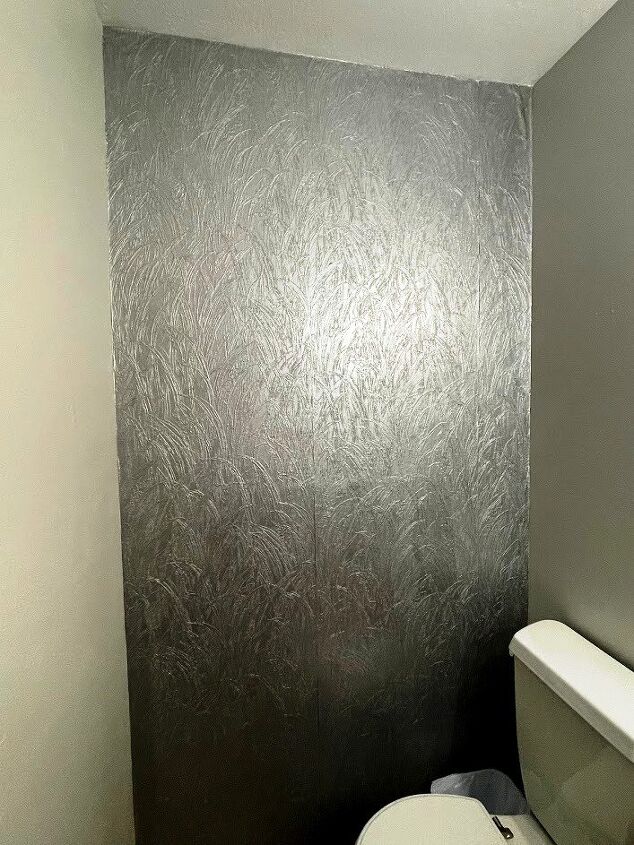
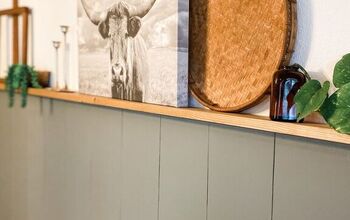
On a positive note, the silver enhanced the pattern on the wallpaper and it looked really good! Now, it was time to find a way to make this into an accent wall.
After some thought, I decided to add trim to the wallpaper to cover the seams. I remembered that Home Depot had PVC trim in a variety of sizes so I went to take a look. I found a 1" trim that had rounded corners. I thought it would work really well! All I would need to do is cut it and glue it to the wallpaper! I bought eight 8' strips for $3.29 each.
Before installing the trim, I applied some Elmer's glue to the piece in the upper right-hand corner and pressed it down. The first piece of trim would go along the top of the wall. I measured the space & used my miter saw to cut the length, mitering the corners.
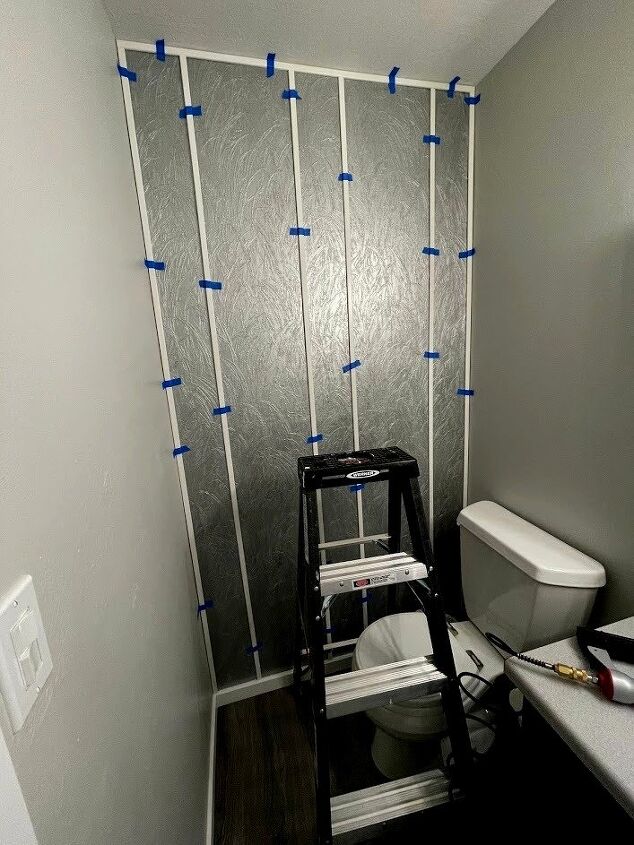
I taped up the top piece of trim, then measured the length needed for each of the side pieces. Once I had those taped up, I cut one for each of the seams. One seam was 21" from the left wall and the other seam was 7" from the right wall. After taping up the two 'seam' pieces of trim, I calculated where the last two pieces would go, measured the lengths, and cut those.
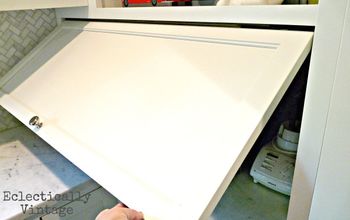
After taping all the pieces of trim to the wallpaper, it was apparent that gluing them in place would not work; the walls were too uneven. I would have to use my nail gun.
Now, I don't mind using my nail gun to install trim. In fact, it's one of my favorite tools! It's just that if I had been able to glue the trim to the wallpaper, all I would have to do to finish the job was caulk around the outside edges. By using the nail gun, I would now be spackling the nail holes, sanding to smooth it out, then painting the trim before doing the caulking. The bonus of using the nail gun, though, is that it's fast and I know the trim will be secure.
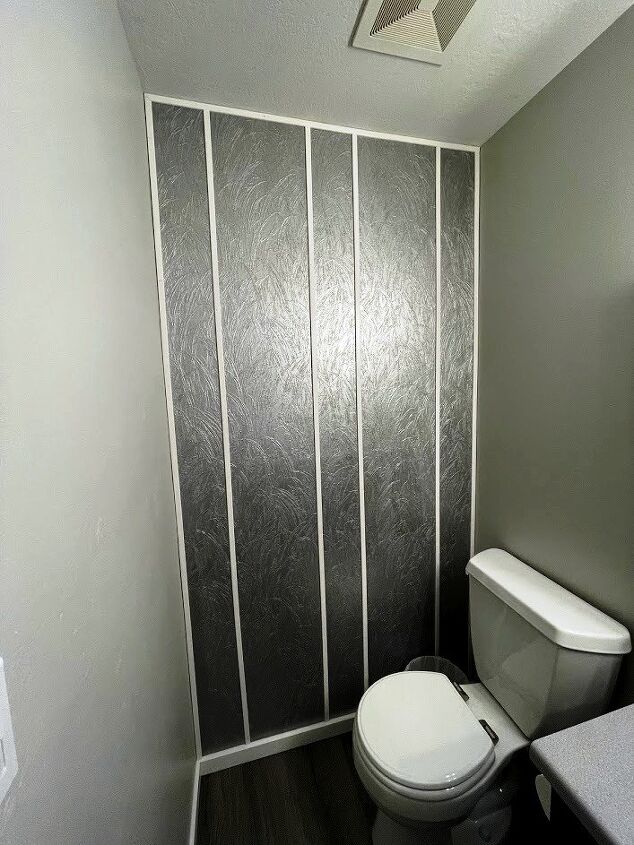
Once all the strips of trim had been installed, my son suggested we add some cross pieces to give it a more interesting look.
There was leftover trim, so I measured the width between each of the vertical strips and cut several pieces of trim.
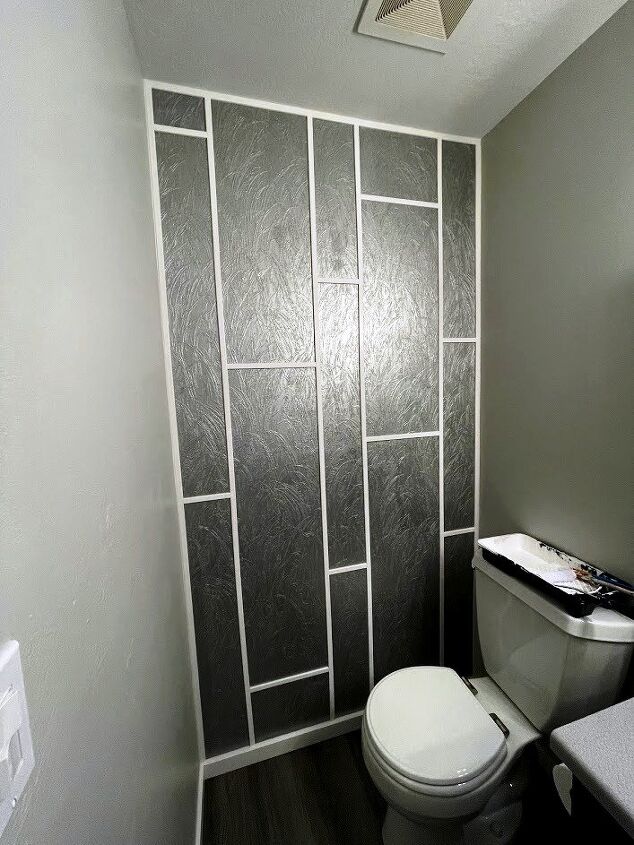
I placed the horizontal strips in a random pattern and used my nail gun to attach them to the wall. Once all the trim was in place, it was time to spackle, sand, paint, caulk.

I never thought that painting this wallpaper would be so easy and look so good! Adding the trim was the perfect touch to make it a statement wall! The cost of the paint & trim was just about $30.
Instructions
- Using a 4" roller, paint wallpaper with paint color of your choice
- Using a small angled paintbrush, paint along the edges of the wallpaper
- Measure length and cut trim to fit using a miter saw
- Tape trim to wall with painter's tape
- Attach trim using a nail gun or hammer and small finishing nails
- Fill in nail holes with spackle using a putty knife
- Lightly sand spackle using a sanding block
- Paint trim using a small roller or paintbrush
- Caulk any areas as needed
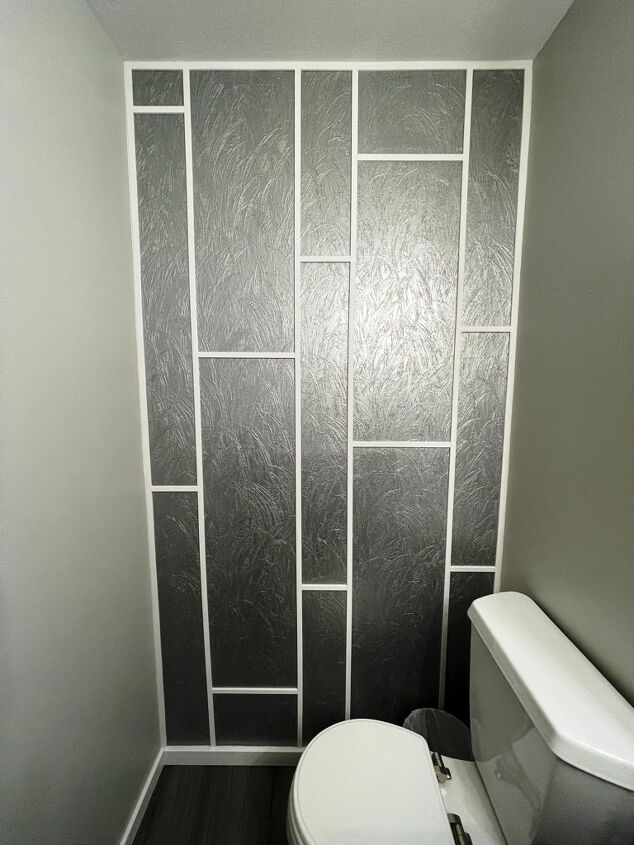
Finished accent wall!
Resources for this project:
See all materials


Comments
Join the conversation
-
Interesting & clever accent wall…
-
Yo . Please review laws in your state about civil liberties and financial prostitution. Some of the work depicted in this unsolicited em leads a investigation to federal charges. Can I suggest you familiarize yourself with our constitution and wire laws such as sc law 17.
Blueman
3/10/24


Frequently asked questions
Have a question about this project?
Why did you wait until trim was installed to paint. Wouldn't it be simpler to paint before installing? Also was the wallpaper vinyl and if so, no special paint was required (like a base coat primer) before the top coat?