


Painting a Stair Runner in 3 Easy Steps

March 16, 2020
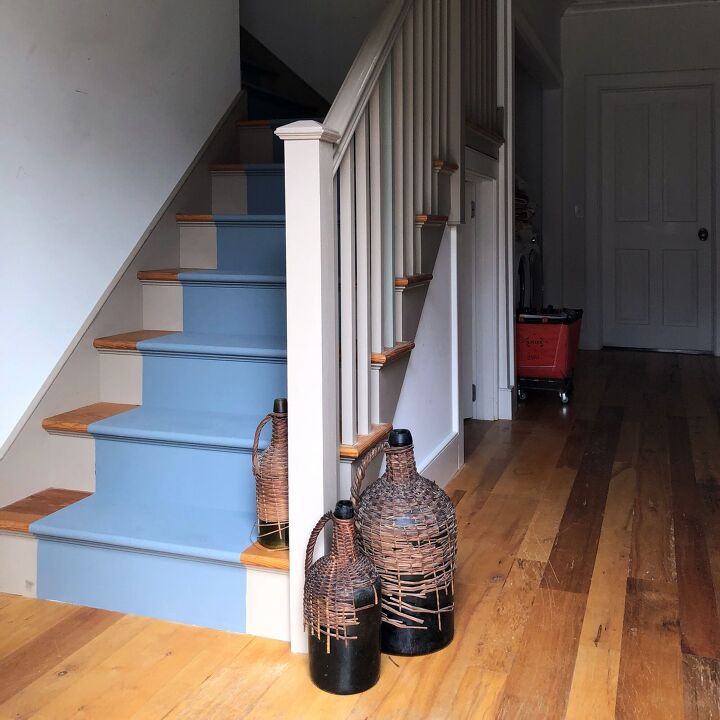
A few years back I painted a runner down a flight of steps in my home. I chose a light periwinkle color and sealed it with a poly top coat which has since yellowed, the steps are also super scuffed up so I've decided to give them a refresh.
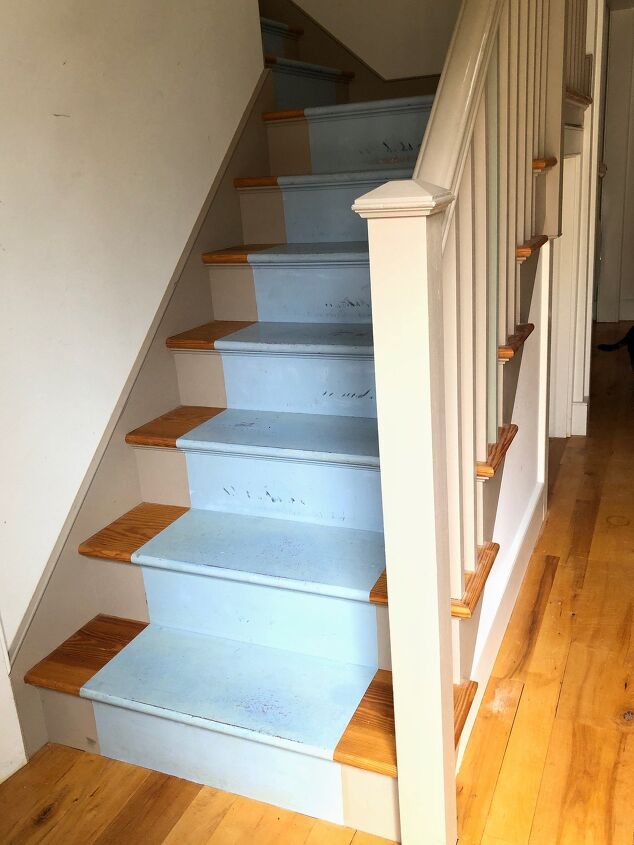
One of my favorite colors is Scandinavian Blue so that's what I decided to use but after the first coat, I thought it was too light so I made a custom color by mixing Code Blue and Pigeon Grey, perfect!
What I used for the stair makeover:
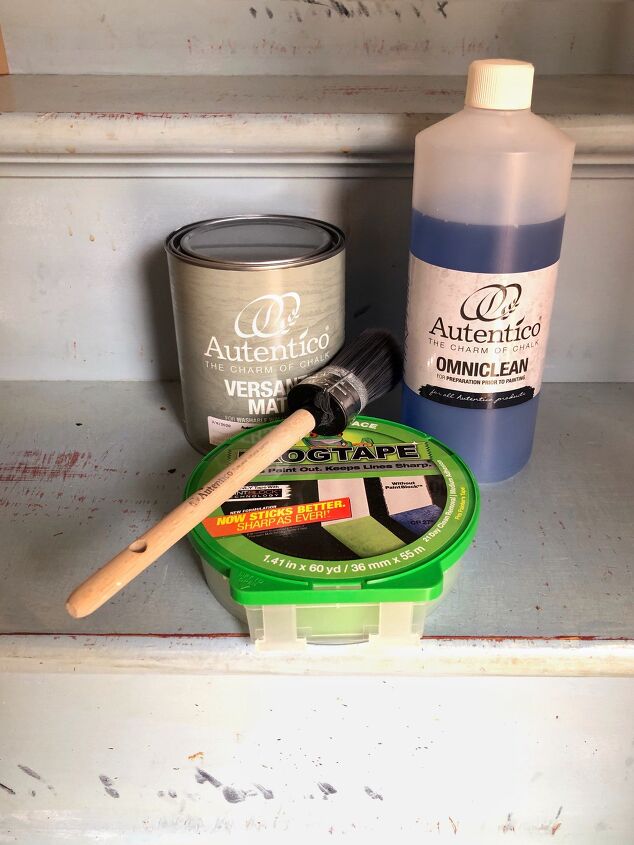
- TSP cleaner
- Frog Tape
- Versante Matte in Code Blue and Pigeon Grey
- 35mm oval brush
- Putty knife
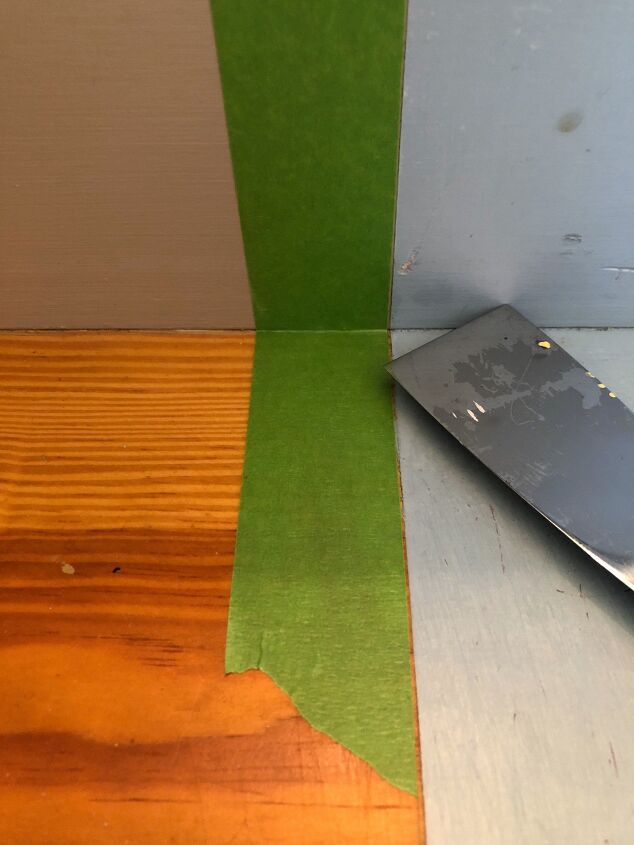
The 3 steps for this project are cleaning, taping and painting, that's it, super easy! The most time consuming part was the taping, which actually only took me about 20 minutes. For cleaning, first I vacuumed and then I mixed Omniclean 10 to 1 (10 parts water to 1 part Omniclean) in a bucket and used a mop to wash the steps. For the risers, I used a large sponge.
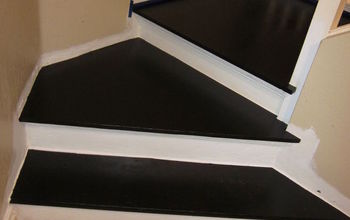
When all was dry, I taped and made sure to have my putty knife by my side to push the tape into the area where the step meets the riser, this keeps a nice crisp edge. I also taped about a 16th of an inch past the previous painted edge to make sure the original paint would be completely covered.
The painting went so fast! I just had to make sure my dog and cats were all kept away, as much as I love paw prints I didn't want them all over the house! Versante Matte is really beautiful to work with and covers very well. All it took was 2 coats and I was done. I applied the second coat right before bedtime, this gave it time to dry over night and we were able to walk on the steps the next day with no issue.
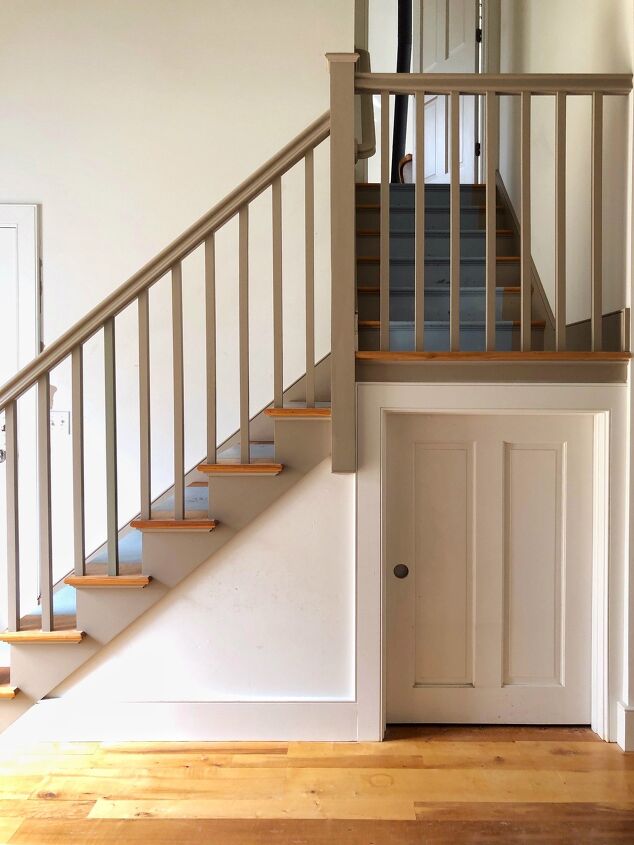
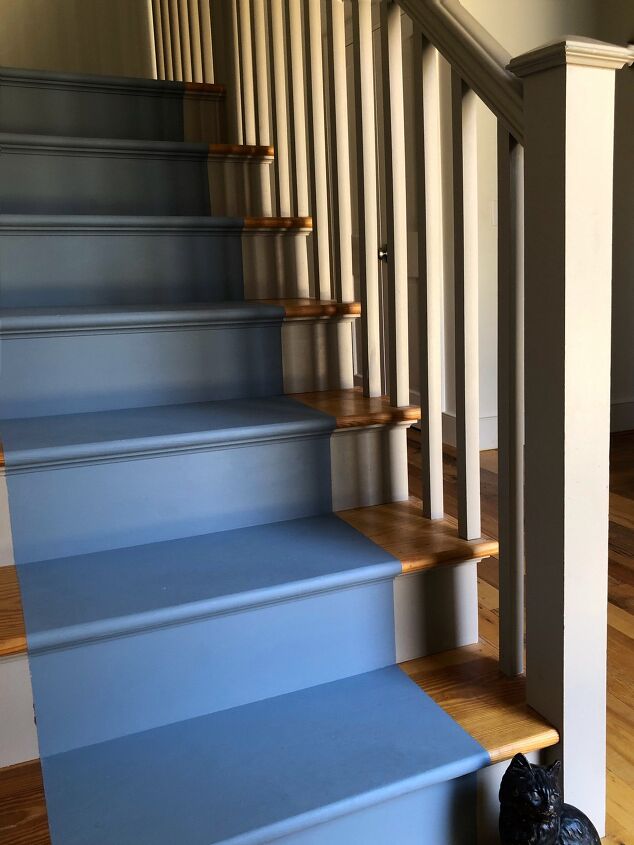
Here are some shots taken in the late afternoon:
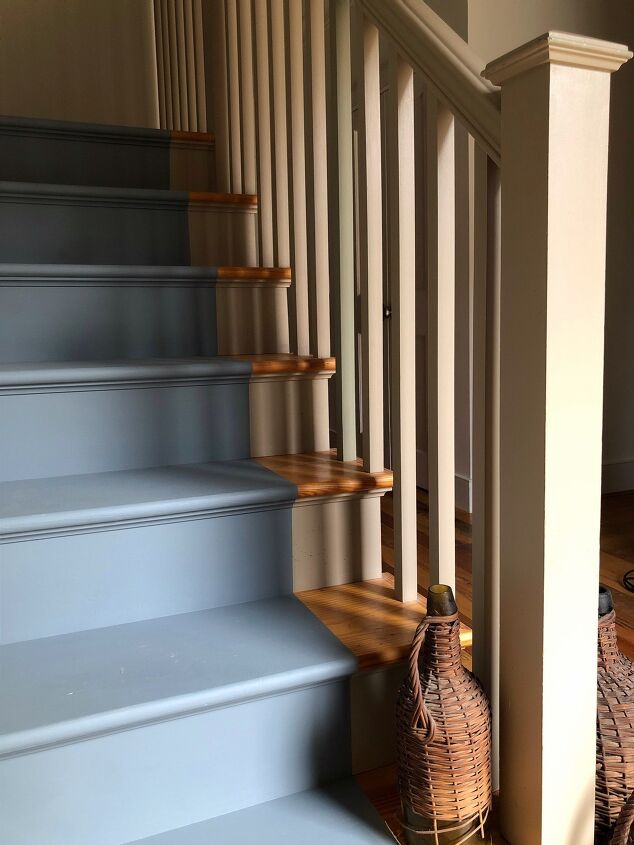
And here's a shot taken early in the day before noon, notice the difference in how the color looks!
Versante has a built in sealer so I won't be applying a top coat, which makes the whole process very easy. I tend to like a "lived in" feel for my home, just look at my floors, so I left all the dents and scratches in the steps. If that's not your thing you can fill those in, sand, prime and then carry on with the painting.

It feels great to cross this off my paint project to do list. I have many more projects so stay tuned! Do you have any things around your home that need a refresh or a whole makeover? Spring really is the perfect time to make a plan and get them done. Please join us in the Chalk Mercantile DIY Society to show off your work, ask questions, and see what others are working on.
Jayne


Comments
Join the conversation
-
Congratulations 👏
This is a very nice & well-done project 🎨
I really love it ❤️ 💗
Thank you for sharing 😉


Frequently asked questions
Have a question about this project?
I’ve been wanting to do this to my basement steps forever and am stumped by one thing - the measuring. The steps are not perfectly equal in width, so how do I get the runner to look even step to step. Measuring from the center can make the runner different distances from the edges. Measuring from the edges will make the width of the runner inconsistent step to step. 🧐