Upcycled Tin Can Planters

Here I go again trying to pretend that I have a green thumb! Sometimes I feel it’s ok to “fake it ‘til you make it”, and that phrase is so true for my trying to plant things. What better way to recycle than to use a bunch of tin cans as your planters? Anything that can be reused is A-OKAY in my book!
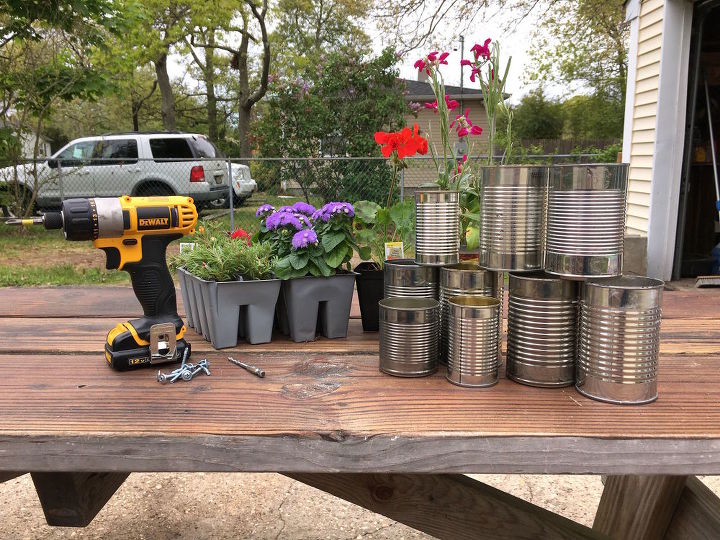
Because I'm a crafting/DIY supply hoarder, I already had a bin of blank tin cans that I've been saving for whatever project happened to call for them. If you don't have a collection like I do, all you have to do is rip off the labels and pick off as much glue as you can the next time you have canned goods that you're making a meal with.
*Note: this project could cost more than $30 if you do not already have the necessary tools and hardware.
The first step in this project is crucial in the “I don’t want to kill my plants before they even had a chance to live” area. You need to drill a few holes on the bottom of all of your cans. For the smaller cans, I chose to drill the holes on the very bottom since it was easier to safely grasp the can and because the area was thin.
For my regular-size cans, I drilled on the sides, towards the bottom – again, because it was safer to grasp the can and the sides seemed more thin.
Seriously be super careful drilling your holes! You want to keep a pretty steady, firm grip on the can while you drill.
The next step was a little experiment I threw in but I’m sure it will help hold the spray paint better. I used a small piece of sand paper to rough up the cans a little. You won’t notice a huge difference but if you look closely, you’ll be able to see scratches on the surface.
After your holes are drilled and your cans are prepped for paint, sit them all out (upside down) and spray them. **I just realized that I didn't have spray paint in my materials photo but I used the same paints as I did in my crate planter project.**
As I've mentioned in a previous post, my husband is in construction so we always have random tools around. This next step has an optional approach that includes this little contraption. This adapter wasn't cheap--it's was about $20 at Home Depot but it made my life so much easier with this project!
Instead of attempting to nail or finagle my drill so I could screw the cans to my pallet, this adapter for my drill made attaching the cans a zip! I drilled a "starter hole" first the same way I drilled the little holes on the bottom to allow water to release, then I went ahead and drilled the screw into the hole I had drilled. *Note: if you have excess glue from where your label was adhered to the can, drip your hole in that area so that you can't see it when you display your cans.
Going ahead and drilling the screw into the can made it easier to attach the can to my pallet.
Once you've attached all of your cans, fill them with your potted plants.
Don't you love it?! Much like the crate planter project, these upcycled cans are a fun, unique way to display your favorite flowers or herbs this summer. This is also another idea to spruce up your backyard fence but again, you can just use a shipping pallet instead. Happy planting!
DIY home decor using repurposed tin cans
Enjoyed the project?
Suggested materials:
- Tin cans (my basement)
- Spray paint (Home Depot)
- Drill (Home Depot)
- Screws (Home Depot)
- Potted plants (Home Depot)
- Pallet (the back of a random store)
- Sandpaper (Home Depot)
- Off-set adapter (Home Depot)
Comments
Join the conversation
-
 Grandmasue10
on Jan 29, 2020
I have also seen on Pinterest (I forget who the author was, sorry) painted tin cans with flowers lined up on a horizontal fence support and twined together. Makes a pretty multi colored display.
-
-
 AlisonMary
on May 19, 2020
Like this project and wow those colours are perfect💕
-















Frequently asked questions
Have a question about this project?
What kind of plants will grow happily in tin cans?
How do you smooth off the cut edge from where you opened the can with a tin opener?
mall my cans have very sharp edges from the opening. U.K.