


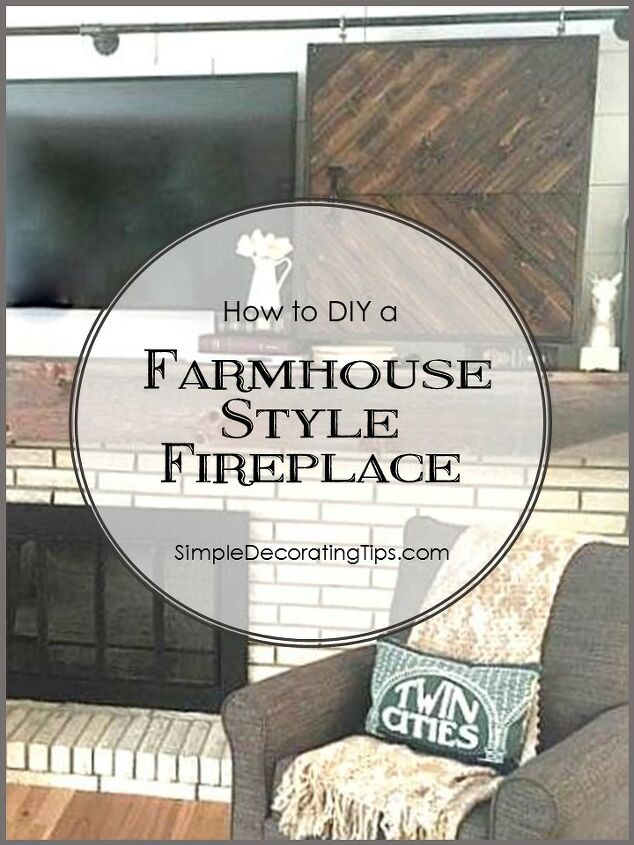
DIY Farmhouse Style Fireplace
6 Materials
$500
20 Hours
Medium
Hi, I'm Liz from SimpleDecoratingTips.com a DIY and decorating blog.
Our son and daughter-in-law, Aaron and Melissa are done remodeling their house. They took a 1970’s-something traditional house and transformed it into an open concept farmhouse style home. It turned out absolutely stunning and I’m super excited to get the okay from them to share it with you here.
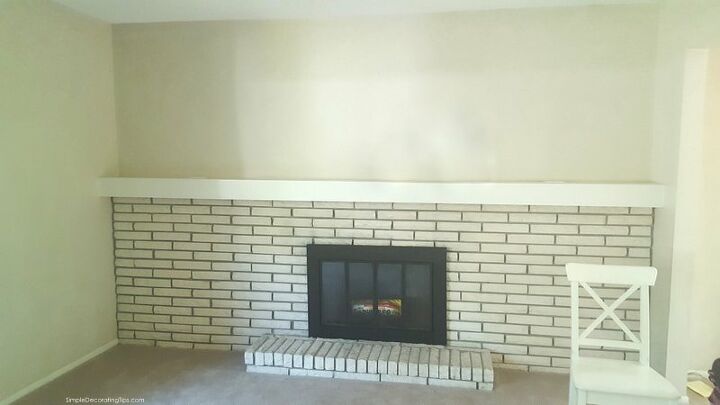
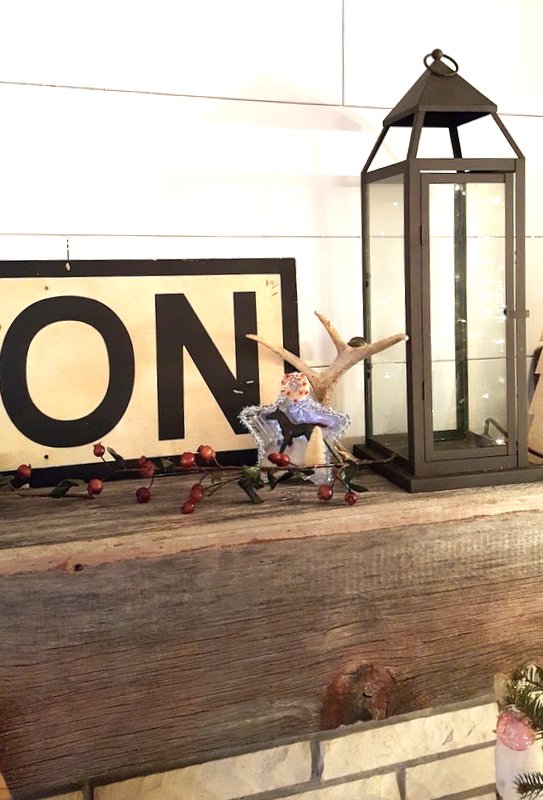
The old fireplace was just so, well… blah!However, this is an example of what I frequently talk about.. in the design world of remodeling and renovating, it’s important to be able to value what is worth keeping because it is quality. (of course, taking in the budget constraints is a factor too)Although the fireplace was blah, overall the brick was fine, no, better than fine, it was good quality. (doesn’t their brick look like the same brick on our new house we’re currently renovating? It too was built in 1970-something.)Melissa had planned to paint all the trim in the whole house white, and the walls just a very slight off-white. That wouldn’t make this fireplace look different from what it was in this picture. She had considered painting the brick white too, but after some thought, she decided to wait to see if actually the visual texture of the cream brick and gray mortar would pull in some of the accent pieces of furniture.This fireplace wall would be the main focal point wall of their main level once the walls were opened up… it needed to be more than just blah!
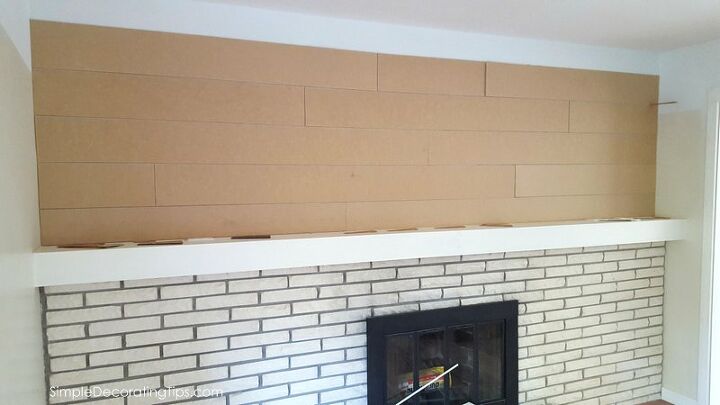
The planks were glued on the wall above the fireplace mantel laying them out in a horizontal fashion. To get a clear definition of planks, as he was gluing the boards on the wall, he set nails between each plank creating a small space between each plank. Once the glue was dry, the nail-spacers were removed.We primed and painted them with the same white paint color as the rest of the trim.
Next, to re-do the mantel…
Removing the existing mantel wasn’t necessary, fortunately, once a ‘re-do’ plan was figured out. Aaron wanted a beam look, but instead of ripping out the existing mantel, which would have been a big mess, they covered the existing mantel with 2 super long barn boards creating a beam feel.To accomplish this we were fortunate enough to have family friends that have an antique barn that is falling in and just happened to have 2 boards long enough for this mantel.This is that barn!
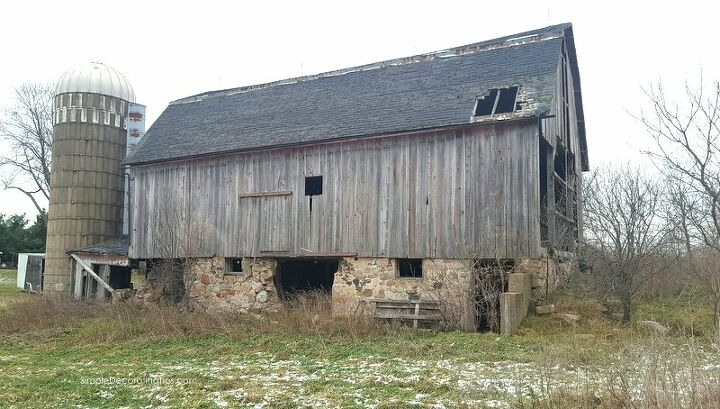
Isn’t it so pretty? I love, love, love old barns. This one is so charming… sad that it’s falling in, but so nice that the owner’s allowed us to keep part of it alive by repurposing it!
Here is the close-up of the barn boards on the mantel at Aaron and Melissa’s:
They did a great job attaching them over the existing mantel, it has the appearance of a huge barn beam. I love the color of the aged wood… it’s mostly gray with just a hint of the old red paint in some of the grooves. So much character!Next, Aaron made these two sliding barn door style shutters based on a design Melissa gave him.
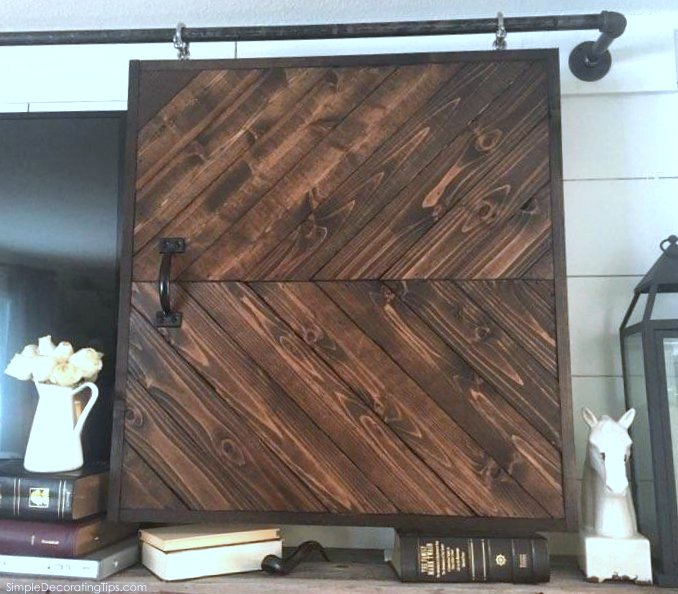
To save a lot of money and to be super creative, instead of using barn door sliding hardware, Aaron fashioned the sliding hardware from standard pipe pieces he was able to buy off the shelf at Home Depot or Menard’s. Some of the pieces needed to be spray painted black, and lightly sanded for an aged look, but still, it turned out to be pennies to the dollar being creative like this!
Here you can see the finished farmhouse style fireplace:
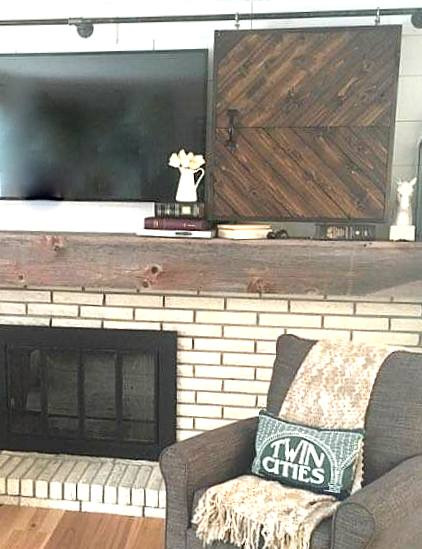
The idea is that they could slide the shutters ‘closed’ to cover up the TV, but I don’t think they ever do… they just look so charming open. At Christmas Melissa hung a festive wreath on the center of each shutter. It looked great!
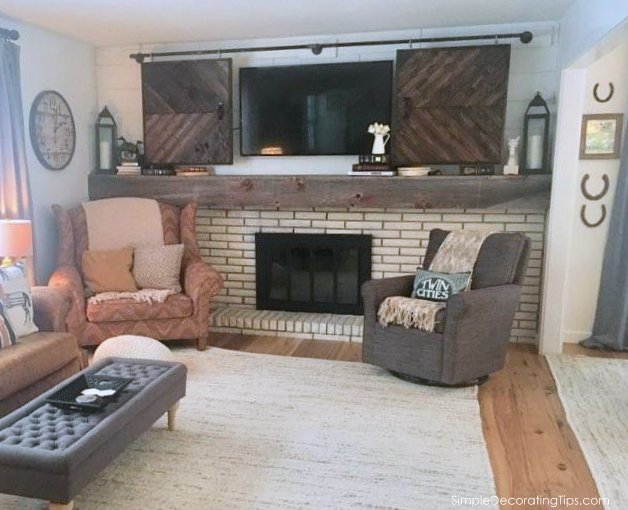
The texture of the gray grout turned out to look great with the gray barn wood and other gray pieces they have in the space. The whole fireplace wall is now such a stunning and warm focal point in the room, well whole space now that the walls are gone and living room, dining room, kitchen and entry all enjoying this cozy farmhouse style fireplace.I’m thrilled that I have the opportunity to share with you Aaron and Melissa’s house that they worked so hard on and made into a beautiful home for their family… CLICK HERE to read more about their reno transformations.If you liked this fireplace transformation, HERE are many more I've worked on!


Any price and availability information displayed on [relevant Amazon Site(s), as applicable] at the time of purchase will apply to the purchase of this product.
Hometalk may collect a small share of sales from the links on this page.More info

Want more details about this and other DIY projects? Check out my blog post!


Frequently asked questions
Have a question about this project?