


How I Transformed a Yard Sale Sofa With Chalk Paint! Part 2
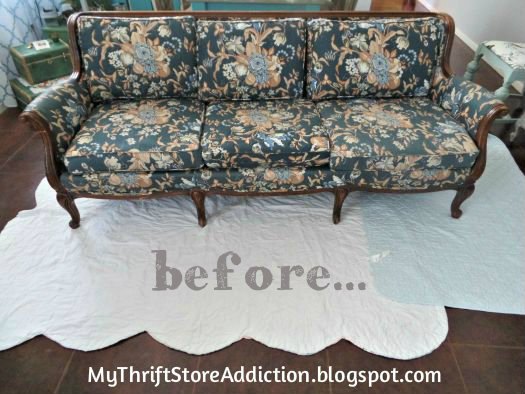
In Part 1, I shared how I almost walked away from this yard sale reject! I'm sure glad I didn't though-- as is often the case with cast off pieces, this diamond in the rough had hidden potential. Here's how it looked BEFORE! I'll continue where I left off in the process... {See Part 1 http://www.hometalk.com/diy/living-room/furniture/transformed-sofa-with-chalk-paint-11741463}
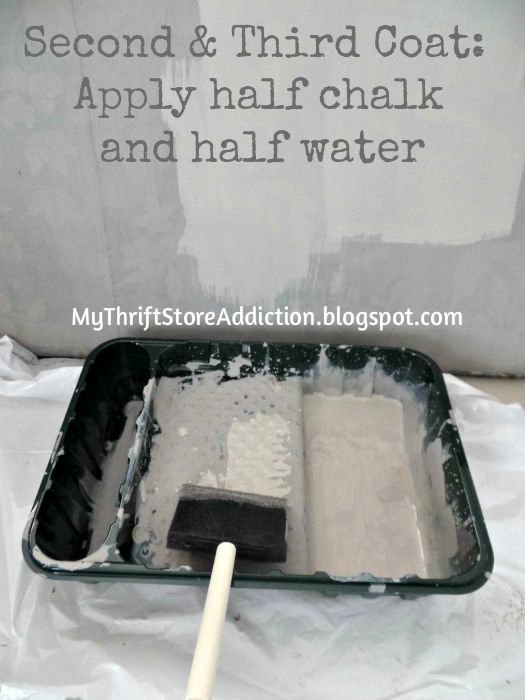
Pretty much everything I read stressed the importance of allowing the paint to dry 24 hours and sanding with 220 grit sandpaper in between coats. I know it sounds weird to sand upholstery, but it works! If your fabric does not have a pattern or is closer to the paint color you choose, you may only need two coats. Of course, I chose a light shade to cover a dark pattern so I needed three! After the first coat, the paint and water mixture is half and half and I also found I did not need to mist the fabric first.
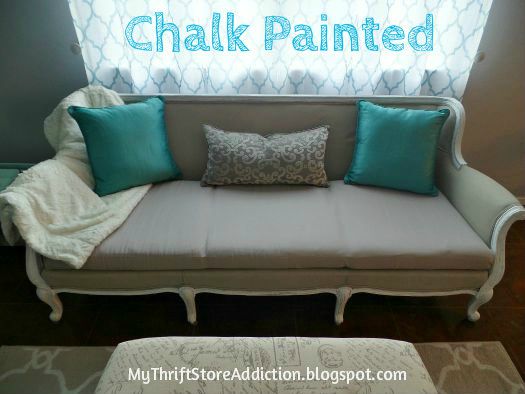
I wanted to show a close up after the third coat. It doesn't appear to be painted--it just looks like fabric and is also not hard or stiff to the touch! I have read other tutorials where it mentioned painted fabric feeling "crunchy." Mine really doesn't! The chintz like fabric may be part of the reason but I also attribute the desired texture to adequate thinning with water, drying and sanding. This shade Mineral, by Waverly looked much lighter before it dried and almost caused a panic(!) but the dried color was perfect.

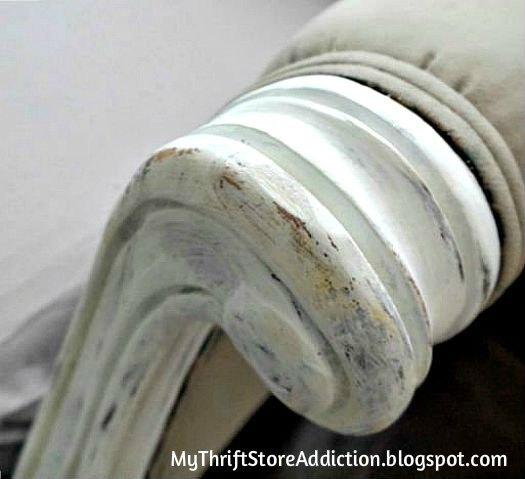
For the wood trim, I used Waverly White and lightly distressed it.
Since this was my first experience with painted upholstery, I planned to recover the seat cushions with fabric--just to make sure they would be comfy. Did you notice I chose not to use the back cushions? I wanted a similar look to my other vintage sofa, Rosie. { http://www.hometalk.com/diy/living-room/furniture/how-to-style-a-vintage-sofa-5629163}
Continue to my blog and don't miss a thing!

Want more details about this and other DIY projects? Check out my blog post!
Comments
Join the conversation
4 comments
-
Simply stunning transformation...makes me want to look twice at those cheap finds!!
-
Amazing job!


Frequently asked questions
Have a question about this project?
Why there´s no gaps between the coussins in the second photo?