


"A Fabulous SPiT Polish" Best Done With Unicorn SPiT!

by
Abbie Lummus
9 Materials
$200
7 Days
Medium
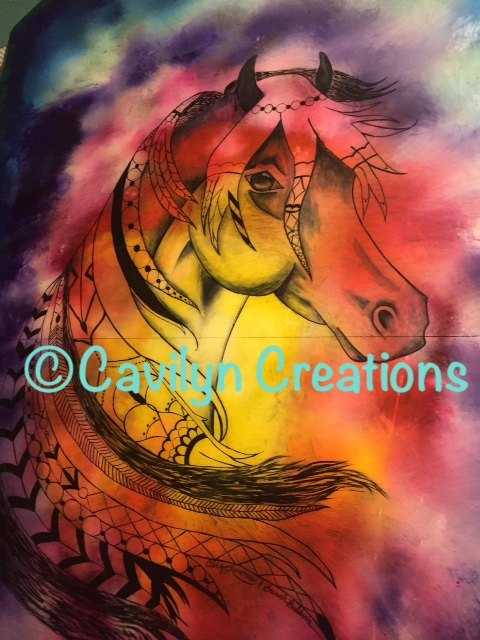
My friend and I wanted to bring Unicorn SPiT to our art class, and yes We definitely did! I am a sophomore in high school, and creating functional works of art is my passion. Well, except for watercolor painting, that's my other passion! Lets just say I have tried many sports, from Ballet, to Softball, and now Horseback Riding. I often incorporate my love of horses into my paintings, whether it be decorative or functional art! Please continue reading to see how we transformed this table from a goodwill score, to a masterpiece!
If you like the table, please go to our page at www.facebook.com/cavilyncreations/ and give our page a like so we know you read this post!
If you like the table, please go to our page at www.facebook.com/cavilyncreations/ and give our page a like so we know you read this post!
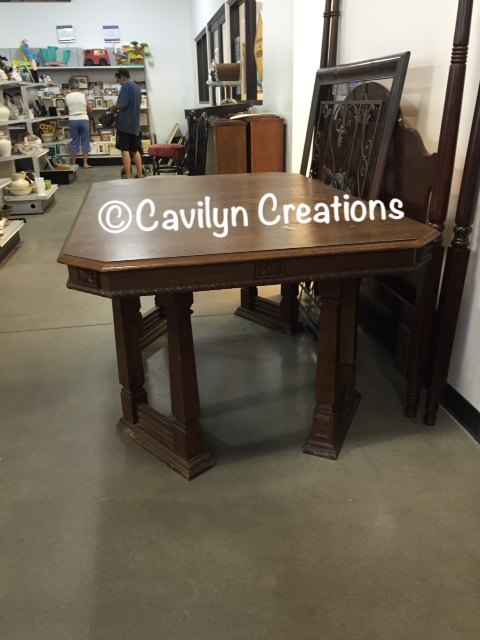
Goodwill at 50% off, means $20... Score!
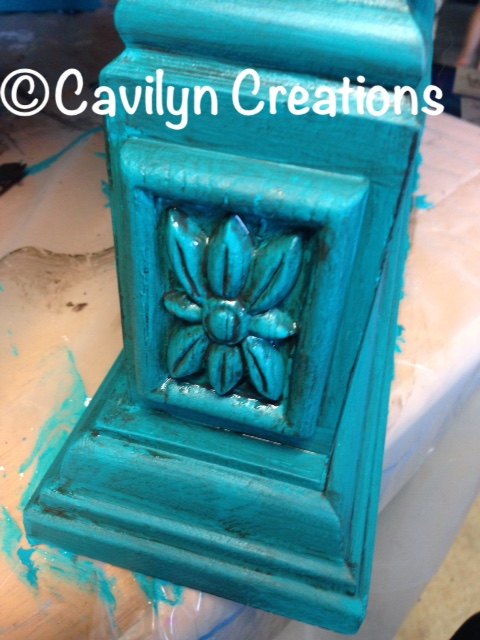
We decided on a deep turquoise from Wise Owl Chalk Synthesis Paint for the base of the table. Next, we used Dark Glaze by Rethunk Junk. With a glaze you paint it on and immediately wipe it off with a clean, old t-shirt.
As the side is a part of the base of the table, we painted the side with Deep Turquoise by Wise Owl Chalk Synthesis Paint. At this point the base is beginning to take its shape! This next step can be a bit interesting, use the dark glaze on the top half of the side while keeping the rope portion clean and bright! The next step is the fun part... for now!
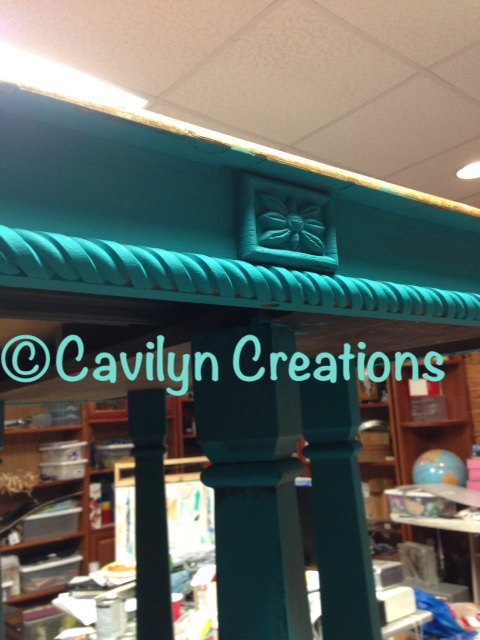
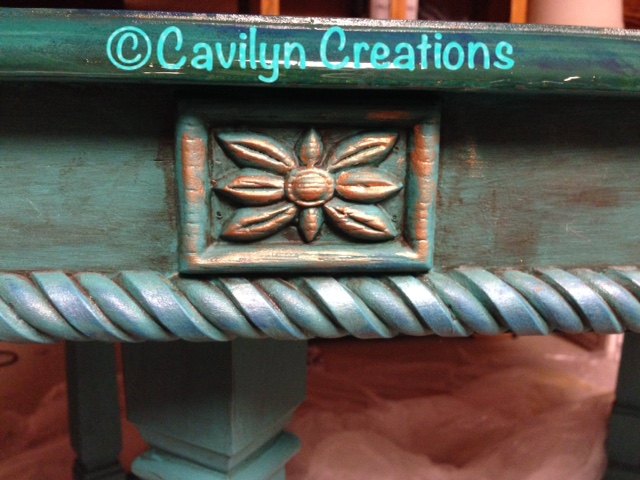
Next, we used a Metallic Silver Pigment by Jacquard, to act as a highlight for the rope. Use the Deep Turquoise Chalk paint like an adhesive!
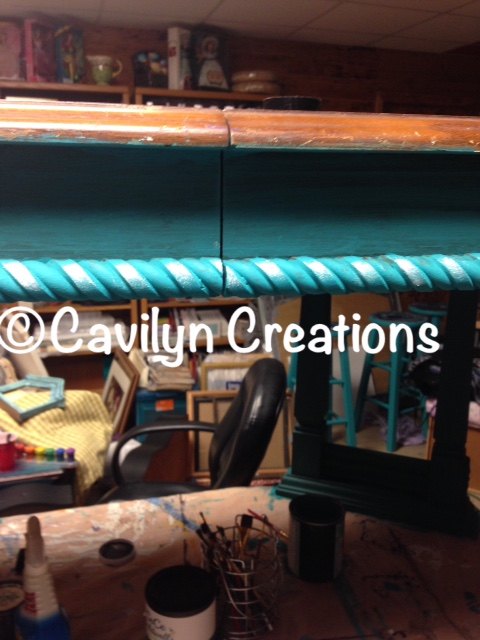
After we applied the pigment we decided that the rope needed to tie into the rest of the side, so we carefully applied the Dark Glaze by Rethunk Junk over the pigments. Next, we dry brushed some Blue Thunder by Unicorn SPiT Gel Stain and Glaze onto the rope to add some dimension to it! As if the glaze isn't enough, we brushed some Metallic Copper Paint onto the flower accents as well! Now the base of table is almost finished, now you just need to seal it! We decided we wanted more of a flat finish for the base because the top would soon be very shiny. So we used General Finishes "Flat Out Flat" for the base.
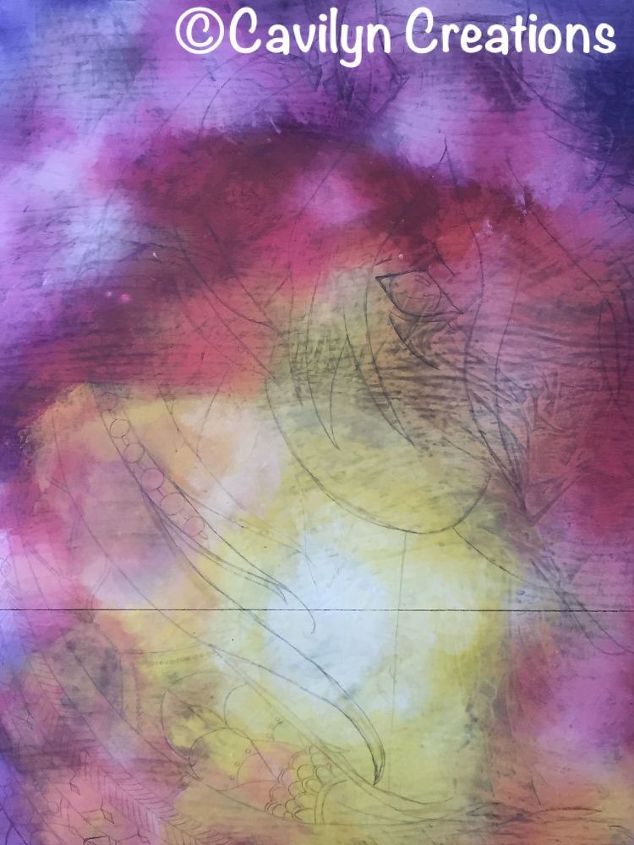
Now we begin the REALLY fun part... The top! We used a wide variety of colors for this table (All the colors being by Unicorn SPiT Gel Stain and Glaze), starting from the center we dripped White Ning, then Lemon Kiss, then Phoenix Fire, then Pixie Punk Pink, then Purple Hill Majesty, then Blue Thunder (Wow that's a lot to type!). To dull it down we dripped White Ning all over. Although in the end the White Ning brightened the colors...
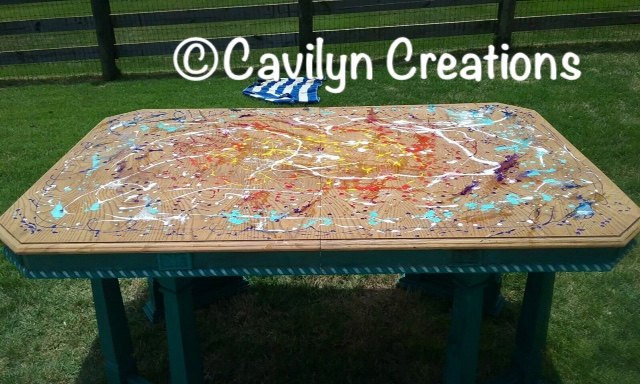
The way the Stain Press Technique works is you spray the bare wood so that it doesn't absorb the colors to fast, you will now lay down your colors in a pattern, then place a plastic drop cloth on top. Then you will spray the plastic to make it easier to manipulate the SPiT underneath, now you will rub your hands on top until you receive the desired look and slowly lift the plastic, and now you are left with a masterpiece!
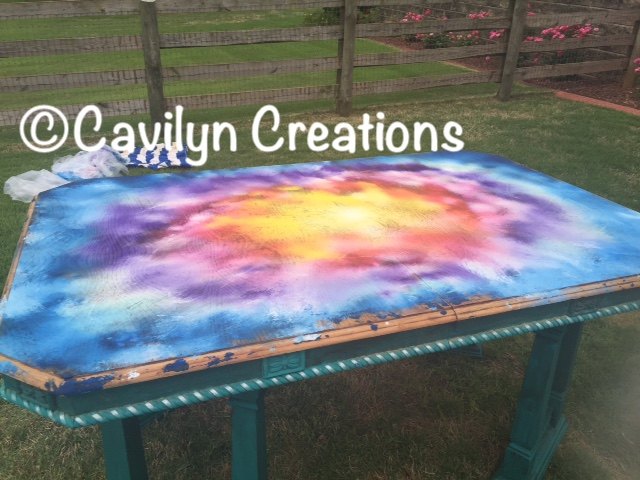
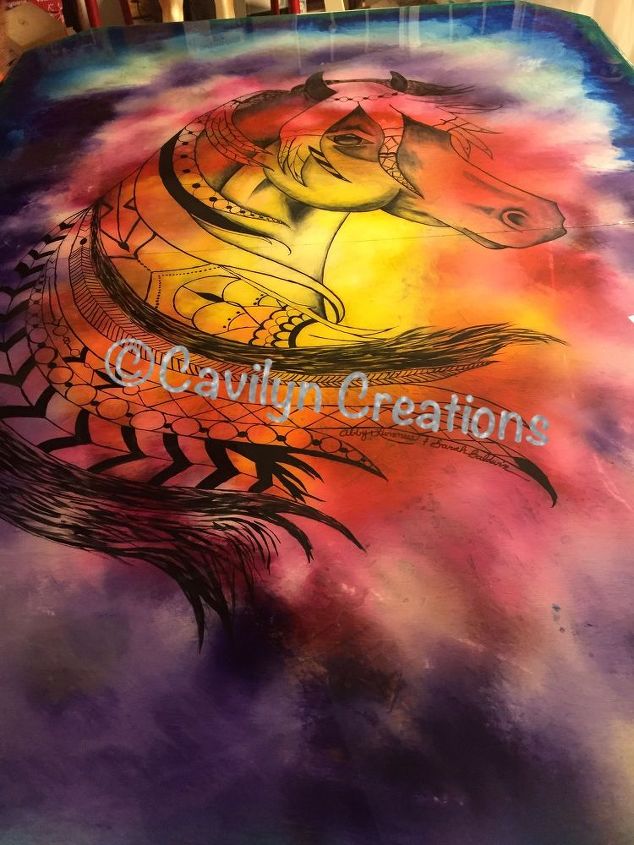
For the edge we used Navajo Jewel by Unicorn SPiT Gel Stain and Glaze with some blue thunder to almost create a border and make the top tie into the base color a bit better. At first the plan was to paint a Silhouette of horses running, but no, that would too easy according to my mother! So we then went hunting on pinterest for a tribal horse head, and we definitely found one! So now we had the honor of fighting with our projector and free handing a few places that wouldn't focus, but it was worth it!
We used a combination of Black Sharpies and Midnight's Blackness by Unicorn SPiT Gel Stain and Glaze to line the horse.
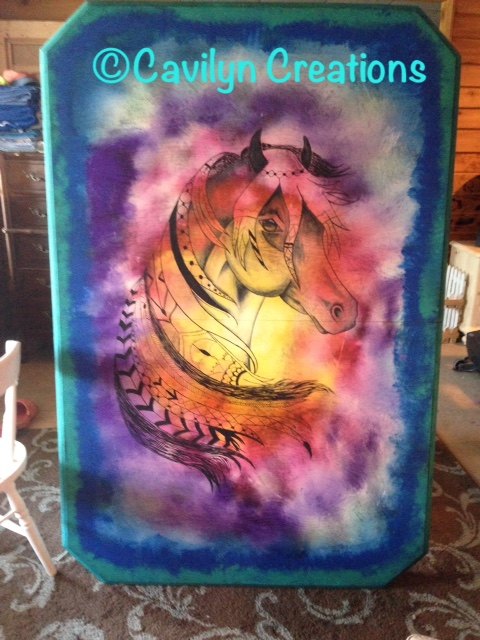
Now everything is lined and ready for sealing! We used Famowood's Two Part Epoxy to seal the top of the table. While this product can seem very nerve wracking at first, the 3-Dimensional look it gives is mind blowing! Just take your time with this process, it would be beneficial to try it on a small scale first to get the hang of it. The way this product works is you measure how much you will need, then place the hardener into the other part and mix for 6 minutes, then take everything and transfer it to another container and mix for another 6 minutes. Now your epoxy is ready to go onto your surface, have a spreader on hand before you pour it. After you have poured it, use your spreader to even out the surface. This product will self level so it can be a bit forgiving in that sense. After it is spread you will use a heat gun (mine is by Wagner) to pop the bubbles that form, be careful not to run over the same areas to much because you will literally burn the epoxy and cause it to make white bubbles that wont go away... and trust me that's not fun! It will need a few days to cure and then its good to go! There are many helpful videos on how to use this product on Youtube, so I recommend looking at those so that you can see what I am trying to describe. I would say this is a pretty cool transformation, going from a table lacking life, to a table that you can tell is beaming!
Comments
Join the conversation
2 of 37 comments
-
OUTSTANDING! BEST USE OF A GOODWILL FIND I HAVE EVER SEEN!!!!
-
Amazing!!! What a great job!


Frequently asked questions
Have a question about this project?