


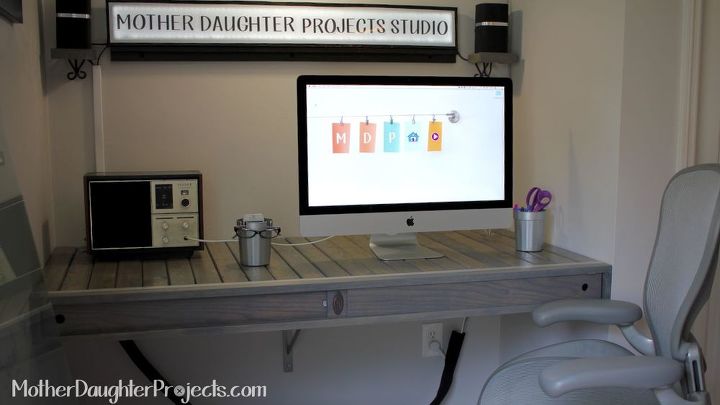
Floating Desk Build
$95
1.5 Weeks
Advanced
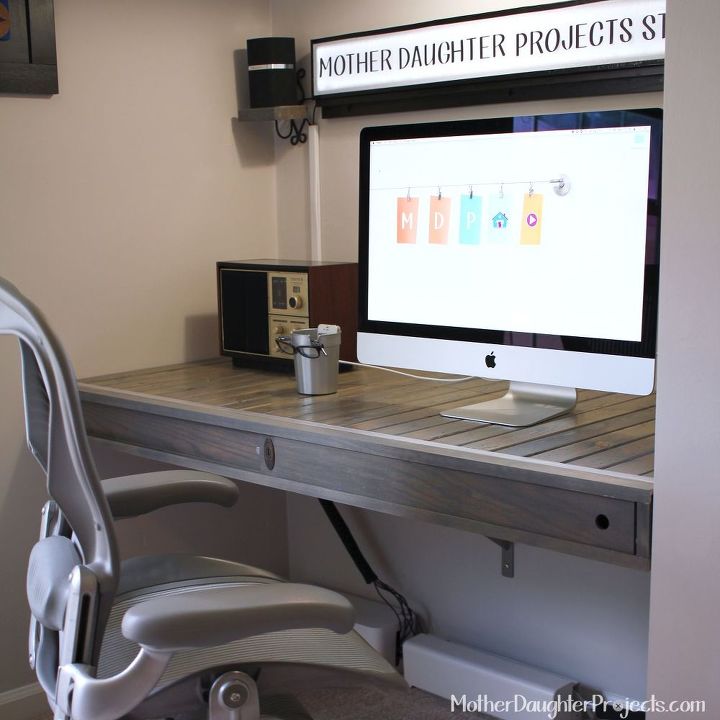
When Steph decided to turn her guest room into an office, it was apparent she needed a new desk. There is a great nook in the room that just cried out for a built in, floating desk. Research on the web showed it was a completely do-able project, so we thought, why not?
We don't necessarily encourage you to use our step by step tutorial but encourage you to study our procedure as a way to education yourself on how to and how not to do things if you decide to build your own floating desk. We are so happy we tried this, we learned so much from it, and are excited to share!
We bought some new materials for this but also reused a lot of materials we had.
Please check out our website for more details and a how-do video!
{
"id": "3649555",
"alt": "",
"title": "",
"video_link": "https://www.youtube.com/embed/Oy_l3EsWuhY",
"youtube_video_id": "Oy_l3EsWuhY"
}
{
"width": 634,
"height": 357,
"showRelated": true
}
Watch the how-to video!
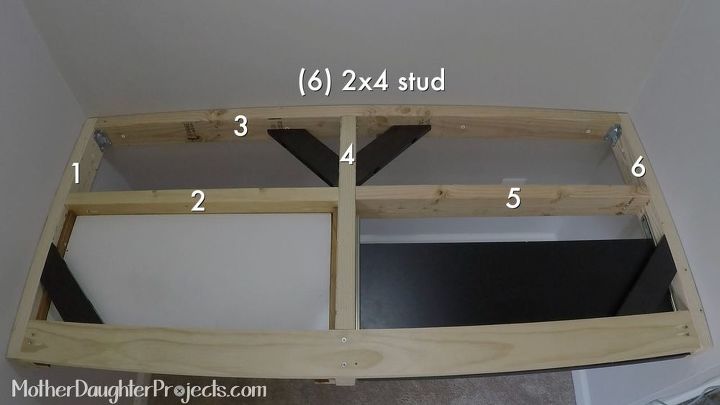
To make the desk support:
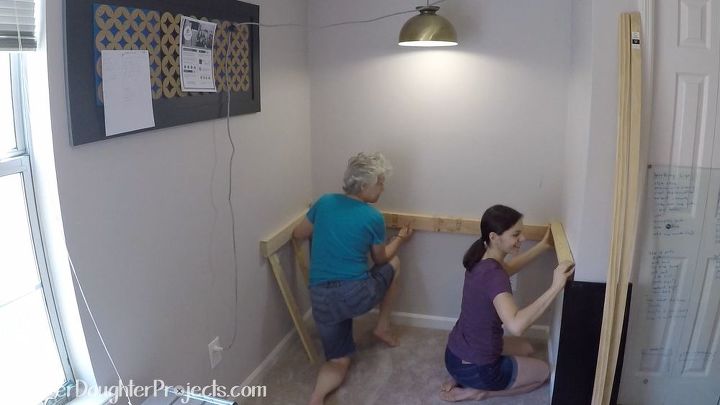
First we measured the space where the desk needed to fit. Then we marked and cut the 2x4 boards.
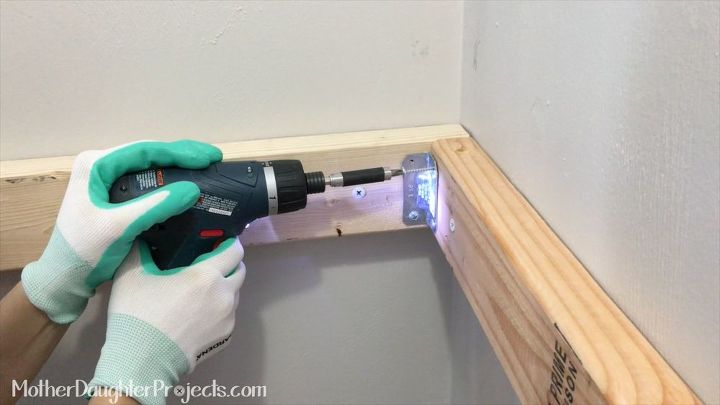
Next we screwed the 2x4’s into the wall. We made sure to screw into as many studs as we could and added a few wall dog screws (screw and anchor in one) where studs were not available.
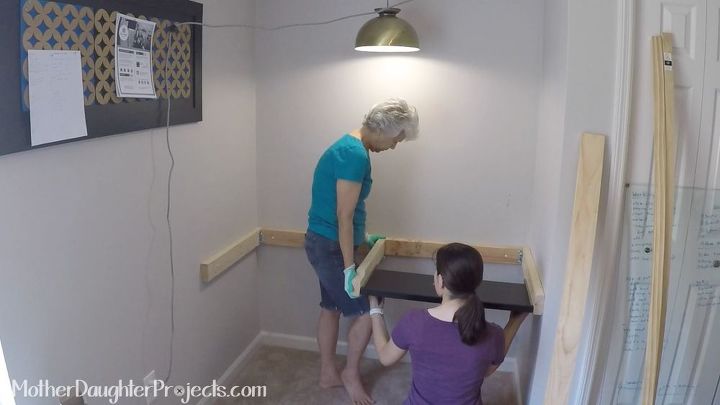
The middle support is not centered. We based the middle 2x4 placement on the width of the keyboard. We used another metal bracket to attach the middle board.
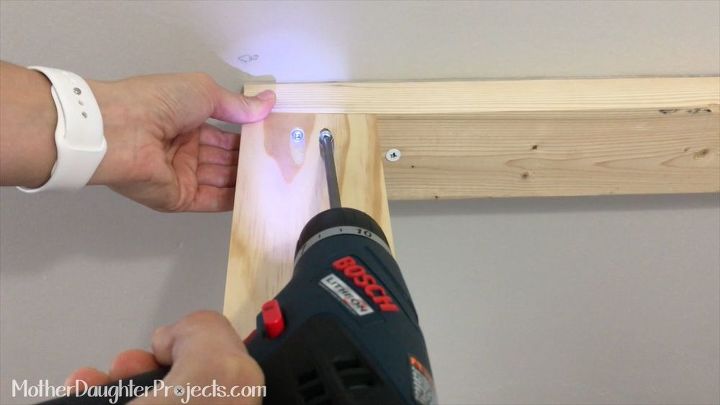
Next we dry fit the 1x4 pine board that attaches to the top. We were not sure how to attach the wood. We ended up making pocket holes using the kreg jig system. This was our first time using this tool and are really happy with the results.
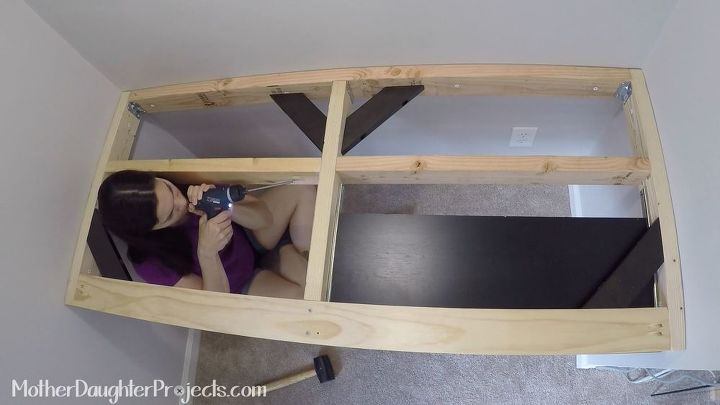
We added corner brackets and more 2x4s for support.
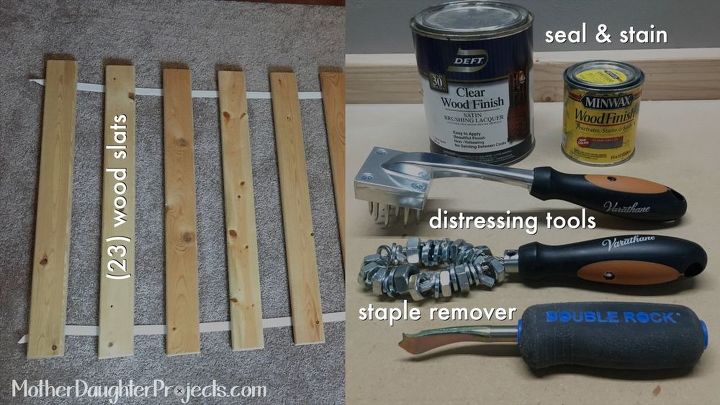
Now onto the top of the desk. We used 23 wood slats, distressing tools, a staple remover, grey stain and sealer.
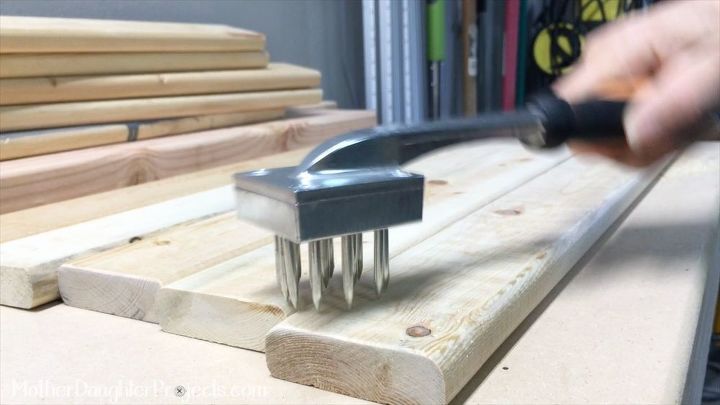
Mom used some distressing tools to beat up the wood. We wanted it to look a little aged so this helped achieve the perfect look.
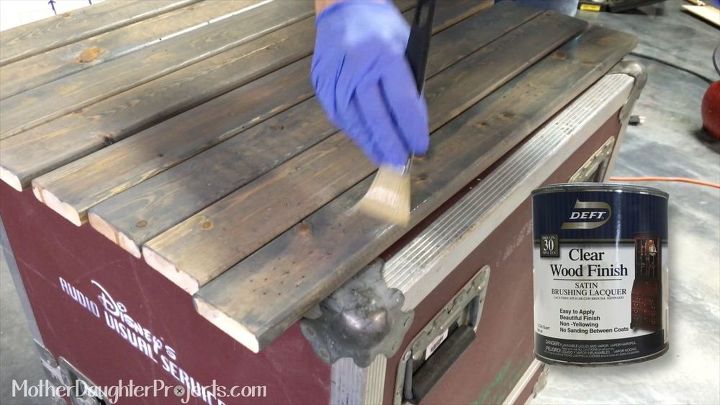
Then Mom moved on to stain and seal all the slats. The seal she chose was actually recommend by the contractor that did a major remodel at her house.
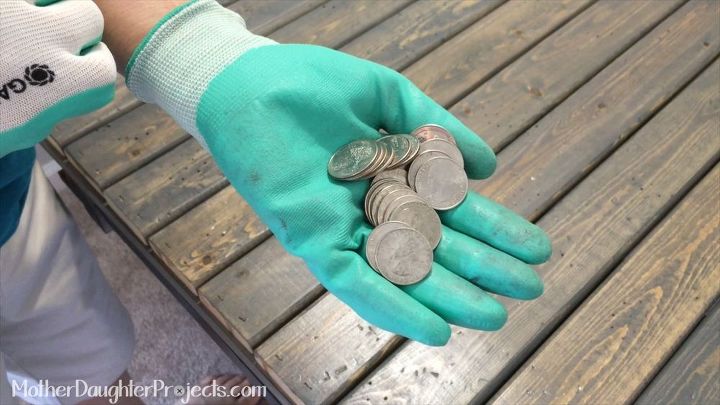
We put the slats in place and used quarters as spacers.
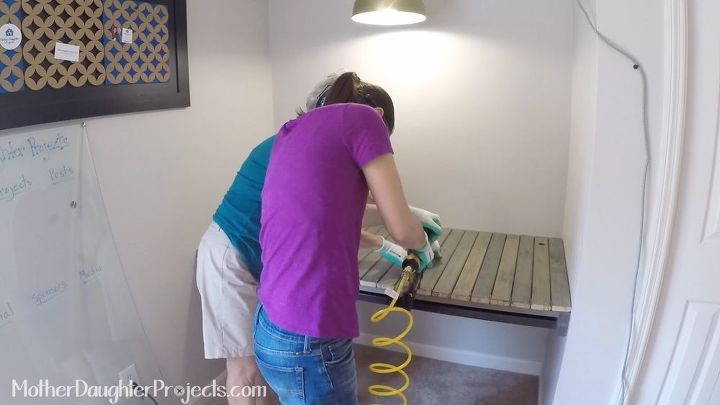
We used a compressor and nail gun to attach the slats to the frame. This was our first time using both these tools but after reading through the manuals and safety tips we felt confident and look forward to using these tools again.
To see how we made the front, some of the challenges we faced, and a full materials list please visit our website.

Want more details about this and other DIY projects? Check out my blog post!
Comments
Join the conversation
2 of 77 comments
-
gorgeous! Love bespoke hand built - so much more character than a bought mass produced piece
-
Really cool!


Frequently asked questions
Have a question about this project?
Great job creating such a functional space. Love the aesthetics too. Did you do a sliding facefront to cover the keyboard tray? Nevermind, I found the link to the more detailed build out. Very thorough article. You gals are great at this!
Is that some kind of covering around the cords below the desk? I need something like that, could you tell me where I can purchase it, or what it's called? Thx!
I have a space would like a desk but only 2 sides to connect it to. Back and right side. How would this do there? Suggestions?