


Cloffice: How to Make an Office in a Closet
Do you need a home office, but your space is small?
Then we have the perfect idea for you, a cloffice!
Say what?!
A cloffice, an office in a closet.
In fact, we’ll show you how simple it is to DIY a cloffice in your home.
In this post . . .
- What is a Cloffice?
- Prep the space
- Add a Desk
- Add Lighting
- Add Storage
- Vertical Storage
- Floating Shelf Storage
- Add a Feature Wall with Fabric
- Make it Inspiring
What is a Cloffice?
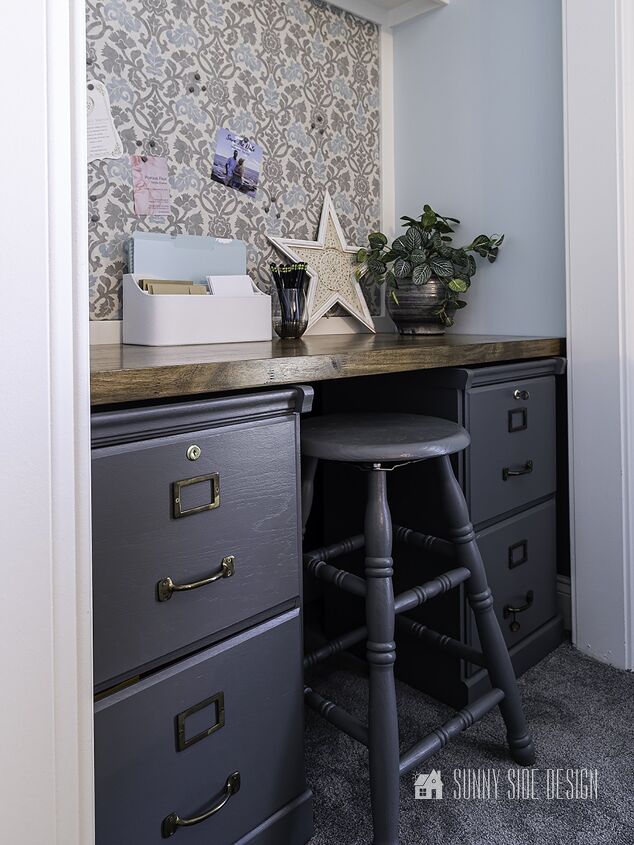
A cloffice is a closet or a nook that you can transform into a functional office space.
Or course you don’t need a large walk-in closet to make this happen.
Just add a desk surface, storage area and a chair to a small closet or nook.
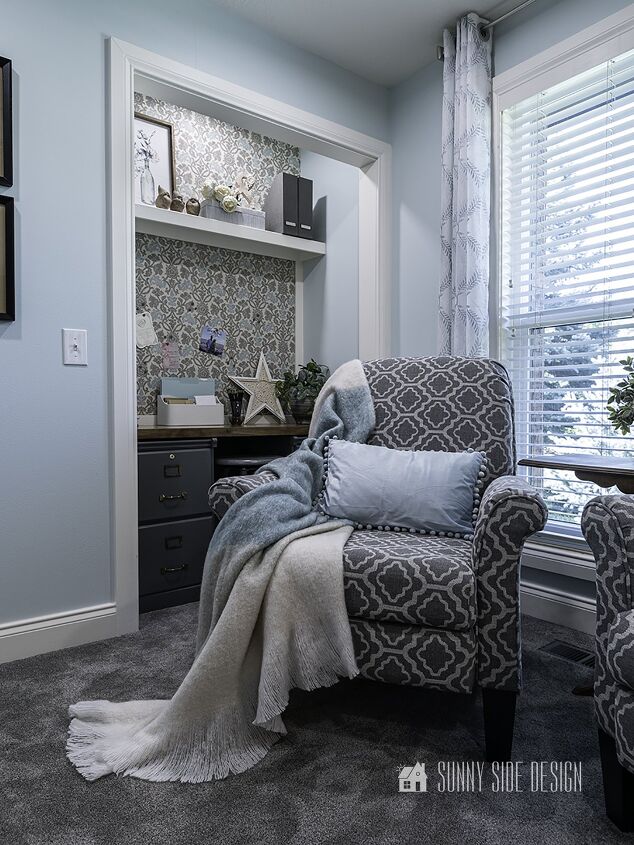
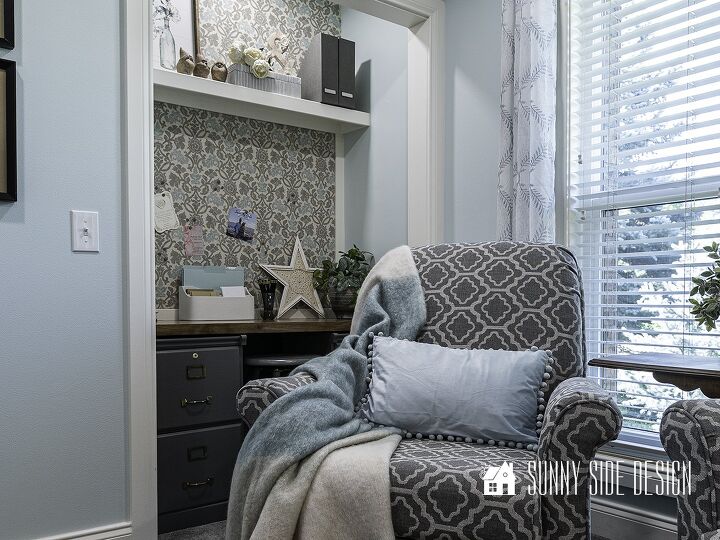
When we remodeled our clients home to make a second master suite, we used their current office space for the enlarged bedroom.
Now our clients are both retired and don’t require a large space, just somewhere to sit down and pay the bills and keep their paperwork organized.
However, if you are looking for a space where you did need to work from home, this set up will still work.
The only thing I’d suggest is a more comfortable chair.
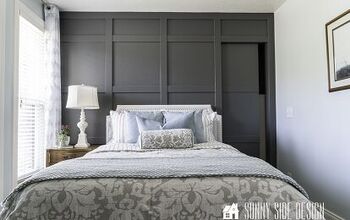
So let’s take a look at how we created this office in a 4 1/2′ closet.
Are you enjoying this post?! Pin it and save it for later.
And if you know someone who would love this idea, please share!
Sharing is caring!
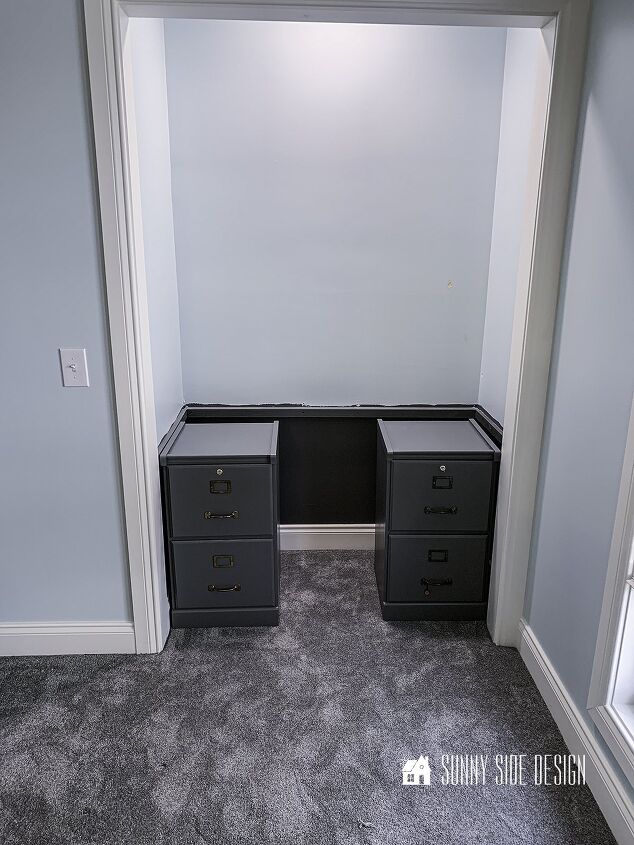
Prep the space
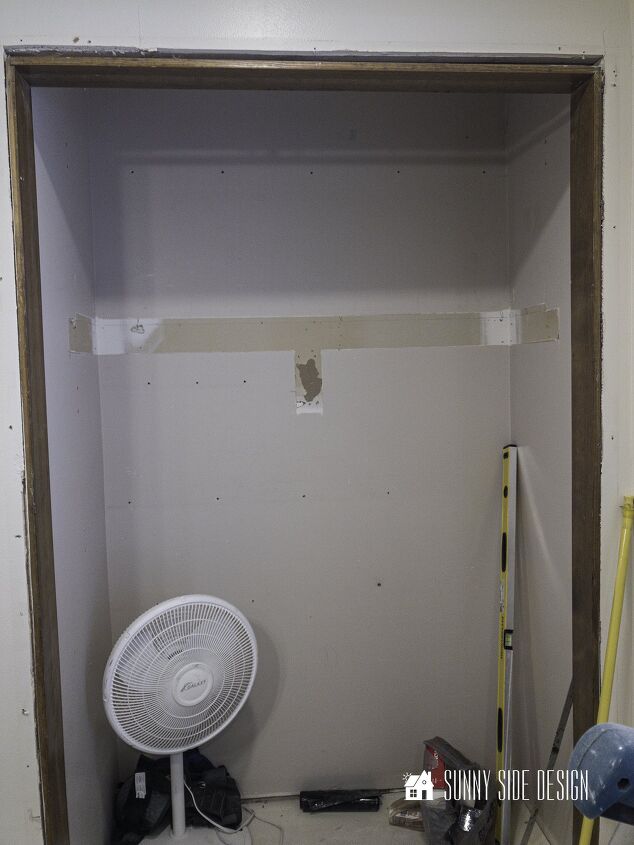
To begin, we cleared out the closet space, and removed the clothing rod and shelf.
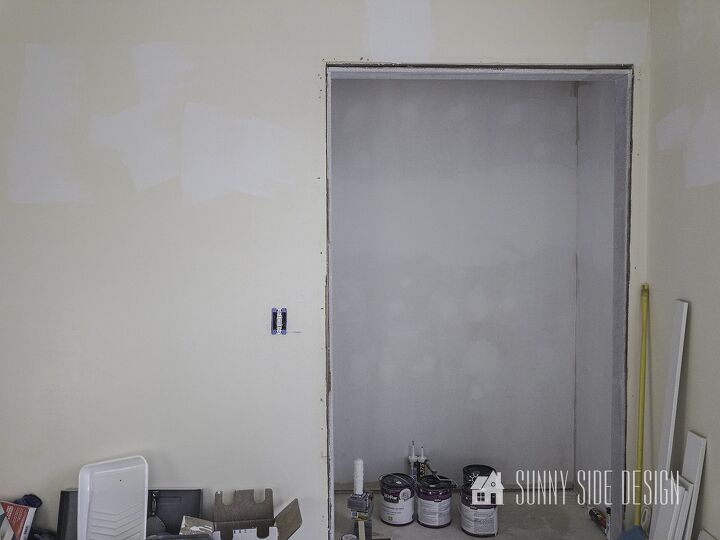
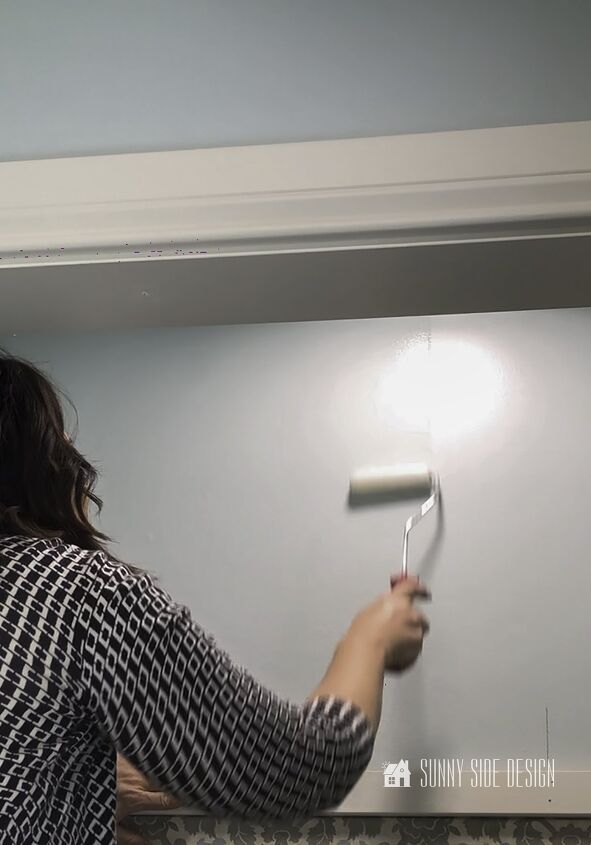
Next up, the wall was repaired with drywall mud and primed.
Finally add a coat of paint.
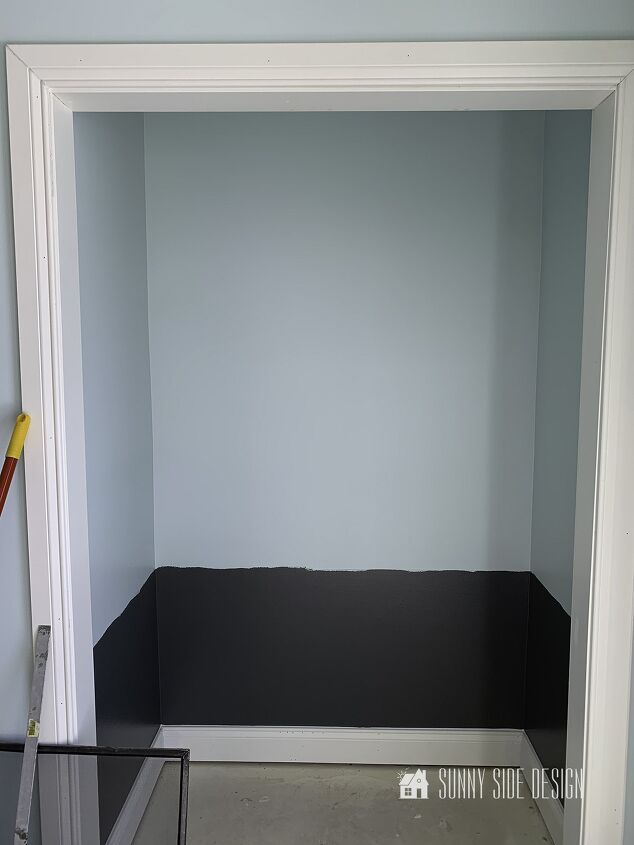
In our cloffice we painted the wall the same blue a the rest of the room.
Then the lower section of the wall that will be below the desk space is painted the same charcoal grey as the board and batten accent wall.
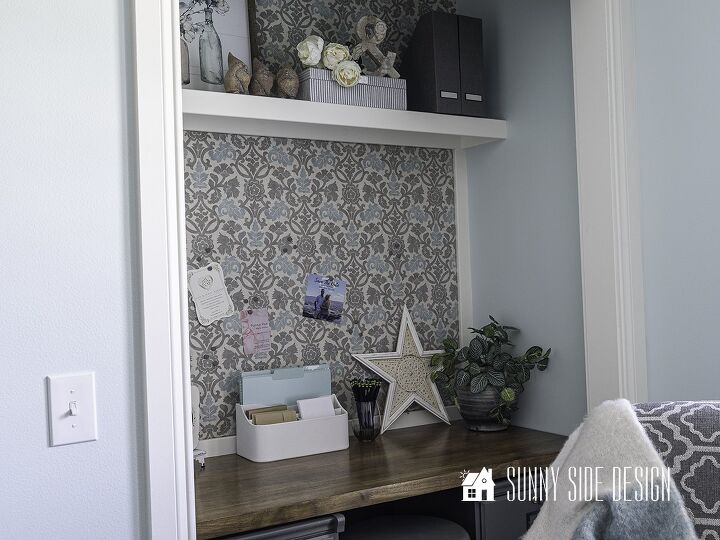
Add a Desk
Next up we want to have a good desk surface to work on.
Now of course, you could purchase a desk that will fit your closet or nook area, however I like the idea of it being more of a built-in feature.
So we are installing a floating desk.
Cleats are installed on the 3 walls at the height we want our desk to sit.
We also painted the cleats grey to blend into the wall.
Two wood filing cabinets were also painted grey and placed in the nook.
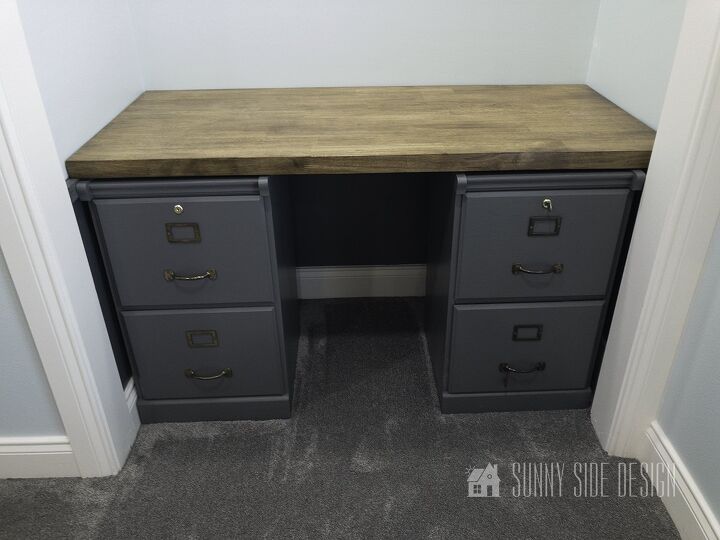
Finally bring in the desk surface.
For our desk surface we purchased a piece of butcher block.
It is stained to match the refinished furniture in the room
Add Lighting
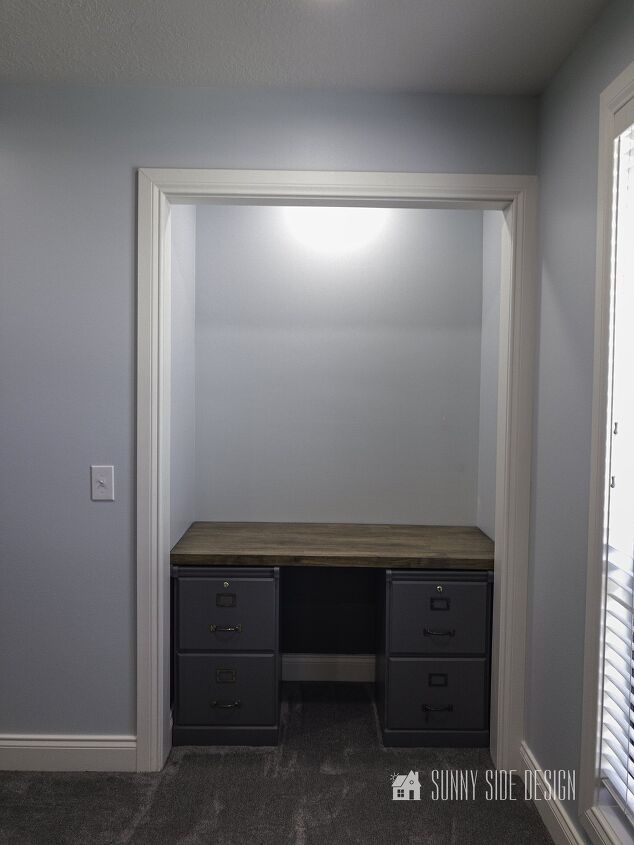
One very important element you want to add to your cloffice it lighting.
Generally speaking a closet does not have a light.
We had an electrician install a can light in the cloffice area when he was installing lighting for the rest of the room.
If you don’t want to hire an electrician to add lighting, there are options like installing a battery operated puck light.
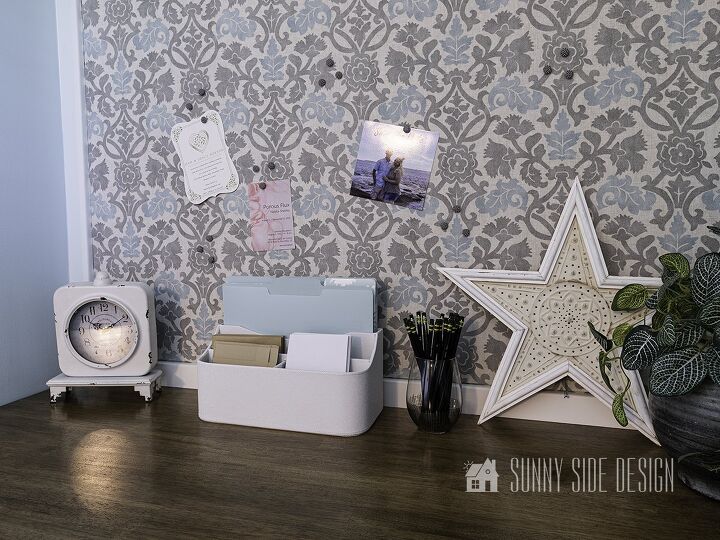
Add Storage

You don’t want to skimp on storage in your cloffice.
Our client already had two oak filing cabinets.
They were painted the charcoal grey and slide under the desk surface.
Not only does this give them plenty of storage for their important documents, but fits seamlessly into the design.
Vertical Storage
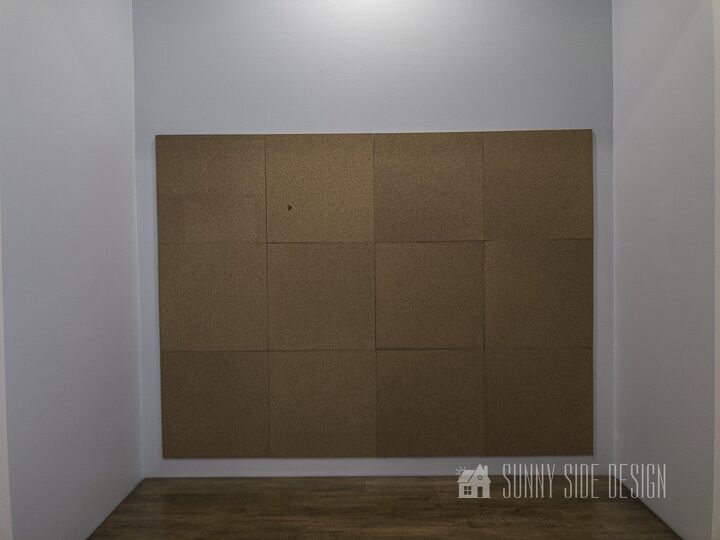
When working in a small area like this cloffice, you’ll want to maximize your storage space.
One way to add more storage is with a pin board.
We purchased cork tile squares and mounted them to the wall with 3M tape
Then cover the cork tiles with fabric by stapling it to the wall on all four sides.
This is the same fabric that we used to make a pillow for the bed.
Spreading the color and pattern around the room makes it feel cohesive.
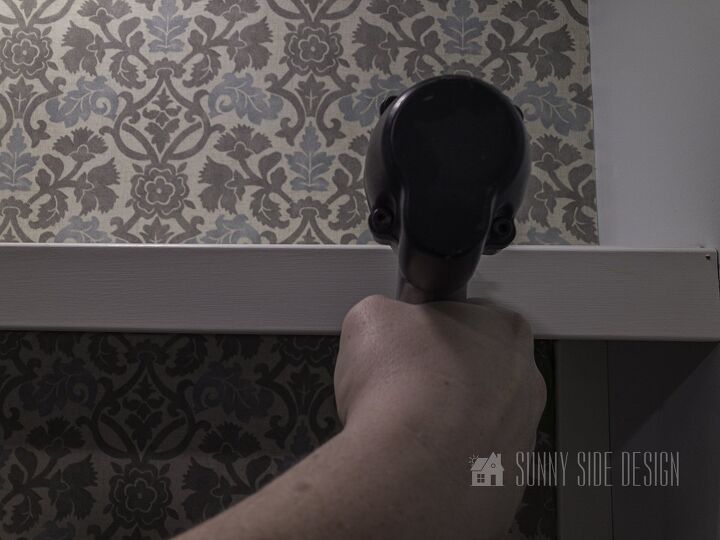
Finally trim out the pin board with white painted boards on all four sides.
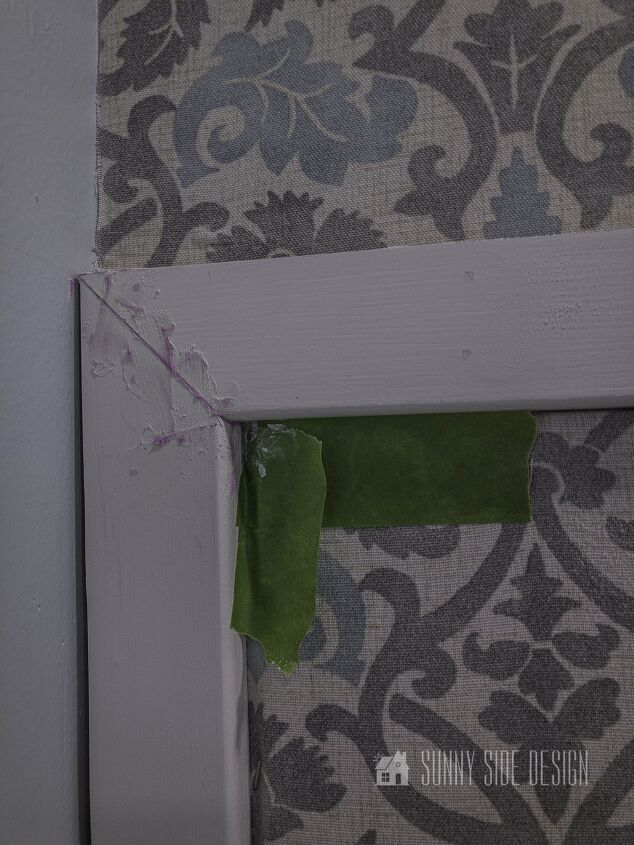
The corners of the boards were cut at a 45° angle.
Then the corners and nail holes were puttied in and painted.
Let’s stay connected! Follow us on social media!
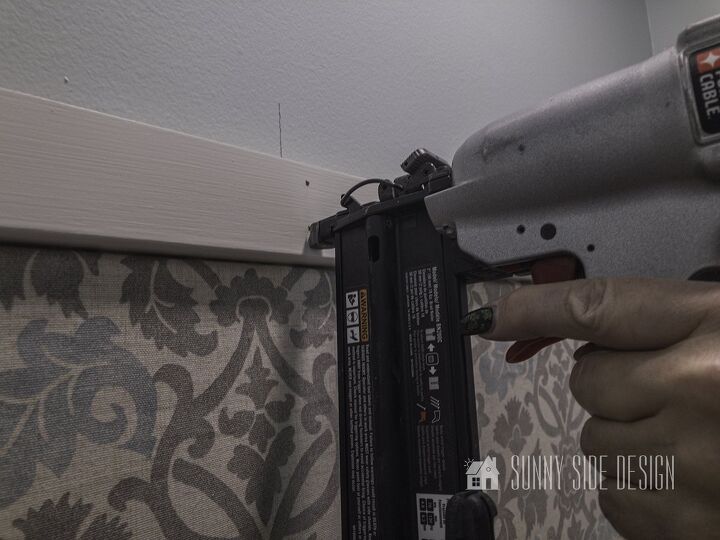
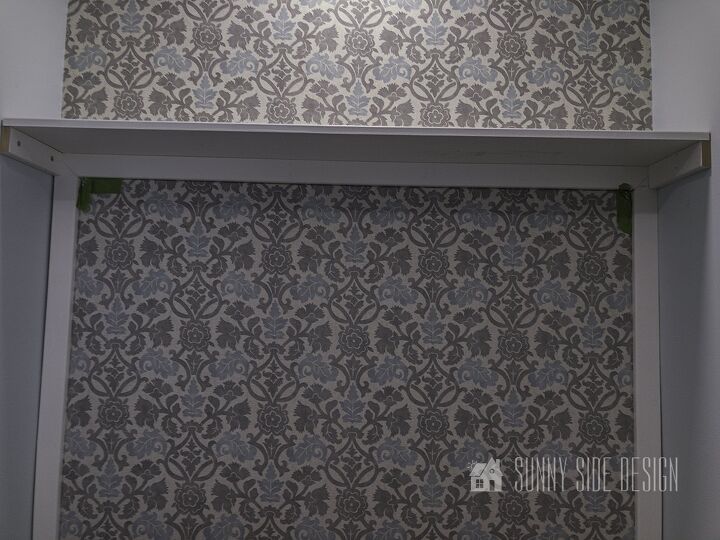
Floating Shelf Storage
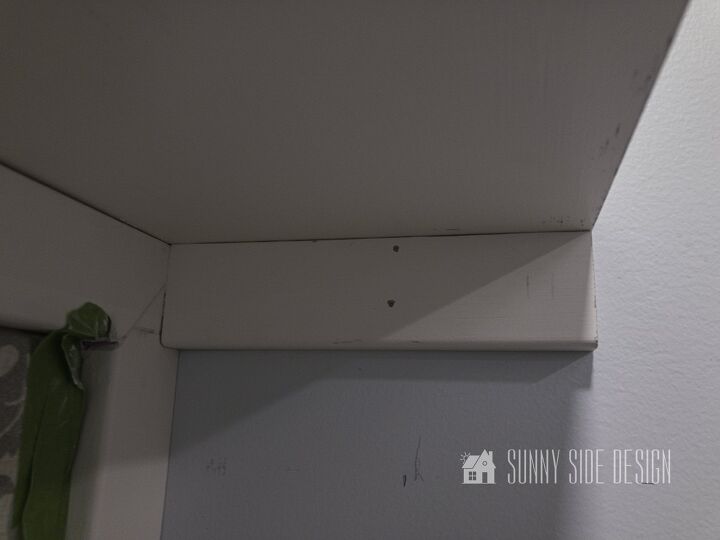
Another way to add wall storage in this cloffice is with shelves.
Adding floating shelves will keep the space uncluttered.
We used the molding we secured at the top of the pin board for the cleat along the back of the shelf.
Then we installed a cleat on the right side into studs.
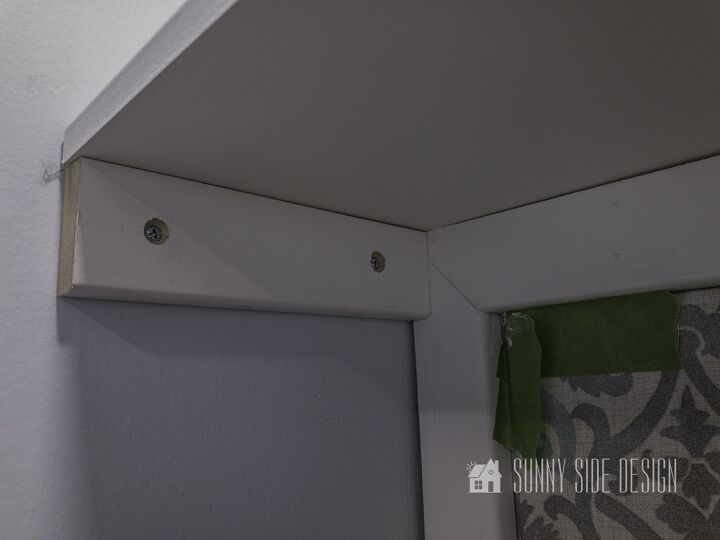
However, on the left side there was not a stud to secure the cleat to.
So we installed two wall anchors to secure the cleat on the left side.
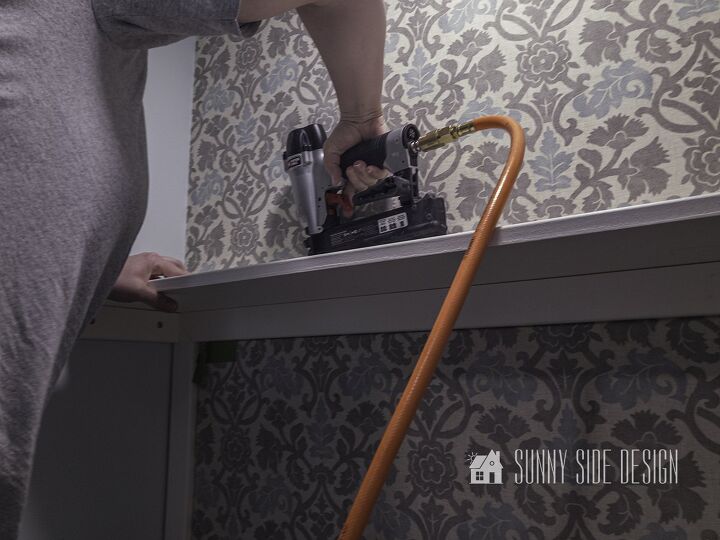
A shelf was then placed on all three cleats and secured with brads.
To finish off our floating shelf we placed a piece of molding along the front of the shelf and secured it to the shelf with brads.
Finally all of the nail holes are then puttied and all of the boards caulked and painted.
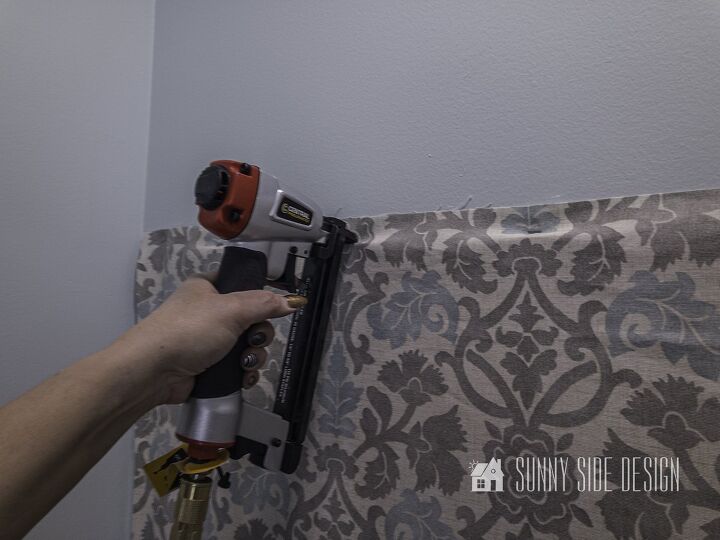
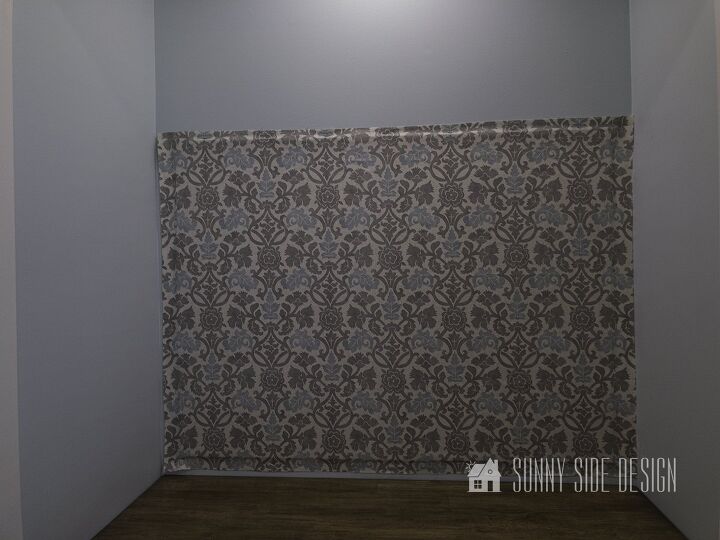
Add a Feature Wall with Fabric
We wanted to create a feature wall along this side of the room with the fabric.
So above the floating shelf, we attached more of this beautiful fabric.

To do this we applied liquid fabric starch to the wall with a small foam roller.
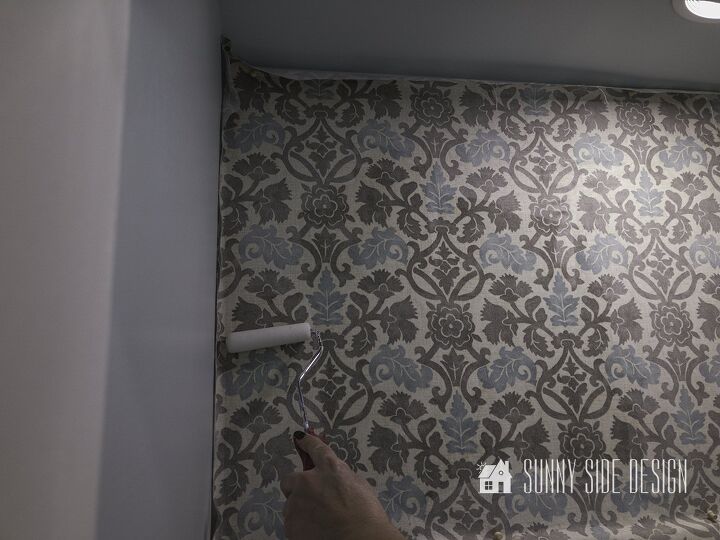
Then you’ll take the fabric and place it against the wall.
We found it helpful to place push pins into the fabric along the top and sides.
Then roll more of the liquid fabric starch over the fabric until it is saturated.
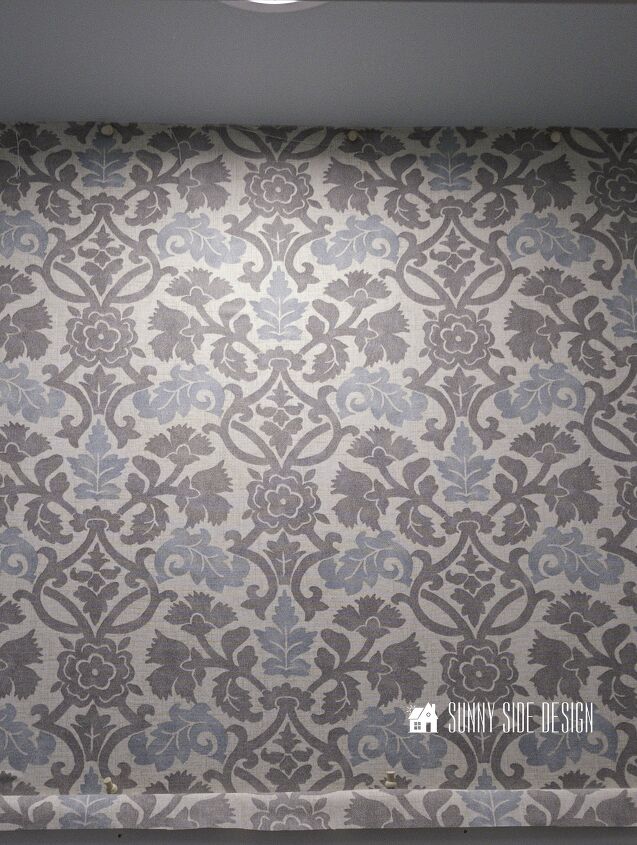
Leave the push pin in place until the liquid fabric starch is dry.
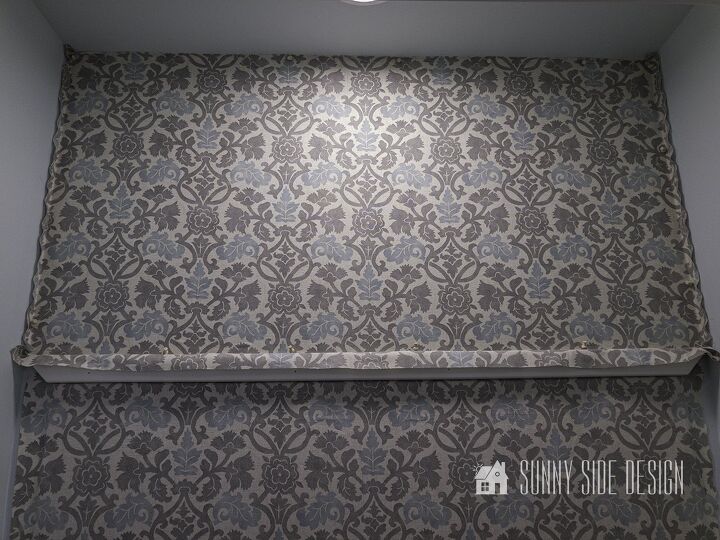
Finally, remove the push pins and trim excess fabric with an xacto knife.
We are thrilled with the way this cloffice turned out.
It’s the perfect place to sit and pay bills and keep the household papers in order.
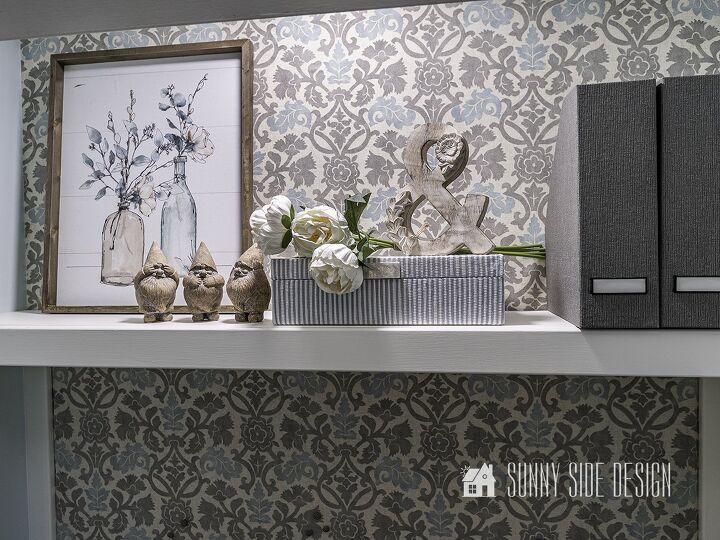
To keep some of the not so pretty items stored we used pretty boxes and files, while adding a bit of decor to the cloffice.
Make it Inspiring
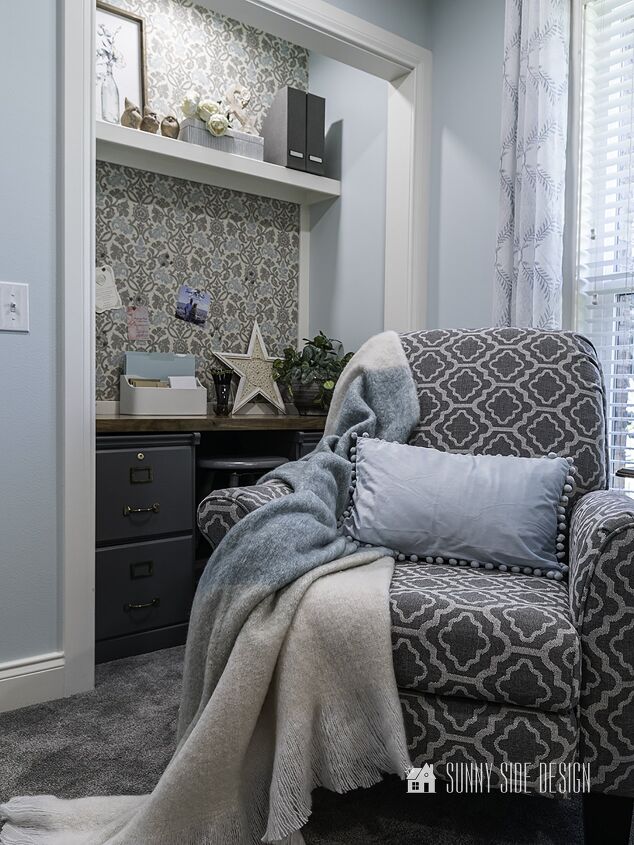
Add a few pieces to your cloffice that inspire you.
A piece of art, a collection, plants, something that will inspire you while working in your office.
Thank you for spending a little time with us today.
Please pin it to save it for later and share it with your friends!
Sharing is caring!
We hope you found a little inspiration here today.
Are you ready to add a cloffice in your home?
Would this be something that would work in your home?
Please share your thoughts and questions with us.
We love to hear from you!
If you’re new here, WELCOME! We love having new readers and friends!
You can learn more about us here.
Let’s stay connected!
Subscribe to our free newsletter so you don’t miss any inspiration for your home.
Please PIN and save for later, and share with your friends!
Sharing helps grow our following!
Thanks for stopping by and as always here at Sunny Side Design…
WE HOPE TO BRING YOUR HOME TO THE SUNNY SIDE OF THE STREET.
Be sure to follow us on Pinterest for even more home decor and DIY ideas.
To see what we are working on before it’s on our blog, follow us on Instagram.
You will also find our video tutorials on our YouTube channel.

Comments
Join the conversation
-
Very cute idea!!!
-
I really liked your cloffice! Beautiful job


Frequently asked questions
Have a question about this project?
What a amazing space transformation. What color stain did you use on the butcherblock desktop? I think that's what I'm looking for. And those wooden file cabinets...She just happened to have them??? So lucky! Very well done.
So where do you now store your clothes that were previously in the closet?
Wonderful job🥰
we made a pantry from our coat closet, more important than coats👍🏻😉👍🏻