


DIY Tire Table

by
Homes.com
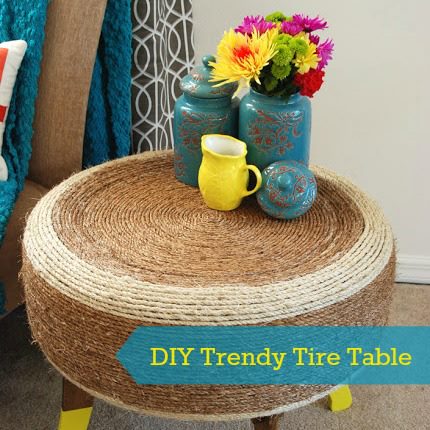
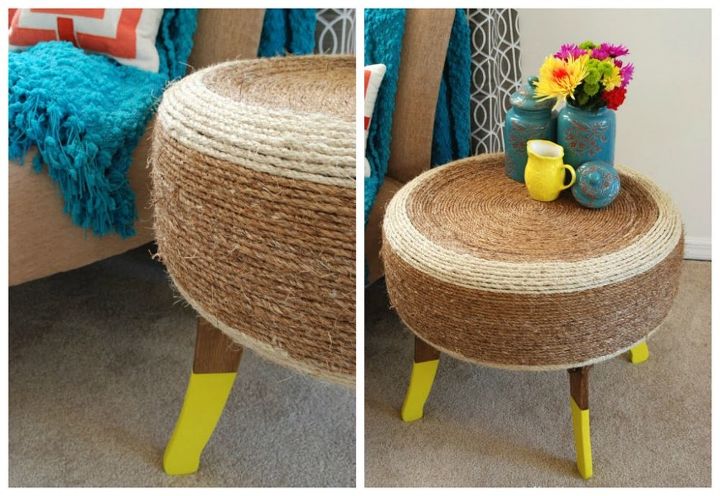
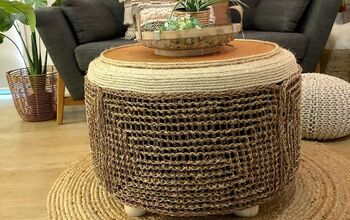
We’re bringing you another creative winning project from the Creating with the Stars promotion Homes.com was honored to sponsor. We love how Sarah, from While They Snooze, used an everyday item to create something spectacular for the up-cycle theme. Who would have thought an ugly tire could become such a beautiful table! See how she made this statement home decor piece.
Brought to you by Sarah:
Supplies:
Old tire – Mine still had the rim… it will still work if it doesn't.
Plywood – One circle for the base and one for the top. My plywood is 1/2″ thick.
Legs – Get creative! I used wood but you could use an upside down flower pot, metal, or buy pre-made legs from Ikea. This tutorial will show you how to make wood legs.
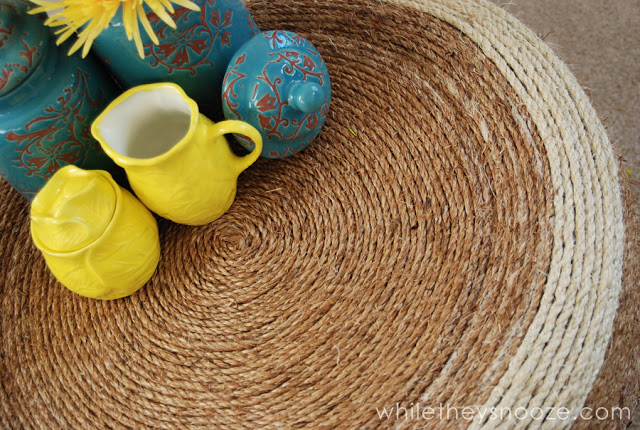
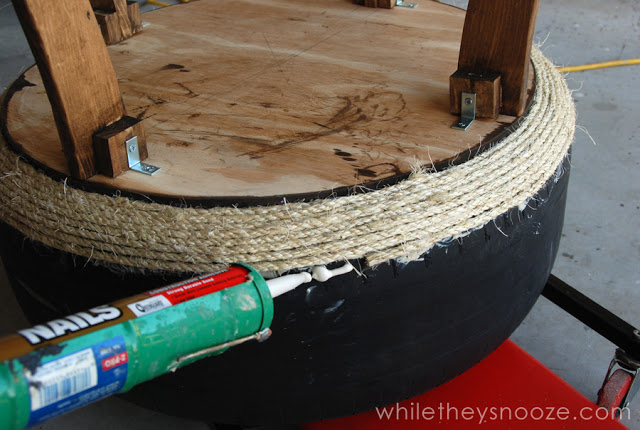
Rope – to disguise the tire. I used 350 feet (yikes!) of 1/4″ sisal and manila rope sold in little bags at Home Depot.
Glue/Screws/hardware to attach the legs – This will vary depending on what legs you get.
Construction Adhesive – To glue the tire to the base and the rope to the tire. I used Liquid Nails.
Basic tools - This will vary depending on what your base is made from. I used a jig saw to cut the circles. A chop saw, table saw, and jig saw the cut the legs. Drill to attach the legs.
Step 1: Scrub your tire.Chances are it’s going to be really grimy. Give it a scrub with some dish soap to cut the grease. This will also help your adhesive stick better. Let it dry.
Step 2: Cut out two plywood circles.First circle should fit in the center of your tire to make a flat surface to form the table top. I measured, then nailed a piece of string into the center of my plywood, attached a pencil, and drew the circle. I had to sand the edges of the circle here and there to make it fit in the tire.
The second circle is the base that the tire will sit on. Trace your tire and cut the circle one or two inches smaller than that.
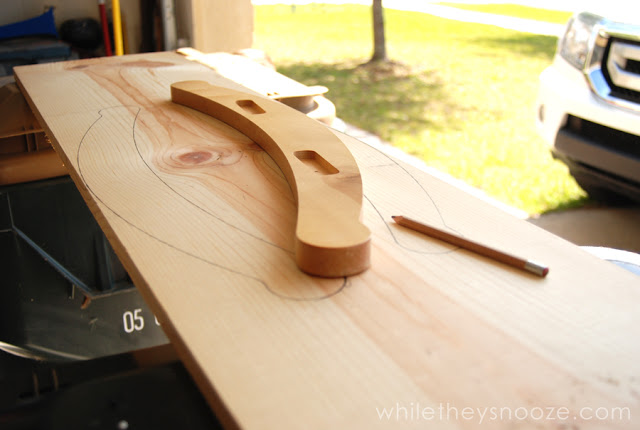
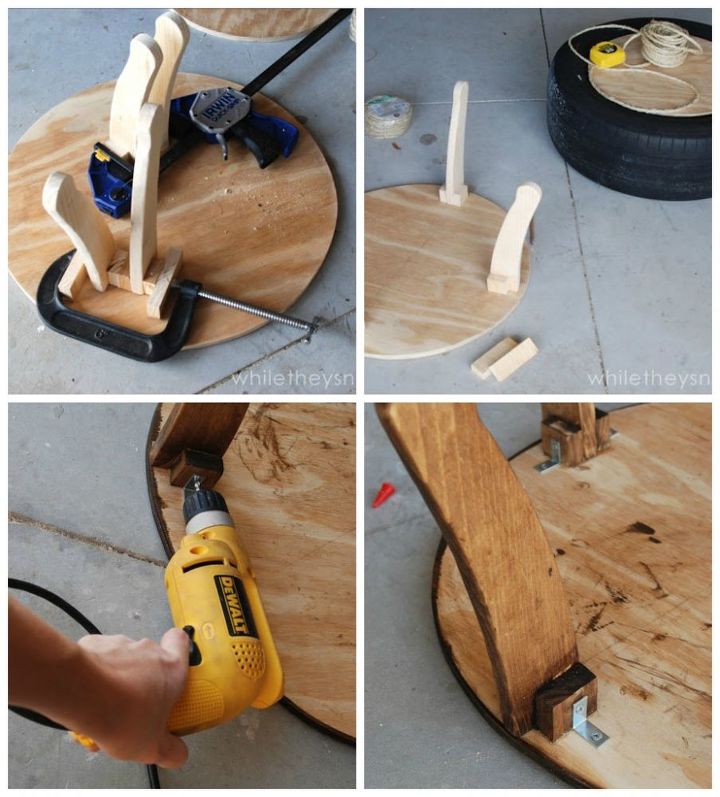
Step 3: Cut out some legs.Since this table will be replacing another table in my living room, I measured the height of that existing table. It was 20″. The tire is 9″ high, so I needed 11″ legs. Side tables vary in height though. They should work well with the seating they will be next to. So measure your tire and then figure out how high you need your legs.
I must confess, my husband came up with the idea of using the rocker slats from our rocking octopus, cut in half, for the legs.
- Sarah
For the full tutorial visit blog.homes.com
http://blog.homes.com/2013/07/diy-trendy-tire-table/
project ating
Brought to you by Sarah:
Supplies:
Old tire – Mine still had the rim… it will still work if it doesn't.
Plywood – One circle for the base and one for the top. My plywood is 1/2″ thick.
Legs – Get creative! I used wood but you could use an upside down flower pot, metal, or buy pre-made legs from Ikea. This tutorial will show you how to make wood legs.
Rope – to disguise the tire. I used 350 feet (yikes!) of 1/4″ sisal and manila rope sold in little bags at Home Depot.
Glue/Screws/hardware to attach the legs – This will vary depending on what legs you get.
Construction Adhesive – To glue the tire to the base and the rope to the tire. I used Liquid Nails.
Basic tools - This will vary depending on what your base is made from. I used a jig saw to cut the circles. A chop saw, table saw, and jig saw the cut the legs. Drill to attach the legs.
Step 1: Scrub your tire.Chances are it’s going to be really grimy. Give it a scrub with some dish soap to cut the grease. This will also help your adhesive stick better. Let it dry.
Step 2: Cut out two plywood circles.First circle should fit in the center of your tire to make a flat surface to form the table top. I measured, then nailed a piece of string into the center of my plywood, attached a pencil, and drew the circle. I had to sand the edges of the circle here and there to make it fit in the tire.
The second circle is the base that the tire will sit on. Trace your tire and cut the circle one or two inches smaller than that.
Step 3: Cut out some legs.Since this table will be replacing another table in my living room, I measured the height of that existing table. It was 20″. The tire is 9″ high, so I needed 11″ legs. Side tables vary in height though. They should work well with the seating they will be next to. So measure your tire and then figure out how high you need your legs.
I must confess, my husband came up with the idea of using the rocker slats from our rocking octopus, cut in half, for the legs.
- Sarah
For the full tutorial visit blog.homes.com
http://blog.homes.com/2013/07/diy-trendy-tire-table/
project ating

Comments
Join the conversation
2 of 27 comments
-
Very cool!! Love the jars! Did u do them??
-
Amazing!!! So beautiful, functional and clever. I love it!!


Frequently asked questions
Have a question about this project?
what kind of rope and glue did you use and will it sustain all weather?
How did you figure out how much rope you would need?