


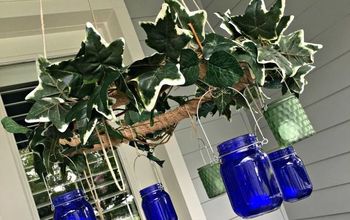
DIY Mason Jar Chandelier

by
Katie Nathey
Check out my DIY Mason Jar Chandelier, which we hung right above the sweetheart table during our wedding reception. You can see more photos and details on my blog.

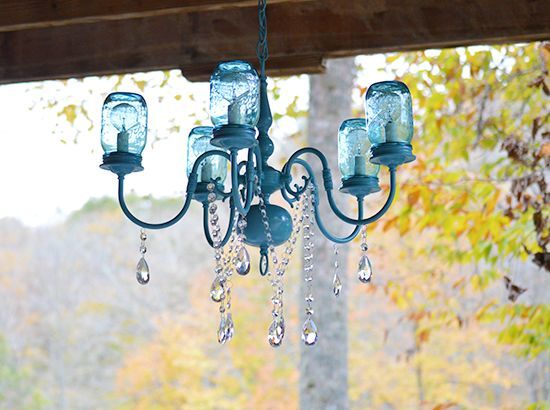
DIY Mason Jar Chandelier
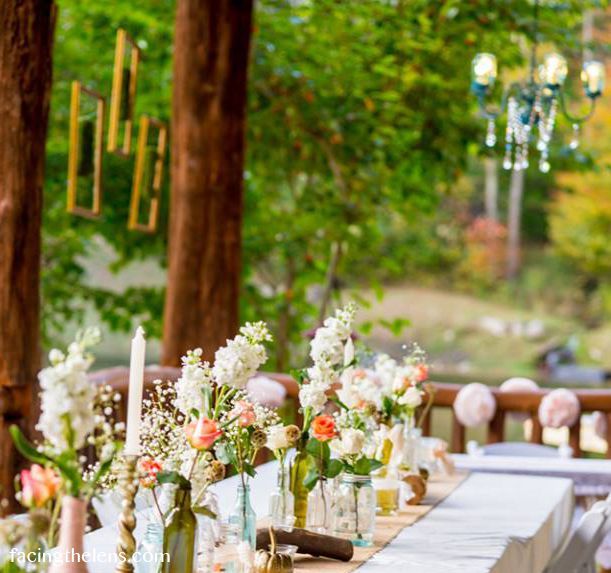
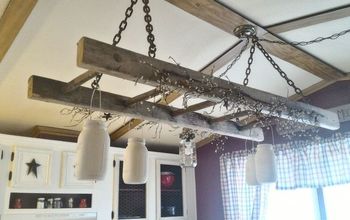
Photo of the chandelier in the background during our wedding reception.
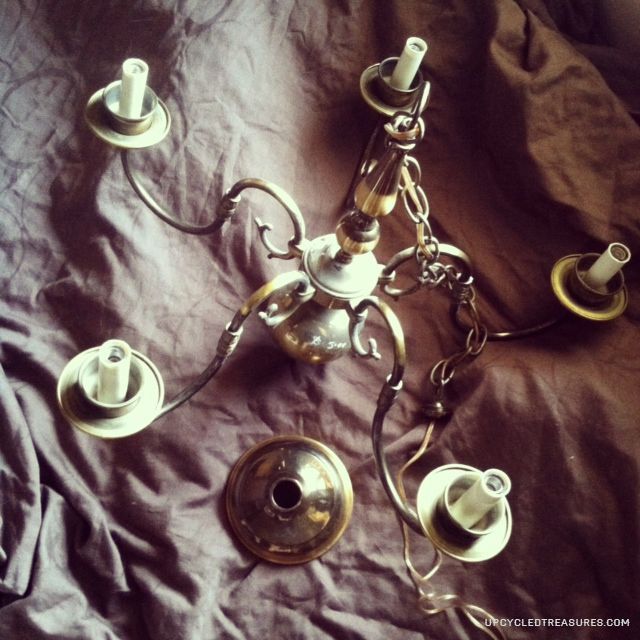
This is the before photo
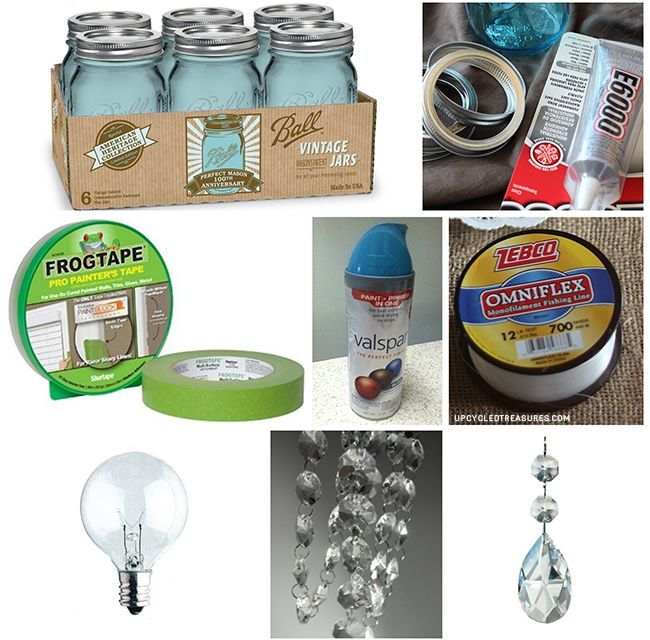
Here are the materials I used to transform it into a mason jar chandelier.
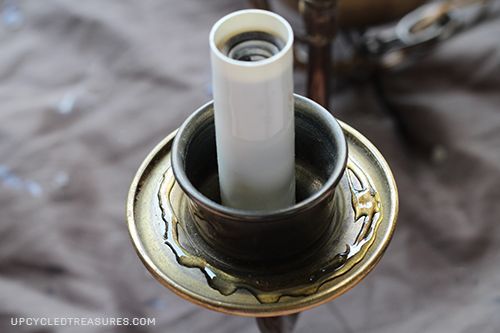
I used E600 glue to attach the mason jar lid rings to the chandelier light area, this way the jars could screw into the lids.
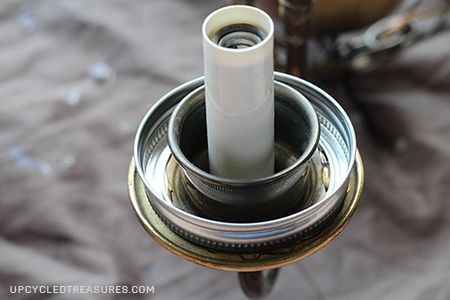
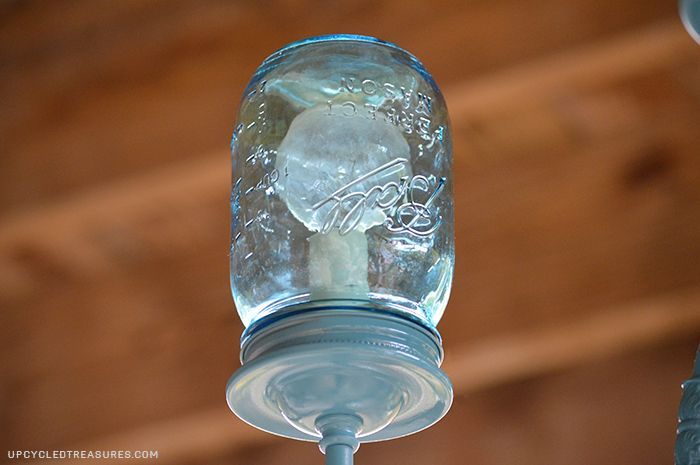
After I placed the mason jar lid ring in place I removed the excess glue and let it dry for a few hours. The mason jar could then be screwed into the lid, yet remains removable in case the bulbs need to be changed out.
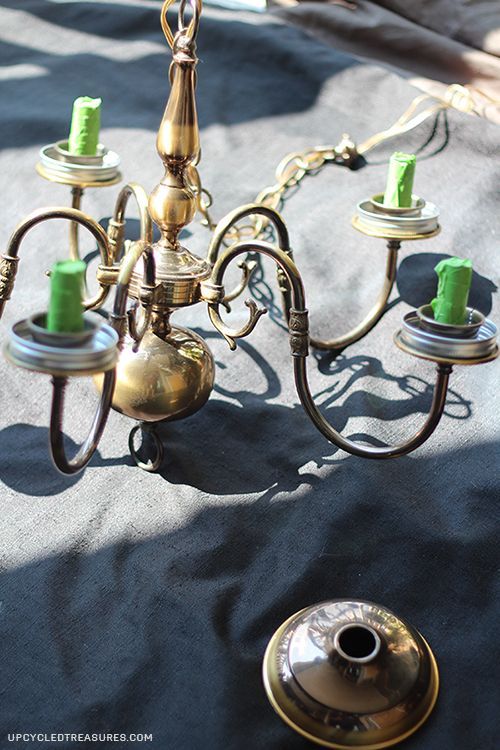
I then taped off the sections I didn't want to get paint on.
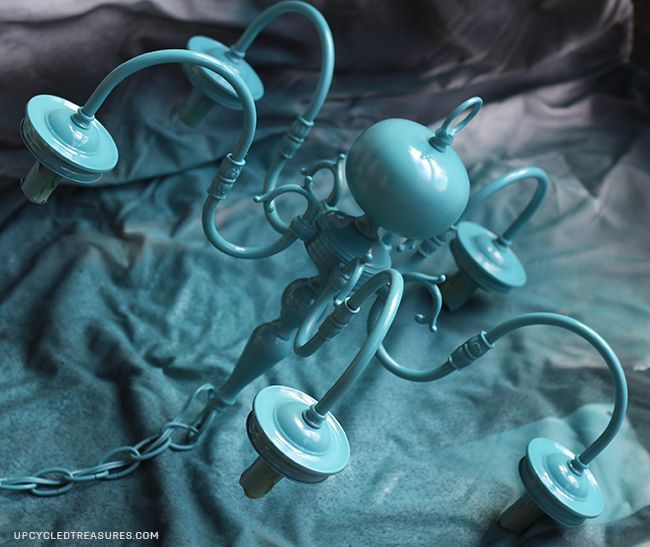
I sprayed a couple coats of paint on the chandelier, letting it dry in between and also moving it around to make sure the entire thing was covered.
I wish I would have had extra crystals to add right below the lighting sections, but the chandelier now has a permanent home at Memory Mountain at Wolf Laurel for future brides to use :)
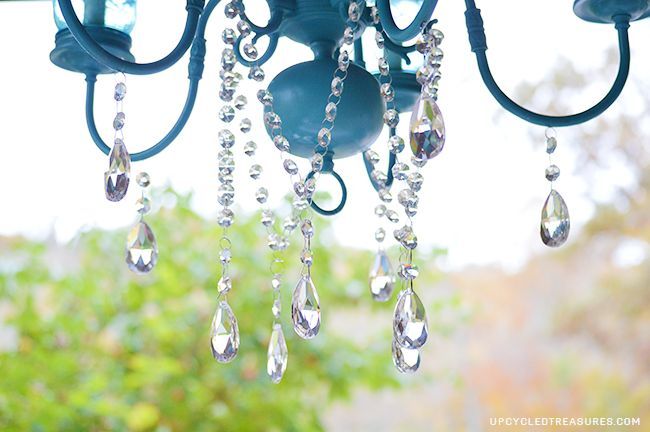
I attached the crystals using 12lb, clear fishing line.
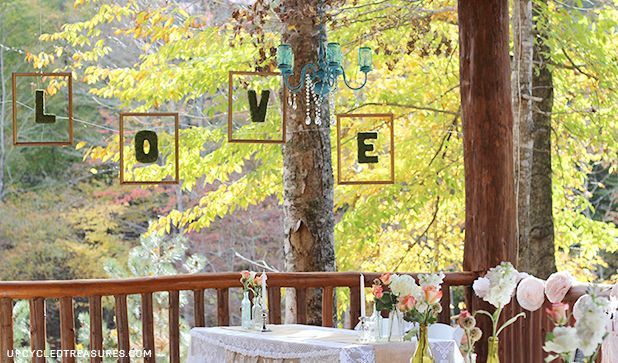
Here is another photo that was taken during the reception set up, right before I ran upstairs to get ready :)
Close up of the finished DIY Mason Jar Chandelier.
Want more details about this and other DIY projects? Check out my blog post!
Comments
Join the conversation
2 of 30 comments
-
I made one with 2 old candle holders, some garage sale jewelry and a set of solar flickering dusk-dawn tea lights and hung it in my back yard Pear tree!!
-
Beautimous!! :)


Frequently asked questions
Have a question about this project?
Wonder if would work with ceiling fans?
What size jars did you use?