


White Painted Cabinets Simplify a Kitchen Renovation
I recently renovated my kitchen in just a few short weeks! We saved tons of money by not ripping out a single cabinet, nor did we change any of the appliances. But the room was completely transformed nonetheless. Take a look and see for yourself...

The photo above is the before picture. The cabinets were dark cherry, the floor was a bland dark ceramic, the counters were all black granite and the backsplash was an odd faux glass in a blue-grey shade. It was dark and depressing, despite being a perfecting good layout. Add to that the fact that I've always wanted a white kitchen. The direction I wanted to go in was clear!

The first few steps were to address the floor, counter and backsplash. For the counters, we decided to keep most of the black granite, first because of price, and second because it was already an elegant material. But so much black throughout the kitchen was dragging it down, so we simply chose to replace the counter on the island. We selected white quartz for durability to simulate the look of calacatta gold marble.
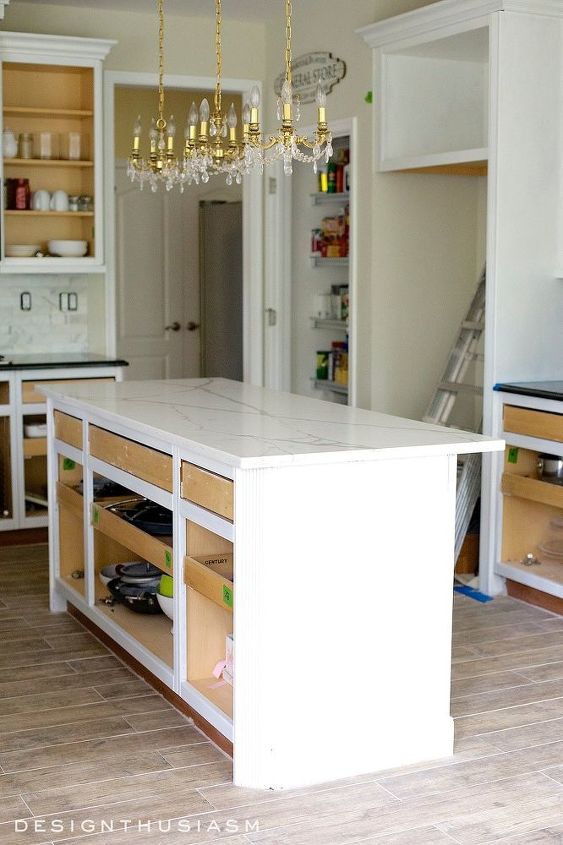
For the floor we went with a faux wood tile. You can see the details on the floor renovation here: Kitchen Floor Replacement
So with those steps out of the way we were beginning to see great progress but the most dramatic change was yet to come.
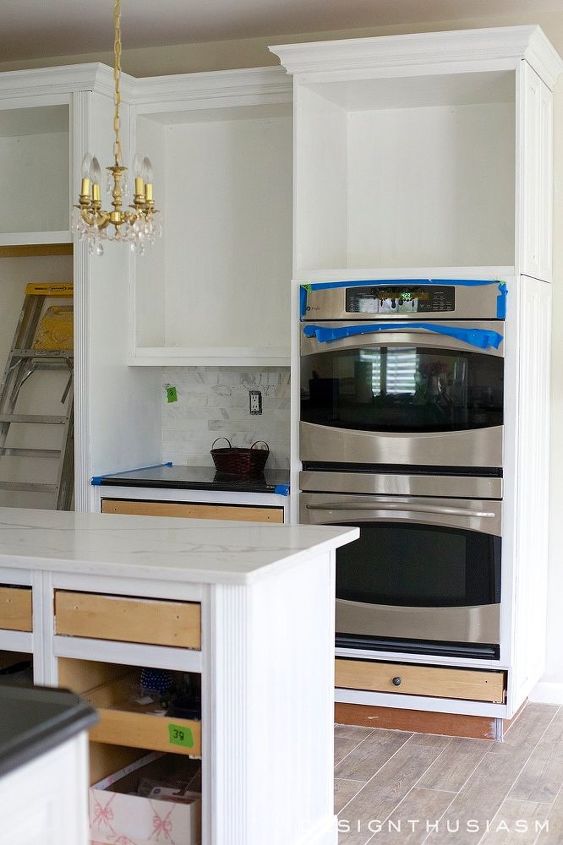
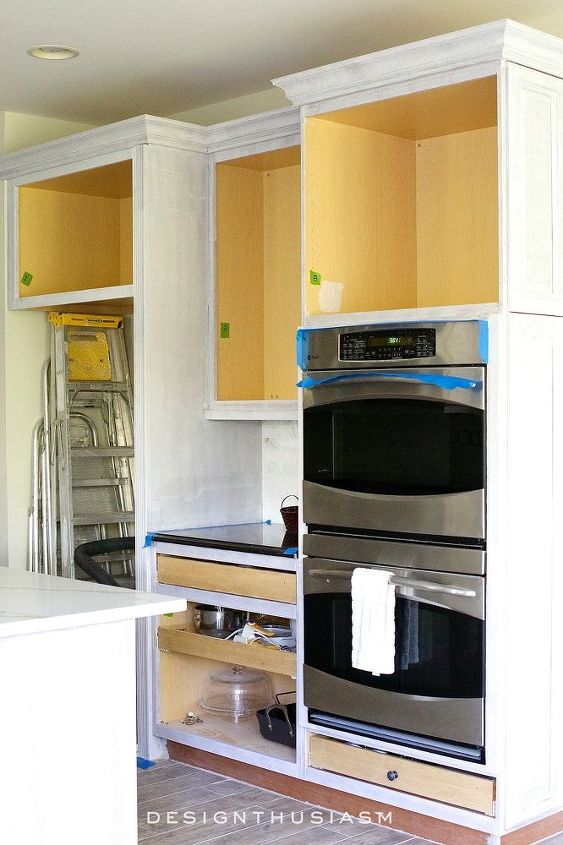
One of the things I was most certain of was that I wanted to have a full wall of glass front cabinets. So for these cabinets the insides needed to be painted as well.
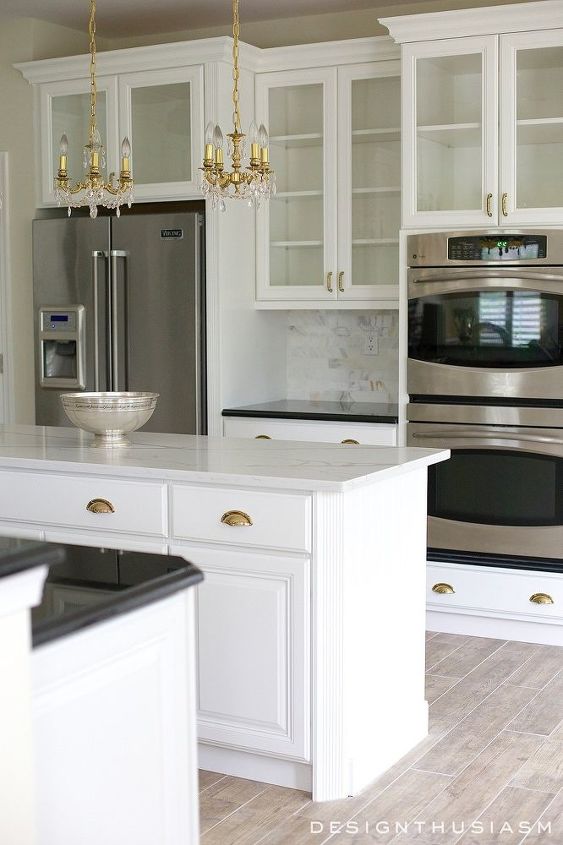
And here's the first shot of the finished cabinets. If you look back at the before picture, the change is quite dramatic.
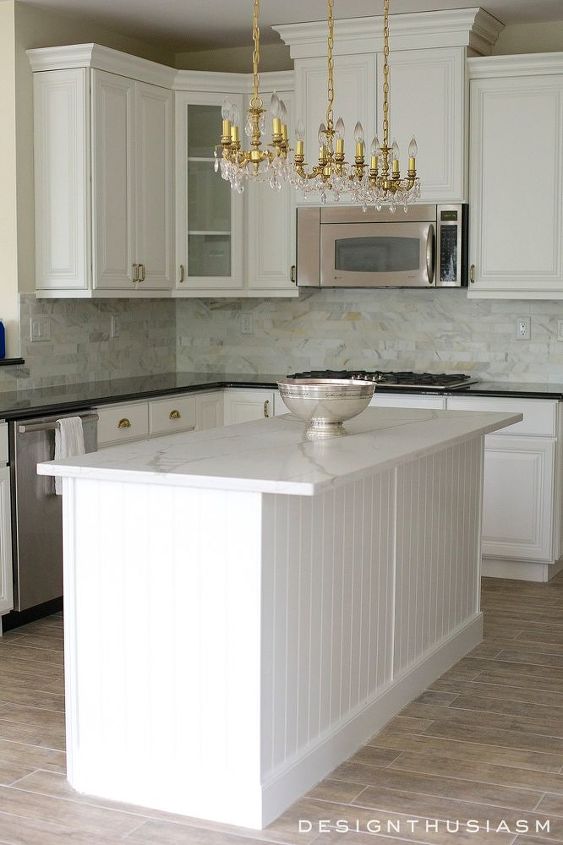
The entire space was lightened up, so much so that our kitchen looks much bigger. It also has a more current and youthful look.
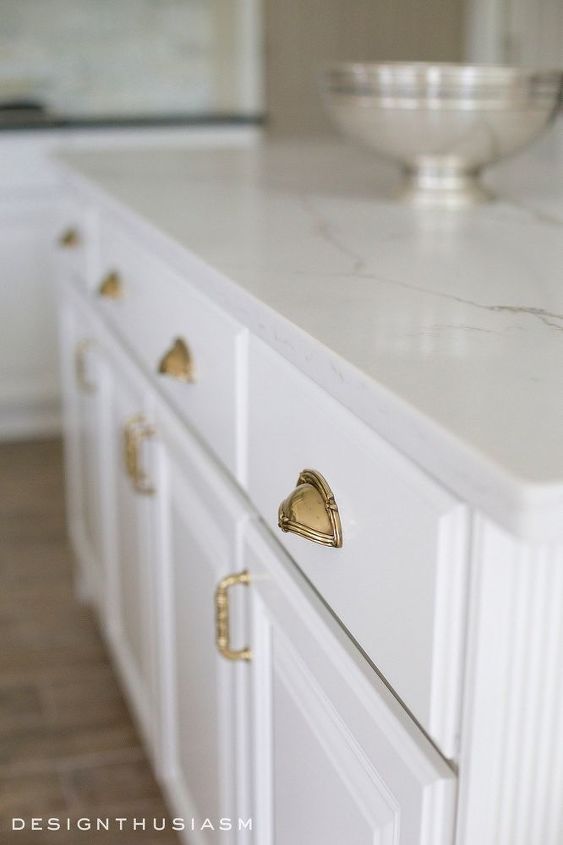
For hardware I knew I wanted the look of unlacquered brass. The bin pulls on the drawer fronts look much more updated than what we had before, while adding interest to the flat drawers.
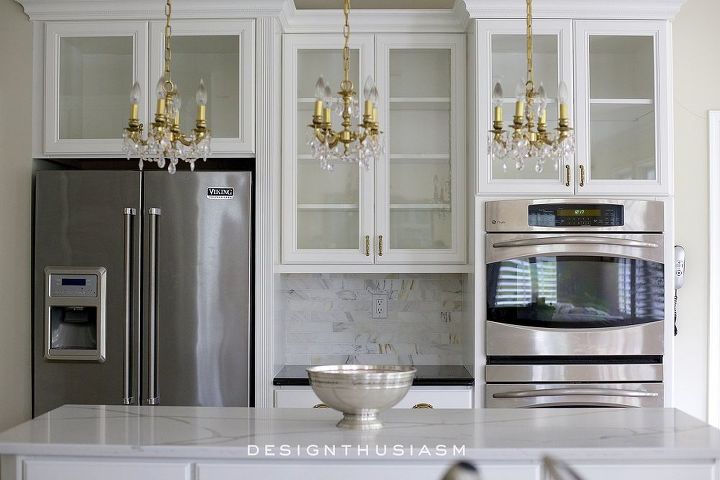
The biggest transformation is the opened up look provided by the glass front cabinets. They are obviously empty in this photograph, but I spent a lot of time styling them, as well as adding vintage accessories to dress up the counters and the rest of the kitchen.
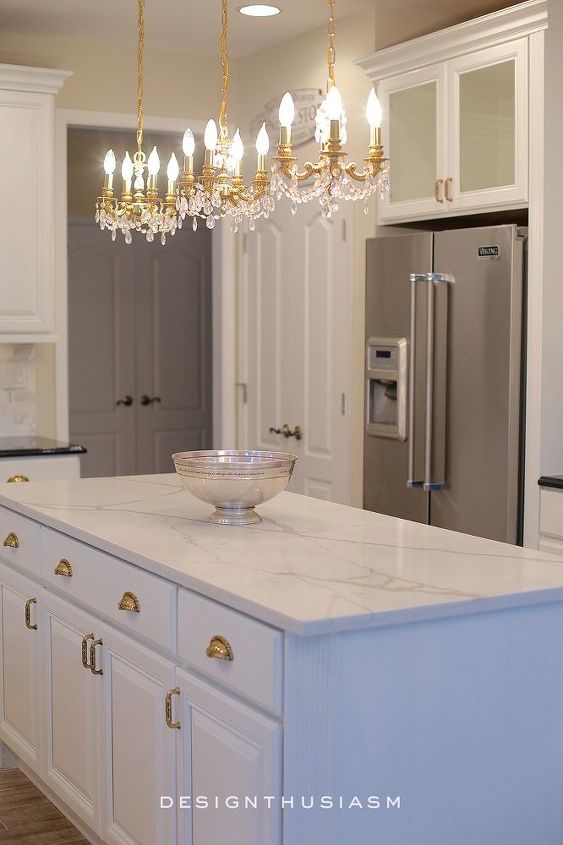
My crystal chandeliers that I added when we moved into our home a year ago, finally make sense. I knew all along what I was planning to do. For the completed kitchen with all of the final styling and accessories, you can click on the blog post link below. It's like having a completely new kitchen, and yet we completed it in just a few weeks!

Want more details about this and other DIY projects? Check out my blog post!
Comments
Join the conversation
4 of 136 comments
-
Beautifully done. We are getting ready to explore doing a tiny '63 kitchen. It would be wonderful if it looked half as good as yours. Love it!
-
Love this kitchen transformation, I too have painted wood cabinets with great results. My question is, what backsplash did you use, love it. Would look great in my next kitchen reno in my retirement home.


Frequently asked questions
Have a question about this project?
What type of paint was used on the exterior of the cabinets?
What brand of paint did you use what color and what type semi gloss, gloss, etc
the white color is good for small kitchen