


If You Want Fancy, Go French...doors That Is...
So remember when I told you all (I mean ALL) about our bathroom remodel? And remember a LOOOOOONG time ago, I told you about our closet remodel? Well remember last year when I made sliding doors how I told you about my hatred of interior doors…especially boring ones? Well if you put all those pieces together, it would make sense when I tell you that I removed the closet and bathroom door during remodels and they never got replaced.
Since we don’t have kids, or inside pets, I really don’t see a problem with not having doors on the master bathroom or closet, but Danny SOMEONE thinks doors are a necessity. Here is what we had going on before. The opening in the back is the bathroom and the one towards the front is the closet. It’s really awful right now after the bathroom remodel chaos, so it’s on the to do list for next year.
Since we don’t have kids, or inside pets, I really don’t see a problem with not having doors on the master bathroom or closet, but Danny SOMEONE thinks doors are a necessity. Here is what we had going on before. The opening in the back is the bathroom and the one towards the front is the closet. It’s really awful right now after the bathroom remodel chaos, so it’s on the to do list for next year.

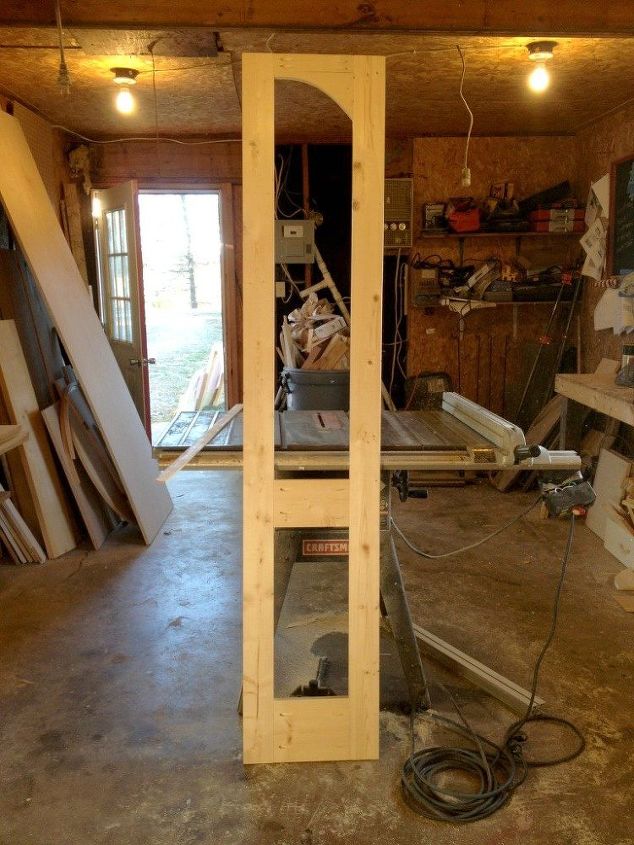
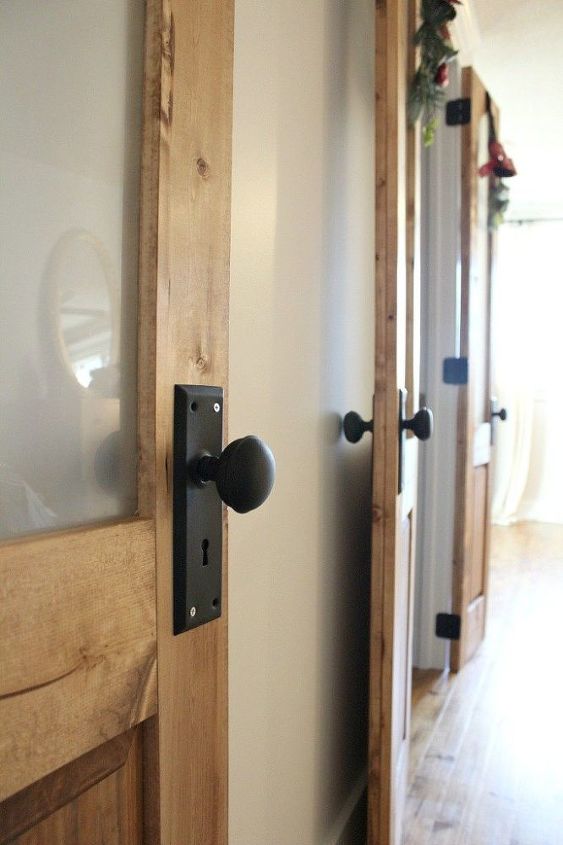
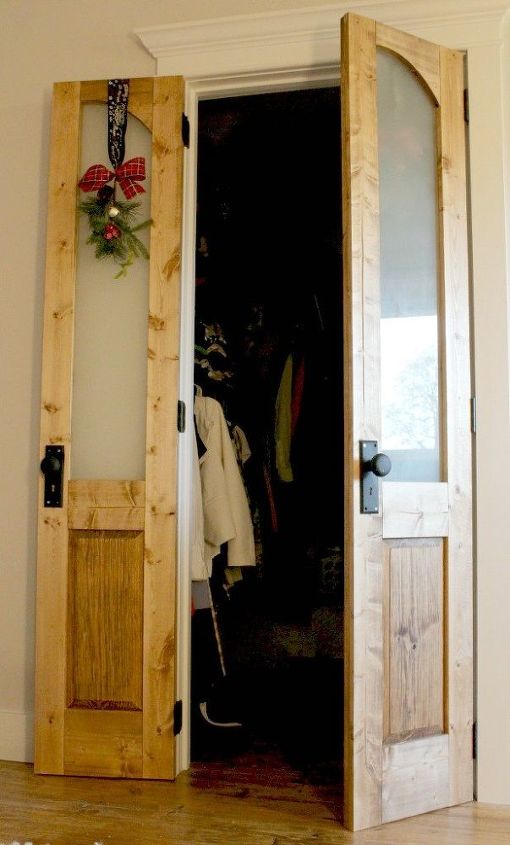
Danny has a thing about sliding doors. And by “thing” I mean “hatred.” So sliding doors were out of the question for in here. But all these stupid doors take up so much space (for real I hate doors) when they open, so I didn’t want normal sized doors. My solution was French doors that both opened INTO the bedroom instead of the closet and bathroom since they are both so small to begin with. I wanted “fancy looking” French doors, so I did raised panels on the bottom and arched frosted glass on the top.
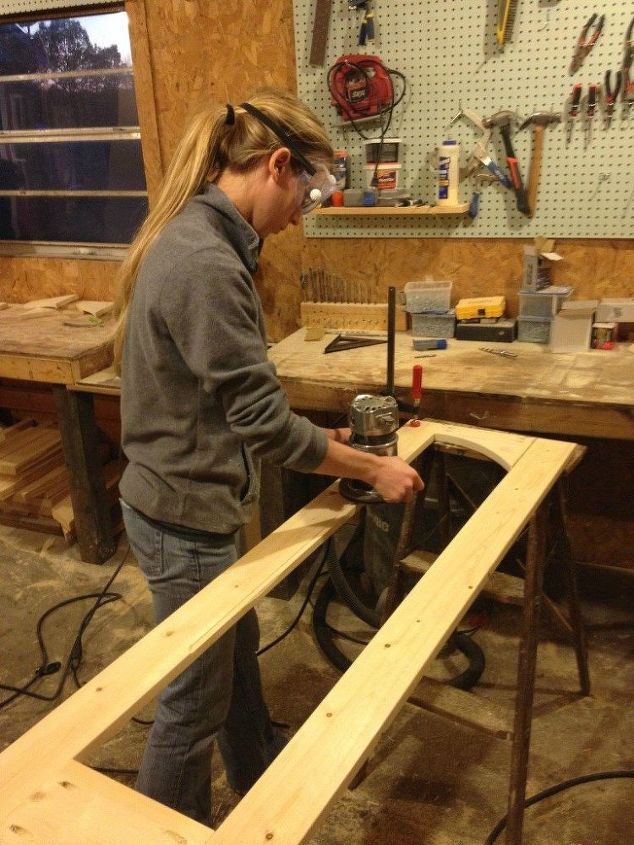
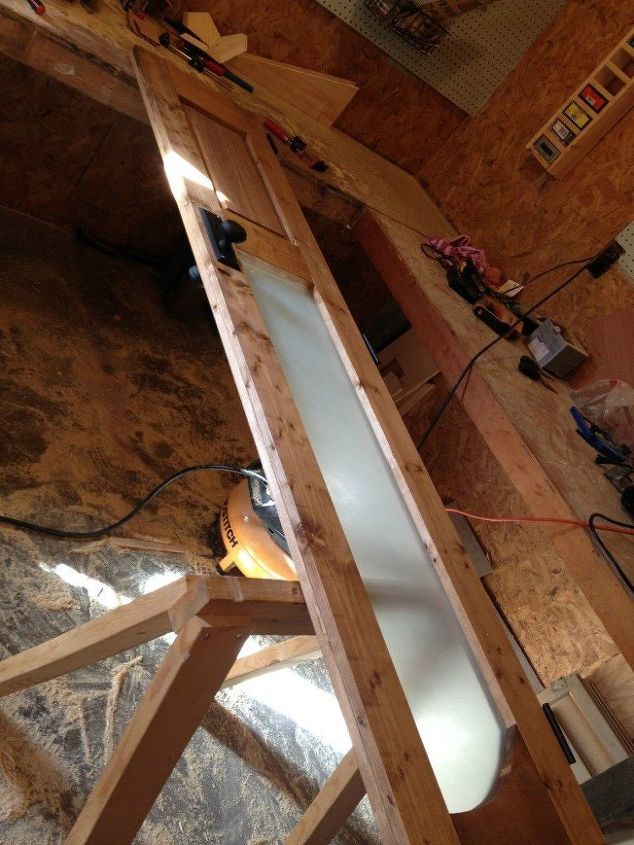
Then I cut out the grooves for the frosted glass.
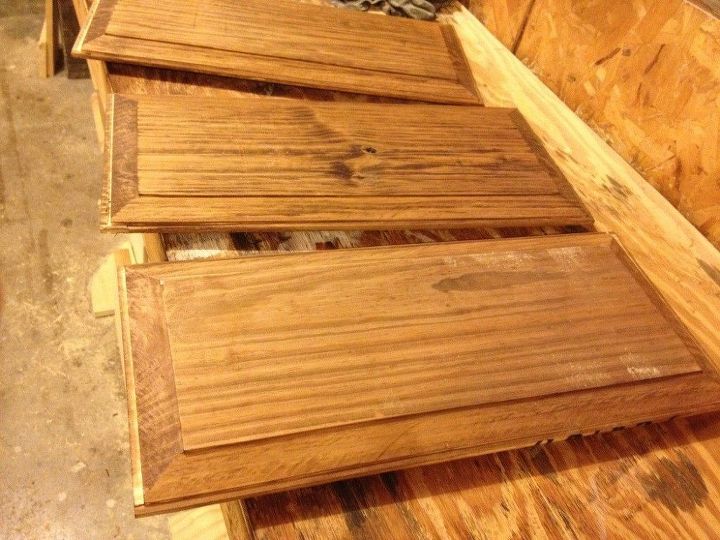
Then I cut the raised panels for the bottom.
Finally, I built the frames for the back side and glued them together.
Once the stain was dry and the antique knobs attached, I hung them up.
Here is a sneak peek, but you can see all the after pictures and get the full detailed tutorial in the link below.

Want more details about this and other DIY projects? Check out my blog post!
Comments
Join the conversation
2 of 41 comments
-
I love this idea! I would like these at mt hallway going to guest bedroom. The hallway is small so this would be great. i just showed this to my carpenter husband as a "I want this"! Thank you for the great pics!
-
Hello. I was looking for the link to your tutorial for the french doors. Love them!


Frequently asked questions
Have a question about this project?