


How to Easily Make a Burlap Poinsettia

by
Amie
6 Materials
Burlap, burlap, and more burlap! It’s not enough that I made my own no-sew burlap curtains, but now I’ve started decking my Christmas tree in the rough and rustic fabric. I’m super excited about my latest creation because it is so easy! I combined some tips I found on the internet with a little creativity to come up with the easiest tutorial on how to make a burlap poinsettia.
The whole project takes about an hour of active time, but you can break that down into three short steps done over 2-3 days. Tackling this project in shorter steps makes it a perfect project to squeeze in while you are doing other things.
The whole project takes about an hour of active time, but you can break that down into three short steps done over 2-3 days. Tackling this project in shorter steps makes it a perfect project to squeeze in while you are doing other things.
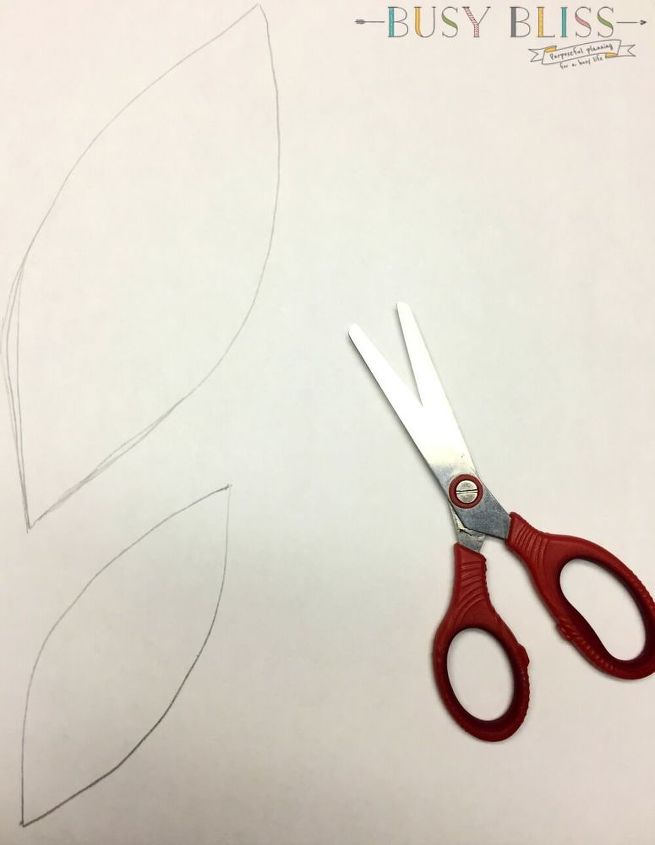
Start by making a flower petal pattern out of paper. Freehand draw your patterns to the size and shape of your liking. Using a pattern allows you to be consistent in the size and shape. I made two sizes for my burlap poinsettia.
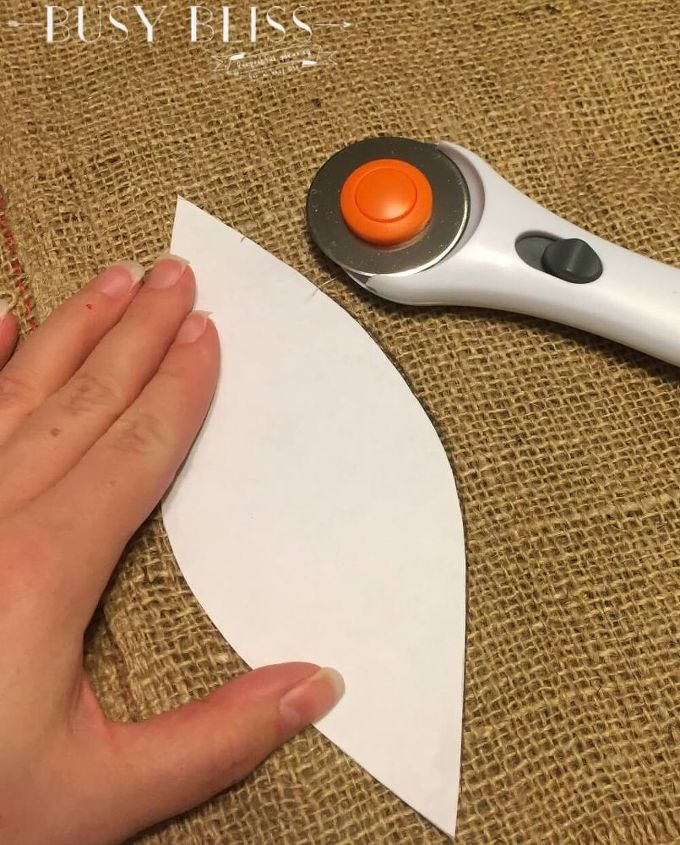
Next, using the pattern, cut out your burlap. I was a little doubtful about the rotary cutter’s ability to cut through thick burlap, but it was amazing! It did so well that I ended up folding the burlap so that I was cutting through four layers at a time. I also cut my petals out as close to each other as possible so that I wasn’t wasting a lot of fabric.
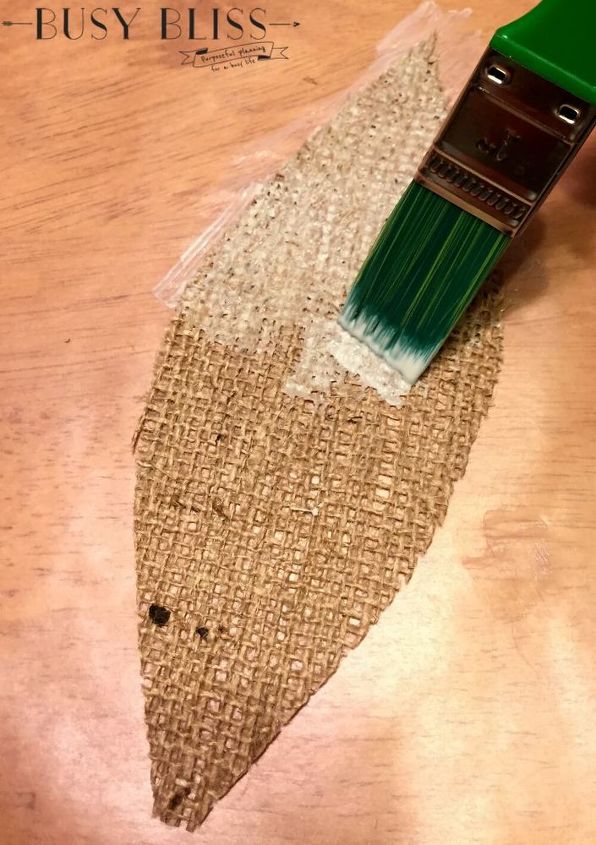
You might be wondering right about now how to make a burlap poinsettia keep its shape. Well, my friend, that would be with Mod Podge.
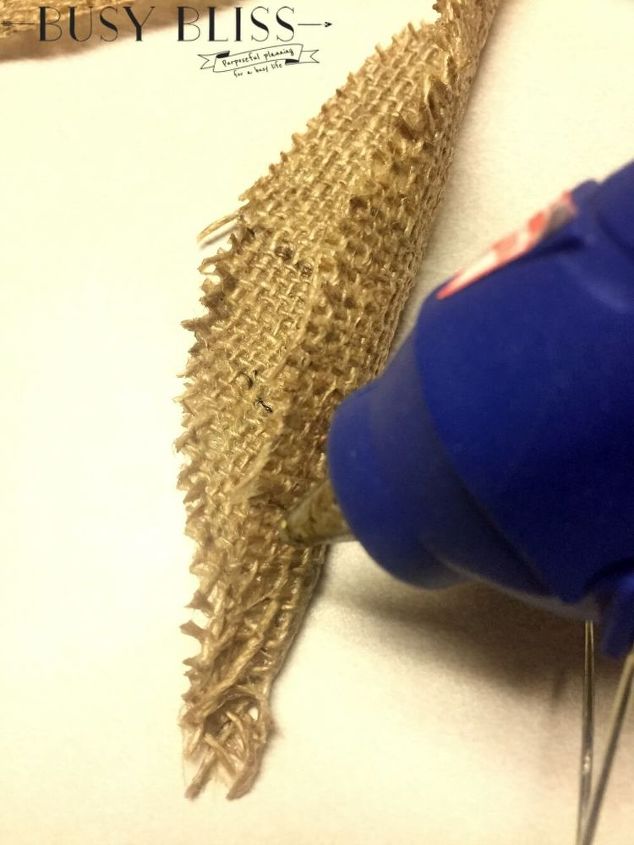
After the petals have completely dried, they are easy to shape. Starting with the larger petals, take one and fold the edges over to form a taco shape {that’s a very technical term}.
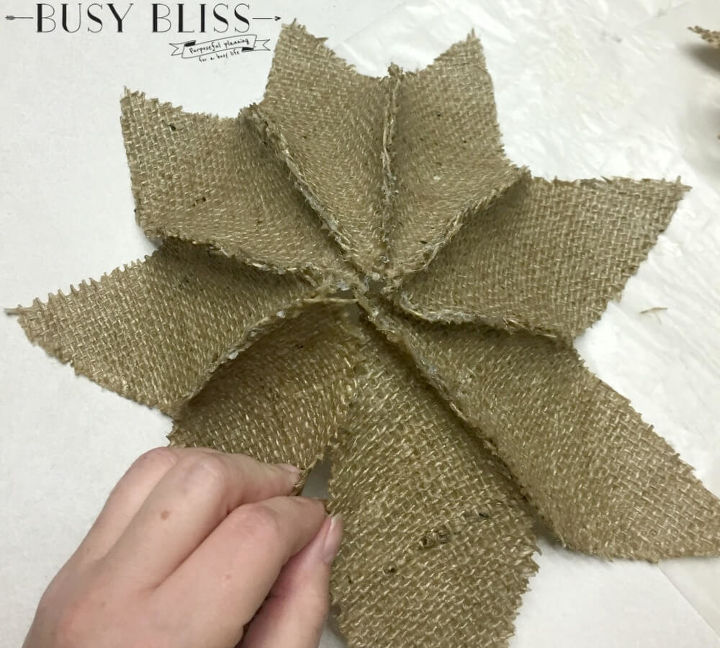
Next, glue the first petal to the last the same way you have glued the others. After the glue is dry, shape your flower as needed. If it starts to get a cone shape from the petals being glued together, simply push it down in the middle to get it a little flatter.
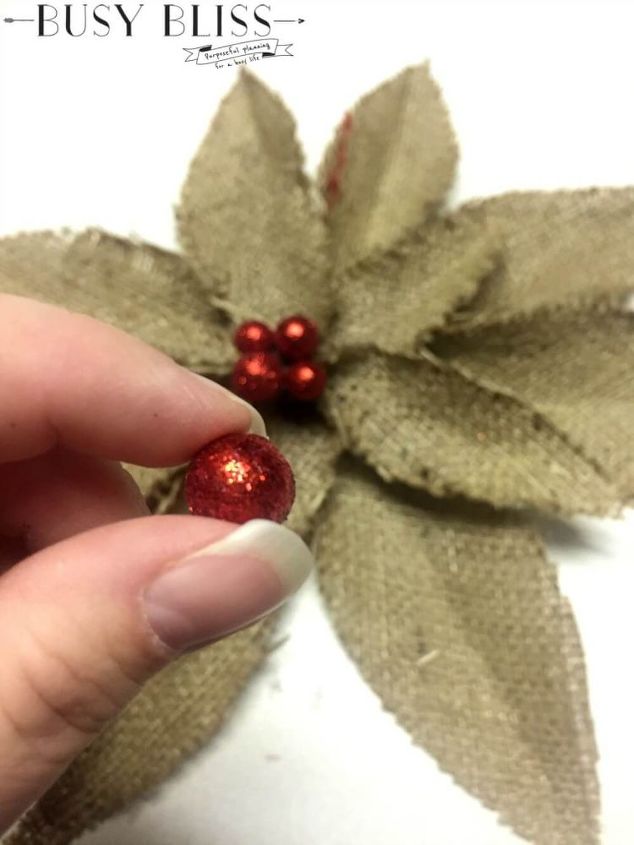
Add a little shimmer by gluing some artificial berries to the center.
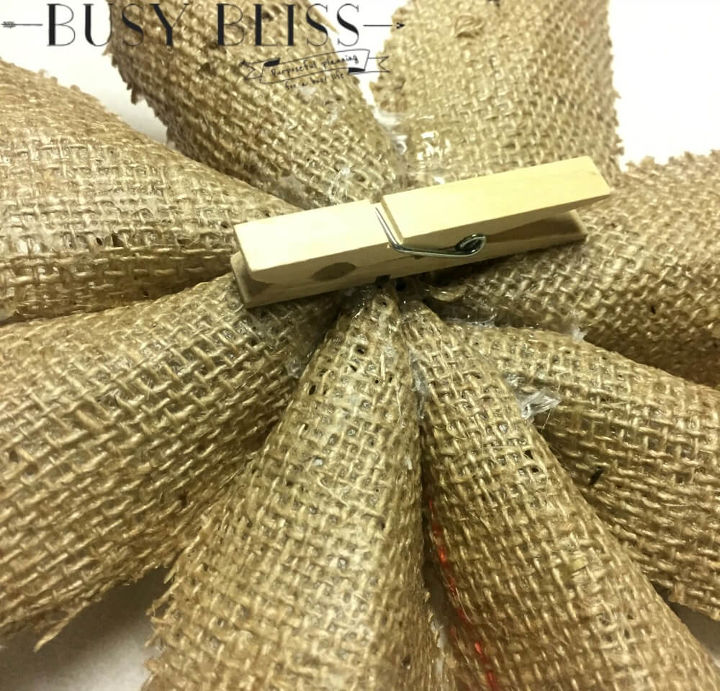
Glue a clothes pin to the back of your poinsettia for an easy way to hang your burlap flower.
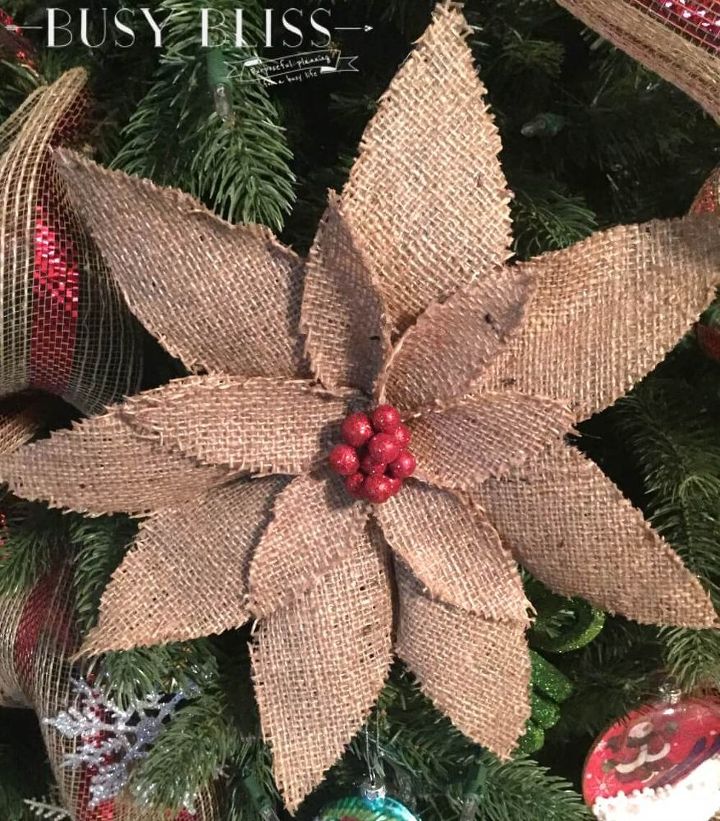
And that’s how to make a burlap poinsettia! Use them as ornaments, hang them on a wreath or stocking, or use them as a homemade touch to decorate your Christmas gifts.
Want more details about this and other DIY projects? Check out my blog post!
Comments
Join the conversation
2 of 86 comments
-
Yes, this looks like fun. I might attach a flower stem and make a bouquet of red poinsettias.
-
Burlap, plaid, red berries.......ALL a great look for Christmas. This poinsettia is adorable!!!


Frequently asked questions
Have a question about this project?
Directions on howto make a button wreth
Can you use modge podge on regular cotton fabric to have the same effect as the burlap material?
When I cut my burlap it comes apart