


Transforming a Dated Piece of Art With Unicorn SPiT
3 Materials
I had a piece of art that I loved when I purchased it about 10 years ago, but it no longer fit my decor, so I transformed it with the help of my favourite product...Unicorn SPiT. I hope you will pick up at least one tip to use on your own projects. I will use Unicorn SPiT several ways in this piece including creating a background, painting a picture and glazing. I will also show you an easy way to transfer a design.
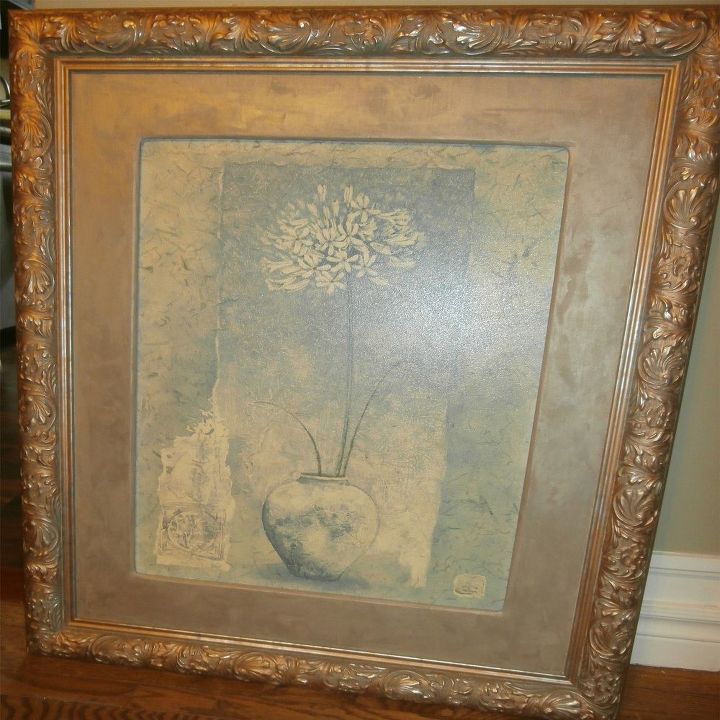
Painting-Before
Although this piece of art no longer fit my decor, it had a pretty decorative frame and a nice wide mat. The room that it will be going into has a peacock colour scheme and theme, so guess where I went with this?
Adding a background
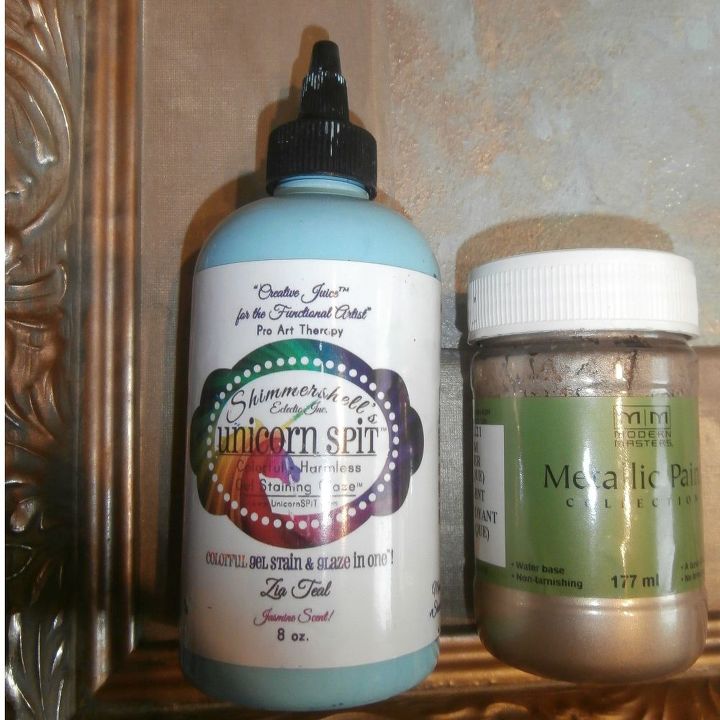
First I needed to give my peacock a soft new background. I used the Unicorn SPiT colour called Zia Teal (one of my favourites) and a Modern Masters metallic called Warm Silver (which I actually find to be more of a soft gold). I just put dabs of colour on the previous background randomly and used a brush to "slip slap" a mottled background. I slightly blended the colours together, but not too much or you will just end up with a muddy looking background that is all one colour.

Colouring page design
I wanted a fairly simplistic peacock design, so I went to trusty Google and entered "free adult colouring pages" and low and behold I found my peacock design. I enlarged the photo to fit my space. As luck would have it, I needed the peacock to be about 4 times the size of one page, so I put 1/4 of the design on each 8 1/2" X 11" sheet of paper. You can go as elaborate or as simple as you would like with your design choice. It could even be something as simple as a nice silhouette in black on a pretty background. By the end of this painting and about 50 peacock feathers later, I was wishing I had gone a little simpler...lol.
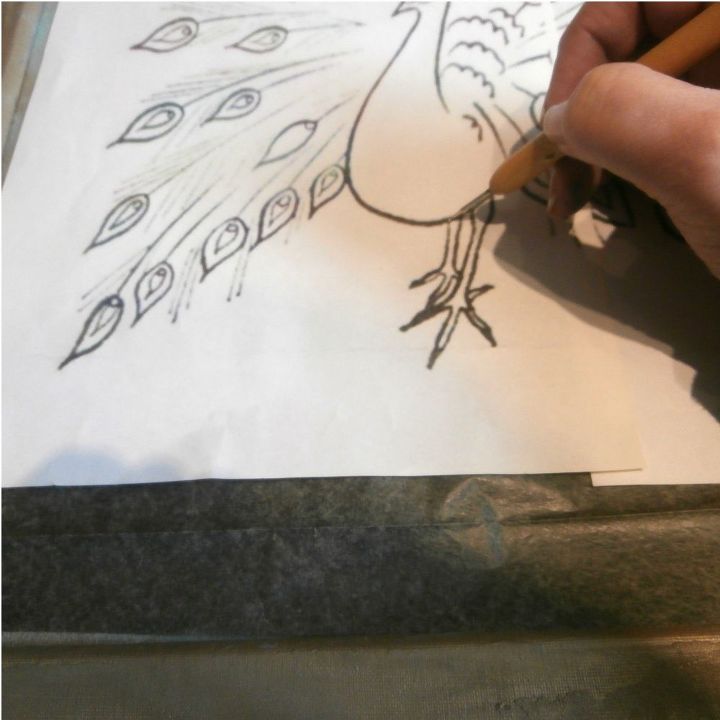
Transferring the design to the canvas.
To transfer my design to the canvas, I used a technique I had used for many years. I placed a piece of carbon paper (available at art supply stores in a variety of colours) face down on my project, placed my design sheet on top of that and transferred the image by following the lines with a stylus (a pencil or pen works too!)
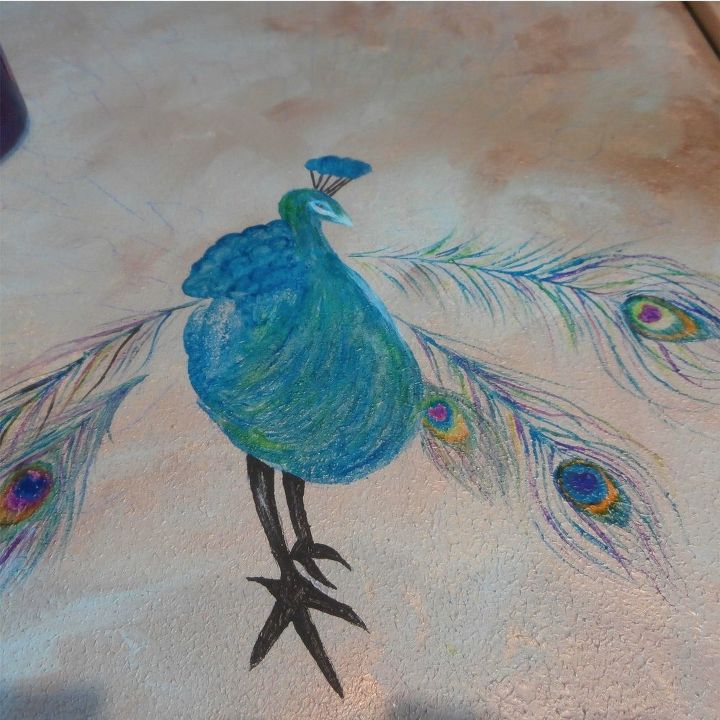
At this point I have started painting in my design using Unicorn SPiT stain and glaze. I was using their newest product called "Sparkle Stain" which will be released to the public in January. I had been lucky enough to win some of the prototype in a contest. The colours are incredibly vibrant and contain holographic mica particles.

Glazing the frame with Unicorn SPiT
My room for this painting is finished in all shades of aqua, turquoise and teal with metallic gold accents. I wanted the frame to be in keeping with the turquoise theme, but with metallic gold poking through. I applied one of the Sparkling Unicorn SPiT stain colours to my frame with a paintbrush after taping off some areas that I wanted to remain solid gold. For this piece I used the stain called Grace C Hummingbird at full strength. I then used a dry microfibre cloth to wipe back the high areas. You can remove as much or as little of the glaze as you like, just play with it until you are happy with the look. This technique also looks beautiful in more traditional colours (such as a black glaze over copper) to give an antique/aged look.
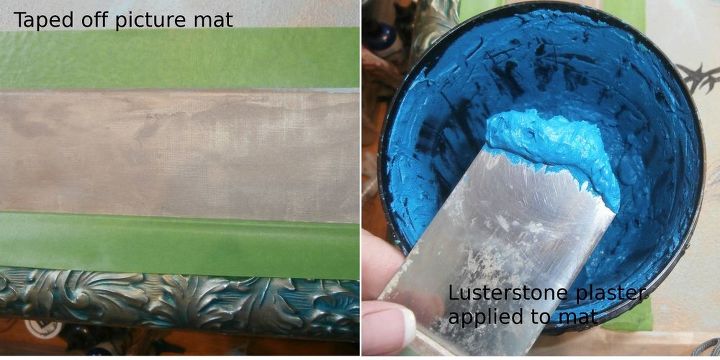
Lusterstone picture mat
I wanted to change the colour of the mat and had a product called Lusterstone on hand that fit in well with the other colours. I had already used this product on the accent wall where this picture will be hung. Lusterstone is a metallic plaster that is towelled on to walls. I used a very small trowel on this mat and even applied some with a gloved hand to the edges of the mat.
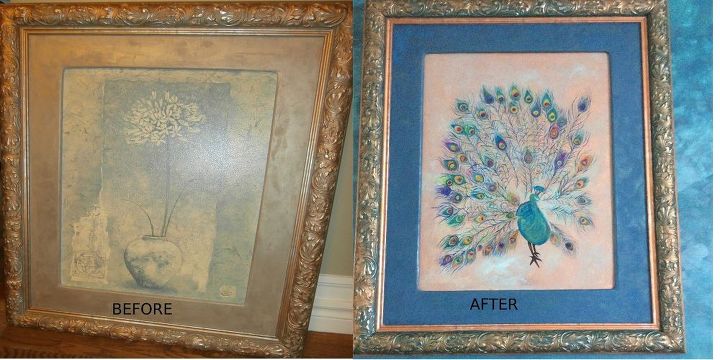
Before and After
Here you can see that with a few simple steps (and some great products), you can make a dramatic change to a dated piece of art.
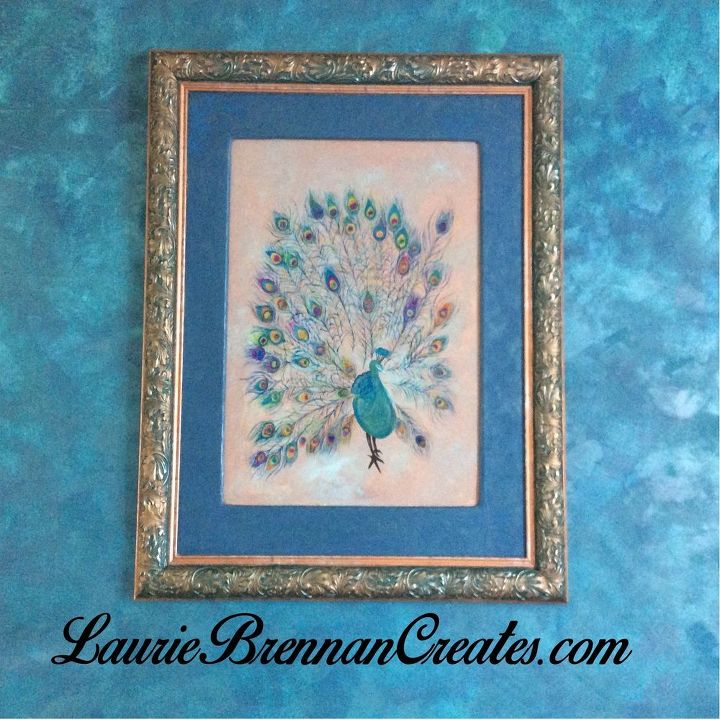
Finished piece
I have learned through the years that I am creative and artistic, but I will never be a master of "fine art". With a few simple tricks and techniques I was able to create a piece I was happy with and fits my decor. Unicorn SPiT is generally sealed with an oil based sealer, but I decided not to seal this piece as it would not be handled and would just require dusting.

Want more details about this and other DIY projects? Check out my blog post!
Comments
Join the conversation
4 of 74 comments
-
Gorgeous! Thanks so much for sharing.
-
Awesome redo on that painting and frame Laurie! love it!


Frequently asked questions
Have a question about this project?
Hello, I love this project you did. Was wondering what base color you used on the wall with the lusterstone? I've ordered the Peacock Blue lusterstone , but it isn't as real as I hoped it would be. On the color swatch it appears to be over some sort of real but I have yet to figure it out. Hope you can help. Thank you