


Corner Fireplace Mantel Makeover
5 Materials
I’ve wanted to make over our fireplace area for a while now, but just never had the opportunity to do it until last year before Thanksgiving. We were doing our usual mad dash to get everything cleaned up and ready to host Turkey Day. If you know me, you know that I just love to overload my schedule and then stress out about it until everything’s done, and last Thanksgiving was no exception! I just couldn’t stand our snoozefest of a fireplace area anymore, and I wanted it to look good for Turkey Day.
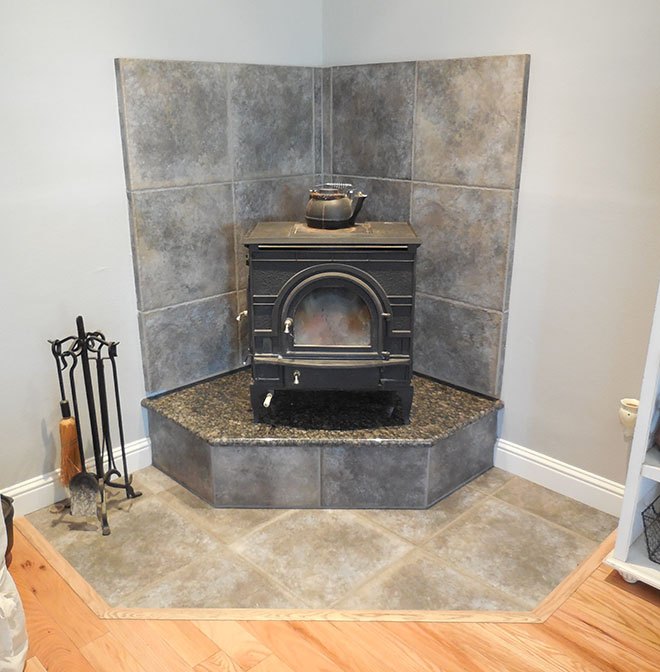
We didn’t have enough time to tear out the existing tile and replace it with something else, so I had to work with what was there. I liked the tile in of itself (we did use it for our kitchen floor after all), but it was too dark in back of the wood stove, and it just made the whole corner of the room look dull and dreary.
I decided painting the tile a lighter color to be my best alternative to lighten up the area. I’ve never painted tile before, so this was going to be an interesting experience! I chose to use one of my tried and trusted chalk paint lines for the job: Valspar Chalky Paint in Kid Gloves, Antiquing Glaze, and Limewash Glaze. I didn’t use any type of sealing wax for obvious reasons: I’m sure it would melt right off once the tile started heating up from the wood stove!

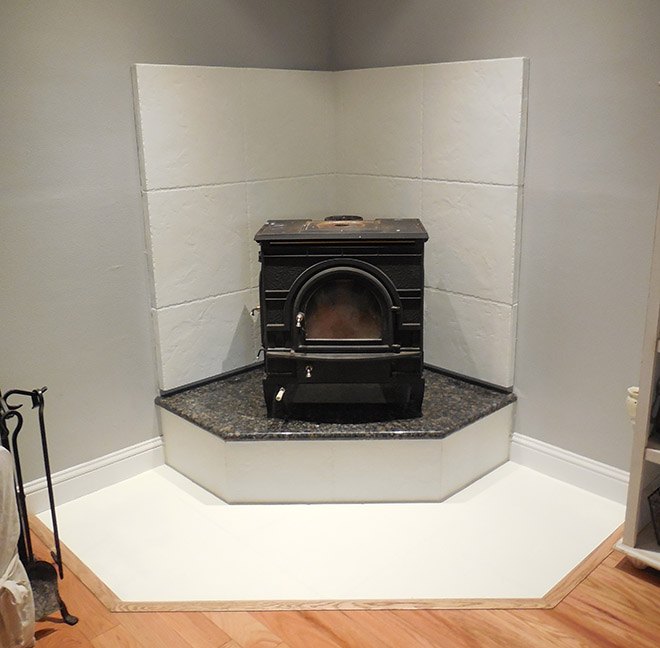
I applied the antiquing glaze, which darkened it up a little too much… it was real close to the original tile color. But when I applied the limewash glaze, it lightened it up to a nice, neutral shade that wasn’t too bright.
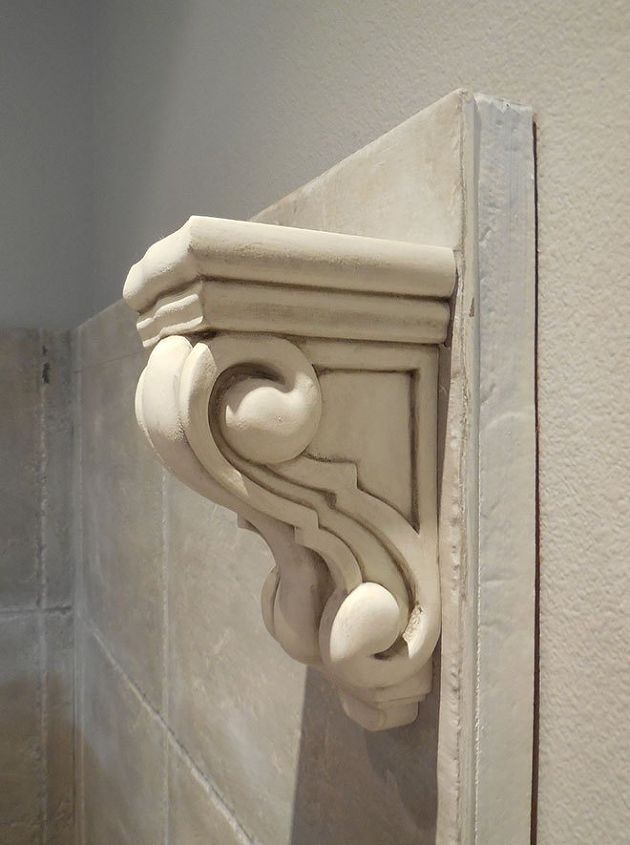
I found these corbels at Home Depot. They have a pretty good selection of corbels, so even if these aren’t your cup of tea, you’re sure to find some that are!
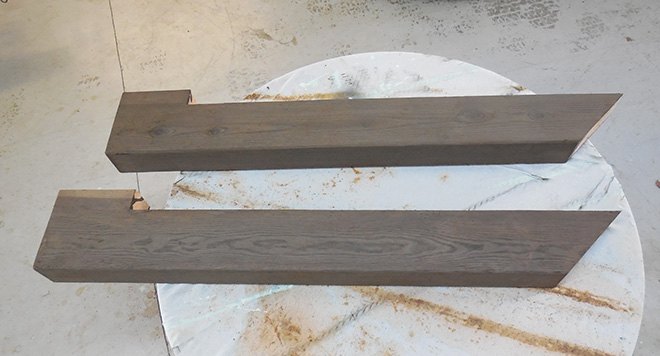
For the fireplace mantel itself, we got a 4″ x 8″ x 8′ wood board and cut it down to fit the mantle as well as allow airspace for the gap between the tile and wall to allow air flow. Please note that if you attempt to do a similar makeover on your fireplace, you may not have to do the same. For safety’s sake, please make sure to follow all the safety specs for your particular fireplace/stove insert/freestanding stove/whatever and check with your local building department to make sure everything you plan to do is up to code.
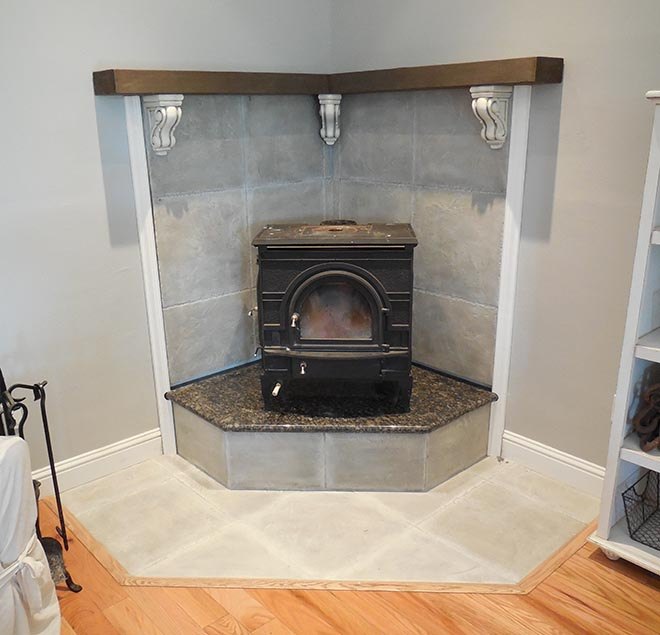
Here’s the finished product before we put the stovepipe back on. We also finished up the sides of the tile with some crown moulding. I am so happy with the results, especially the fact that we were able to get finished up before Thanksgiving!
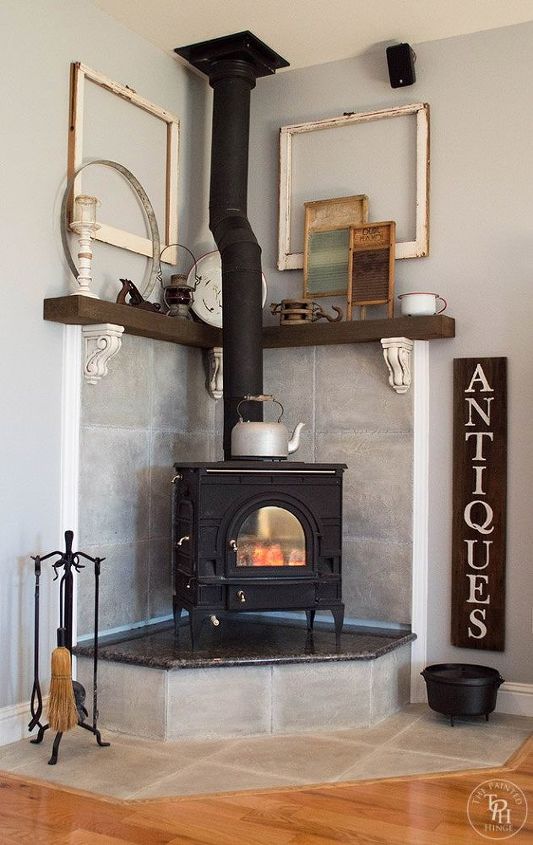
I forgot to get a pic of it with the Thanksgiving decorations, but this is how I have it decorated now. I am so happy with the results; especially since I was able to do it without ripping the original tile out or spend a lot of money!

Want more details about this and other DIY projects? Check out my blog post!
Comments
Join the conversation
2 of 45 comments
-
Very beautiful. I see some cute stocking and Christmas deco aroumd the fire place. And possible a dog or cat in front of it lol. My dog and cat loved sleeping in front of our pellet stove when we lived in our old house. I love the comfy homeless of a fire place or letter stove. So cozies and adds a romantic vibe as well. I'm my apartment now I have an electric heater that looks just like a fire place. In fact I have 2. One for my living room and one for my bedroom. I love the romance it creates and the coziness.
-
very beautiful and ideal


Frequently asked questions
Have a question about this project?
It looks great! I would like to know how you attached the finials as I am looking to place a mantle on my wall but have stone beind it.
Does anyone know the restrictions for wood burning stoves in NY? My kid just purchased a home with one and there’s no tile behind it. This came out beautiful! I am very nervous about these though
Maybe use the same paint treatment used on the corbels on the white side trim pieces? Love the look!